

The 5-Minute Viral Food Board That’s Breaking the Internet
There is something undeniably magical about a kitchen that feels alive, and nothing captures that spirit quite like the viral herb-infused food boards currently taking over our feeds. I remember the first time I set out a simple wooden platter adorned not just with cheeses, but with handfuls of aromatic, home-grown greenery; the room instantly filled with the scent of a Tuscan summer. It wasn’t just about the snack; it was about the connection to the earth and the vibrant, pulsing energy that fresh plants bring to a home.
We live in a world that moves far too fast, but the simple act of snipping a sprig of rosemary or watching a tiny basil sprout break through the soil invites us to slow down and breathe. This post is your ultimate guide to bringing that viral, lush aesthetic into your own space. Whether you have a sprawling backyard or a tiny windowsill, we’re diving deep into how to cultivate the very ingredients that make your food boards—and your life—feel extraordinary and full of flavor.
How to Curate Fresh Herb Garden Ideas for Culinary Inspiration
Why we love this
The aroma of crushed basil leaves mingling with the crisp, clean scent of mint provides an instant mood lift that no candle can replicate. When you run your fingers through a bushy rosemary plant, the resinous, woodsy fragrance clings to your skin, grounding you in the present moment. There is a tactile joy in the soft, fuzzy texture of sage leaves and the delicate, feathery fronds of dill dancing in a light breeze. Enjoying these herbs is about more than just taste; it’s about the vibrant green visual pop they add to your kitchen and the satisfying crunch of a leaf freshly plucked and tossed onto a warm, crusty piece of sourdough.
Essential Elements:
- A selection of Mediterranean seeds (basil, oregano, thyme).
- Organic, nutrient-rich potting soil.
- Terracotta or ceramic drainage pots.
- A sunny windowsill location with at least 6 hours of light.
- A fine-mist spray bottle for gentle hydration.
How to make it
- Assess your culinary preferences by listing the five herbs you use most frequently in your cooking to ensure your garden is functional.
- Select a high-quality organic potting mix specifically formulated for vegetables and herbs, which ensures proper aeration and nutrient delivery.
- Fill your chosen containers with soil, leaving about an inch of space from the rim to prevent overflow during watering.
- Plant your seeds at the depth specified on the packet, usually about twice the width of the seed, and lightly pat the soil to ensure contact.
- Mist the soil surface until it is damp but not soggy, using a spray bottle to avoid displacing the delicate seeds.
- Place the pots in a south-facing window where they can soak up the maximum amount of natural sunlight throughout the day.
- Monitor the soil moisture daily; when the top inch feels dry to the touch, it is time for a thorough but gentle watering.
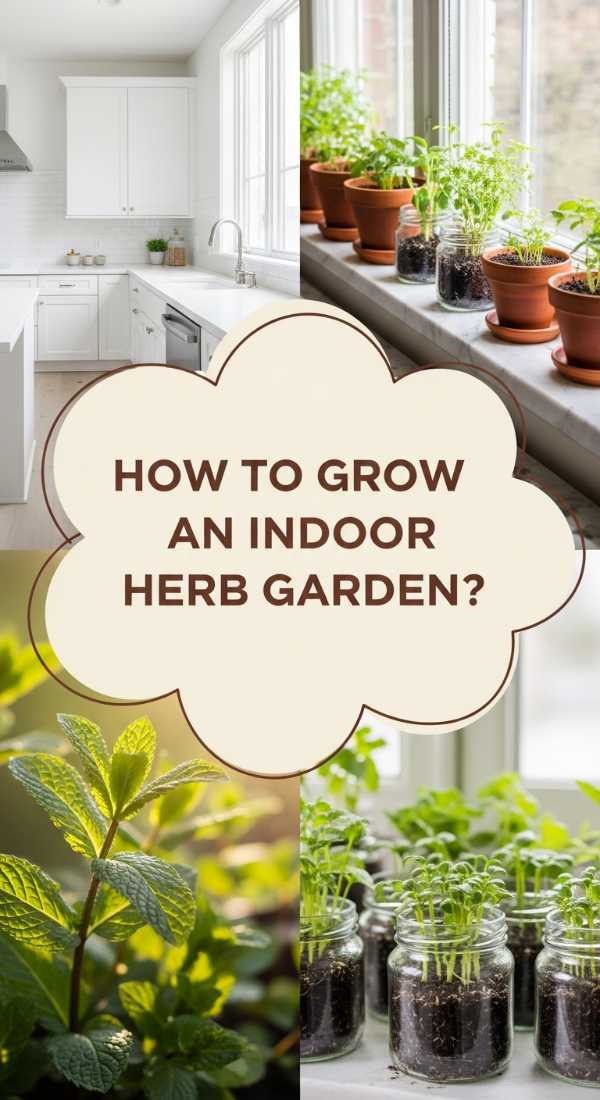
How to Grow a Lush Indoor Herb Garden for Kitchen Freshness
Why we love this
There is a profound sense of abundance that comes from having a living pantry right at your fingertips while you cook. The visual of deep emerald leaves against a clean kitchen backsplash creates a spa-like serenity that makes meal prep feel like a creative ritual rather than a chore. As you sauté garlic, the addition of a fresh sprig of thyme releases a complex, earthy bouquet that transforms a simple dinner into a gourmet experience. It’s the feeling of a permanent spring morning, where the air is always fresh and the promise of a delicious, homegrown meal is just a snip away.
Essential Elements:
- A multi-tier shelving unit or windowsill tray.
- LED grow lights for low-light kitchens.
- Self-watering planters to maintain consistent moisture.
- Liquid seaweed fertilizer for monthly feeding.
- Pruning shears for clean, healthy harvests.
How to make it
- Determine the light levels in your kitchen using a light meter app; if you receive less than 6 hours of direct sun, invest in a full-spectrum LED grow light.
- Assemble your shelving or tray system, ensuring it is sturdy and located away from cold drafts or high-heat appliances like ovens.
- Transplant established herb starts into self-watering pots, which use a reservoir system to provide consistent hydration to the roots.
- Position your grow lights approximately 6 to 12 inches above the plants, setting a timer for 12-14 hours of light per day to mimic summer conditions.
- Begin a feeding schedule using a diluted liquid fertilizer once every four weeks during the growing season to encourage lush leaf production.
- Harvest from the top of the plant rather than the bottom, cutting just above a leaf node to encourage the plant to branch out and become bushier.
- Rotate your pots every few days to ensure all sides of the plant receive equal light exposure, preventing leggy or leaning growth.
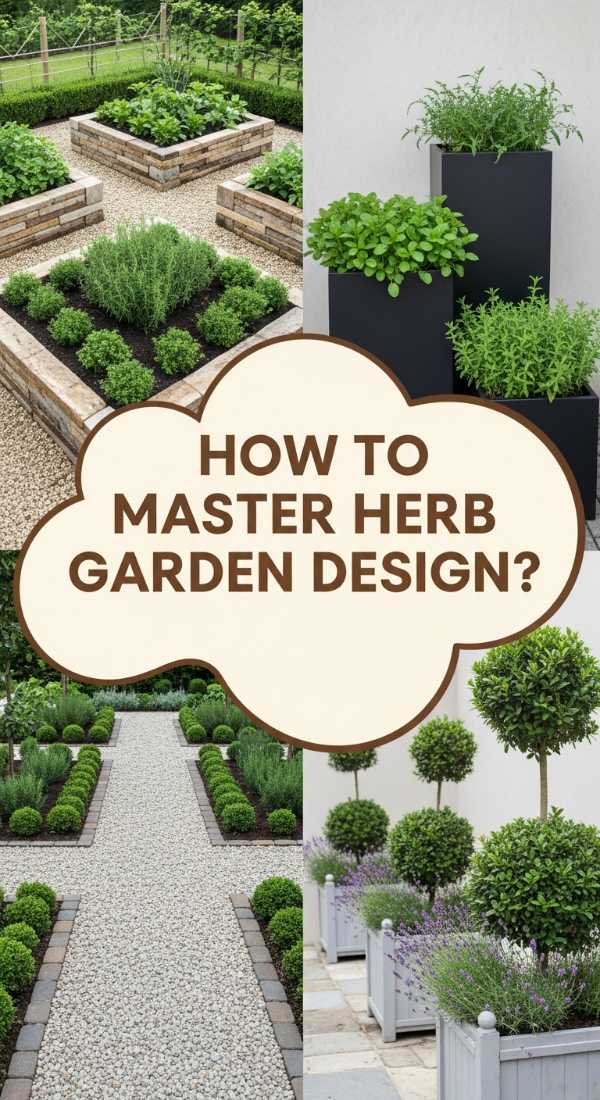
How to Master Modern Herb Garden Design for a Stunning Oasis
Why we love this
A modern herb garden is the intersection of high design and humble nature, offering a sleek aesthetic that calms the mind. The clean lines of minimalist planters paired with the wild, sprawling textures of mint and cilantro create a stunning visual contrast that serves as a living piece of art. Imagine the cooling sensation of a damp terra-cotta pot on a hot afternoon and the sharp, bright scent of lemon verbena cutting through the air. It’s a sophisticated sanctuary that feels both organized and organic, providing a peaceful corner where you can escape the digital world and reconnect with the simple beauty of growth.
Essential Elements:
- Geometric minimalist planters (concrete, matte black, or white).
- Decorative river stones for drainage and aesthetics.
- A unified color palette for all containers.
- High-contrast plant varieties (e.g., dark purple basil next to bright lime mint).
- A dedicated corner or nook with clean architectural lines.
How to make it
- Select a specific color palette for your pots—such as charcoal, slate, and white—to create a cohesive, designer look for your herb display.
- Choose herbs with varying textures and heights, like tall, structural rosemary and low-creeping thyme, to create visual layers in your design.
- Layer the bottom of your sleek planters with an inch of decorative river stones to improve drainage while adding a professional finishing touch.
- Fill the planters with premium potting soil, ensuring the soil level is consistent across all containers for a uniform appearance.
- Plant your herbs, placing the tallest varieties in the back or center and the trailing varieties near the edges to soften the hard lines of the pots.
- Top the soil with a thin layer of fine gravel or moss to hide the dirt and create a clean, finished “landscaped” look.
- Arrange the pots in a structured grid or a purposeful cluster on a modern stand, ensuring the arrangement feels balanced and intentional.
How to Style Unique Herb Planter Ideas for a Chic Veranda
Why we love this
Transforming your veranda with unique planters creates an outdoor living room that feels like a hidden Mediterranean escape. The sound of wind rustling through tall chives and the sight of delicate purple chive blossoms add a layer of sensory richness to your morning coffee routine. There is a rustic charm in repurposed vessels—like vintage crates or aged ceramic jugs—that tells a story of tradition and slow living. The air on a chic veranda feels heavier with the perfume of blooming oregano and lavender, inviting you to linger longer in the sunshine and soak in the artisanal beauty of your own creation.
Essential Elements:
- Repurposed vintage containers (wooden crates, galvanized buckets).
- Weather-resistant plant markers (copper or slate).
- Trailing herb varieties like Creeping Thyme or Nasturtiums.
- Outdoor-grade potting mix with perlite for drainage.
- A small bistro set for enjoying the view.
- Scour local flea markets or your own attic for unique vessels, ensuring you drill drainage holes in the bottom of any non-traditional containers.
- Line wooden or porous containers with a thin plastic liner (with holes) to prevent the wood from rotting and to keep moisture near the roots.
- Mix perlite into your potting soil at a 1:4 ratio to increase aeration, which is crucial for outdoor plants exposed to heavy rain.
- Group your unique planters in odd numbers (3, 5, or 7) to create a more natural and visually appealing vignette on your veranda.
- Insert elegant copper or slate markers into each pot to identify your herbs while adding a touch of sophisticated hardware to the greenery.
- Integrate trailing herbs around the edges of taller planters so they can spill over the sides, creating a lush, overflowing look.
- Apply a light layer of organic mulch to the top of the soil to help retain moisture during hot, windy days on the veranda.
- Non-GMO organic herb seeds.
- A humidity tray for moisture-loving herbs.
- Natural pest control (neem oil or insecticidal soap).
- Filtered water at room temperature.
- A notebook for tracking growth and watering cycles.
- Start with high-quality, non-GMO seeds to ensure your herbs are as healthy and pure as possible for consumption.
- Set up a humidity tray by filling a shallow dish with pebbles and water, then placing your pots on top to increase the local moisture levels.
- Water your plants with filtered, room-temperature water to avoid shocking the roots or introducing chlorine and fluoride to your edible greens.
- Check the undersides of leaves weekly for any signs of pests; if found, treat immediately with a gentle, organic neem oil spray.
- Fertilize sparingly with a balanced organic liquid food to ensure the herbs grow strong without accumulating excess salts.
- Keep a growth journal to note which herbs thrive in specific corners of your home, helping you refine your healthy living setup over time.
- Snip your herbs frequently; regular harvesting prevents the plant from flowering (bolting), which keeps the leaves sweet and tender.
- Reclaimed wood or FSC-certified cedar.
- Home-made compost or high-quality worm castings.
- Biodegradable seed starting pots.
- A rainwater collection barrel.
- Natural hemp twine for support.
- Construct a basic rectangular planter box using reclaimed cedar, which is naturally rot-resistant and doesn’t require chemical treatments.
- Prepare your soil by mixing two parts organic potting soil with one part well-aged compost or nutrient-dense worm castings.
- Sow your seeds in biodegradable peat or paper pots first to minimize root disturbance when they are ready to be moved to the main garden.
- Install a simple rainwater collection system nearby to use natural, mineral-rich water for your sustainable garden needs.
- Space your plants according to their mature size to ensure good airflow, which naturally prevents fungal diseases without the need for chemicals.
- Use natural hemp twine and bamboo stakes to support taller herbs like dill or tarragon as they grow, keeping them upright and healthy.
- Mulch the surface with dried leaves or straw to suppress weeds and maintain soil temperature sustainably throughout the season.
- A wall-mounted pocket planter or felt vertical system.
- Heavy-duty wall anchors and a level.
- Lightweight potting mix (with extra vermiculite).
- A drip tray or waterproof backing to protect walls.
- Assorted herbs with similar light requirements.
- Measure your wall space and use a level to mark the installation points for your vertical planter system, ensuring it’s at a comfortable height for harvesting.
- Secure the waterproof backing or plastic barrier to the wall first to prevent any moisture damage to your home’s structure.
- Install the mounting hardware using heavy-duty anchors that can support the weight of wet soil and mature plants.
- Fill the planting pockets with a lightweight potting mix; avoiding heavy garden soil is key for vertical systems to prevent sagging.
- Tuck your herb starts into the pockets, placing the most water-thirsty plants at the bottom where moisture naturally collects.
- Water the top row slowly and evenly, allowing the gravity-fed system to trickle down to the lower layers without over-saturating the bottom.
- Prune the vertical wall regularly to maintain a tidy appearance and prevent the plants from shading each other out.
- An all-in-one herb starter kit or basic pots.
- Pre-moistened seed-starting mix.
- Clear plastic domes or wrap (to create a mini-greenhouse).
- Plant labels and a permanent marker.
- A sunny, draft-free spot.
- Choose three easy-to-grow “beginner” herbs like basil, chives, and mint, which are resilient and germinate quickly.
- Moisten your seed-starting mix in a bowl before putting it into pots; it should feel like a wrung-out sponge, not a muddy soup.
- Fill small starter pots with the mix and place 2-3 seeds in each, ensuring they aren’t buried too deep (follow the packet guide).
- Cover the pots with a clear plastic dome or cling wrap to trap humidity, which speeds up the germination process significantly.
- Place the pots in a warm, bright spot—on top of a refrigerator is often a great warm place for seeds to wake up.
- Remove the plastic cover as soon as you see the first green sprouts to allow for air circulation and prevent “damping off” fungus.
- Once the seedlings have two sets of true leaves, thin them out by snipping the smaller ones to let the strongest plant thrive.
- Terra-cotta pots or mason jars.
- Chalkboard paint or acrylic craft paints.
- Paintbrushes and stencils.
- Decorative twine or ribbon.
- Clear sealant spray (for painted surfaces).
- Clean your pots or jars thoroughly with soap and water to ensure the paint adheres perfectly to the surface.
- Apply two coats of chalkboard paint to the center of the pot, allowing it to dry completely between applications for a durable finish.
- Use stencils or freehand designs to add patterns or quotes that resonate with your kitchen’s aesthetic.
- Once the paint is dry, apply a clear, non-toxic sealant spray to protect your artwork from water splashes and soil stains.
- Wrap the rim of the pot with rustic jute twine, securing it with a small dab of hot glue for a farmhouse-chic look.
- Label each pot with chalk so you can easily change the names if you decide to rotate your herb varieties later.
- Place your custom creations in a prominent spot where they can serve as both a functional garden and a beautiful piece of home decor.
- A high-quality garden hose with a gentle spray nozzle.
- Organic mulch (like cedar chips or straw).
- A sharp set of garden bypass pruners.
- Organic liquid fertilizer for high-growth periods.
- A harvest basket or apron.
- Water your outdoor herbs early in the morning (before 9 AM) to ensure the moisture reaches the roots before the sun evaporates it.
- Apply a 2-inch layer of organic mulch around the base of the plants to keep the roots cool and prevent moisture loss during summer heatwaves.
- Fertilize every two weeks with a diluted organic fish emulsion or seaweed extract to support the rapid growth seen in high-summer.
- Prune your herbs aggressively; for many varieties, cutting back up to one-third of the plant encourages even more vigorous regrowth.
- Watch for “bolting” (flowering) and snip off flower buds immediately to keep the plant’s energy focused on producing flavorful leaves.
- Check for signs of heat stress, such as wilting; if herbs look sad in the afternoon, consider providing temporary shade during the hottest hours.
- Harvest your herbs just before you need them, ideally in the morning after the dew has dried but before the sun is at its peak, for maximum oil concentration.
How to make it
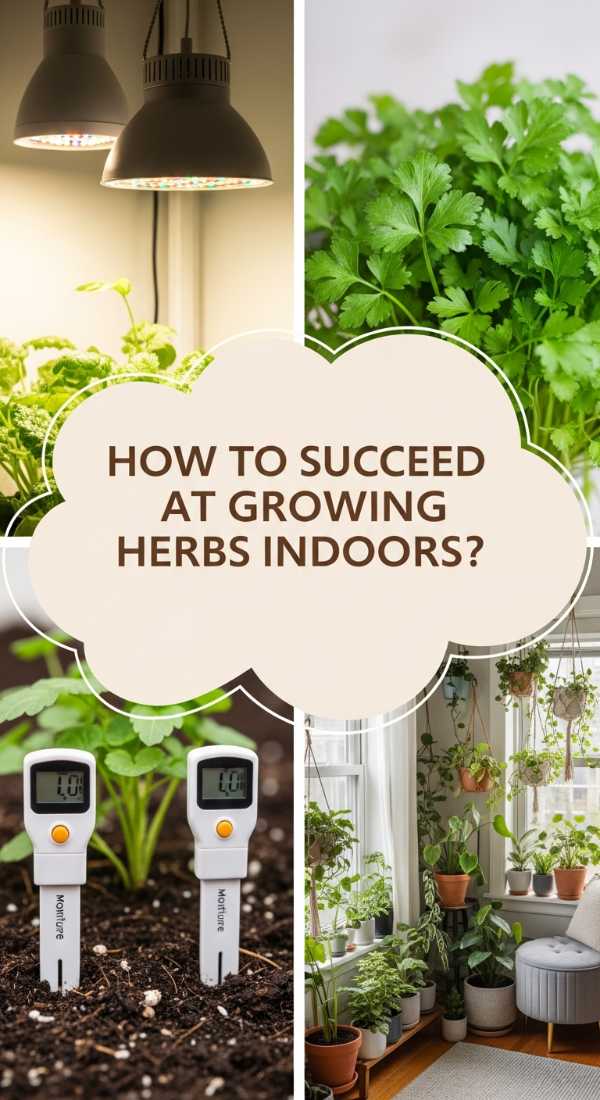
How to Succeed at Growing Herbs Indoors for Healthy Living

Why we love this
Bringing herbs indoors is a commitment to wellness that pays off in every vibrant, nutrient-dense bite you take. The crisp, peppery bite of fresh arugula or the sweet, cooling notes of spearmint add a layer of vitality to your diet that store-bought versions simply lack. There is a deep, psychological satisfaction in nurturing a living thing and then using its essence to nourish your own body. The kitchen becomes a laboratory of health, where the bright green hues of chlorophyll-rich leaves serve as a constant reminder of nature’s power to heal and energize from the inside out.
Essential Elements:
How to make it
How to Build a Sustainable DIY Herb Garden with Ease
Why we love this
Sustainability in the garden is about honoring the cycle of life, and building your own setup from scratch is incredibly rewarding. The earthy smell of damp compost and the rough texture of reclaimed cedar boards connect you directly to the environment in a meaningful way. There’s a quiet pride in knowing that your garden doesn’t just produce food, but does so in a way that respects the planet. Watching a bee hover over a flowering cilantro plant or seeing the soil turn dark and rich with nutrients makes you feel like a steward of the earth, creating a small but powerful ripple of green change.
Essential Elements:
How to make it
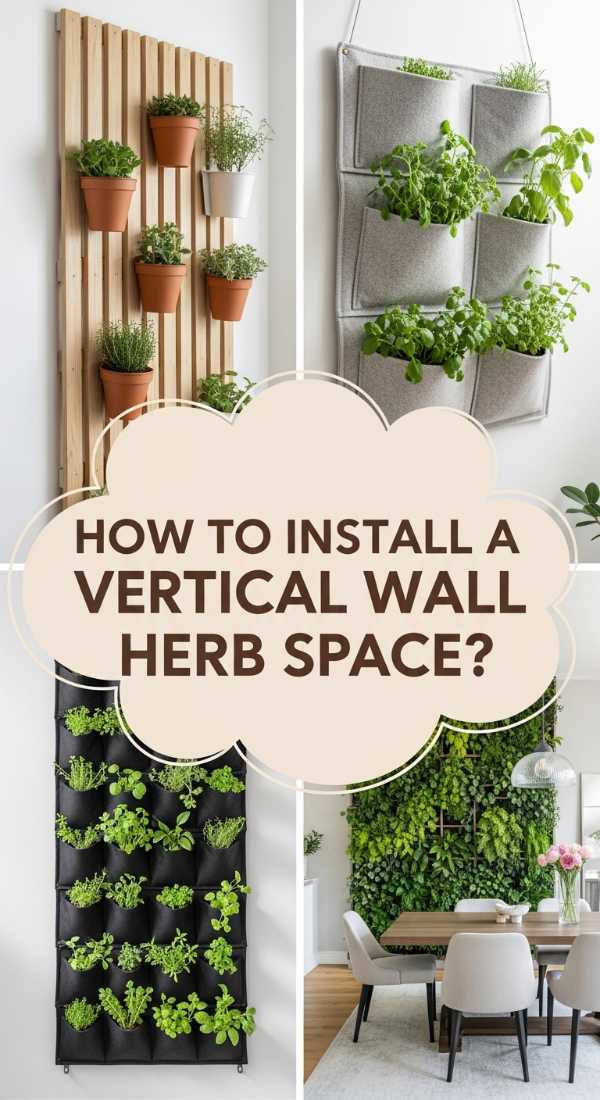
How to Install a Vertical Wall Herb Space for Small Living
Why we love this
A vertical herb wall is the ultimate solution for urban dwellers, turning a blank, sterile wall into a breathing, vibrant tapestry of life. The sight of a lush curtain of green hanging in a small apartment creates a dramatic focal point that feels like an indoor forest. You can feel the air quality improve as the plants filter the indoor environment, leaving behind a crispness that is palpable. It’s a clever use of space that maximizes every inch, allowing you to harvest fresh cilantro or parsley just steps from your stove, even in the heart of a bustling city.
Essential Elements:
How to make it
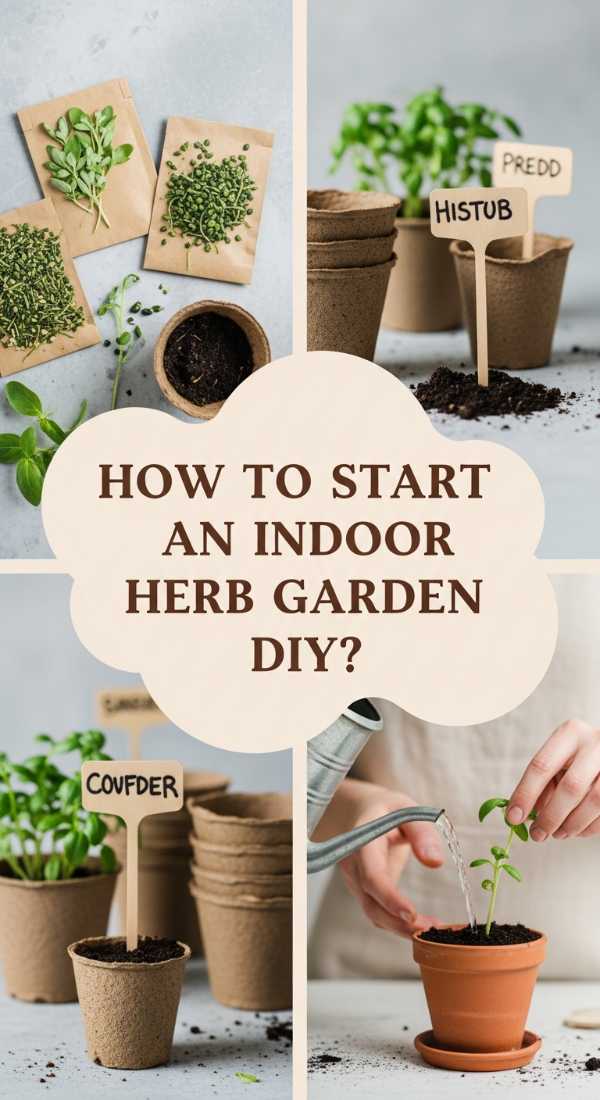
How to Start an Indoor Herb Garden DIY for Complete Beginners
Why we love this
Starting your very first herb garden is like opening a door to a new world of flavor and discovery. There is a childlike wonder in seeing the first tiny green loop of a sprout emerge from the dark earth after days of patient waiting. The soft, gentle leaves of a young basil plant feel incredibly delicate, yet they hold the promise of spicy, aromatic pesto. For a beginner, this project is a low-stakes way to practice mindfulness and celebrate the magic of biology, transforming a simple kitchen counter into a site of daily inspiration and culinary growth.
Essential Elements:
How to make it
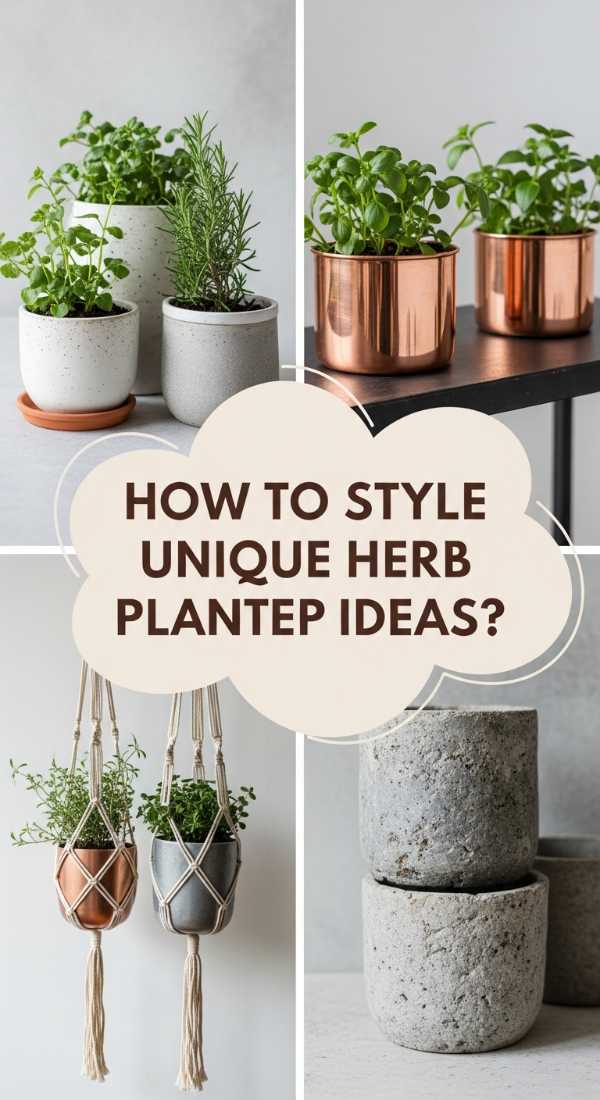
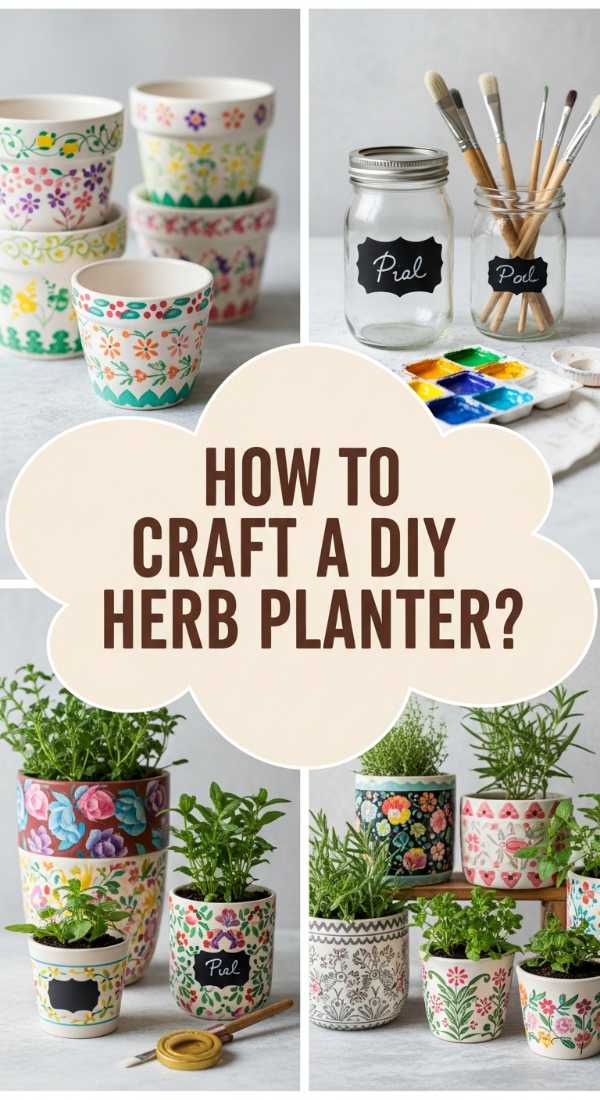
How to Craft a Personalized DIY Herb Planter for Home Decor
Why we love this
Personalizing your herb planters allows your home decor to reflect your unique personality while housing your favorite flavors. The feel of wet paint on a brush or the texture of twine being wrapped around a mason jar is a soothing, tactile experience that precedes the gardening itself. When you see your hand-stenciled pots lined up, there’s a sense of artistic accomplishment that makes the greenery look even more vibrant. It turns a functional garden into a curated decor piece that sparks conversation and adds a warm, handcrafted touch to your living space.
Essential Elements:
How to make it
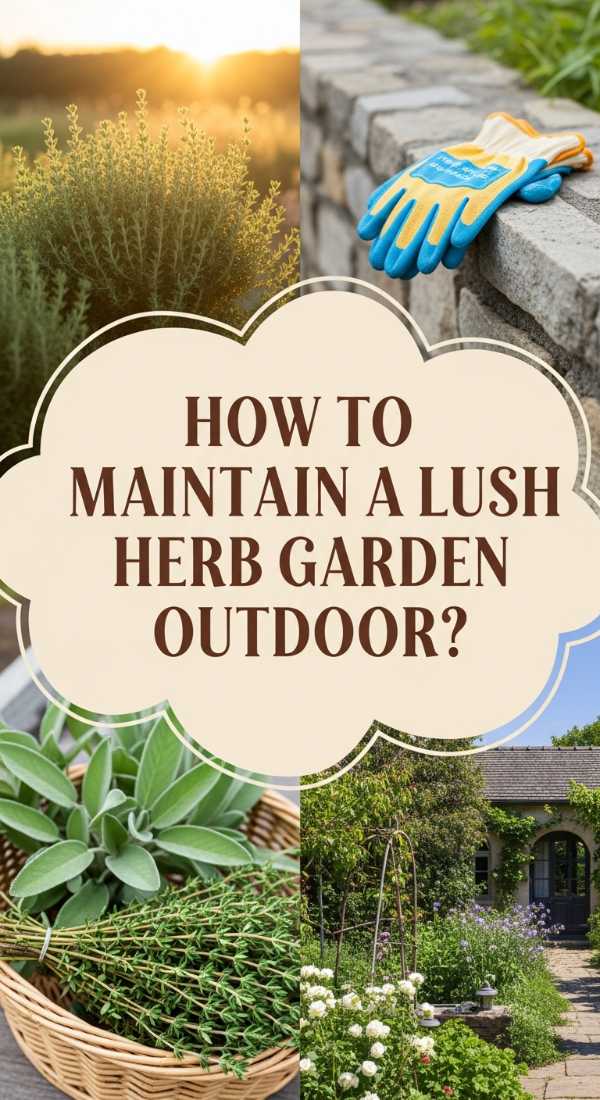
How to Maintain a Lush Herb Garden Outdoor for Summer Harvests
[IMAGE_10]
Why we love this
An outdoor herb garden in the peak of summer is a sensory explosion, where the heat of the sun draws out the essential oils of the plants until the whole yard smells like a spice market. The feeling of sun-warmed soil between your fingers and the bright, buzzing energy of pollinators visiting your flowering oregano is pure bliss. Harvesting large bundles of basil and parsley for a backyard BBQ feels like a generous gift from nature. It’s a time of peak abundance, where the garden is at its most resilient, vibrant, and flavorful, offering a lush backdrop for summer memories.
Essential Elements:
How to make it
Wrapping Up Your Viral Herb Journey
Creating the ultimate food board starts long before you lay out the crackers and cheese; it begins with the love and care you put into your very own herb garden. From the sleek lines of a modern indoor setup to the rustic charm of a veranda garden, these greens are the heartbeat of a vibrant home. Now that you have the tools and the inspiration, go forth and grow something beautiful—your kitchen (and your Instagram feed) will thank you!