

We’ve all been there—standing in front of an open fridge at 6 PM, wondering how to turn a random assortment of ingredients into something that feels special. This viral food board is the answer to those frantic weeknights, turning a simple meal into a shared experience that looks like it stepped right out of a high-end bistro. It’s about more than just food; it’s about the laughter shared over a communal platter and the ease of a meal that comes together in minutes but lingers in your memory long after the last bite is gone.
The magic of this board lies in its versatility. Whether you’re hosting a last-minute gathering or just want to spice up your Tuesday night routine, these components are designed to be quick, flavorful, and visually stunning. By combining textures and savory aromas, you create a tapestry of taste that caters to everyone at the table. Get ready to transform your kitchen into the heart of your home with these ten viral-inspired techniques.
How to cook creamy chicken?
Why we love this
There is something incredibly soul-soothing about the way a heavy cream sauce wraps itself around a perfectly seared chicken breast, creating a dish that feels both elegant and deeply comforting. The aroma fills your kitchen with a cozy warmth that feels like a big hug, while the golden-brown sear on the outside provides a satisfying contrast to the silkiness of the cream. It is a dish that balances richness with delicate herbal notes, making every mouthful a luxurious experience that you’ll want to savor slowly, perhaps with a crusty piece of bread to catch every last drop of sauce.
Ingredients
- 2 boneless chicken breasts
- 1 cup heavy cream
- 3 cloves garlic, minced
- 1 tsp fresh thyme
- 2 tbsp olive oil
- Salt and pepper to taste
How to make it
- Begin by patting your chicken breasts completely dry with a paper towel; this is the secret to achieving that professional golden crust. Season both sides generously with salt and black pepper.
- Place a large stainless steel or cast-iron skillet over medium-high heat and add the olive oil. Wait until the oil is shimmering but not smoking before carefully laying the chicken in the pan.
- Sear the chicken for 5-7 minutes on each side without moving it, which allows the Maillard reaction to create a deep, flavorful crust. Once internal temperature hits 165°F, remove the chicken and set it aside to rest.
- Lower the heat to medium and add the minced garlic to the same pan, stirring constantly for 30 seconds until fragrant but not burnt.
- Pour in the heavy cream and fresh thyme, using a wooden spoon to scrape up the browned bits (the fond) from the bottom of the pan for maximum flavor.
- Simmer the sauce for 3-4 minutes until it thickens enough to coat the back of a spoon, then slide the chicken back into the pan to coat it in the velvet-like sauce before serving.
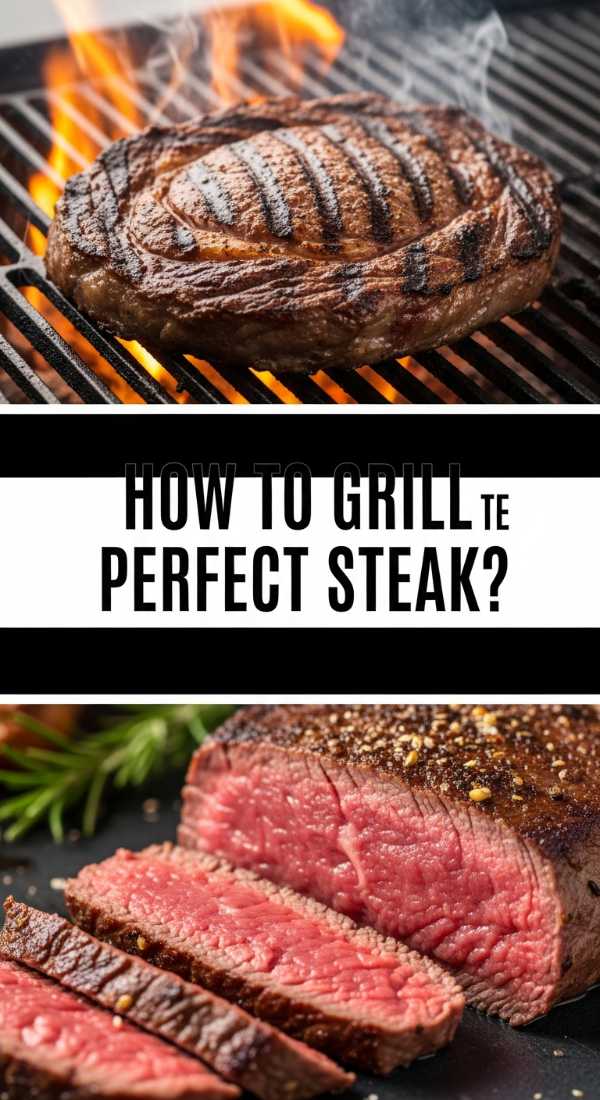
How to grill perfect steak?
Why we love this
There is nothing quite like the primal sizzle of a steak hitting a hot grill, sending up a cloud of savory, mouth-watering steam that promises a feast for the senses. As the crust forms into a deep, mahogany brown, the interior remains succulent and tender, releasing its rich juices with every slice. The smell of rendered fat and cracked black pepper is intoxicating, creating a sensory experience that feels both indulgent and deeply satisfying, especially when the meat has been rested to perfection to ensure every bite is as juicy as the first.
Ingredients
- 1 lb Ribeye or New York Strip
- 2 tbsp high-smoke point oil (like grapeseed)
- Coarse sea salt
- Cracked black pepper
- 1 tbsp unsalted butter
How to make it
- Take your steak out of the refrigerator at least 30-45 minutes before cooking to allow it to reach room temperature, which ensures even cooking throughout the cut.
- Pat the meat dry and season it aggressively with coarse sea salt and cracked pepper; the salt helps create a dry surface for a superior sear.
- Preheat your grill or cast-iron skillet to very high heat. You want the surface to be screaming hot—test it by flicking a drop of water; it should dance and evaporate instantly.
- Lay the steak down and press firmly. For a medium-rare finish, cook for about 3-4 minutes on the first side until a dark, crunchy crust forms.
- Flip the steak and add a knob of butter to the pan (if using a skillet), spooning the melting fat over the meat for the final 3 minutes of cooking.
- Crucially, remove the steak and let it rest on a cutting board for at least 10 minutes. This allows the fibers to relax and the juices to redistribute so they don’t run out when you slice it.
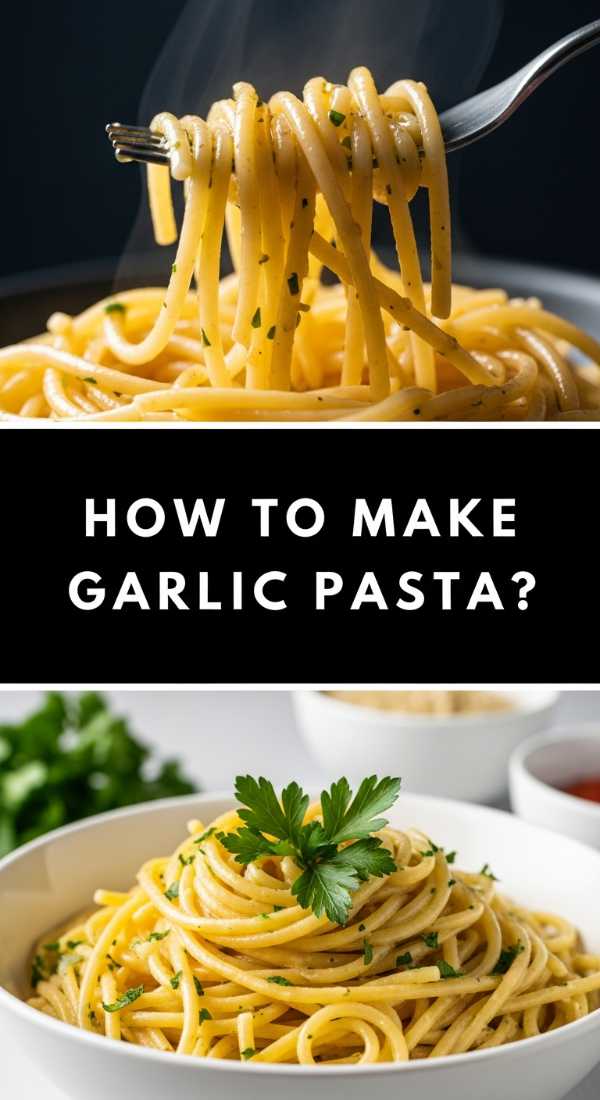
How to make garlic pasta?
Why we love this
The simplicity of garlic pasta is its greatest strength, where the pungent, sweet aroma of slowly sautéed garlic mingles with the nutty scent of toasted olive oil to create something truly magical. Each strand of al dente pasta is coated in a glossy, translucent sauce that clings to the curves of the noodles, offering a gentle bite followed by a burst of savory flavor. It’s a clean, bright dish that feels light on the palate but deeply comforting, reminiscent of sun-drenched afternoons in a Mediterranean courtyard and perfectly suited for a shared board.
Ingredients
- 8 oz spaghetti or linguine
- 1/4 cup extra virgin olive oil
- 6 cloves garlic, thinly sliced
- 1/2 tsp red pepper flakes
- Fresh parsley, chopped
- 1/2 cup reserved pasta water
How to make it
- Bring a large pot of heavily salted water (it should taste like the sea) to a rolling boil and cook your pasta for 1-2 minutes less than the package instructions for a perfect al dente bite.
- While the pasta cooks, add the olive oil and thinly sliced garlic to a cold pan. Turn the heat to low-medium and let the garlic slowly infuse the oil as it heats up.
- Watch the garlic closely; you want it to become soft and a very pale golden color. If it turns dark brown, it will be bitter, so keep the heat gentle.
- Add the red pepper flakes to the oil for the last 30 seconds to release their heat and color.
- Use tongs to transfer the pasta directly from the water into the oil. Pour in about 1/4 cup of the starchy pasta water and toss vigorously.
- The starch in the water will emulsify with the oil to create a creamy, silky sauce. Finish with a handful of fresh parsley and a final drizzle of high-quality oil before serving.
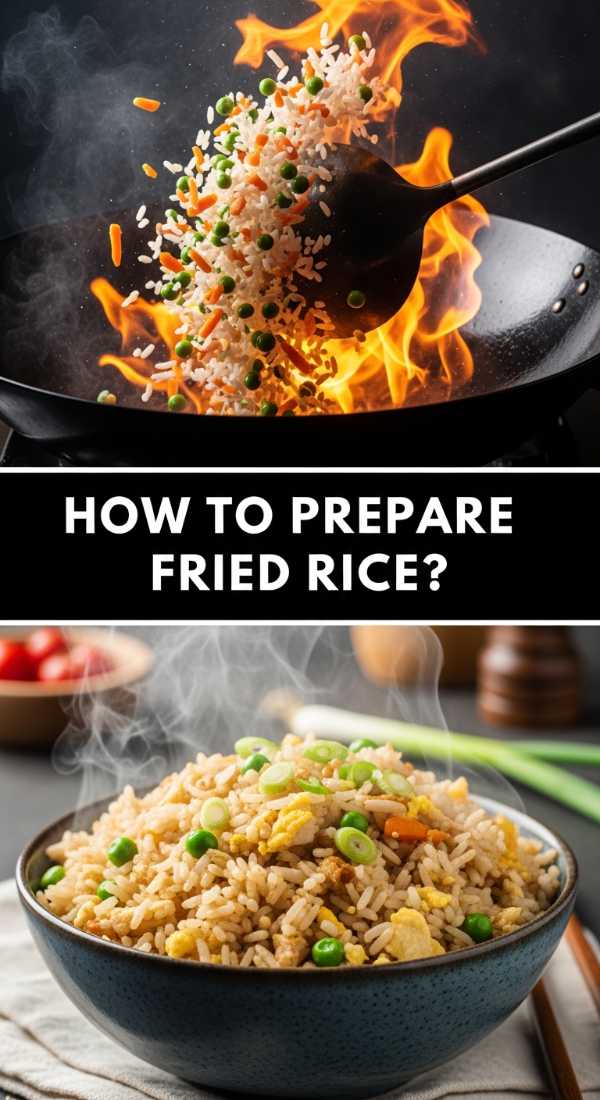
How to prepare fried rice?

Why we love this
High heat is the secret to that authentic, slightly smoky ‘wok hei’ flavor that makes fried rice so irresistible, with each grain of rice toasted to a delicate, chewy perfection. The vibrant colors of crisp peas and carrots pop against the golden hue of the soy-seasoned rice, while the aroma of toasted sesame oil ties everything together into a fragrant, savory masterpiece. It is a symphony of textures—from the soft scrambled egg to the crunch of green onions—that creates a festive, comforting bowl of goodness that disappears within minutes of hitting the table.
Ingredients
- 3 cups chilled, day-old white rice
- 2 eggs, lightly beaten
- 1 cup frozen peas and carrots
- 3 tbsp soy sauce
- 1 tbsp sesame oil
- 2 stalks green onion, sliced
How to make it
- The most important step is using cold, day-old rice. Fresh rice is too moist and will turn mushy in the pan; cold rice grains stay separate and get that classic ‘fried’ texture.
- Heat a wok or large non-stick skillet over high heat with a tablespoon of neutral oil. Pour in the beaten eggs and scramble them quickly, then remove and set aside.
- Add another splash of oil and toss in the peas and carrots, stir-frying for 2 minutes until they are bright and tender-crisp.
- Add the cold rice to the pan, breaking up any large clumps with a spatula. Let the rice sit undisturbed for 30 seconds at a time to allow it to toast against the hot surface.
- Pour the soy sauce and sesame oil over the rice, tossing constantly to ensure every grain is seasoned and the color is uniform.
- Fold the scrambled eggs back in along with the green onions, tossing one last time to heat everything through before serving immediately while steaming hot.
How to sear butter shrimp?

Why we love this
Watching shrimp transform from translucent grey to a vibrant, pearly pink in a pool of bubbling, nut-brown butter is one of the simple joys of cooking that never gets old. The aroma of searing seafood combined with zesty lemon and sharp garlic is enough to make anyone’s mouth water, promising a dish that is light yet incredibly flavorful. Each shrimp is plump and juicy, snapping slightly with each bite to reveal a sweet, delicate interior that is perfectly complemented by the rich, savory sauce, making it a sophisticated addition to any viral food board.
Ingredients
- 1 lb large shrimp, peeled and deveined
- 3 tbsp unsalted butter
- 2 cloves garlic, crushed
- 1/2 lemon, juiced
- Fresh parsley for garnish
- Pinch of paprika
How to make it
- Ensure your shrimp are completely thawed and patted dry with paper towels. Any excess moisture will cause the shrimp to steam rather than sear.
- Melt the butter in a wide skillet over medium-high heat until it begins to foam and turn a very light amber color.
- Add the shrimp in a single layer, ensuring they aren’t crowded. Season with salt and a pinch of paprika for a hint of smokiness and color.
- Cook for exactly 90 seconds on the first side. You are looking for the edges to turn opaque and pink while the center remains slightly translucent.
- Flip the shrimp and add the crushed garlic and lemon juice to the bubbling butter. Tilt the pan and spoon the garlic-lemon butter over the shrimp for another 60-90 seconds.
- Remove the pan from the heat the moment the shrimp form a ‘C’ shape. Overcooked shrimp turn into an ‘O’ and become rubbery; ‘C’ stands for cooked and tender!
How to roast seasoned veggies?

Why we love this
Roasting transforms humble vegetables into caramelized jewels of flavor, bringing out a natural sweetness that you just can’t get from steaming or boiling. The edges of the broccoli and carrots turn crisp and slightly charred, offering a smoky contrast to their tender, earthy centers that melt in your mouth. Tossed in a blend of fragrant rosemary and sea salt, the aroma that wafts from the oven is reminiscent of a harvest feast, making these veggies a vibrant, essential star of the board rather than just a side dish.
Ingredients
- 2 cups broccoli florets
- 2 large carrots, sliced diagonally
- 1 red bell pepper, chopped
- 2 tbsp olive oil
- 1 tsp dried rosemary
- 1/2 tsp garlic powder
How to make it
- Preheat your oven to 425°F (220°C). A high temperature is essential for caramelization; lower temperatures will result in soft, soggy vegetables.
- Cut your vegetables into uniform sizes so they cook at the same rate. Diagonally slicing carrots increases surface area for more browning.
- Place the veggies on a large sheet pan and drizzle with olive oil, rosemary, garlic powder, and salt. Use your hands to toss them, ensuring every piece is lightly coated in oil.
- Spread the vegetables out so they are in a single layer with space between them. If the pan is crowded, they will steam instead of roast.
- Roast for 20-25 minutes. Halfway through the cooking time, use a spatula to flip the vegetables to ensure even browning on all sides.
- Look for charred ‘flavor spots’ on the edges of the broccoli and a slight wrinkling of the peppers before removing them from the oven to serve warm.
How to make fluffy omelets?

Why we love this
A perfect omelet is a study in texture, with a pale golden exterior that gives way to a center that is incredibly soft, creamy, and light as a cloud. The gentle steam rising from the folded egg carries the scent of melted butter and fresh herbs, inviting you to dive into its tender, pillowy layers. It feels like the ultimate luxury breakfast, yet its simplicity is what makes it so beautiful, providing a mild, comforting base that pairs perfectly with the bolder, spicier elements of your communal board.
Ingredients
- 3 large eggs
- 1 tbsp heavy cream
- 1 tbsp unsalted butter
- 1/4 cup shredded cheddar cheese
- Chives, finely chopped
How to make it
- Whisk your eggs with the heavy cream and a pinch of salt in a bowl for at least 60 seconds. You want to incorporate air to ensure the final result is light and fluffy.
- Heat a small non-stick skillet over medium-low heat and add the butter. Wait for the butter to melt and just begin to bubble, but do not let it brown.
- Pour the egg mixture into the center of the pan. Using a heat-resistant spatula, immediately begin pushing the cooked edges toward the center, tilting the pan so the raw egg fills the gaps.
- Once the base is set but the top still looks slightly wet and creamy, sprinkle the shredded cheese over one half of the omelet.
- Turn the heat to the lowest setting and cover the pan for 30 seconds to help the cheese melt without overcooking the bottom of the eggs.
- Gently fold the omelet in half and slide it onto the board. The residual heat will finish cooking the interior to a perfect, soft custard consistency.
How to bake cheesy lasagna?

Why we love this
There is a profound sense of satisfaction in cutting through the layers of a lasagna, where the bubbling, browned cheese on top stretches into long, gooey strings of deliciousness. The rich, tomato-based meat sauce seeps into the tender pasta sheets, creating a marriage of flavors that is hearty, savory, and deeply nostalgic. The aroma of melting mozzarella and parmesan mingled with dried oregano is the quintessential smell of a home-cooked Italian dinner, promising warmth and fullness that anchors the entire food board experience.
Ingredients
- 6 oven-ready lasagna noodles
- 1.5 cups marinara sauce
- 1 cup ricotta cheese
- 2 cups shredded mozzarella
- 1/4 cup grated parmesan
- 1 tsp dried oregano
How to make it
- Preheat your oven to 375°F (190°C). Start with a small baking dish that fits on your board and spread a thin layer of marinara sauce on the bottom to prevent sticking.
- Place two noodles over the sauce. Spread a layer of ricotta cheese over the noodles, then top with more marinara and a handful of mozzarella.
- Repeat the layers—noodles, ricotta, sauce, mozzarella—until you reach the top of the dish. For the final layer, be extra generous with the mozzarella and parmesan.
- Sprinkle the dried oregano over the top cheese layer for that classic herbal aroma and a pop of color.
- Cover the dish tightly with aluminum foil, making sure the foil doesn’t touch the cheese (spray the foil with oil if needed). Bake for 25 minutes to cook the noodles through.
- Remove the foil and bake for an additional 10-15 minutes, or until the cheese is bubbling and has developed those beautiful, dark golden-brown spots. Let it rest for 5 minutes before serving so the layers set.
How to make honey chicken?

Why we love this
Honey chicken is a delightful dance of sweet and savory, where the sticky, amber glaze clings to every golden nugget of crispy chicken, catching the light like a jewel on your platter. The first bite reveals a satisfying crunch followed by the tender, juicy meat inside, all tied together by the floral sweetness of honey and the sharp, warming kick of ginger. It’s a dish that feels celebratory and fun, with an aroma that is both spicy and sugary, making it an instant favorite for anyone who loves bold, balanced flavors and a bit of a sticky-finger experience.
Ingredients
- 1 lb chicken thighs, bite-sized
- 1/2 cup cornstarch
- 1/4 cup honey
- 2 tbsp soy sauce
- 1 tsp fresh grated ginger
- Neutral oil for frying
How to make it
- Toss the bite-sized chicken pieces in cornstarch until they are heavily and evenly coated. The cornstarch creates a much crispier, lighter shell than flour does.
- Heat about 1/2 inch of oil in a heavy skillet over medium-high heat. To test the heat, drop a bit of starch in; if it sizzles instantly, it’s ready.
- Fry the chicken in batches for 4-5 minutes, turning occasionally, until they are golden brown and very crisp. Remove and drain on a wire rack or paper towels.
- In a separate small saucepan, combine the honey, soy sauce, and grated ginger. Simmer over low heat for 2-3 minutes until the mixture bubbles and thickens into a glaze.
- Place the fried chicken in a large bowl and pour the hot honey glaze over it. Toss quickly and thoroughly so every piece is coated in the sticky sauce.
- Serve immediately while the coating is still crunchy and the glaze is warm and lustrous, garnishing with sesame seeds if desired.
How to cook beef tacos?
[IMAGE_10]
Why we love this
The smell of cumin, chili, and browned beef is the unmistakable scent of a taco night done right, bringing a sense of excitement and zest to the dinner table that is hard to beat. Each taco is a handheld explosion of flavor, where the savory, spiced meat provides a warm base for the cool crunch of fresh lettuce and the sharp, bright tang of lime. The textures are a playful mix of soft tortillas and crisp toppings, creating a messy, joyful eating experience that is as much about the fun of assembly as it is about the delicious taste.
Ingredients
- 1 lb ground beef (80/20 mix)
- 1 tbsp chili powder
- 1 tsp cumin
- 1/2 tsp onion powder
- 8 small corn or flour tortillas
- Toppings: Shredded lettuce, lime wedges, salsa
How to make it
- Place a large skillet over medium-high heat and add the ground beef. Use a wooden spoon to break the meat into small, uniform crumbles as it browns.
- Cook the beef until it is completely browned and no pink remains. For the best flavor, let it sizzle in its own fat for an extra minute to get some crispy edges.
- Drain the excess grease from the pan, leaving just a tablespoon for moisture. Add the chili powder, cumin, onion powder, and a splash of water (about 1/4 cup).
- Simmer the meat for 3-5 minutes until the water has evaporated and the spices have formed a thick, flavorful coating around the beef.
- While the meat simmers, warm your tortillas in a dry pan for 30 seconds per side until they are soft and slightly charred. This improves their texture and prevents them from breaking.
- Assemble the tacos by spooning the beef into the tortillas and piling on the fresh toppings, finishing with a generous squeeze of lime to cut through the richness of the beef.
The Secret to a Perfect Viral Board
Assembling your viral food board is an art form in itself. The trick is to group the hot items together while leaving space for fresh garnishes like herbs, sliced lemons, and small bowls of dipping sauces. By varying the heights and colors of these ten dishes, you create a visual feast that is just as Instagram-worthy as it is delicious. Remember, the best part of a food board is that there are no rules—feel free to mix and match these recipes to suit your own personal style and cravings!
Frequently Asked Questions
Find answers to common questions about creating the perfect simple food board below.