
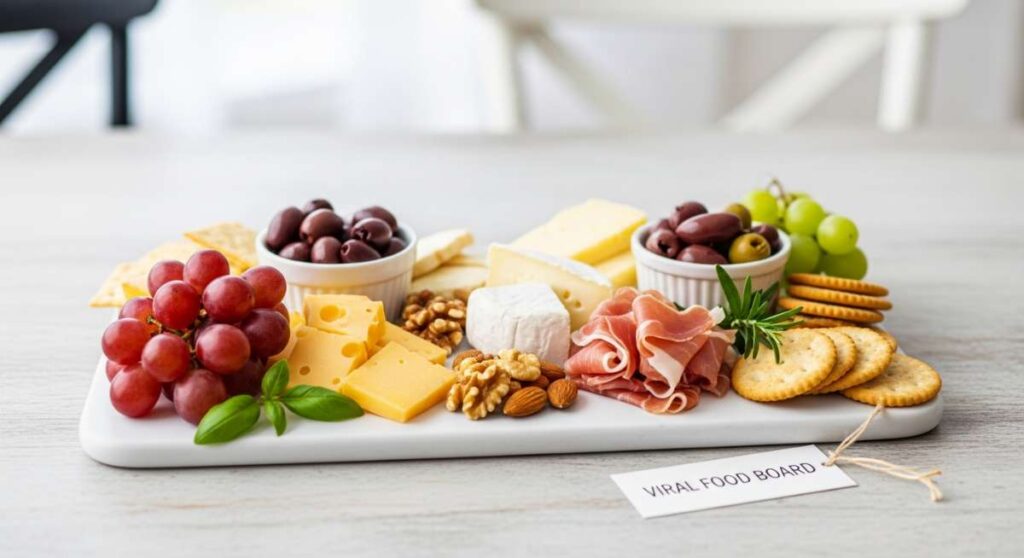
Stop Everything: These Simple Food Boards are Taking Over the Internet
There is something inherently magical about gathering around a table where the food isn’t just a meal, but a conversation piece. Over the last few months, my social media feeds have been completely dominated by the ‘board’ trend, and honestly, I am not complaining one bit. It started with simple charcuterie, but it has evolved into a full-blown lifestyle movement that celebrates the beauty of abundance and the ease of grazing. Whether you are hosting a backyard bash or just trying to make a Tuesday night dinner feel special, these boards are the ultimate hack for effortless elegance.
The secret to why these boards are taking over is their accessibility; you don’t need to be a Michelin-starred chef to arrange a stunning display of fresh ingredients. It’s about the tactile experience of picking exactly what you want, the vibrant colors that pop against a wooden surface, and the way it brings people together to share stories while they snack. Today, I’m breaking down ten different ways to bring this viral trend into your own home, from sunset cocktails to hearty slow-cooked dinners that serve themselves.
How to make refreshing cocktails

Why we love this
There is nothing quite like the crisp, effervescent pop of a perfectly chilled cocktail on a humid afternoon. This DIY cocktail board allows guests to customize their drinks with muddled herbs, bright citrus wheels, and artisanal syrups, creating a sensory playground of aromas like crushed mint and zesty lime. The visual of condensation beads forming on a crystal carafe paired with the sweet, botanical scent of gin or vodka makes the act of drink-making feel like a sophisticated ritual rather than just a chore.
Ingredients
- 2 cups Premium Gin or Vodka
- 1 liter Sparking water or Club soda
- Fresh mint leaves and basil
- Sliced cucumbers and lemons
- Handcrafted elderflower or hibiscus syrup
- Large ice cubes or floral-infused ice
How to make it
- Begin by chilling your glassware in the freezer for at least 20 minutes to ensure every sip stays icy cold from start to finish.
- Prepare your garnish board by thinly slicing cucumbers and lemons into uniform rounds; use a mandoline if available for that professional, translucent look.
- Place the fresh herbs in small bowls of ice water for five minutes before serving; this ‘shocks’ the herbs, making them vibrant green and incredibly fragrant.
- Set out your base spirit in a glass decanter and arrange the syrups in small pourers to prevent stickiness on the board surface.
- To assemble a drink, instruct guests to muddle two herb leaves at the bottom of a glass to release essential oils, add a splash of syrup, fill with ice, and top with spirits and soda.
How to grill juicy kabobs
Why we love this
The aroma of charred wood and caramelized meat wafting through the air is the quintessential scent of summer, promising a meal that is as satisfying to eat as it is beautiful to look at. Grilling kabobs on a board offers a rustic, communal feel where the smoky notes of the grill mingle with the sweetness of fire-roasted bell peppers and onions. Every bite delivers a delightful contrast between the crisp, seared exterior of the protein and the tender, juicy center that melts in your mouth with savory richness.
Ingredients
- 1.5 lbs Sirloin steak or Chicken breast, cubed
- Red, green, and yellow bell peppers
- Red onion wedges
- Zucchini rounds
- Marinade: Olive oil, minced garlic, rosemary, and balsamic glaze
How to make it
- Whisk together the olive oil, garlic, and rosemary in a large bowl, then submerge your protein cubes, allowing them to marinate in the refrigerator for at least 2 hours to break down fibers for maximum tenderness.
- If using wooden skewers, soak them in water for at least 30 minutes to prevent them from igniting on the high heat of the grill.
- Thread the meat and vegetables onto the skewers, ensuring there is a tiny bit of space between each item; crowding the skewer will cause the food to steam rather than sear.
- Preheat your grill to a medium-high heat (about 400°F) and lightly oil the grates to prevent sticking.
- Place kabobs on the grill and sear for 3-4 minutes per side, looking for dark grill marks and internal temperatures of 145°F for steak or 165°F for chicken; let them rest on the serving board for 5 minutes before serving to allow juices to redistribute.
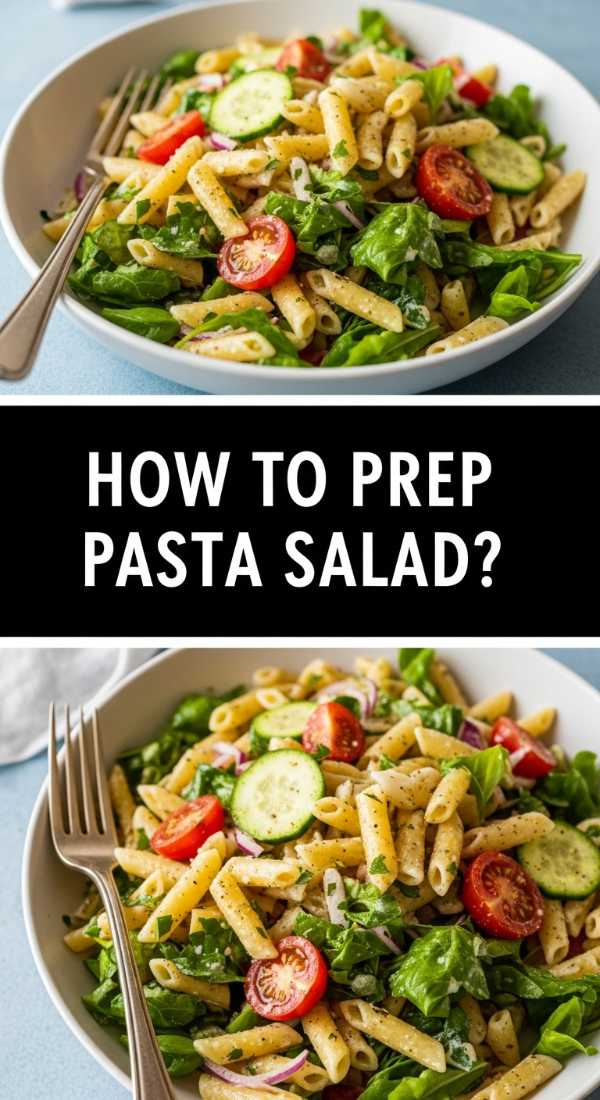
How to prep pasta salad

Why we love this
Pasta salad is the ultimate canvas for color and texture, offering a refreshing bite that stays delicious even as the sun climbs higher in the sky. We love how the al dente pasta catches pockets of tangy vinaigrette, while the crunch of fresh vegetables provides a sharp contrast to creamy pearls of mozzarella. It is a dish that feels light yet filling, filled with the Mediterranean aromas of dried oregano, sun-ripened tomatoes, and the salty punch of Kalamata olives.
Ingredients
- 1 lb Rotini or Farfalle pasta
- 1 cup Cherry tomatoes, halved
- 1/2 cup English cucumber, diced
- 1/4 cup Red onion, finely minced
- 8 oz Fresh mozzarella pearls
- Italian dressing: Olive oil, red wine vinegar, dried oregano, and honey
How to make it
- Boil a large pot of heavily salted water—it should taste like the sea—and cook the pasta for exactly one minute less than the package directions for a true al dente bite.
- Immediately drain the pasta and rinse it under cold running water to stop the cooking process and remove excess starch, which prevents the pasta from becoming gummy.
- In a small jar, emulsify your dressing by shaking the oil, vinegar, and seasonings vigorously until the mixture is thick and opaque.
- In a massive mixing bowl, toss the cooled pasta with half of the dressing, then fold in your vegetables and mozzarella pearls gently to avoid breaking the cheese.
- Cover and refrigerate for at least one hour to let the flavors meld; right before serving on your board, drizzle the remaining dressing and toss once more for a glossy, fresh finish.
How to pack picnic snacks

Why we love this
The picnic snack board is a whimsical nod to childhood wonders, filled with an array of bite-sized treats that invite you to slow down and enjoy the scenery. There is a tactile joy in snapping a crisp cracker or peeling a wedge of artisanal cheese while sitting on a soft blanket under a sprawling oak tree. The combination of salty nuts, sweet dried fruits, and savory meats creates a balanced flavor profile that keeps your palate excited with every reach towards the board.
Ingredients
- Selection of hard and soft cheeses (Cheddar, Brie, Goat)
- Cured meats like Prosciutto and Salami
- Multigrain crackers and baguette slices
- Fresh grapes and dried apricots
- Marcona almonds or candied walnuts
How to make it
- Select a sturdy, lightweight wooden or bamboo board that fits easily into your picnic basket or cooler bag.
- Slice hard cheeses into uniform triangles and leave soft cheeses whole with a small spreader to maintain their structural integrity during transport.
- Roll the prosciutto into tight ribbons and fold the salami into quarters, tucking them closely together on the board so they don’t slide around during the walk to your picnic spot.
- Fill any small gaps on the board with nuts and dried fruits to act as ‘anchors’ that keep the larger items in place.
- Wrap the entire board tightly in parchment paper followed by a layer of beeswax wrap or plastic wrap to keep the crackers crisp and the cheese from sweating in the heat.
How to cook summer soup
Why we love this
Summer soup, particularly a chilled gazpacho or a light corn chowder, is a revelation for those who think soup is only for the winter months. We love the vibrant, garden-fresh scent of blended tomatoes and peppers that fills the kitchen, offering a cooling sensation that is incredibly revitalizing. When served on a board alongside crusty bread and herb-infused oils, it becomes a sophisticated centerpiece that celebrates the height of the season’s harvest with every silky, cool spoonful.
Ingredients
- 6 large Ripe tomatoes, cored
- 1 Red bell pepper, seeded
- 1 Cucumber, peeled
- 2 cloves Garlic
- 3 tbsp Extra virgin olive oil
- 1 tbsp Sherry vinegar
How to make it
- Roughly chop all your vegetables, ensuring you use the ripest tomatoes possible as they provide the base liquid and sweetness for the soup.
- Place the tomatoes, pepper, cucumber, and garlic into a high-powered blender and pulse until the mixture is completely smooth and aerated.
- While the blender is running on low, slowly drizzle in the olive oil and sherry vinegar; this emulsification process creates a creamy texture without the need for dairy.
- Pass the soup through a fine-mesh sieve into a glass bowl to remove any remaining skins or seeds, resulting in a perfectly velvety consistency.
- Chill the soup in the refrigerator for at least 4 hours; serve in small chilled bowls on a board garnished with a micro-dice of the original ingredients and a swirl of oil.
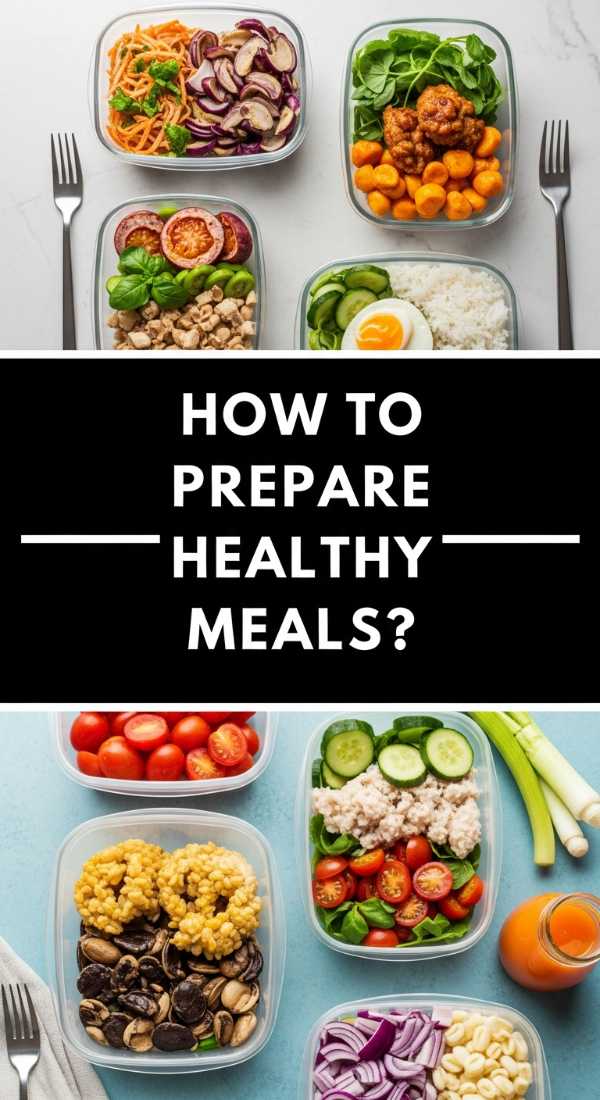
How to prepare healthy meals
Why we love this
A healthy meal board is all about the ‘power of the plate,’ focusing on vibrant microgreens, lean proteins, and complex carbohydrates that leave you feeling energized rather than weighed down. The visual appeal of a ‘rainbow’ board—deep purple cabbage, bright orange carrots, and emerald broccoli—stimulates the appetite in a wholesome way. It makes nutritious eating feel like an indulgence because of the variety of textures, from the snap of raw snap peas to the creamy richness of a tahini drizzle.
Ingredients
- Grilled salmon fillets or Tofu blocks
- Roasted sweet potato wedges
- Steamed broccoli florets
- Shredded purple cabbage and carrots
- Quinoa or Brown rice base
- Lemon-tahini dressing
How to make it
- Preheat your oven to 400°F and roast the sweet potato wedges with a light coating of olive oil and sea salt until the edges are caramelized and the centers are fluffy (about 25 minutes).
- Season your protein with lemon zest and cracked black pepper; sear in a non-stick skillet over medium-high heat until the salmon flakes easily with a fork or the tofu is golden brown on all sides.
- Blanch the broccoli in boiling water for exactly 2 minutes, then plunge into an ice bath to lock in that striking bright green color and crisp-tender texture.
- Arrange the grain base in the center of the board and fanned-out rows of vegetables and protein around it to create a visually organized and appetizing display.
- Whisk tahini, lemon juice, and a splash of warm water until smooth; serve this in a small central ramekin for dipping or drizzling over the entire board.
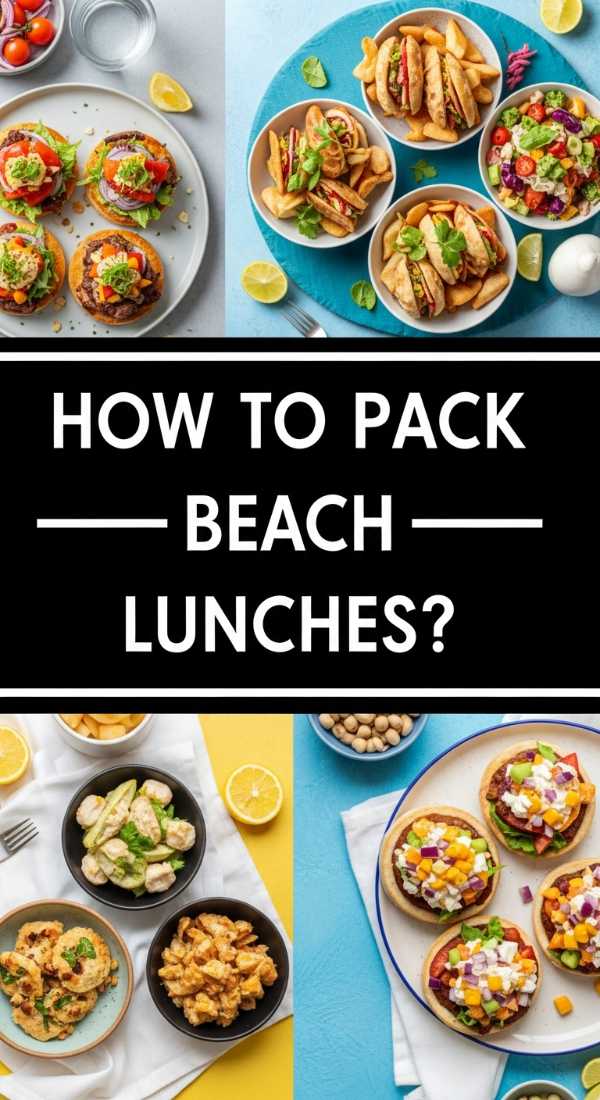
How to pack beach lunches

Why we love this
Beach lunches need to be resilient, sand-proof, and incredibly refreshing to combat the salt and sun. A beach board focuses on hydration and easy-to-grab finger foods that don’t require utensils or heavy cleanup. We love the cooling crunch of watermelon wedges and the saltiness of pretzels that help replenish electrolytes after a long swim. It’s the ultimate way to stay fueled while lounging, turning a simple day at the shore into a gourmet seaside retreat.
Ingredients
- Cold-cut turkey or ham roll-ups
- Hard-boiled eggs (peeled)
- Watermelon and pineapple chunks
- Celery sticks with nut butter
- Pretzel rods or Rice cakes
How to make it
- Start by prepping your fruit; cut watermelon and pineapple into thick wedges that are easy to hold by the rind, which minimizes sticky fingers.
- Roll high-quality deli meats tightly and secure them with a toothpick if necessary, then chill them overnight so they hold their shape.
- Use a leak-proof container for any ‘wet’ items like pickles or fruit to ensure the sand stays out and the juices don’t soak into your dry snacks.
- Layer your board inside a hard-sided cooler, placing ice packs directly underneath the board to maintain a safe temperature of 40°F or below.
- Pack a separate small bag of dry items like pretzels or rice cakes to be added to the board right before eating, ensuring they maintain their crunch against the humid ocean air.
How to make crockpot dinner
Why we love this
The magic of a crockpot dinner board lies in the transformation of humble ingredients into a fall-apart tender feast with almost zero effort. Coming home to the savory, mouth-watering aroma of slow-cooked pot roast or pulled pork is an emotional hug in a bowl. When spread out on a large board with roasted root vegetables and a side of thickened gravy, it creates a rustic, family-style atmosphere that encourages everyone to dig in and pass the platter.
Ingredients
- 3 lbs Chuck roast or Pork shoulder
- 1 lb Baby potatoes, halved
- 4 large Carrots, cut into chunks
- 1 Onion, quartered
- 2 cups Beef or Vegetable broth
- Fresh thyme and bay leaves
How to make it
- For maximum flavor, sear the meat in a hot skillet with a tablespoon of oil for 3 minutes per side until a deep brown crust forms before placing it in the slow cooker.
- Layer the onions, potatoes, and carrots at the bottom of the crockpot to act as a ‘rack’ for the meat, allowing the juices to flavor the vegetables as they cook.
- Pour the broth over the top and add the herbs; set the cooker to ‘Low’ and cook for 8-10 hours—the long, slow process is essential for breaking down the tough connective tissues into tender morsels.
- Once finished, remove the meat and vegetables carefully with a slotted spoon to a large rimmed board to prevent any juice runoff.
- Strain the remaining liquid into a saucepan, simmer it over high heat to reduce by half for a concentrated glaze, and pour it over the meat right before the family gathers.
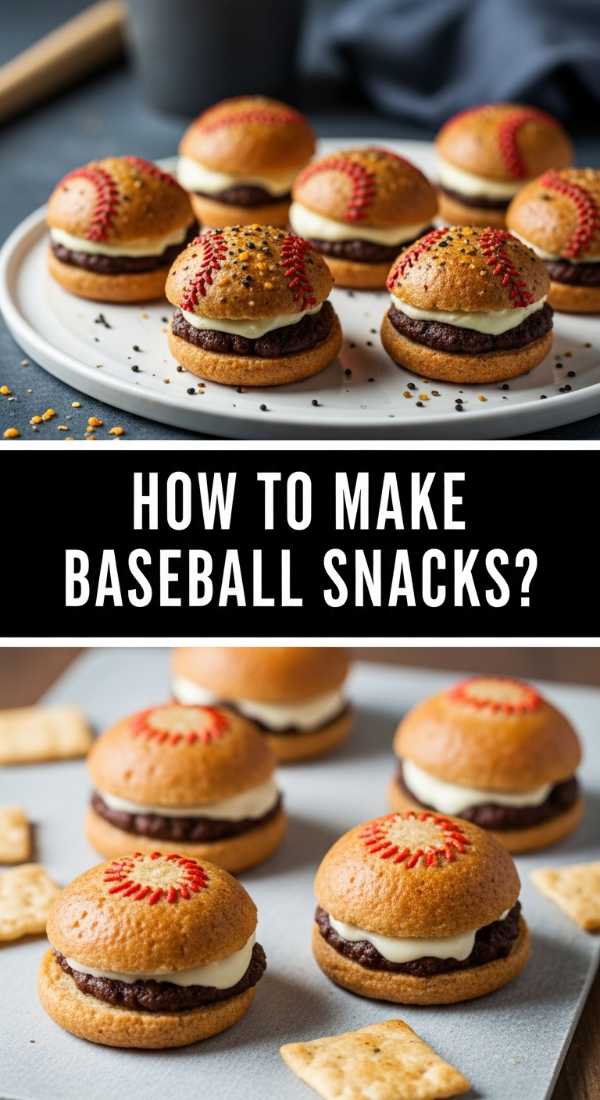
How to make baseball snacks

Why we love this
A baseball snack board is a home run for any game day, bringing the nostalgia of the stadium right to your living room. We love the classic combination of salty, buttery popcorn and the sweet snap of chocolate-covered peanuts. It’s a playful, high-energy board that captures the excitement of the sport, featuring iconic treats that are meant to be shared during the tense moments of a bottom-of-the-ninth rally.
Ingredients
- Freshly popped buttered popcorn
- Soft pretzel bites with mustard dip
- Cracker Jacks or Caramel corn
- Beef jerky strips
- Roasted peanuts in the shell
- Red and white licorice twists
How to make it
- Pop your popcorn fresh and toss it with melted high-quality butter and a fine-grain sea salt so every kernel is perfectly coated.
- Warm the soft pretzel bites in the oven at 350°F for 5 minutes until they are soft and pillowy; serve them in a pile next to a small bowl of spicy brown mustard.
- Create ‘zones’ on your board: a salty zone for peanuts and jerky, and a sweet zone for caramel corn and licorice to keep flavors from overlapping.
- Leave the peanuts in their shells for that authentic ballpark experience; provide a small empty bowl on the side for guests to discard the husks.
- Scatter the licorice twists across the board in a decorative ‘stitching’ pattern to mimic the look of a baseball, adding a fun thematic touch to the display.
How to make hummingbird food
[IMAGE_10]
Why we love this
While not for human consumption, a hummingbird ‘board’ or station is a beautiful way to host nature’s most dazzling guests on your patio. There is a serene joy in watching these tiny, iridescent creatures dart to and fro, their wings humming at incredible speeds. The simple sweetness of the nectar mirrors the blossoms of summer, and setting up a dedicated spot for them turns your outdoor space into a living, breathing part of your home’s ecosystem.
Ingredients
- 1 cup Granulated white sugar
- 4 cups Filtered water
- Red ribbons or bright flowers (optional for attraction)
How to make it
- In a clean saucepan, combine the sugar and water; do not use honey, brown sugar, or artificial sweeteners, as these can be fatal to hummingbirds.
- Heat the mixture over medium heat, stirring constantly until the sugar is completely dissolved; you do not need to bring it to a rolling boil, just enough to ensure a clear solution.
- Let the nectar cool to room temperature—this is vital to ensure the heat doesn’t warp your feeder or harm the birds.
- Fill your clean hummingbird feeder (ideally one with red accents, as birds are naturally drawn to the color) and hang it in a shaded area to prevent the sugar from fermenting quickly in the sun.
- Clean the feeder and replace the nectar every 3-5 days, especially in high heat, to ensure the birds have a fresh, healthy supply of energy.
The Board Trend is Here to Stay
From the refreshing sips of a DIY cocktail station to the rustic charm of a slow-cooked family dinner, the food board trend is more than just an Instagrammable moment—it’s a way of reclaiming the joy of eating. It encourages us to play with our food, to appreciate the raw beauty of ingredients, and most importantly, to share that beauty with the people we love. So, clear off your biggest wooden plank, gather your favorite snacks, and start building your own viral-worthy masterpiece today.
Frequently Asked Questions
Everything you need to know about mastering the art of the board.