

The Viral Food Board Everyone is Obsessed With (And It’s So Simple!)
There is something magical about those long, golden afternoons where the sun hangs low in the sky and the only thing on the agenda is good company and even better food. I remember the first time I set out a massive, overflowing board on our patio table; the way my friends’ eyes lit up as they reached for a slice of crusty bread or a perfectly ripe peach was better than any five-course meal I’ve ever labored over. It’s about that effortless, ‘grazing’ lifestyle that makes summer feel like it could last forever.
Lately, the internet has been buzzing about the ‘Viral Food Board’—a concept that takes the classic charcuterie and elevates it into a full-blown meal. It’s not just cheese and crackers anymore; it’s about vibrant salads, grilled skewers, and chilled dips that invite everyone to dig in and stay a while. It’s visual, it’s tactile, and honestly, it’s the most stress-free way to host. You prep it all beforehand, lay it out, and then you’re actually part of the party instead of being stuck in the kitchen.
Today, I’m sharing the ultimate guide to building your own viral-worthy summer spread. Whether you’re poolside, at a picnic, or just having a quiet dinner on the deck, these recipes are designed to be the stars of your board. We’re talking about textures that crunch, flavors that zing, and that unmistakable feeling of summer in every single bite. Let’s dive into the recipes that will make your next gathering absolutely unforgettable!
12 Fresh Summer Salad Recipes (Step-by-Step Guide)

Why we love this
Nothing says summer quite like the refreshing crunch of a salad that tastes like it was plucked straight from a sun-drenched garden. This particular Watermelon and Feta medley is a masterclass in balance, offering a juicy sweetness that is immediately cut by the sharp, salty tang of premium sheep’s milk cheese. As you take a bite, the aromatic fragrance of fresh mint leaves wafts up, perfectly complementing the subtle heat of a light lime-chili dressing. It’s an ethereal experience that cools you from the inside out, leaving a lingering brightness on your palate that makes it impossible to stop at just one serving.
Ingredients
- 4 cups cubed seedless watermelon
- 1 cup crumbled high-quality feta cheese
- 1/2 red onion, very thinly sliced
- 1/2 cup fresh mint leaves, torn
- 1/4 cup extra virgin olive oil
- 2 tablespoons fresh lime juice
- A pinch of sea salt and Tajin seasoning
How to make it
- Start by prepping your watermelon; ensure it is chilled for at least 3 hours before cutting to keep the texture crisp. Slice into uniform 1-inch cubes.
- Prepare the red onion by soaking the thin slices in ice water for 10 minutes. This technique removes the harsh sulfuric bite, leaving them sweet and crunchy.
- In a small glass jar, whisk together the extra virgin olive oil and lime juice until emulsified. The mixture should look slightly thickened and cloudy.
- Arrange the watermelon cubes on a wide, shallow platter rather than a deep bowl to prevent the fruit from crushing under its own weight.
- Drain the onions and pat them dry with a paper towel before scattering them over the watermelon.
- Sprinkle the crumbled feta evenly across the top, ensuring every section of the platter gets a bit of saltiness.
- Drizzle the lime-oil dressing over the entire board in a slow, zigzag motion.
- Finish by scattering the hand-torn mint leaves and a light dusting of Tajin. Serve immediately while the watermelon is still icy cold.
10 Best Cookout Side Dishes (Step-by-Step Guide)

Why we love this
The star of any cookout isn’t always the main course—often, it’s the smoky, creamy, and charred goodness of Mexican Street Corn (Elote) served off the cob. Imagine the smell of corn kernels caramelizing over an open flame, their sweetness intensifying as they develop those beautiful dark brown spots. When tossed with a silky crema and tangy lime, the corn becomes a decadent, velvety side dish that pairs perfectly with the smokiness of a grill. It’s a riot of textures: the pop of the corn, the creaminess of the sauce, and the crumbly friction of the cotija cheese creating a sensory explosion in every spoonful.
Ingredients
- 4 cups roasted corn kernels (fresh or frozen)
- 1/4 cup Mexican crema or sour cream
- 1/4 cup mayonnaise
- 1/2 cup crumbled cotija cheese
- 1/4 cup chopped fresh cilantro
- 1 teaspoon smoked paprika or chili powder
- 1 lime, cut into wedges
How to make it
- If using fresh corn, grill the cobs over medium-high heat for about 10-12 minutes, turning frequently until charred all over, then cut the kernels off. If using frozen, char them in a cast-iron skillet with a touch of oil over high heat until they ‘pop’ and brown.
- In a large mixing bowl, combine the Mexican crema and mayonnaise. Stir until smooth and no lumps remain.
- Add the warm corn kernels directly to the cream mixture. The heat from the corn will help thin the sauce just enough to coat every kernel perfectly.
- Fold in half of the cotija cheese and half of the cilantro, ensuring the flavors are distributed throughout.
- Transfer the mixture to a serving bowl or add it as a ‘mound’ on your food board.
- Top with the remaining cotija cheese and cilantro for a beautiful, textured presentation.
- Dust the top with smoked paprika, moving your hand back and forth to get an even, fine coating.
- Serve with lime wedges tucked into the side so guests can add a fresh squeeze of acidity right before eating.
8 Refreshing Summer Cocktail Ideas (Step-by-Step Guide)

Why we love this
When the heat hits its peak, you need a drink that feels like a plunge into a cold spring, and this Cucumber Mint Gin Fizz is exactly that. It starts with the crisp, botanical notes of gin, which are instantly softened by the cooling essence of muddled cucumber that smells like a spa in a glass. The bubbles from the soda water lift the aromatic oils of the mint, tickling your nose with every sip while providing a refreshing effervescence. It’s light, sophisticated, and remarkably hydrating, making it the perfect companion for a long afternoon spent lounging by the water with friends.
Ingredients
- 2 oz London Dry Gin
- 1/2 oz simple syrup
- 3 thick slices of cucumber
- 6 fresh mint leaves
- 1 oz fresh lemon juice
- Soda water to top
- Ice cubes
How to make it
- Place the cucumber slices and mint leaves in the bottom of a heavy-duty cocktail shaker.
- Use a muddler to firmly press down on the cucumber and mint about 5-7 times. You want to release the juices and oils without shredding the mint into tiny bits.
- Add the gin, fresh lemon juice, and simple syrup to the shaker.
- Fill the shaker 3/4 full with large, solid ice cubes. Shake vigorously for at least 15 seconds until the outside of the metal shaker feels frosty.
- Double-strain the mixture through a Hawthorne strainer and a fine-mesh sieve into a tall Collins glass filled with fresh ice. The double strain ensures no bits of mint get stuck in your straw.
- Top the glass with chilled soda water, pouring slowly to maintain the carbonation.
- Garnish with a long, thin ribbon of cucumber peeled with a vegetable peeler and a fresh sprig of mint.
- Serve immediately while the fizz is at its peak.
7 Easy Picnic Food Ideas (Step-by-Step Guide)

Why we love this
Caprese skewers are the ultimate portable luxury, condensing the soul of Italian summer into a single, elegant bite. There is something so satisfying about the contrast between the milky, soft texture of a fresh mozzarella pearl and the taut, snapping skin of a sun-ripened cherry tomato. As you bite down, the rich, earthy base of a balsamic glaze ties everything together, while the peppery hit of fresh basil provides a clean finish. These skewers are visually stunning on a board, resembling little jewels that are as fun to look at as they are delicious to eat, requiring no utensils and leaving no mess behind.
Ingredients
- 1 pint cherry tomatoes (varied colors if possible)
- 1 container small mozzarella pearls (bocconcini)
- 1 bunch fresh large-leaf basil
- 1/4 cup thick balsamic glaze
- 2 tablespoons extra virgin olive oil
- Bamboo skewers or toothpicks
How to make it
- Wash and thoroughly dry the cherry tomatoes and basil leaves. Moisture is the enemy here; you want the glaze to stick, not slide off.
- Drain the mozzarella pearls and pat them dry with a clean paper towel.
- Prepare your skewers by laying them out in a row.
- Thread one cherry tomato onto the skewer, pushing it about halfway down.
- Fold a large basil leaf in half or thirds (depending on size) and slide it on next, so it hugs the tomato.
- Add a mozzarella pearl to the end, securing the basil leaf in place.
- Arrange the completed skewers in a circular pattern on your food board, leaving space in the center for a dipping bowl.
- Just before serving, drizzle the balsamic glaze in a very thin, consistent stream over the skewers.
- Finish with a light misting of olive oil and a crack of black pepper for a professional gourmet touch.
9 Best Summer Grilling Recipes (Step-by-Step Guide)

Why we love this
Grilling fruit might be one of the best-kept secrets of summer cooking, and these Grilled Peach and Prosciutto Skewers are the absolute pinnacle of that craft. When the peach hits the hot grates, its natural sugars caramelize into a deep, honey-like sweetness that contrasts beautifully with the salty, crispy edges of the cured ham. The heat softens the fruit until it’s nearly buttery, while the smoke from the grill adds a layer of complexity that raw fruit simply can’t match. It is a sophisticated, sweet-and-savory combination that feels incredibly upscale yet remains rooted in the rustic charm of outdoor cooking.
Ingredients
- 4 firm but ripe peaches, pitted and quartered
- 8 slices of thin prosciutto, halved lengthwise
- 2 tablespoons honey
- 1 tablespoon apple cider vinegar
- Fresh rosemary sprigs for garnish
How to make it
- Preheat your grill to medium-high heat (about 400°F). Ensure the grates are very clean and lightly oiled to prevent the peaches from sticking.
- Slice each peach into even wedges. It is crucial the peaches are ‘firm-ripe’—if they are too soft, they will turn to mush on the grill.
- Take a strip of prosciutto and wrap it tightly around the middle of each peach wedge. The saltiness will permeate the fruit as it cooks.
- Thread two wrapped wedges onto each skewer, ensuring the prosciutto ends are tucked in so they don’t unravel.
- In a small bowl, whisk together the honey and apple cider vinegar to create a glaze.
- Place the skewers on the grill. Cook for 2-3 minutes per side. You are looking for distinct grill marks and for the prosciutto to become translucent and slightly crisp.
- During the last minute of cooking, brush the honey glaze onto the peaches. Do this late to avoid burning the sugars in the honey.
- Remove from heat and serve warm on your board, garnished with rosemary for a fragrant, forest-like aroma.
6 Easy Summer Crockpot Recipes (Step-by-Step Guide)

Why we love this
The beauty of a summer crockpot recipe is that it keeps the kitchen cool while delivering flavors that taste like they’ve been developing for days. This BBQ Pulled Pork is a masterclass in ‘low and slow,’ resulting in meat so tender it practically melts the moment it hits your tongue. The aroma of tangy vinegar, sweet brown sugar, and smoky hickory fills the house, building anticipation for a meal that is as comforting as it is hearty. It’s the perfect anchor for a food board, providing a warm, savory element that invites guests to build their own sliders or top their salads with something substantial and deeply satisfying.
Ingredients
- 3-4 lb pork shoulder (Boston butt)
- 1 cup your favorite BBQ sauce
- 1/4 cup apple cider vinegar
- 1/4 cup brown sugar
- 1 tablespoon smoked paprika
- 1 teaspoon garlic powder
- 1 onion, sliced
How to make it
- Pat the pork shoulder dry with paper towels. Rub the meat thoroughly with a mixture of brown sugar, smoked paprika, garlic powder, salt, and pepper. Press the spices in so they form a crust.
- Place the sliced onions at the bottom of the slow cooker to act as a natural ‘rack’ for the meat, preventing the bottom from scorching.
- Place the seasoned pork on top of the onions.
- Pour the apple cider vinegar around the base of the pork—this provides the steam and acidity needed to break down the tough connective tissues.
- Cover and cook on LOW for 8-10 hours. Do not use the high setting; the low temperature is what creates that ‘melt-in-your-mouth’ texture.
- Once finished, the pork should pull apart easily with a fork. Remove the meat to a large bowl, discarding excess fat.
- Shred the pork using two forks, then toss with the BBQ sauce and a splash of the juices from the crockpot.
- Serve in a warm bowl on the center of your board, surrounded by mini brioche buns.
11 Healthy Summer Snack Recipes (Step-by-Step Guide)

Why we love this
When the sun is blazing, there is nothing more rewarding than a snack that is as healthy as it is icy-cold and indulgent. This Frozen Yogurt Bark is a vibrant, snap-able treat that feels like eating a frozen rainbow. The base of creamy Greek yogurt provides a satisfying protein punch, while the scatter of fresh berries and crunchy granola offers a play of textures that keeps your taste buds engaged. It’s light, refreshing, and just sweet enough to satisfy a dessert craving without the sugar crash, making it the ultimate ‘guilt-free’ addition to any summer gathering or afternoon snack rotation.
Ingredients
- 2 cups plain or vanilla Greek yogurt
- 2 tablespoons honey or maple syrup
- 1/2 cup fresh raspberries and blueberries
- 1/4 cup sliced strawberries
- 1/4 cup granola
- 1 tablespoon chia seeds
How to make it
- Line a large rimmed baking sheet with parchment paper. This is essential for easy removal once the bark is frozen.
- In a bowl, mix the Greek yogurt with the honey or maple syrup until fully incorporated and glossy.
- Spread the yogurt mixture onto the parchment paper using a spatula. Aim for a thickness of about 1/4 to 1/2 inch. Too thin and it will shatter; too thick and it’s hard to bite.
- Press the berries firmly but gently into the yogurt. Large strawberries should be sliced thin to ensure they freeze evenly.
- Sprinkle the granola and chia seeds over the top, pressing slightly so they adhere to the yogurt.
- Place the baking sheet flat in the freezer. Freeze for at least 3-4 hours, or until the yogurt is rock-solid to the touch.
- Once frozen, lift the parchment paper off the tray and use your hands to snap the bark into irregular, rustic shards.
- Store in a freezer-safe container and only bring out to the food board at the very last second to prevent melting.
5 Viral Summer Pasta Salads (Step-by-Step Guide)

Why we love this
Forget the mayo-heavy pasta salads of the past; the modern viral version is all about brightness, acidity, and light textures, like this Lemon Orzo Salad. The tiny, rice-shaped pasta absorbs a zesty lemon-garlic vinaigrette, making every bite an explosion of citrusy sunshine. It’s packed with crisp cucumbers, briny kalamata olives, and creamy feta, creating a Mediterranean-inspired profile that feels incredibly sophisticated. The scent of fresh dill and parsley tied it all together, making this dish smell like a fresh breeze. It’s the kind of side dish that actually gets better as it sits, making it a reliable and delicious staple for any food board spread.
Ingredients
- 1 lb orzo pasta
- 1 English cucumber, diced
- 1 cup cherry tomatoes, halved
- 1/2 cup kalamata olives, sliced
- 1/2 cup crumbled feta
- 1/4 cup fresh dill and parsley, chopped
- Dressing: 1/3 cup olive oil, juice of 2 lemons, 2 cloves minced garlic
How to make it
- Boil the orzo in a large pot of salted water according to the package directions, but aim for ‘al dente’—it should still have a slight bite.
- Drain the pasta and immediately rinse it under cold running water. This stops the cooking process and removes excess starch, preventing the orzo from clumping.
- In a small bowl, whisk together the olive oil, lemon juice, and minced garlic. Let this sit for 5 minutes to allow the garlic to mellow in the acid.
- In a large mixing bowl, combine the cooled orzo with the cucumbers, tomatoes, and olives.
- Pour the dressing over the pasta while the orzo is still slightly damp; this helps it absorb the flavor more effectively.
- Gently fold in the crumbled feta and the fresh herbs. The herbs should be the last thing added to keep them from bruising.
- Let the salad chill in the refrigerator for at least 30 minutes before serving to allow the flavors to marry.
- Taste and add an extra squeeze of lemon or a pinch of salt just before placing on the board to revive the brightness.
8 Fun Pool Snack Ideas (Step-by-Step Guide)
Why we love this
When you’re lounging by the pool, you want snacks that are easy to grab, mess-free, and vibrantly colorful, which is why these Rainbow Fruit Skewers are a perennial favorite. There is something inherently joyful about seeing the spectrum of colors—from deep purple grapes to bright red strawberries—all lined up in a perfect row. The cold, watery crunch of the fruit provides instant hydration, while a side of fluffy marshmallow yogurt dip adds a playful, cloud-like sweetness. It’s a snack that appeals to the inner child in everyone, turning a simple tray of fruit into a whimsical centerpiece that captures the essence of a carefree summer day.
Ingredients
- Strawberries (Red)
- Cantaloupe chunks (Orange)
- Pineapple chunks (Yellow)
- Honeydew or Kiwi (Green)
- Blueberries (Blue)
- Purple grapes (Purple)
- Dip: 1 cup Greek yogurt mixed with 1/2 cup marshmallow fluff
How to make it
- Start by washing all the fruit thoroughly and drying them to ensure they aren’t slippery when threading.
- Cut the larger fruits (pineapple, cantaloupe, kiwi) into uniform cubes roughly the size of a large grape. Consistency is the key to a professional look.
- Arrange the fruit in bowls according to the colors of the rainbow (ROYGBIV) to make the assembly process faster.
- Take a long wooden skewer and thread the fruit in order: grape, blueberry, kiwi, pineapple, cantaloupe, and finally the strawberry on top.
- Ensure there is enough ‘handle’ space at the bottom of the skewer so guests can pick them up without touching the fruit.
- For the dip, fold the marshmallow fluff into the Greek yogurt using a spatula until swirling together but not completely liquified. This creates a thick, airy texture.
- Place the dip in a small bowl in the corner of your board.
- Lay the skewers in a fan shape around the dip for a high-impact visual display.
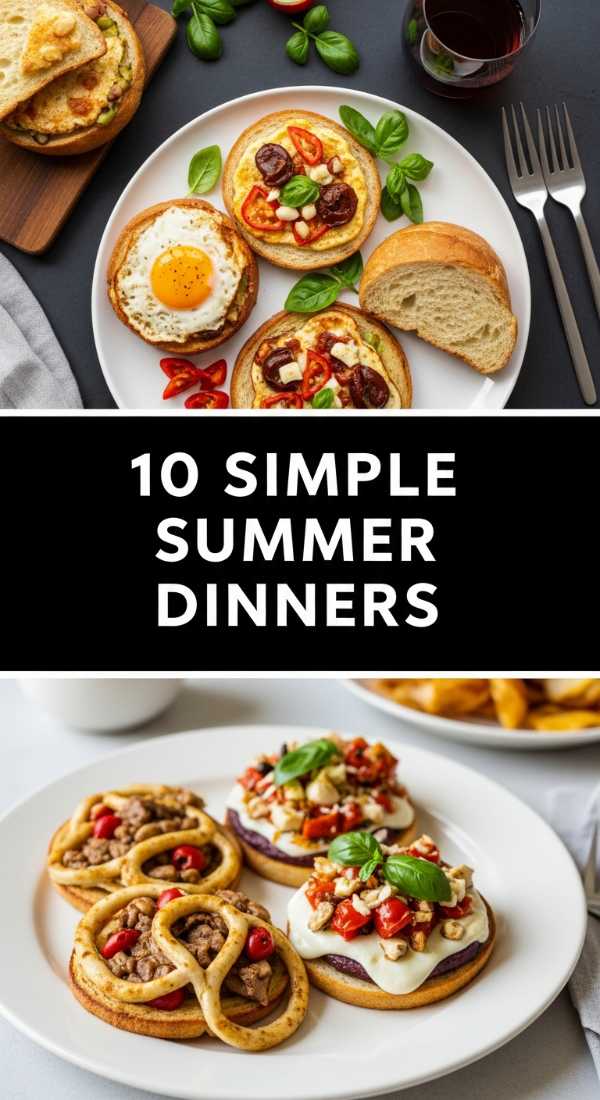
10 Simple Summer Dinner Ideas (Step-by-Step Guide)
[IMAGE_10]
Why we love this
Sheet pan meals are the ultimate ‘simple dinner’ hack, and these Zesty Shrimp Tacos take that convenience and turn it into a gourmet experience. The shrimp cook in a matter of minutes, turning a beautiful opaque pink with edges that get slightly crispy from the high heat of the oven. Tossed in a blend of cumin, lime, and chili, they carry a zesty punch that is perfectly balanced by a cool, crunchy cabbage slaw. There’s something so communal about bringing a whole sheet pan to the table (or board) and letting everyone build their own tacos with warm tortillas and fresh avocado. It’s hot, fresh, and remarkably light, making it the ideal dinner for a humid summer evening.
Ingredients
- 1 lb large shrimp, peeled and deveined
- 2 tablespoons olive oil
- 1 tablespoon taco seasoning (cumin, chili powder, garlic powder)
- Small flour or corn tortillas
- 2 cups shredded cabbage
- 1 avocado, sliced
- Cilantro and lime for serving
How to make it
- Preheat your oven to 400°F (200°C). Line a large sheet pan with parchment paper or aluminum foil for easy cleanup.
- Pat the shrimp dry with paper towels; removing excess moisture is the only way to get a good ‘sear’ in the oven.
- In a bowl, toss the shrimp with olive oil and taco seasoning until every shrimp is evenly coated.
- Spread the shrimp in a single layer on the sheet pan. Do not overcrowd them, or they will steam instead of roast.
- Roast for 6-8 minutes. You will know they are done when they are pink, opaque, and have curled into a ‘C’ shape. Do not overcook, or they will become rubbery.
- While the shrimp roast, wrap your tortillas in foil and place them in the oven for the last 3 minutes to warm through.
- Prepare a quick slaw by tossing the shredded cabbage with a squeeze of lime and a pinch of salt.
- To serve, place the sheet pan directly on your board (use a trivet!), surrounded by the warm tortillas, slaw, and avocado slices for a ‘build-your-own’ taco station.
Conclusion
Creating the ‘Viral Food Board’ isn’t about being a professional chef; it’s about the joy of assembly and the celebration of seasonal ingredients. These recipes are designed to be flexible, colorful, and most importantly, delicious. By focusing on a mix of temperatures, textures, and vibrant flavors, you can turn any ordinary gathering into an extraordinary event. So grab a board, pick a few of these favorites, and let the summer grazing begin!