
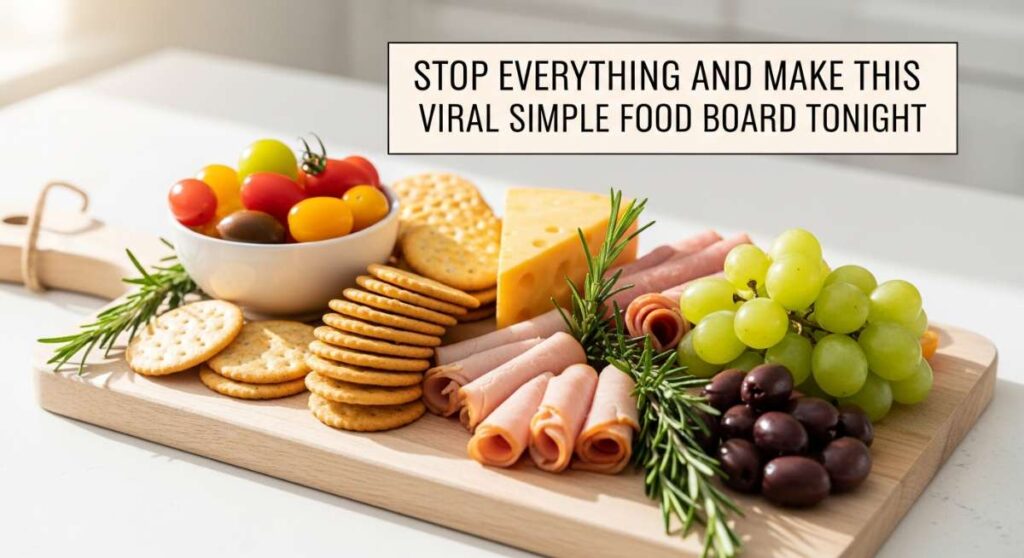
Stop Everything and Make This Viral Simple Food Board Tonight
There is something magical about the way a simple spread of food can turn a mundane Tuesday into an unforgettable memory. We’ve all seen those stunning boards scrolling through our feeds—the ones that look like a work of art but feel like a warm hug. Lately, I’ve found myself leaning away from fussy, complicated dinners and toward these ‘viral’ grazing boards that allow everyone to pick and choose their favorite bites. It’s about more than just the food; it’s about the laughter shared over a bowl of dip and the way a summer evening feels when the table is full of fresh, vibrant colors.
Tonight, I want to share the ultimate collection of recipes that make up my go-to viral food board. Whether you are hosting a backyard bash or just want to treat your family to a fun, interactive meal, these dishes are the stars of the show. They are approachable, incredibly delicious, and designed to be enjoyed together. So, grab your largest platter, pour a glass of something cold, and let’s dive into the flavors that are currently breaking the internet!
How to make rotel dip?

Why we love this
This dip is the undisputed king of comfort food and a staple at every gathering I host. The way the velvety, melted cheese wraps around the spicy, savory sausage and the bright acidity of the diced tomatoes and green chilies is absolutely addictive. When you pull a warm chip through this gooey masterpiece, the aroma of cumin and seasoned meat fills the air, promising a bite that is rich, creamy, and just the right amount of spicy. It’s a crowd-pleaser that disappears in minutes, leaving everyone scraping the bottom of the bowl for that last bit of cheesy goodness.
Ingredients
- 1 lb Ground Breakfast Sausage (mild or hot)
- 1 block (32 oz) Velveeta Cheese, cubed
- 2 cans (10 oz each) Ro-Tel Diced Tomatoes and Green Chilies, undrained
- 1/2 cup Whole Milk (optional for desired consistency)
- Fresh Cilantro and Sliced Jalapeños for garnish
How to make it
- Place a large skillet or Dutch oven over medium-high heat. Add the ground breakfast sausage, breaking it apart with a wooden spoon or meat masher into small, uniform crumbles. Cook for 8-10 minutes until the meat is deeply browned and no pink remains.
- Once fully cooked, carefully drain the excess grease from the skillet to ensure the dip isn’t oily. Return the skillet to low heat.
- Add the cubed Velveeta cheese to the skillet along with both cans of Ro-Tel (do not drain the liquid from the cans, as this provides essential flavor and moisture).
- Stir constantly with a heat-resistant spatula as the cheese begins to melt. Maintaining a low heat is crucial here; if the heat is too high, the cheese can scorch or become grainy.
- If the dip feels too thick, slowly whisk in 1/4 to 1/2 cup of milk until you reach a silky, pourable consistency.
- Once the cheese is completely melted and the mixture is bubbling slightly, transfer it to a slow cooker on the ‘warm’ setting or serve immediately in a pre-warmed bowl garnished with fresh cilantro.
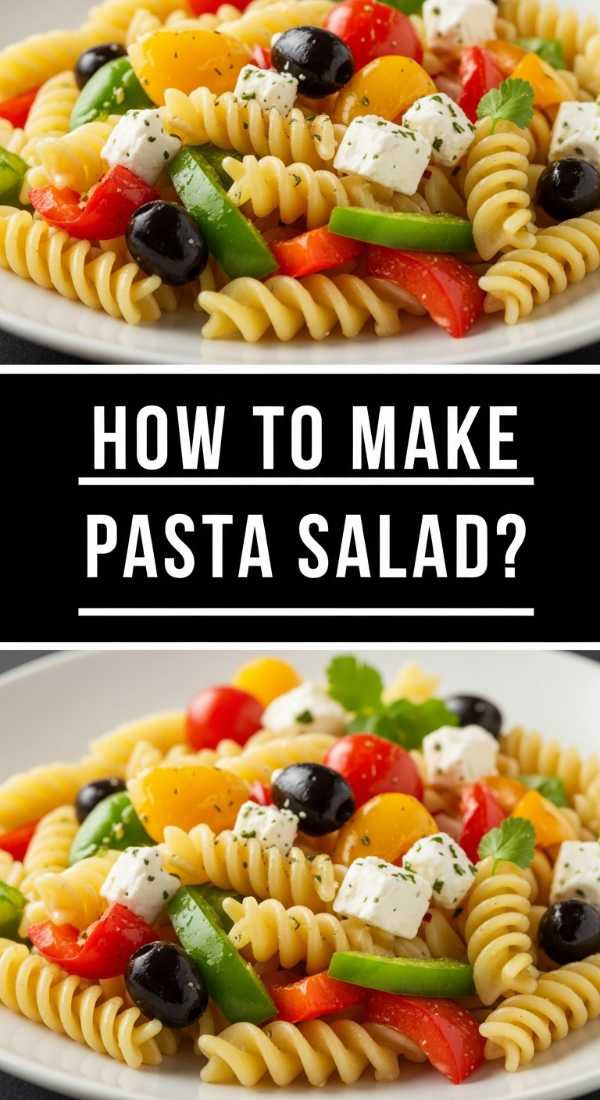
How to make pasta salad?
Why we love this
A great pasta salad is like a symphony of textures and bright, zesty flavors that only gets better as it sits. We love the contrast between the tender, al dente rotini spirals and the crisp, refreshing crunch of bell peppers, cucumbers, and red onions. Every bite is coated in a tangy herb vinaigrette that wakes up the palate, while little pockets of salty feta and savory pepperoni provide bursts of excitement. It’s the ultimate make-ahead dish that brings a cool, garden-fresh energy to your food board, making it the perfect companion for grilled meats or salty snacks.
Ingredients
- 1 lb Rotini or Fusilli pasta
- 1 cup Italian Vinaigrette dressing
- 1 cup Cherry tomatoes, halved
- 1 English cucumber, diced
- 1/2 cup Red onion, finely chopped
- 1/2 cup Black olives, sliced
- 1/2 cup Mini pepperoni slices
- 1 cup Mozzarella pearls or crumbled Feta
- 1/4 cup Fresh parsley, chopped
How to make it
- Bring a large pot of heavily salted water to a rolling boil. Add the pasta and cook according to the package directions, but aim for ‘al dente’—usually 1-2 minutes less than the box suggests. This ensures the pasta holds its shape and doesn’t get mushy after absorbing the dressing.
- Drain the pasta and immediately rinse it under cold running water to stop the cooking process and remove excess starch. Shake well to remove all water.
- In a very large mixing bowl, combine the cooled pasta with half of the Italian dressing. Toss well to coat; this initial layer prevents the pasta from sticking together.
- Add the halved tomatoes, cucumbers, onions, olives, pepperoni, and cheese to the bowl.
- Pour the remaining dressing over the top and fold the ingredients together gently using a large spoon or salad tongs.
- Cover the bowl and refrigerate for at least 2 hours. This chilling period is vital as it allows the pasta to soak up the herb-infused flavors. Before serving, give it one final toss and garnish with fresh parsley.
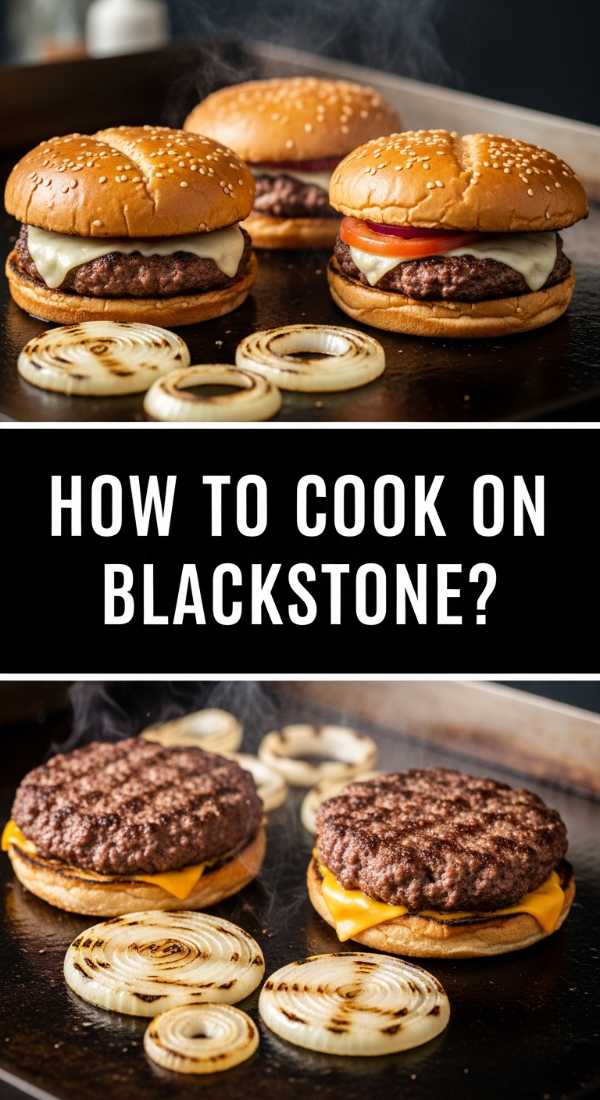
How to cook on blackstone?
Why we love this
Cooking on a Blackstone griddle transforms a meal into a performance, bringing that professional hibachi or diner-style sear right to your backyard. There is something deeply satisfying about the rhythmic sound of spatulas clacking and the intense sizzle of fresh ingredients hitting a perfectly seasoned hot surface. The large flat-top allows for incredible caramelization—think smash burgers with crispy edges or vegetables that are charred on the outside while remaining tender inside. The aroma of smoky fat and searing protein wafting through the air creates an irresistible atmosphere that draws everyone to the patio.
Ingredients
- High-smoke point oil (Avocado or Grapeseed oil)
- Choice of protein (Sliced steak, chicken, or burger patties)
- Assorted vegetables (Onions, peppers, zucchini)
- Coarse Salt and Black Pepper
- Unsalted butter for finishing
How to make it
- Begin by preheating your Blackstone griddle. Turn all burners to medium-high heat and let it sit for about 10 minutes. You’ll know it’s ready when a drop of water flicked onto the surface dances and evaporates instantly.
- Apply a thin, even layer of high-smoke point oil across the entire surface using a long-handled spatula or a squeeze bottle. Wipe away any excess with a folded paper towel held by tongs.
- Create heat zones by keeping one side on high for searing and the other on low for indirect cooking or keeping food warm.
- Place your proteins on the hot side. For steak or burgers, let them sear undisturbed for 3-4 minutes to develop a deep brown crust before flipping. Use the flat spatula to press down firmly for maximum contact.
- On the other side of the griddle, toss your vegetables with a little more oil and salt. Use two spatulas to constantly move and flip the veggies, ensuring they cook evenly without burning.
- As the food nears completion, add a pat of butter over the meat and vegetables for a rich, glossy finish. Use the griddle scraper to move everything to the cool zone or directly onto your serving board.
How to bake strawberry pie?

Why we love this
Strawberry pie is the quintessential taste of summer, capturing the fleeting sweetness of sun-ripened berries in a flaky, golden-brown crust. We adore the way the filling transforms into a jammy, ruby-red glisten that is both tart and sugary, balanced perfectly by the buttery, salt-flecked pastry. When you slice into it, the aroma of cooked sugar and warm berries is intoxicating, promising a dessert that is light yet deeply satisfying. It’s a nostalgic centerpiece for any food board, especially when served with a dollop of cold whipped cream that slowly melts into the warm fruit.
Ingredients
- 2 Pre-made or homemade pie crusts
- 6 cups Fresh strawberries, hulled and sliced
- 3/4 cup Granulated sugar
- 1/4 cup Cornstarch
- 1 tbsp Lemon juice
- 1 tsp Vanilla extract
- 1 Egg (for egg wash)
- 1 tbsp Coarse sparkling sugar
How to make it
- Preheat your oven to 400°F (200°C). Roll out one pie crust and fit it into a 9-inch pie plate, trimming the edges so there is a slight overhang.
- In a large mixing bowl, combine the sliced strawberries, sugar, cornstarch, lemon juice, and vanilla. Toss very gently to ensure the berries are coated without crushing them. Let this sit for 10 minutes; the cornstarch will begin to mix with the juices to create a thickener.
- Pour the strawberry mixture into the prepared bottom crust, mounding them slightly in the center.
- Top with the second crust. You can do a full top with vent slits or cut the dough into strips to create a lattice pattern. Crimp the edges of the top and bottom crusts together to seal in the juices.
- Whisk the egg with a splash of water and brush the entire top crust lightly. Sprinkle with coarse sugar for a professional, crunchy finish.
- Place the pie on a parchment-lined baking sheet (to catch drips) and bake for 45-55 minutes. If the crust browns too quickly, tent it with foil. The pie is done when the crust is deep golden and the strawberry filling is bubbling thick juices through the vents. Allow to cool for at least 3 hours to set before slicing.
How to marinate grilled chicken?

Why we love this
The secret to chicken that is juicy, tender, and bursting with flavor lies entirely in the marinade. We love this process because it takes a simple protein and infuses it with bright citrus notes, earthy herbs, and a hint of smoky sweetness. As the chicken grills, the sugars in the marinade caramelize, creating those beautiful, charred grill marks that pack a punch of savory umami. It’s the kind of dish that smells like a summer cookout from a block away, and the result is meat so succulent it practically melts in your mouth, making it a versatile star for your food board.
Ingredients
- 2 lbs Chicken breasts or thighs
- 1/3 cup Extra virgin olive oil
- 1/4 cup Soy sauce
- Juice of 2 lemons
- 3 cloves Garlic, minced
- 1 tbsp Honey
- 1 tsp Dried oregano
- 1/2 tsp Smoked paprika
How to make it
- In a medium glass bowl or a large zip-top bag, whisk together the olive oil, soy sauce, lemon juice, minced garlic, honey, oregano, and smoked paprika. The oil carries the flavor, while the acid in the lemon helps tenderize the meat fibers.
- Place the chicken pieces between two sheets of plastic wrap and lightly pound them with a meat mallet to an even thickness. This ensures all pieces cook at the same rate and remain juicy.
- Add the chicken to the marinade, ensuring every surface is thoroughly coated. Press the air out of the bag before sealing.
- Refrigerate for at least 30 minutes, though 4 to 6 hours is ideal for maximum flavor penetration. Avoid marinating for more than 12 hours, as the lemon juice can eventually make the texture mushy.
- Preheat your grill to medium-high heat (about 400°F). Lightly oil the grates to prevent sticking.
- Remove the chicken from the marinade and discard the excess liquid. Grill for 6-7 minutes per side. Use an instant-read thermometer to ensure the thickest part reaches exactly 165°F. Let the chicken rest for 5 minutes before slicing to allow the juices to redistribute.
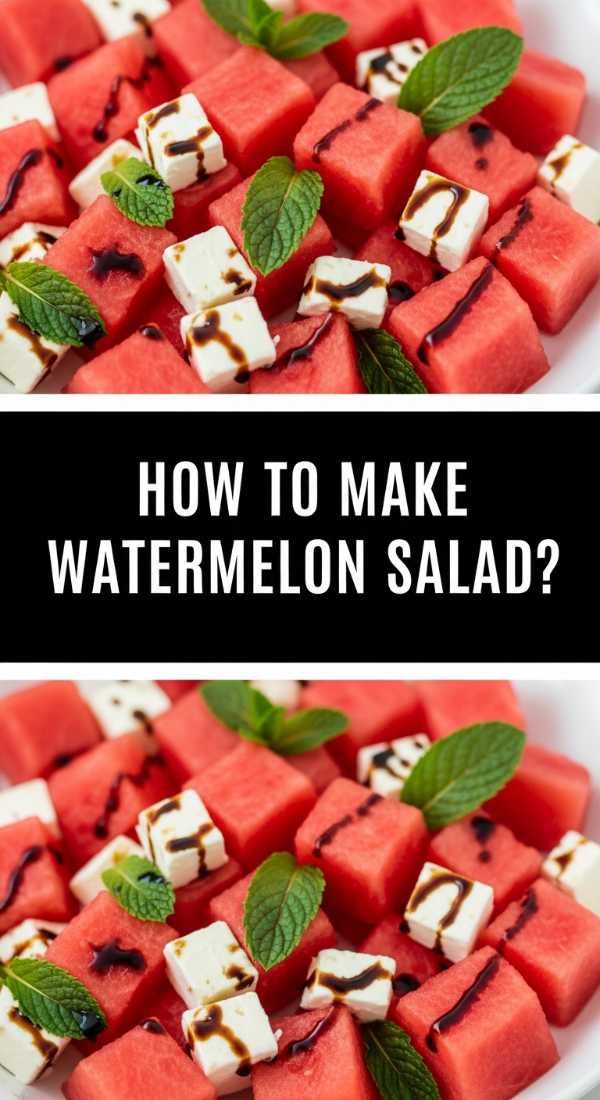
How to make watermelon salad?
Why we love this
This salad is the ultimate refresher, providing a cool, hydrating contrast to the heavier items on the board. We love the sophisticated interplay between the icy sweetness of the watermelon and the salty, creamy tang of crumbled feta cheese. The addition of fresh mint adds a peppery brightness, while a drizzle of balsamic glaze provides a dark, syrupy finish that ties everything together. It’s visually stunning with its vibrant reds and greens, and every bite feels like a splash of cold water on a hot day—crisp, clean, and incredibly revitalizing.
Ingredients
- 6 cups Watermelon, cubed and chilled
- 1/2 cup Feta cheese, crumbled
- 1/4 cup Red onion, very thinly sliced
- 1/2 cup Fresh mint leaves, torn
- 2 tbsp Extra virgin olive oil
- 1 tbsp Lime juice
- Balsamic glaze for drizzling
- Flaky sea salt
How to make it
- Start with a cold watermelon that has been refrigerated for several hours. Cut the watermelon into uniform 1-inch cubes, discarding the rind.
- Place the watermelon cubes in a large, shallow serving bowl. Shallow bowls are better for this salad so the heavy feta and onions don’t all sink to the bottom.
- Scatter the thinly sliced red onions and the crumbled feta over the top of the watermelon. If you find raw onions too sharp, soak them in cold water for 10 minutes beforehand to mellow the flavor.
- In a small jar, shake together the olive oil and lime juice until emulsified. Drizzle this mixture evenly over the salad.
- Just before serving, scatter the torn mint leaves over the top. Tearing the mint rather than chopping it prevents the edges from bruising and turning black.
- Finish with a generous drizzle of balsamic glaze and a pinch of flaky sea salt. The salt is key as it intensifies the sweetness of the fruit and balances the creaminess of the cheese.
How to use sourdough discard?

Why we love this
Using sourdough discard is a beautiful way to minimize waste while adding a complex, fermented tang to your baking. We love how the discard creates a unique texture—whether it’s the shatteringly crisp edge of a cracker or the tender, airy crumb of a pancake. It brings a subtle sourdough ‘funk’ that elevates simple recipes into something artisanal and gourmet. On a food board, discard crackers or flatbreads provide the perfect sturdy vessel for dips, offering a savory depth of flavor that store-bought options just can’t match.
Ingredients
- 1 cup Sourdough discard (unfed)
- 2 tbsp Unsalted butter, melted
- 1/2 tsp Fine sea salt
- 1 tsp Dried herbs (Rosemary, Thyme, or Everything Bagel seasoning)
- Extra salt for topping
How to make it
- Preheat your oven to 325°F (160°C). Line a large rimmed baking sheet with a piece of high-quality parchment paper or a silicone baking mat.
- In a small bowl, mix the sourdough discard with the melted butter, salt, and your choice of dried herbs. Stir until the mixture is smooth and the butter is fully incorporated.
- Pour the mixture onto the center of the parchment paper. Using an offset spatula, spread the batter as thinly and evenly as possible. You want it to be nearly translucent; the thinner it is, the crispier the final product will be.
- Sprinkle a little extra sea salt over the top and bake for 10 minutes.
- Remove the pan from the oven and use a pizza cutter to score the dough into squares or rectangles. This ensures they break into clean shapes later.
- Return the pan to the oven and bake for another 20-30 minutes. Keep a close eye on them; you are looking for a deep golden brown color and a completely dry, firm texture. Once cooled, snap them along the scored lines and serve.
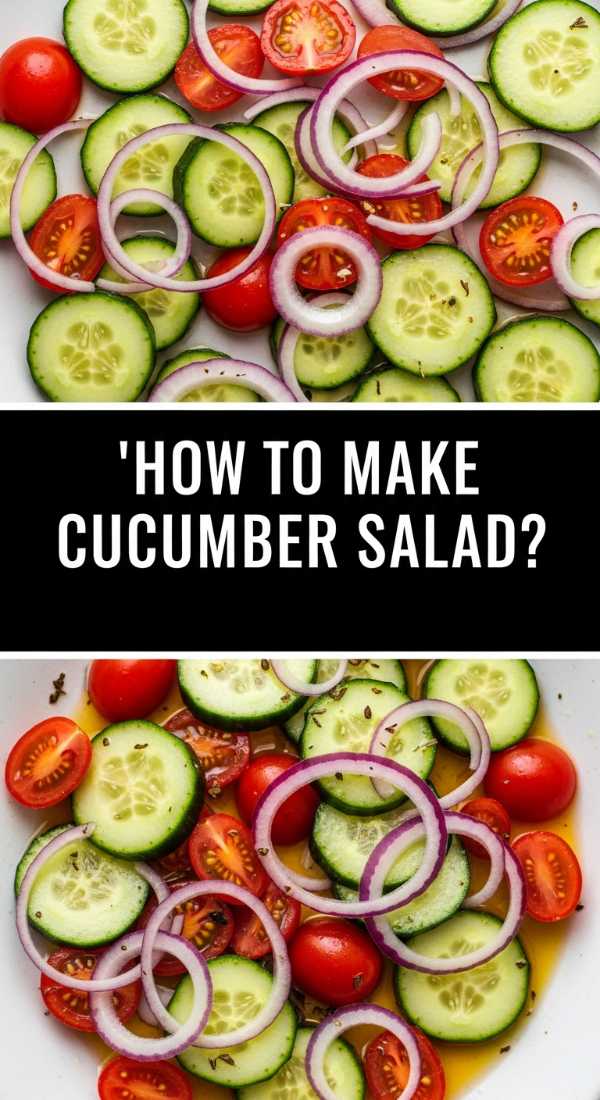
How to make cucumber salad?
Why we love this
Cucumber salad is a classic for a reason—it’s light, crunchy, and packed with a vinegary punch that cleanses the palate between bites of richer foods. We love the simplicity of thin, translucent cucumber slices swimming in a bright, dill-flecked dressing. It’s the kind of side dish that feels effortlessly elegant, offering a snappy texture that remains refreshing even after sitting out on a board. The subtle sweetness of the vinegar dressing balanced with the cool moisture of the cucumber makes it a universal favorite that pairs with literally everything.
Ingredients
- 2 Large English cucumbers (seedless)
- 1/2 Red onion, thinly sliced
- 1/2 cup White wine vinegar or Apple cider vinegar
- 2 tbsp Granulated sugar
- 1/4 cup Fresh dill, chopped
- 1/2 tsp Salt
- 1/4 tsp Black pepper
How to make it
- Using a mandoline slicer or a very sharp knife, slice the cucumbers into very thin rounds. English cucumbers are preferred because their skin is thin and they have fewer seeds.
- Place the sliced cucumbers in a colander and sprinkle with a little salt. Let them sit for 15 minutes to draw out excess water, then pat them dry with paper towels. This step ensures your salad stays crunchy and the dressing doesn’t get watered down.
- In a large bowl, whisk together the vinegar, sugar, salt, pepper, and fresh dill until the sugar is completely dissolved.
- Add the cucumbers and the thinly sliced red onions to the bowl with the dressing.
- Toss everything together until the slices are well-coated.
- Cover and let the salad marinate in the refrigerator for at least 30 minutes before serving. The cucumbers will slightly soften but maintain a distinct ‘snap,’ and the onions will pick up a lovely pickled flavor.
How to make fresas crema?

Why we love this
Fresas con Crema is a decadent, velvety dessert that feels like pure luxury on a spoon. We love the way the luscious, sweetened cream mixture—a blend of sour cream, condensed milk, and heavy cream—coats the fresh, juicy strawberries in a silky embrace. It’s a nostalgic Mexican treat that balances the natural tartness of the fruit with a rich, milky sweetness that isn’t too heavy. On a food board, it serves as a beautiful, creamy dip or a standalone dessert cup that looks sophisticated but is deceptively simple to assemble.
Ingredients
- 1 lb Fresh strawberries, hulled and sliced
- 1 cup Sour cream (or Mexican Crema)
- 1/2 cup Sweetened condensed milk
- 1/2 cup Heavy whipping cream
- 1 tsp Vanilla extract
- Pinch of Cinnamon
How to make it
- Wash, hull, and slice the strawberries into halves or quarters depending on their size. Place them in a large glass bowl.
- In a separate medium bowl, combine the sour cream and the sweetened condensed milk. Use a whisk to blend them until the mixture is perfectly smooth and free of lumps.
- In another cold bowl, whisk the heavy whipping cream until it reaches soft peaks. Gently fold this whipped cream into the sour cream mixture. This adds a lightness and aeration that makes the sauce feel cloud-like.
- Stir in the vanilla extract and a tiny pinch of cinnamon. The cinnamon adds a subtle warmth that enhances the strawberry flavor.
- Pour the cream mixture over the sliced strawberries and fold gently so every piece of fruit is submerged in the sauce.
- Cover and chill for at least one hour. Serve in small glass bowls or clear cups to showcase the beautiful contrast between the red berries and the snow-white cream.
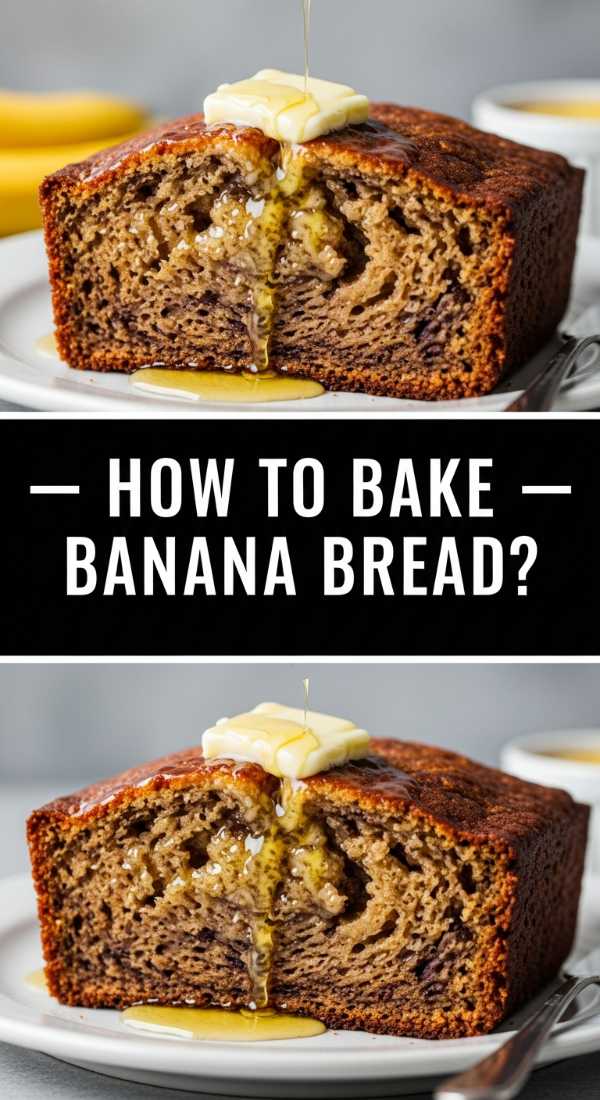
How to bake banana bread?
Why we love this
There is no aroma quite as welcoming as a loaf of banana bread baking in the oven. We love this recipe because it turns overripe, blackened bananas into a moist, dense, and deeply flavorful cake that feels like home. The crust is slightly caramelized and crisp, while the interior remains incredibly soft and studded with whatever mix-ins you desire. It’s a versatile addition to a food board, working just as well for a brunch-style spread as it does for a late-night dessert, especially when served with a smear of salted butter or a drizzle of honey.
Ingredients
- 3 Large, overripe bananas (the spottier, the better)
- 1/3 cup Melted unsalted butter
- 3/4 cup Granulated sugar
- 1 Large egg, beaten
- 1 tsp Vanilla extract
- 1 tsp Baking soda
- Pinch of salt
- 1 1/2 cups All-purpose flour
How to make it
- Preheat your oven to 350°F (175°C) and generously grease a 4×8-inch loaf pan with butter or non-stick spray.
- In a large mixing bowl, peel the bananas and mash them with a fork or a potato masher until they are mostly smooth with just a few small chunks remaining for texture.
- Stir the melted butter into the mashed bananas using a wooden spoon.
- Mix in the sugar, beaten egg, and vanilla extract until well combined.
- Sprinkle the baking soda and salt over the wet mixture and stir.
- Finally, add the flour. Stir gently and stop as soon as you no longer see streaks of white. Overmixing at this stage will develop the gluten and result in a tough, rubbery bread.
- Pour the batter into your prepared loaf pan and smooth the top.
- Bake for 50 to 60 minutes. Test for doneness by inserting a toothpick into the center; it should come out clean or with just a few moist crumbs. Let the bread cool in the pan for 10 minutes before transferring it to a wire rack to cool completely.
The Ultimate Gathering Starts Here
Building this viral food board isn’t just about the recipes—it’s about the feeling of abundance and the joy of sharing. From the spicy, melted Rotel dip to the sweet, creamy fresas con crema, each element brings a different note to the table, creating a harmony of flavors that will have your guests coming back for seconds (and thirds!). I hope these dishes inspire you to clear the table, invite your favorite people over, and enjoy the simple pleasure of a meal made with love. Happy grazing!