
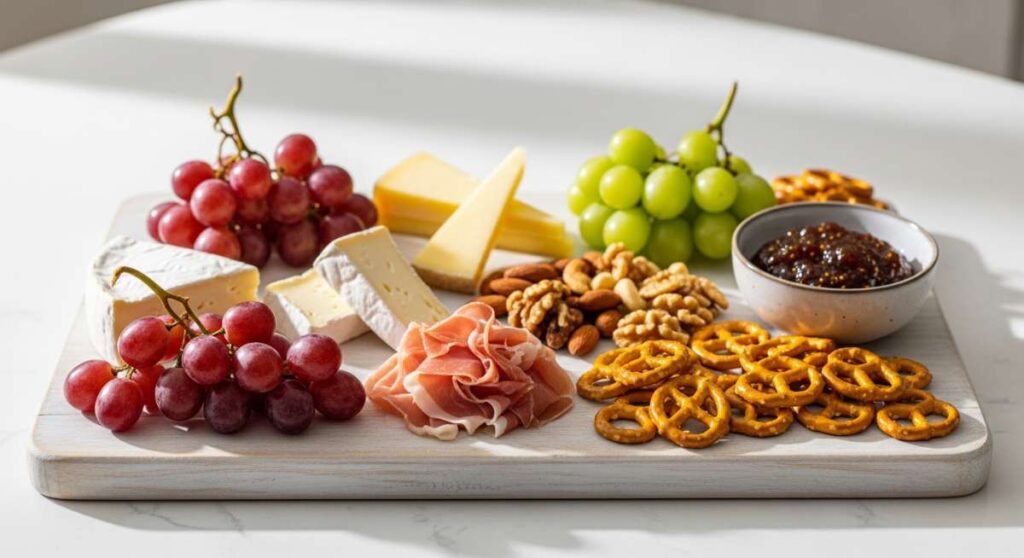
The Viral Food Board That’s Taking Over Your Feed
There is something undeniably magical about the way food brings us together, especially when it’s presented on a sprawling, colorful board that invites everyone to dig in. We’ve all seen those viral aesthetic spreads on our feeds—the ones that look almost too beautiful to eat, yet somehow disappear within minutes. It’s more than just a meal; it’s a sensory experience that celebrates the textures, aromas, and vibrant colors of fresh, home-cooked ingredients. Whether you are hosting a cozy weekend brunch or a late-night dinner party with friends, the ‘Viral Simple Food Board’ is the ultimate way to serve up comfort and style in one delicious package.
I remember the first time I set one of these boards down on my coffee table. The room went silent for a split second before everyone started reaching for their favorite bits—the crispy gyoza, the glistening steak, and that perfectly drizzled hot honey. It wasn’t about formal plating or matching sets; it was about the joy of sharing a variety of flavors and techniques in a way that feels lived-in and loved. This post is your roadmap to recreating that viral sensation at home, breaking down the hero components that will make your next gathering absolutely unforgettable.
How to make fluffy ramen?

Why we love this
There is nothing quite like the comforting steam rising from a bowl of perfectly executed ramen, carrying with it the deep, savory scent of miso and toasted sesame. When done right, the noodles have a delicate, springy bounce that holds onto the rich broth, while the silkiness of a soft-boiled egg adds a luxurious creaminess to every bite. It’s a dish that feels like a warm hug, offering a complex symphony of salty, umami, and slightly sweet notes that dance on the palate and leave you feeling completely satisfied and nourished.
Ingredients
- 2 packs of high-quality ramen noodles
- 4 cups chicken or vegetable broth
- 2 tablespoons red or white miso paste
- 1 tablespoon soy sauce
- 2 soft-boiled eggs
- Sliced scallions and nori for garnish
- 1 teaspoon sesame oil
How to make it
- Begin by bringing your broth to a gentle simmer in a medium saucepan over medium heat. Do not let it reach a rolling boil yet, as you want to preserve the clarity of the flavors.
- In a small bowl, whisk the miso paste with a few tablespoons of the warm broth until it is completely smooth and free of lumps. Stir this slurry back into the main pot along with the soy sauce and sesame oil.
- In a separate pot of boiling water, cook your ramen noodles according to the package instructions—usually about 2-3 minutes. It is vital to pull them out just before they are fully soft to ensure they stay ‘al dente’ in the hot soup.
- Prepare your soft-boiled eggs by boiling them for exactly 6 minutes and 30 seconds, then immediately plunging them into an ice bath. This ensures a jammy, golden center that will flow beautifully over the noodles.
- Assemble by placing the noodles in a deep bowl, pouring the hot, fragrant broth over them, and topping with the halved egg, fresh scallions, and a crisp sheet of nori. Serving immediately while the steam is still rising is key for that viral aesthetic.
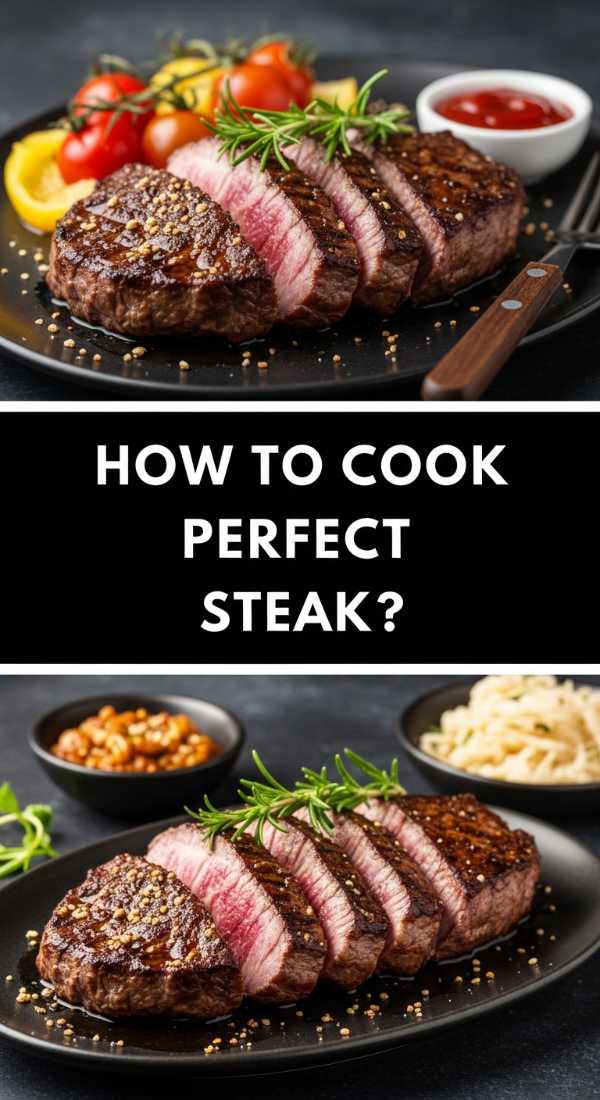
How to cook perfect steak?
Why we love this
The sound of a steak hitting a scorching hot cast-iron skillet is a culinary melody that promises a world of flavor. We love a perfect steak for that incredible contrast between the deeply caramelized, salty crust on the outside and the tender, butter-soft pink center that practically melts away. As the garlic-infused butter foams and spatters, the aroma of toasted herbs fills the kitchen, creating an anticipation that only a high-quality cut of meat can provide. It’s the centerpiece of any great board, offering a rich, iron-forward depth that balances out lighter, fresher sides.
Ingredients
- 1.5 lb Ribeye or New York Strip (room temperature)
- 3 tablespoons unsalted butter
- 4 cloves garlic, smashed
- 2 sprigs fresh rosemary or thyme
- Coarse kosher salt and freshly cracked black pepper
- High-smoke point oil (like grapeseed or avocado oil)
How to make it
- Take your steak out of the refrigerator at least 30-45 minutes before cooking. This is the secret to an even cook; a cold steak will seize up and cook unevenly in the middle.
- Pat the meat completely dry with paper towels. Moisture is the enemy of a good crust. Season aggressively with salt and pepper on all sides, including the fatty edges.
- Heat a heavy cast-iron skillet over high heat until the oil is shimmering and just starting to smoke. Carefully lay the steak into the pan, laying it away from you to avoid oil splashes.
- Sear the first side for 3-4 minutes without moving it. You are looking for a deep, dark mahogany crust. Flip the steak and immediately add the butter, smashed garlic, and herbs to the pan.
- Lower the heat slightly to medium-high. Tilt the pan and use a large spoon to continuously pour the foaming, flavored butter over the steak for another 3 minutes. This ‘basting’ technique adds moisture and deep flavor.
- Remove the steak when it reaches 130°F (54°C) for medium-rare. Crucially, let it rest on a cutting board for at least 10 minutes before slicing against the grain to keep all those delicious juices inside.
How to roast sweet beets?

Why we love this
Beets are nature’s candy, and when they are roasted slowly, their earthy depth transforms into a concentrated, vibrant sweetness that is truly addictive. There is a specific joy in unwrapping a foil-roasted beet to reveal its glistening, jewel-toned flesh, which has become tender enough to cut with a spoon. The texture is smooth and almost buttery, making them the perfect earthy counterpoint to salty cheeses or tangy dressings on a food board. Plus, the visual pop of deep crimson or golden yellow makes any spread look like a professional masterpiece.
Ingredients
- 4-5 medium-sized beets (stems removed)
- 2 tablespoons extra virgin olive oil
- 1 tablespoon balsamic glaze
- Sea salt and cracked black pepper
- Fresh goat cheese (optional garnish)
How to make it
- Preheat your oven to 400°F (200°C). Scrub the beets thoroughly under cold water to remove any dirt, then pat them dry. Do not peel them yet; the skins help steam the interior.
- Place the beets on a large piece of heavy-duty aluminum foil. Drizzle them with olive oil and a pinch of salt. Fold the foil up to create a sealed pouch, which will trap the moisture and ensure they don’t dry out.
- Place the pouch on a baking sheet and roast for 45-60 minutes. You’ll know they are done when a sharp knife slides into the center with absolutely no resistance, like cutting through soft butter.
- Carefully open the pouch (watch for steam!) and let the beets cool for 10 minutes. Using a paper towel, gently rub the skins; they should slip right off with very little effort.
- Slice the warm beets into wedges or rounds, drizzle with a bit more olive oil and the balsamic glaze, and finish with a sprinkle of sea salt to enhance that natural, sugary profile.
How to make one pot rice?

Why we love this
One-pot rice is the unsung hero of the busy home cook, offering a fluffy, aromatic base that soaks up every drop of flavor from the ingredients cooked alongside it. We love the way the bottom of the pot can develop a slightly crispy, golden crust (the socarrat), while the grains on top remain light and separated. The scent of garlic, ginger, and toasted rice filling the air is incredibly nostalgic and appetizing, promising a meal that is both simple and deeply nuanced in its flavor profile.
Ingredients
- 2 cups Jasmine or Basmati rice
- 3.5 cups chicken or vegetable broth
- 2 cloves garlic, minced
- 1 small onion, finely diced
- 1 tablespoon butter or olive oil
- 1/2 teaspoon turmeric (for color)
- Salt to taste
How to make it
- Rinse your rice in a fine-mesh sieve under cold water until the water runs clear. This removes excess starch and is the non-negotiable step for fluffy, non-sticky rice.
- In a heavy-bottomed pot or Dutch oven, heat the butter over medium heat. Sauté the diced onions and minced garlic until they are translucent and fragrant, but not browned.
- Add the dry rice to the pot and stir for 1-2 minutes. This ‘toasting’ phase coats every grain in fat and locks in the starch, ensuring the grains stay distinct after cooking. Stir in the turmeric for that vibrant yellow hue.
- Pour in the broth and add a generous pinch of salt. Turn the heat up to high and bring the liquid to a boil.
- Once boiling, reduce the heat to the absolute lowest setting and cover the pot with a tight-fitting lid. Simmer for 15-18 minutes without lifting the lid—the steam is doing the work!
- Turn off the heat and let the pot sit, covered, for another 5-10 minutes. Finally, uncover and fluff with a fork to release the remaining steam and achieve that perfect, airy texture.
How to drizzle hot honey?

Why we love this
Hot honey is the ultimate ‘viral’ condiment that has taken the culinary world by storm, and for good reason: it’s the perfect balance of heat and sweet. That glossy, amber liquid flowing over a piece of fried chicken or a slice of salty pizza creates a flavor profile that is both exciting and comforting. It awakens the taste buds with a slow-burn spice that is immediately tempered by the floral sweetness of the honey, making every bite a complex and addictive experience that you’ll want to replicate on everything.
Ingredients
- 1 cup high-quality clover or wildflower honey
- 2 tablespoons dried red chili flakes (adjust for heat)
- 1 teaspoon apple cider vinegar
- A pinch of sea salt
How to make it
- In a small saucepan, combine the honey and the red chili flakes over low heat. It is vital to use low heat here; honey can scorch easily, and we want to infuse the flavor, not boil it.
- Heat the mixture until small bubbles begin to form around the edges (about 150°F if you are using a thermometer). Let it infuse for 5-7 minutes, stirring occasionally to distribute the spice.
- Remove the pan from the heat and stir in the apple cider vinegar and a pinch of salt. The vinegar provides a necessary tang that cuts through the intense sweetness, while the salt enhances the floral notes.
- If you prefer a smooth honey, strain the mixture through a fine-mesh sieve into a clean glass jar while it is still warm. If you love the look of the peppers, leave them in!
- Let it cool completely before drizzling. The honey will thicken back up as it reaches room temperature, providing that iconic, slow-moving ‘viral’ drizzle look.
How to fold crispy gyoza?

Why we love this
There is a unique satisfaction in the crunch of a perfectly pan-fried gyoza, followed by the burst of savory, juicy filling inside. We love the contrast between the golden, lace-like crispy bottom and the tender, steamed top of the dumpling wrapper. The process of folding them—creating those delicate pleats—is a meditative act of love that results in a beautiful, hand-crafted addition to any food board. Dipped in a tangy soy-vinegar sauce, they provide a punchy, savory bite that everyone always reaches for first.
Ingredients
- 1 pack round gyoza wrappers
- 1/2 lb ground pork or finely chopped mushrooms
- 2 cups shredded cabbage (salted and squeezed dry)
- 2 cloves garlic, grated
- 1 tablespoon ginger, grated
- 1 tablespoon soy sauce and 1 teaspoon sesame oil
- Cornstarch for dusting
How to make it
- Mix your filling ingredients (meat/mushrooms, cabbage, aromatics, and sauces) in a large bowl until the mixture becomes slightly tacky and well-combined.
- Hold a gyoza wrapper in your non-dominant hand and place a teaspoon of filling in the center. Lightly moisten the entire outer edge of the wrapper with a wet finger.
- Fold the wrapper in half but do not seal it yet. Starting from one side, use your thumb and forefinger to create 4-6 small pleats on the ‘front’ side of the wrapper, pressing each pleat firmly against the flat ‘back’ side to seal.
- Heat 1 tablespoon of oil in a non-stick skillet over medium-high heat. Place the gyoza flat-side down in the pan and fry for 2 minutes until the bottoms are deep golden brown.
- Carefully pour in 1/4 cup of water and immediately cover the pan with a lid. Let the gyoza steam for 3-4 minutes until the wrappers look translucent and the filling is cooked through.
- Remove the lid and continue to cook for another minute until the remaining water has evaporated and the bottoms crisp back up to a perfect crunch.
How to bake garlic salmon?

Why we love this
Baked salmon is the epitome of effortless elegance, especially when it is smothered in a fragrant, buttery garlic crust that keeps the fish incredibly moist. We love the way the natural healthy fats of the salmon pair with the sharp bite of garlic and the bright acidity of fresh lemon, creating a dish that feels light yet deeply satisfying. When baked correctly, the salmon flakes away easily with a fork, revealing a tender, buttery interior that is a staple for any high-protein lifestyle board.
Ingredients
- 2 large salmon fillets (skin-on)
- 3 tablespoons melted butter
- 4 cloves garlic, finely minced
- 1 teaspoon fresh parsley, chopped
- 1/2 lemon, sliced into rounds
- Salt and lemon pepper to taste
How to make it
- Preheat your oven to 400°F (200°C) and line a baking sheet with parchment paper or foil for easy cleanup.
- Pat the salmon fillets dry with paper towels. If the skin is wet, it won’t crisp or release easily, and the meat may steam rather than roast.
- In a small bowl, whisk together the melted butter, minced garlic, chopped parsley, and a pinch of salt. Brush this mixture generously over the top of each fillet, ensuring the garlic is evenly distributed.
- Top each fillet with a couple of lemon slices. These will caramelize in the oven, releasing their juices directly into the fish.
- Bake for 12-15 minutes depending on the thickness of the fillets. A professional tip: check for doneness by pressing the top of the fillet with a fork; if the meat separates into ‘flakes’ easily, it is done.
- For a viral finish, turn the broiler on for the last 60 seconds to slightly brown the garlic and lemon edges, but watch closely to ensure it doesn’t burn!
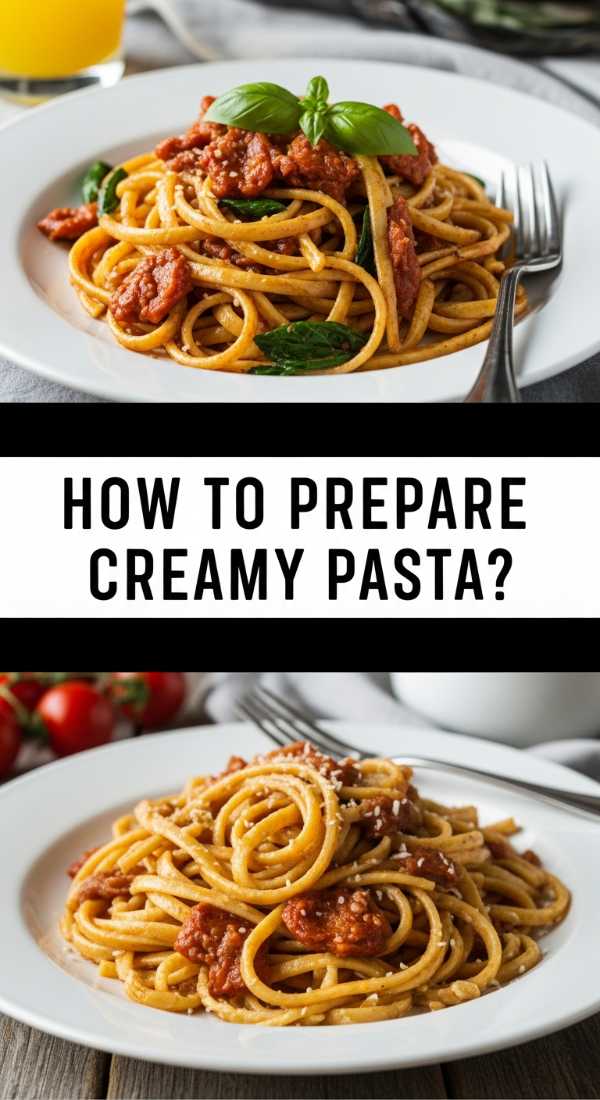
How to prepare creamy pasta?
Why we love this
Creamy pasta is the ultimate comfort food, a silky and indulgent dish that feels like a celebration in every bite. We love the way a well-emulsified sauce coats every strand of pasta, creating a glossy sheen that looks as good as it tastes. The aroma of simmering cream and nutty parmesan cheese is enough to make anyone’s mouth water, and the versatility of the dish allows it to be the perfect companion to everything from roasted vegetables to seared proteins on your food board.
Ingredients
- 1/2 lb Fettuccine or Pappardelle pasta
- 1 cup heavy cream
- 1/2 cup freshly grated Parmesan cheese
- 2 cloves garlic, minced
- 1/2 cup reserved pasta water
- Black pepper and fresh parsley for garnish
How to make it
- Boil your pasta in a large pot of heavily salted water. Aim for ‘al dente’—about 1-2 minutes less than the package instructions—as it will finish cooking in the sauce.
- Before draining, reserve at least a cup of the starchy pasta water. This is the liquid gold that helps the sauce cling to the noodles.
- In a wide skillet, sauté the minced garlic in a touch of butter over low-medium heat until fragrant. Pour in the heavy cream and bring to a very gentle simmer.
- Reduce the heat to low and whisk in the Parmesan cheese a handful at a time, stirring constantly to ensure it melts smoothly into the cream without clumping.
- Add the cooked pasta directly into the skillet. Toss vigorously, adding splashes of the reserved pasta water as needed to create a smooth, emulsified sauce that coats every noodle.
- Finish with plenty of freshly cracked black pepper and a sprinkle of parsley. Serve immediately, as the sauce will thicken as it cools.
How to cook hearty stew?

Why we love this
A hearty stew is a labor of love that fills the entire home with a rich, savory scent that lingers in the best possible way. We love the deep, complex flavors that develop over hours of slow simmering—the way the beef becomes fork-tender and the vegetables soak up the wine-infused broth until they are bursting with savory goodness. It is a rustic, soul-warming dish that encourages guests to grab a crusty piece of bread and dive into the center of the board, making it the perfect communal meal.
Ingredients
- 1 lb beef chuck, cut into 1-inch cubes
- 2 carrots and 2 potatoes, chopped
- 1 onion, diced
- 2 tablespoons tomato paste
- 1 cup dry red wine (like Cabernet)
- 3 cups beef bone broth
- 2 sprigs fresh thyme and 2 bay leaves
How to make it
- Season the beef chunks generously with salt and pepper. In a large Dutch oven, heat oil over high heat and sear the beef in batches. You want a dark brown crust on all sides; this ‘fond’ on the bottom of the pot is where all the flavor lives.
- Remove the beef and add the onions, carrots, and potatoes. Sauté for 5 minutes, then stir in the tomato paste, cooking for 2 minutes until it turns a deep rust color.
- Deglaze the pan by pouring in the red wine, using a wooden spoon to scrape up all those flavorful browned bits from the bottom.
- Add the beef back into the pot along with the broth, thyme, and bay leaves. Bring to a boil, then reduce the heat to a very low simmer.
- Cover and cook for 2 to 2.5 hours. The meat should be tender enough to break apart with the back of a spoon. If the sauce is too thin, simmer uncovered for the last 20 minutes to reduce and thicken.
How to fry honey chicken?

Why we love this
Honey chicken strikes that incredible balance between a shattered-glass crispy exterior and a sticky, sweet-and-sour glaze that is impossible to stop eating. We love the visual of the glossy sauce clinging to the golden-fried chicken, garnished with sesame seeds and green onions for that perfect ‘Instagrammable’ look. It provides a satisfying crunch and a punch of flavor that works beautifully as a finger food on a board, pairing perfectly with rice or fresh greens.
Ingredients
- 1 lb chicken breast or thighs, cut into bite-sized pieces
- 1/2 cup cornstarch (for the ultimate crunch)
- 1/4 cup honey
- 2 tablespoons soy sauce
- 1 tablespoon rice vinegar
- 1/2 teaspoon garlic powder
- Oil for frying
How to make it
- Toss the chicken pieces in a bowl with garlic powder, salt, and pepper. Then, coat each piece thoroughly in cornstarch, shaking off any excess. The cornstarch creates a much crispier, lighter shell than flour does.
- In a small bowl, whisk together the honey, soy sauce, and rice vinegar to create your glaze. Set this aside near the stove.
- Heat about 1 inch of oil in a heavy skillet or wok to 350°F (175°C). Fry the chicken in small batches for 4-5 minutes until golden brown and crispy. Remove to a wire rack to drain.
- In a clean large pan, pour in the honey mixture and heat until it starts to bubble and thicken slightly (about 1-2 minutes).
- Add the fried chicken to the pan and toss quickly to coat every piece in the sticky glaze. Do this over high heat for only 30 seconds to ensure the coating stays crispy while becoming perfectly glazed.
The Final Spread
Building a food board like this is an exercise in creativity and joy. There is no right or wrong way to arrange these elements—simply place your larger bowls of stew or ramen first, then fill in the gaps with the steak, salmon, and crispy gyoza. The result is a vibrant, communal feast that celebrates the beauty of home cooking. When you bring this to the table, you aren’t just serving dinner; you are creating a memory that your friends and family will be talking about long after the last drop of hot honey is gone. Happy cooking!