

From Butter to Boards: Simple Ideas That Are Taking Over the Internet
There is something inherently magical about the way a simple meal can transform a room. We’ve all seen the butter board craze sweep through our feeds, turning a humble stick of dairy into a canvas for edible art, but the trend has evolved into something even more soul-satisfying. It’s about the ‘board’ mentality—taking those simple, comforting dishes we crave and presenting them in a way that invites everyone to lean in, grab a fork, and stay a while. It’s about the crackle of a crispy dumpling and the golden hue of a roasted beet turning a Tuesday night into a core memory.
When I think about the recipes that truly go viral, they all share one thing: they are approachable yet feel like a total indulgence. They remind us that we don’t need a five-course tasting menu to feel pampered. We just need textures that pop, flavors that linger, and the warmth of a kitchen that smells like garlic and toasted sesame. These ideas aren’t just about feeding ourselves; they’re about the joy of the process and the beauty of a shared board that looks almost too good to eat—almost.
How to make crispy gyoza?

Why we love this
There is nothing quite like the auditory satisfaction of tapping a chopstick against a perfectly lacey gyoza skirt. The contrast between the tender, steamed top and the shatteringly crisp bottom creates a culinary rhythm that is hard to beat. As you bite through, the aroma of toasted sesame oil and pungent ginger blooms, releasing a savory steam that warms you from the inside out. It’s a sensory experience that feels like a hidden gem from a Tokyo alleyway, brought right to your own wooden serving board.
Ingredients
- 1 pack frozen or fresh gyoza wrappers
- Ground pork or finely minced mushrooms
- Napa cabbage, shredded and salted
- Minced ginger and garlic
- Soy sauce and toasted sesame oil
- 1 tbsp cornstarch mixed with 1/2 cup water (for the skirt)
How to make it
- Prepare your filling by mixing your protein or mushrooms with the aromatics and cabbage, ensuring all excess moisture is squeezed out of the greens to prevent sogginess.
- Pleat the wrappers tightly around a teaspoon of filling, using a dab of water to seal the edges like a fan.
- Heat a non-stick skillet over medium-high heat with a tablespoon of neutral oil until it shimmers.
- Place the gyoza flat-side down in a circular pattern and fry for 2-3 minutes until the bottoms are a deep golden brown.
- Whisk your cornstarch slurry and pour it directly into the pan; immediately cover with a tight-fitting lid to trap the steam.
- Let them steam for about 5 minutes, then remove the lid and continue cooking until the water evaporates and the slurry transforms into a delicate, brown, honeycomb-like lace.
- Carefully invert the entire pan onto a plate to showcase the crispy ‘skirt’ on top.
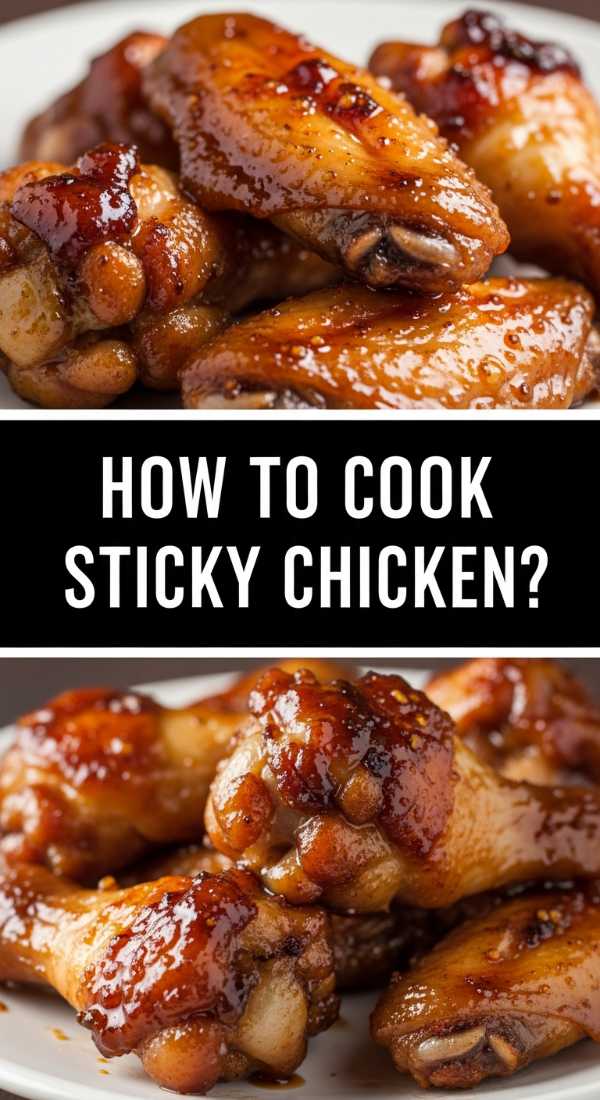
How to cook sticky chicken?
Why we love this
Sticky chicken is the ultimate crowd-pleaser, boasting a glossy, mahogany glaze that clings to every crevice of the meat. The scent of bubbling brown sugar and soy sauce caramelizing in the pan is enough to bring anyone running to the kitchen. It’s sweet, it’s salty, and it has that addictive ‘lip-smacking’ quality that makes you reach for just one more piece. On a board, the vibrant colors and the sheen of the sauce look absolutely regal, especially when garnished with a pop of green from fresh scallions.
Ingredients
- Chicken thighs, bone-in or boneless
- Dark soy sauce
- Honey or brown sugar
- Rice vinegar
- Fresh grated ginger
- Red pepper flakes
How to make it
- Pat the chicken dry with paper towels; moisture is the enemy of a good sear, and you want that skin to be a base for the glaze.
- Season lightly with salt and sear in a hot cast-iron skillet skin-side down for 6-8 minutes until the fat has rendered and the skin is crispy.
- Flip the chicken and reduce the heat to medium; meanwhile, whisk your soy sauce, honey, vinegar, and ginger in a small bowl.
- Pour the sauce over the chicken, allowing it to bubble and reduce.
- Use a spoon to continuously baste the chicken with the thickening sauce as it cooks through—this builds layers of flavor.
- The chicken is done when the internal temperature hits 165°F and the sauce has reduced to a thick, syrupy consistency that coats the back of a spoon.
- Let it rest for five minutes before serving to ensure the juices redistribute and the glaze sets into a beautiful, sticky lacquer.
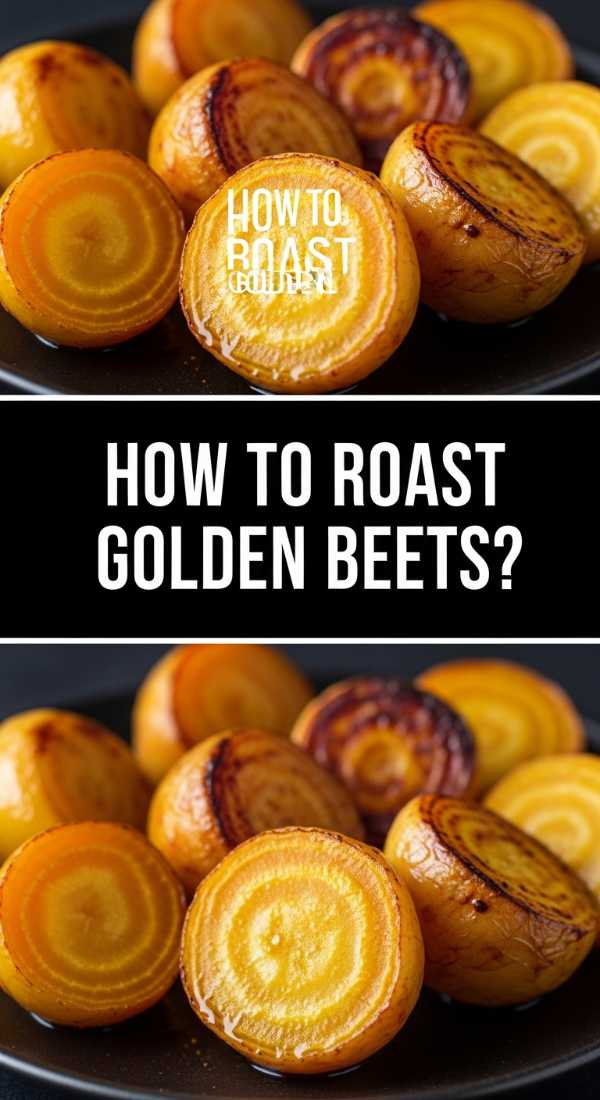
How to roast golden beets?
Why we love this
Golden beets are the sunnier, mellower cousins of the traditional red beet, offering a buttery sweetness without the intense earthiness that some find overwhelming. When roasted, they transform into tender, jewel-like morsels that glow against a dark serving board. The aroma is subtly sweet and autumnal, reminiscent of a garden after a light rain. They provide a sophisticated pop of color and a velvety texture that pairs beautifully with tangy cheeses or crunchy nuts, making them a staple for any modern food board.
Ingredients
- 4-5 large golden beets
- Extra virgin olive oil
- Maldon sea salt
- Fresh thyme sprigs
- Balsamic glaze (optional)
How to make it
- Preheat your oven to 400°F (200°C) to ensure a high-heat roast that encourages natural sugars to caramelize.
- Scrub the beets thoroughly under cold water, remove the leafy tops, and pat them dry.
- Place each beet on a square of aluminum foil, drizzle with olive oil and a pinch of salt, then fold the foil into a tight pouch.
- Roast the pouches on a baking sheet for 45-60 minutes; they are ready when a paring knife slides into the center with zero resistance.
- Carefully open the foil and let them cool slightly; the skins should slip right off with a gentle rub of a paper towel.
- Slice them into thick wedges or rounds to reveal the vibrant yellow interior.
- Finish with a final drizzle of high-quality oil and a sprinkle of flaky salt while they are still warm to maximize flavor absorption.
How to make spicy honey?

Why we love this
Spicy honey is the condiment that launched a thousand boards, and for good reason—it’s a masterclass in balance. The initial hit of floral sweetness is quickly followed by a slow, creeping warmth that tingles on the palate. It smells like a summer meadow infused with the sharp, clean scent of dried chilies. Drizzled over salty cheese or fried chicken, it creates a flavor profile that is both comforting and exciting, proving that sometimes the simplest infusions are the most transformative.
Ingredients
- 1 cup high-quality clover or wildflower honey
- 2 tbsp dried red chili flakes (or 2 sliced fresh habaneros for extra heat)
- 1 tsp apple cider vinegar
- A pinch of sea salt
How to make it
- Pour the honey into a small heavy-bottomed saucepan over low heat; you want to warm it, not boil it, to preserve the honey’s delicate enzymes.
- Add the chili flakes or fresh peppers and stir gently to combine.
- Allow the mixture to steep on the lowest possible heat for about 10-15 minutes, watching closely to ensure no bubbles form.
- Taste a small drop—if you want more heat, let it steep longer; if it’s perfect, remove it from the heat immediately.
- Stir in the apple cider vinegar and salt; the acid cuts through the sugar and helps the heat bloom.
- Strain the honey through a fine-mesh sieve into a clean glass jar if you want a clear liquid, or leave the flakes in for a rustic, artisanal look.
- Let it cool completely before sealing; it will thicken back up to its original luscious consistency.
How to bake cheesy pasta?

Why we love this
There is a primal comfort in a dish of baked cheesy pasta, with its bubbling crust and the way the cheese pulls into long, molten strings as you scoop it up. The scent of toasted breadcrumbs and sharp cheddar filling the air is the ultimate kitchen hug. Every bite is a mix of textures: the crispy, golden-brown edges of the noodles and the silken, creamy sauce hidden underneath. It’s the kind of dish that demands to be the centerpiece of a board, surrounded by fresh herbs and crusty bread for dipping.
Ingredients
- 1 lb short pasta (rigatoni or cavatappi)
- 4 cups shredded sharp cheddar and gruyère mix
- 3 cups whole milk
- 1/4 cup butter and 1/4 cup flour (for roux)
- 1/2 tsp smoked paprika and nutmeg
- Panko breadcrumbs
How to make it
- Boil your pasta in heavily salted water for 2 minutes less than the package instructions; it must remain ‘al dente’ as it will continue cooking in the oven.
- In a separate pot, melt the butter and whisk in the flour, cooking for 1-2 minutes until it smells slightly nutty to create a blonde roux.
- Slowly stream in the milk while whisking constantly to prevent lumps, simmering until the sauce thickens enough to coat a spoon.
- Remove from heat and fold in 3/4 of the cheese, stirring until you have a glossy, thick mornay sauce.
- Toss the pasta with the sauce, ensuring every tube is filled with cheesy goodness, and pour into a buttered baking dish.
- Top with the remaining cheese and a generous layer of panko breadcrumbs mixed with a little melted butter.
- Bake at 375°F (190°C) for 20-25 minutes until the top is a deep, architectural gold and the sauce is bubbling furiously at the edges.
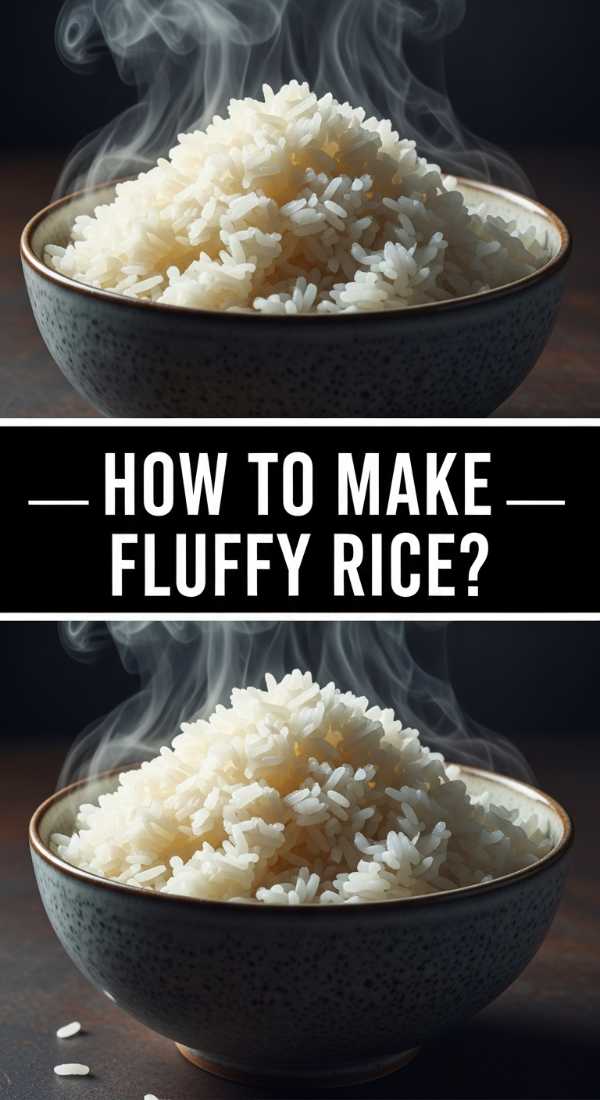
How to make fluffy rice?
Why we love this
Fluffy rice is the quiet hero of the culinary world, providing a clean, cloud-like base that carries the weight of bolder flavors. When done right, each grain stands independent and proud, offering a gentle bite that isn’t sticky or mushy. The aroma of pure, steamed jasmine or basmati is subtle and nutty, acting as a calming palate cleanser between spicy or salty bites. On a board, a bowl of perfectly steamed rice represents the ultimate balance, grounding the meal and making everything else shine brighter.
Ingredients
- 2 cups long-grain white rice (Jasmine or Basmati)
- 3 cups water (or chicken stock for extra flavor)
- A pinch of salt
- 1 tsp butter or oil (optional)
How to make it
- Rinse the rice in a fine-mesh strainer under cold water until the water runs completely clear; removing this excess starch is the secret to individual grains.
- Place the rice in a pot with a tight-fitting lid and add the water and salt.
- Bring the water to a rolling boil over high heat, then immediately turn the heat down to the lowest possible setting.
- Cover the pot tightly and simmer for exactly 15 minutes—do not, under any circumstances, lift the lid to peek.
- After 15 minutes, turn off the heat but leave the pot on the burner, covered, for another 10 minutes to allow the remaining steam to finish the job.
- Remove the lid and use a fork to gently fluff the rice, lifting from the bottom to release the steam without mashing the grains.
- Add a tiny pat of butter at the end for a professional, glossy finish and a hint of richness.
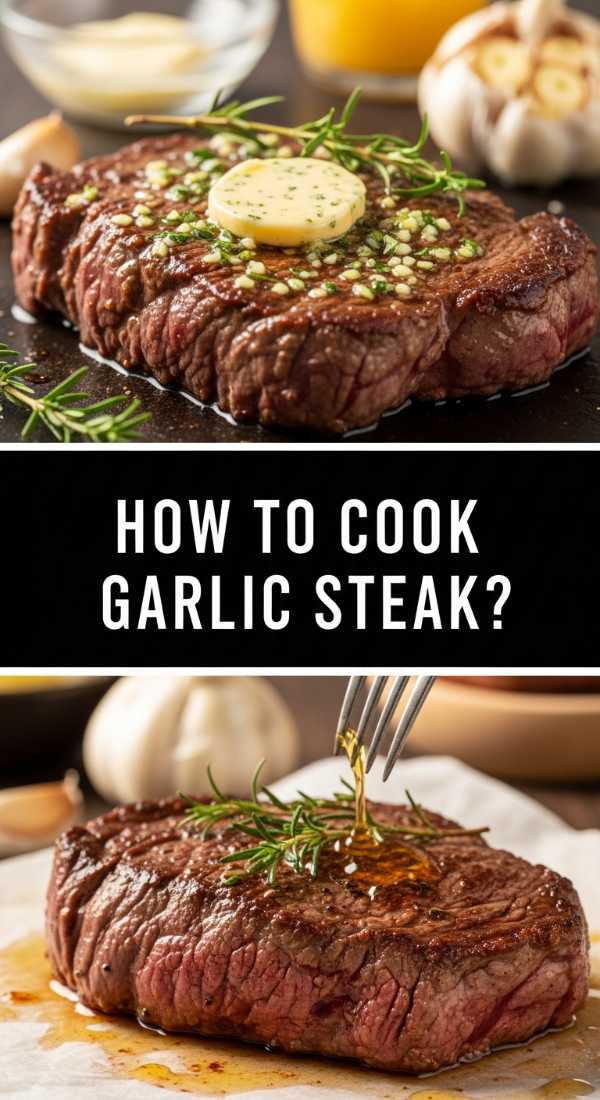
How to cook garlic steak?
Why we love this
A garlic-basted steak is a masterclass in aromatherapy; the moment the smashed cloves hit the hot butter, the scent is intoxicatingly savory. The steak itself boasts a dark, crusty sear that gives way to a tender, rosy center that melts like butter on the tongue. It feels indulgent and masculine yet perfectly refined when sliced thin and laid out across a wooden board. The pooling juices mixed with garlic-infused butter create a natural sauce that makes every bite feel like a celebration of high-quality ingredients.
Ingredients
- 2 thick-cut Ribeye or New York Strip steaks
- 4 tbsp unsalted butter
- 6 cloves garlic, smashed
- Fresh rosemary and thyme
- Coarse kosher salt and black pepper
How to make it
- Take the steaks out of the fridge 30 minutes before cooking to bring them to room temperature; this ensures even cooking through the center.
- Pat the meat extremely dry and season aggressively with salt and pepper on all sides, including the edges.
- Heat a heavy cast-iron skillet over high heat until it is smoking slightly.
- Sear the steak for 3-4 minutes on the first side without moving it, creating a thick, caramelized crust.
- Flip the steak, then immediately add the butter, smashed garlic, and herbs to the pan.
- Tilt the pan slightly so the melting butter pools at the bottom with the garlic; use a large spoon to continuously drench the steak in this foaming, flavorful fat.
- Cook until the internal temperature reaches 130°F for medium-rare, then remove to a cutting board and let it rest for at least 8 minutes before slicing to lock in those precious juices.
How to make sweet potatoes?

Why we love this
Sweet potatoes are nature’s candy, but when they are roasted until the natural sugars seep out and caramelize into a sticky, dark glaze, they become something truly ethereal. They offer a creamy, mash-like interior encased in a slightly chewy, salty skin. The aroma is warm, earthy, and reminiscent of cozy holidays, but with a modern twist of lime or chili, they become vibrant and fresh. They are the perfect anchor for a vegetable-forward board, offering a satisfying weight and a gorgeous orange hue that brightens the whole spread.
Ingredients
- 3-4 large sweet potatoes
- Olive oil
- Cinnamon or smoked paprika (depending on sweet vs savory)
- Honey or maple syrup
- Flaky sea salt
How to make it
- Preheat your oven to 425°F (220°C); sweet potatoes need high heat to achieve that characteristic skin-char while softening the inside.
- Cut the potatoes into uniform rounds or thick wedges to ensure they all cook at the same rate.
- Toss the pieces in a bowl with olive oil, salt, and your choice of spice until every surface is well-coated.
- Arrange them on a parchment-lined baking sheet in a single layer, ensuring they aren’t crowded; if they touch, they will steam instead of roast.
- Bake for 25-30 minutes, flipping halfway through to get a consistent golden-brown color on both sides.
- For the last 5 minutes of cooking, drizzle a little honey over the top to create a sticky, glossy finish.
- Remove from the oven and sprinkle with extra flaky salt while the honey is still hot and tacky.
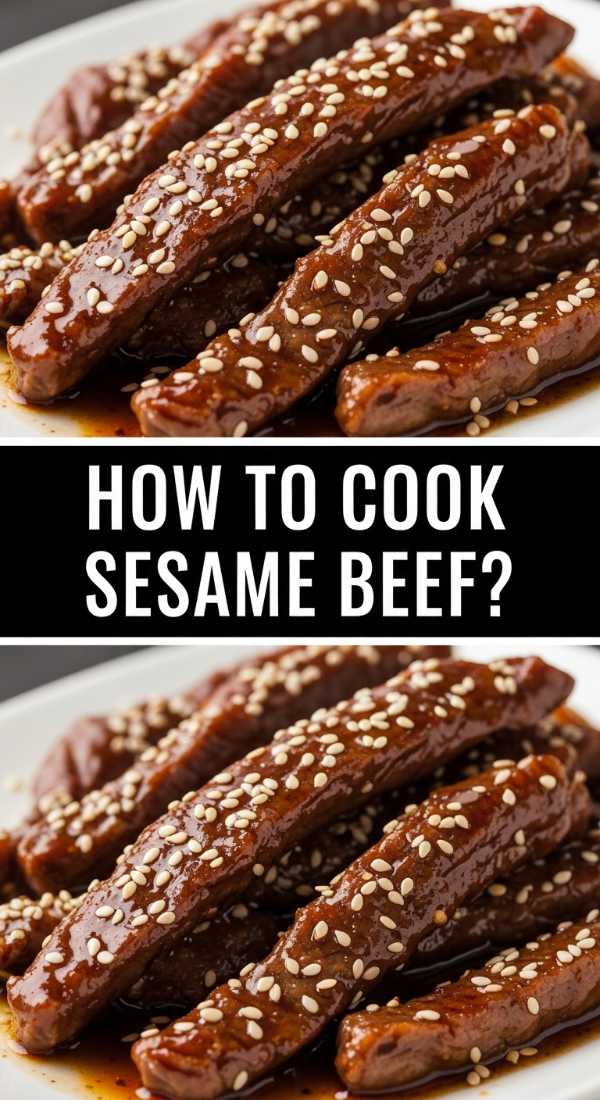
How to cook sesame beef?
Why we love this
Sesame beef is a whirlwind of texture and umami, featuring thin ribbons of steak that are flash-fried to create crispy edges and a succulent interior. The scent of toasted sesame seeds and fermented soy is sharp and inviting, cutting through the richness of the meat. It’s a dish that feels alive, with the heat of ginger and the crunch of seeds dancing on your palate. Laid out on a board with fresh cucumber ribbons, it’s a stunning example of how simple ingredients can create a complex, professional-level flavor profile.
Ingredients
- 1 lb flank steak or sirloin, sliced paper-thin against the grain
- 1/4 cup soy sauce
- 2 tbsp toasted sesame oil
- 1/4 cup cornstarch (for dusting)
- Toasted sesame seeds and sliced green onions
- 1 tbsp brown sugar
How to make it
- Marinate your sliced beef in soy sauce, sugar, and sesame oil for 20 minutes to tenderize the fibers.
- Drain the marinade and toss the beef strips in cornstarch until they are lightly and evenly coated; this is the key to the ‘crispy-tender’ texture.
- Heat a wok or large skillet with two tablespoons of oil over very high heat until the oil ripples.
- Add the beef in small batches—if you add too much at once, the pan temperature will drop and the meat won’t sear.
- Stir-fry vigorously for only 2-3 minutes until the edges are dark and crispy but the center is still juicy.
- Toss in a generous handful of toasted sesame seeds in the final 30 seconds so they stick to the glaze.
- Garnish immediately with fresh green onions to provide a cool, sharp contrast to the hot, savory beef.
How to make creamy soup?

Why we love this
A truly great creamy soup is like velvet in a bowl, offering a smooth, comforting embrace that lingers on the tongue. Whether it’s roasted tomato or earthy mushroom, the key is the depth of flavor that comes from slowly simmering aromatics until they melt into one another. The aroma is a concentrated essence of the vegetables, enriched by the subtle sweetness of cream. On a board, serving small cups of soup alongside crusty bread and cheeses makes for an interactive, cozy dining experience that feels both rustic and incredibly chic.
Ingredients
- 2 lbs of your base vegetable (tomatoes, squash, or mushrooms)
- 1 large onion and 3 cloves garlic
- 4 cups vegetable or chicken stock
- 1/2 cup heavy cream or coconut milk
- Fresh herbs (thyme or basil)
How to make it
- Sauté your onions and garlic in butter over medium heat until they are translucent and fragrant, taking care not to brown the garlic.
- Add your main vegetables (chopped) and cook for another 5-10 minutes to develop their natural flavors.
- Pour in the stock and bring to a gentle boil, then reduce the heat and simmer for 20-30 minutes until the vegetables are completely soft.
- Use an immersion blender to puree the soup directly in the pot until it is perfectly smooth with no remaining chunks.
- Stir in the cream or coconut milk and return to a very low simmer for 5 minutes; do not let it boil once the cream is added or it may break.
- Taste and adjust your seasoning—cream mutes salt, so you will likely need a generous pinch more than you think.
- Serve with a final swirl of olive oil or a dollop of crème fraîche for that viral-ready aesthetic.
Conclusion: The Art of the Shared Table
Building a board is more than just a plating technique; it’s an invitation to slow down. Whether you’re piling up crispy gyoza or arranging roasted golden beets, the goal is to create a visual and flavorful journey that people can experience together. These simple ideas have taken over the internet because they strip away the pretense of fine dining and focus on what really matters: bold flavors, beautiful colors, and the simple joy of sharing a meal. So, grab your favorite wooden board, pick a few of these recipes, and start creating your own viral-worthy spread tonight.