
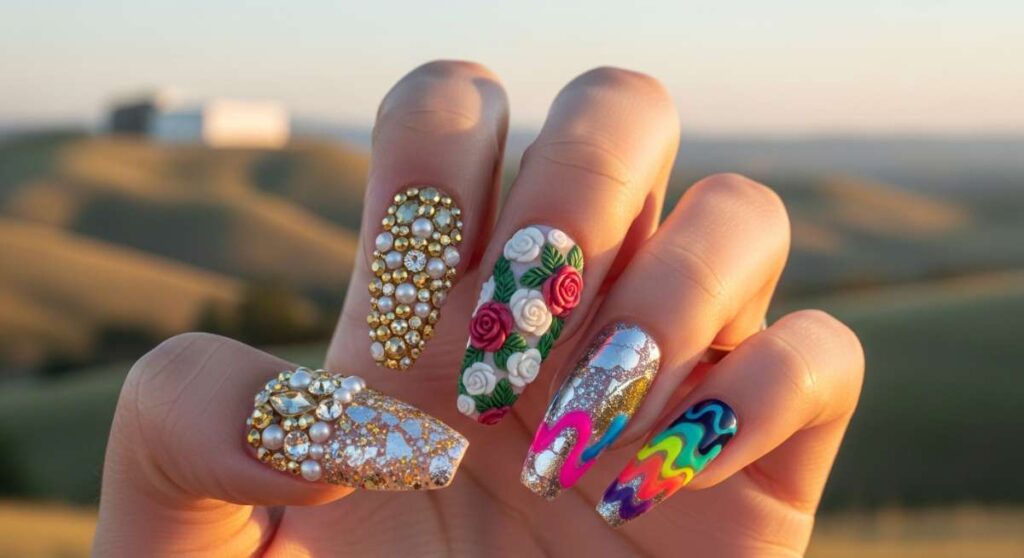
Go Big or Go Home: The Ultimate Guide to Maximalist Nail Art
Hi, loves! Take a deep breath with me and let all that heavy energy out. Today, we’re talking about something that truly nourishes the soul—the art of self-expression through our fingertips. You know those days when you just want your hands to tell a story of joy, vibrance, and absolute fearlessness? That’s what maximalism is all about. It’s a soft, warm embrace for your personality, allowing every color in your heart to shine through.
I truly believe that when we look down and see a rainbow of colors, it’s like a little hug for our mood. Whether you’re a pro with a brush or just starting your DIY journey, there’s so much room here for you. We’re going to dive deep into the world of maximalist nails together, holding hands every step of the way. Let’s turn those nails into tiny, wearable masterpieces that make you feel like the beautiful, glowing light you are.
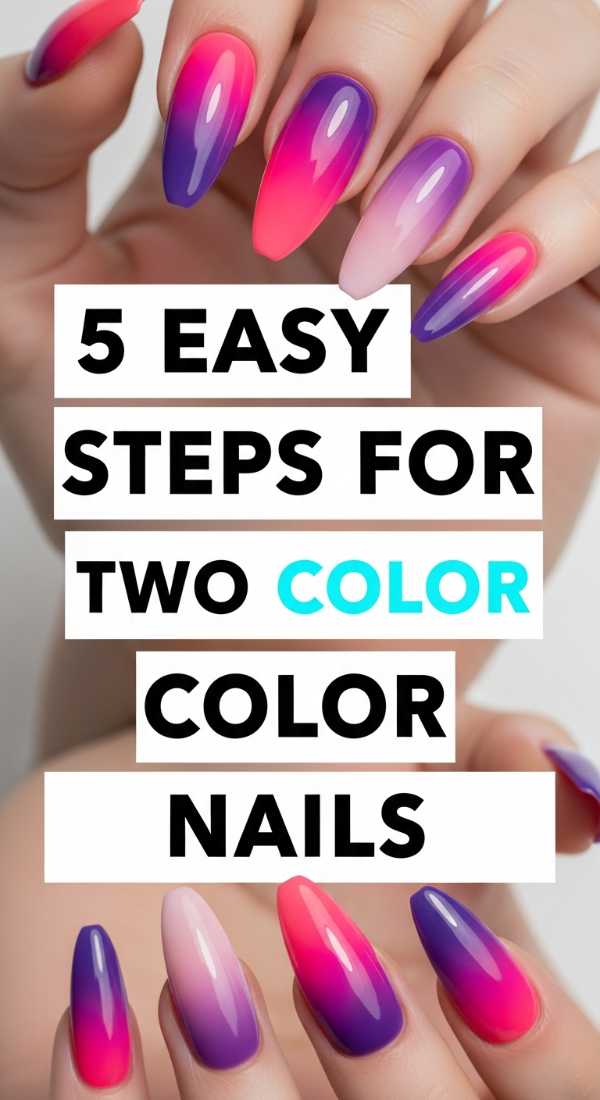
Mastering the Two-Tone Dance
Why to love this recipe:
Sometimes, loves, the most beautiful stories start with just two chapters. This two-color technique is like a gentle conversation between your favorite shades, perfect for when you want a pop of color without feeling overwhelmed. It’s simple, elegant, and so very sweet.
Essential Ingredients:
- Base coat protection
- Two contrasting high-pigment polishes
- Nail striping tape
- Fine-tip cleanup brush
- Glossy top coat
How to Prepare:
- Apply your base coat and let it dry completely—patience is a form of self-care!
- Paint the entire nail with your lighter base color.
- Once dry, apply a strip of tape vertically or diagonally across the nail.
- Paint the second, bolder color on one side of the tape.
- Peel the tape immediately and seal with a top coat for a crisp, clean finish.
Budget Range
- Essie Expressie Quick-Dry ($10)
- Holler and Glow Nail Tape ($5)
- Sally Hansen Insta-Dri ($7)
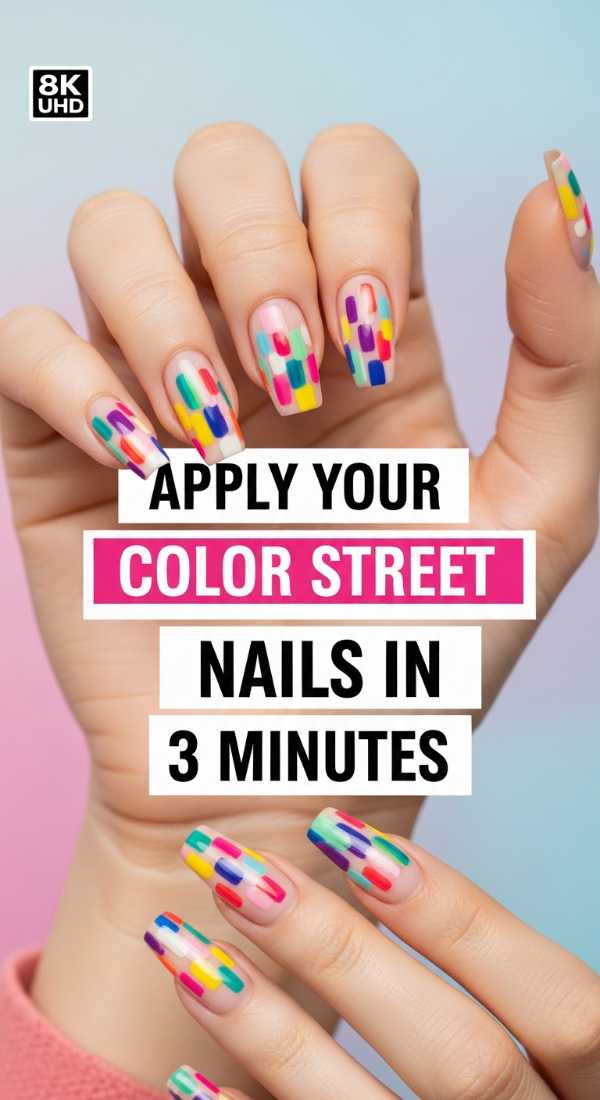
Color Street Magic in Minutes
Why to love this recipe:
We all have those busy days where we need a little sparkle but don’t have an hour to spare. This 3-minute method is like a warm cup of tea for your schedule—quick, satisfying, and oh-so-pretty. It’s the ultimate secret for the woman on the go who still wants to shine.
Essential Ingredients:
- Color Street nail strips
- Alcohol prep pads
- Nail file
- Cuticle pusher
How to Prepare:
- Clean your nails thoroughly with the alcohol pad to remove oils.
- Select the strip size that best matches your nail width.
- Peel the clear cover and the polish strip from the backing.
- Gently stretch and press the strip onto the nail, smoothing from the center outward.
- Fold the excess over the tip and file it off in a downward motion.
Budget Range
- Color Street Mani Sets ($11 – $14)
- Manicure Prep Kit ($3)
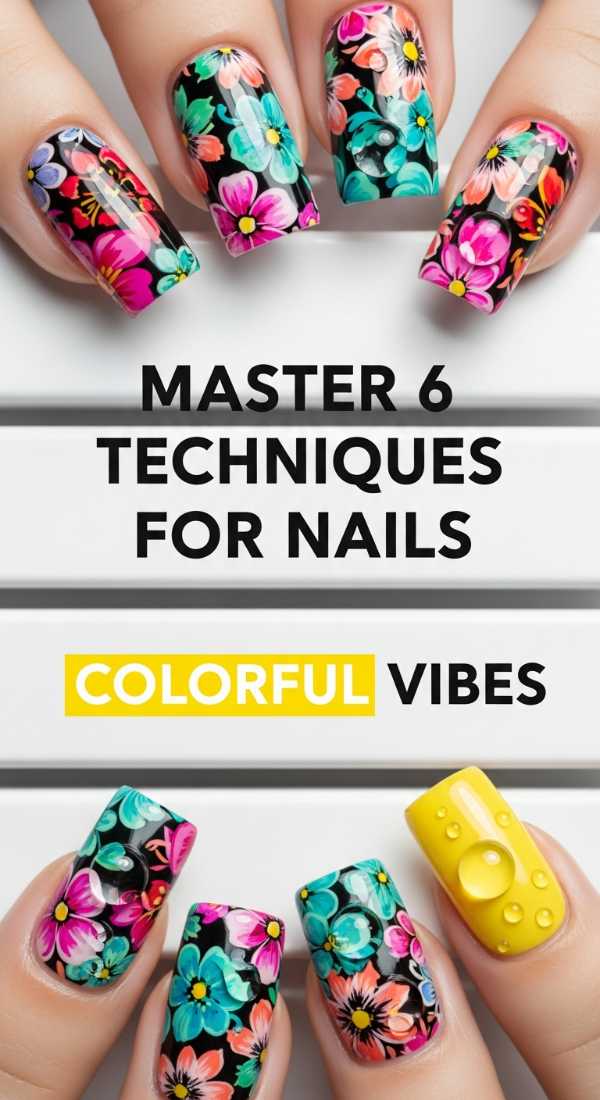
Six Techniques for Colorful Vibes
Why to love this recipe:
Diving into these six techniques feels like opening a box of vintage treasures. It gives you the freedom to play and discover what truly resonates with your spirit. From soft sponges to sharp lines, it’s a journey of creative discovery that celebrates every facet of you.
Essential Ingredients:
- Makeup sponges
- Dotting tools
- Detail brushes
- Stamping plates
- Water marbling bowl
- Nail vinyls
How to Prepare:
- Sponging: Dab two colors onto a sponge and press onto the nail for a soft blend.
- Dotting: Use a tool to create playful polka dots of various sizes.
- Striping: Use a thin brush to paint delicate, intentional lines.
- Stamping: Transfer intricate patterns from a plate to your nail.
- Marbling: Drop polish into water, swirl, and dip your nail in.
- Vinyls: Use stickers to create geometric negative space designs.
Budget Range
- Beetles Gel Nail Art Liner Set ($15)
- Biutee Nail Stamping Kit ($12)
- Generic Makeup Sponges ($2)
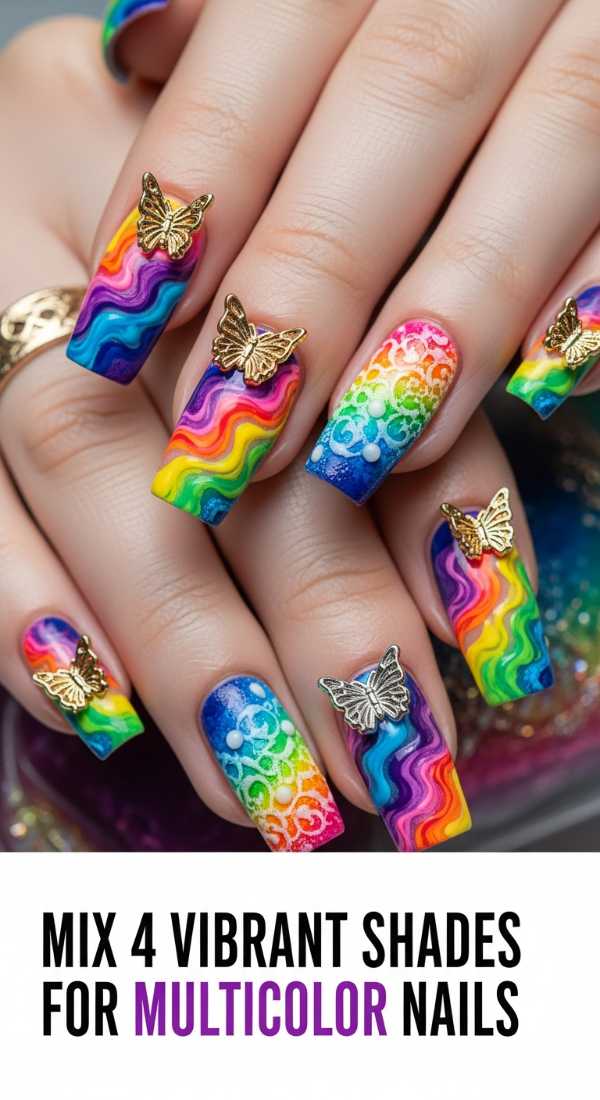
Vibrant Four-Shade Fusion
Why to love this recipe:
This is where we really start to dance, loves! Mixing four vibrant shades is like capturing a summer sunset or a wildflower meadow right on your nails. It’s bold, it’s brave, and it radiates a beautiful energy that people can’t help but notice.
Essential Ingredients:
- Four harmonizing bright polishes
- Mixing palette (or a piece of foil)
- Thin striping brush
- Clear blending gel or top coat
How to Prepare:
- Apply a white base coat to make your four colors truly pop.
- Place a drop of each color onto your palette.
- Using the striping brush, create thin, wavy lines of each color across the nail.
- While wet, use a clean brush to slightly blur the edges where the colors meet.
Budget Range
- Modelones Neon Gel Polish Set ($18)
- Glass Mixing Palette ($8)
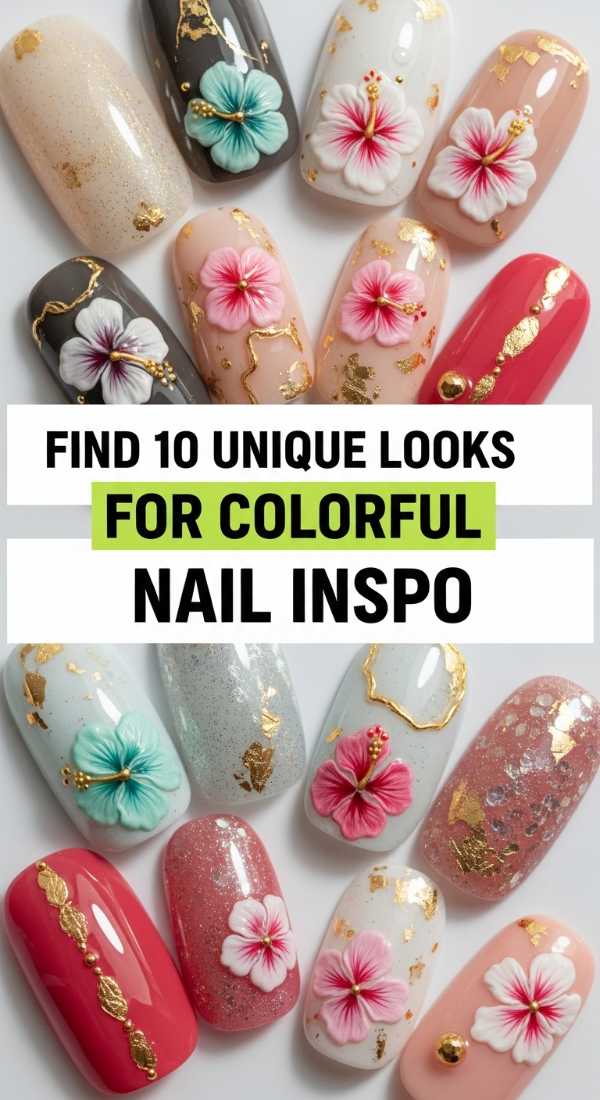
Ten Looks for Endless Inspo
Why to love this recipe:
Sometimes we just need a little spark to light our creative fire. These ten unique looks are like a mood board for your soul, offering a variety of ways to express your inner maximalist. There is no right or wrong here—only what makes your heart sing.
Essential Ingredients:
- Assorted glitters
- Multicolor rhinestones
- Matte and glossy top coats
- Variety of polish finishes
How to Prepare:
- Rainbow French: Each tip a different neon shade.
- Mismatched Solid: Each finger a completely different vibrant color.
- Fruit Medley: Hand-painted cherries, lemons, and berries.
- Abstract Blobs: Organic shapes in contrasting hues.
- Checkered Fun: Tiny squares in two bright tones.
- Animal Print: Neon leopard or zebra patterns.
- Galaxy Swirl: Deep purples and pinks with glitter.
- Floral Garden: Tiny daisies over a bright base.
- Geometric Gems: Triangles and circles in metallic shades.
- Negative Space: Bright colors leaving the natural nail exposed in shapes.
Budget Range
- Makartt Rhinestone Glue Kit ($10)
- Amazon Bulk Nail Charms ($9)
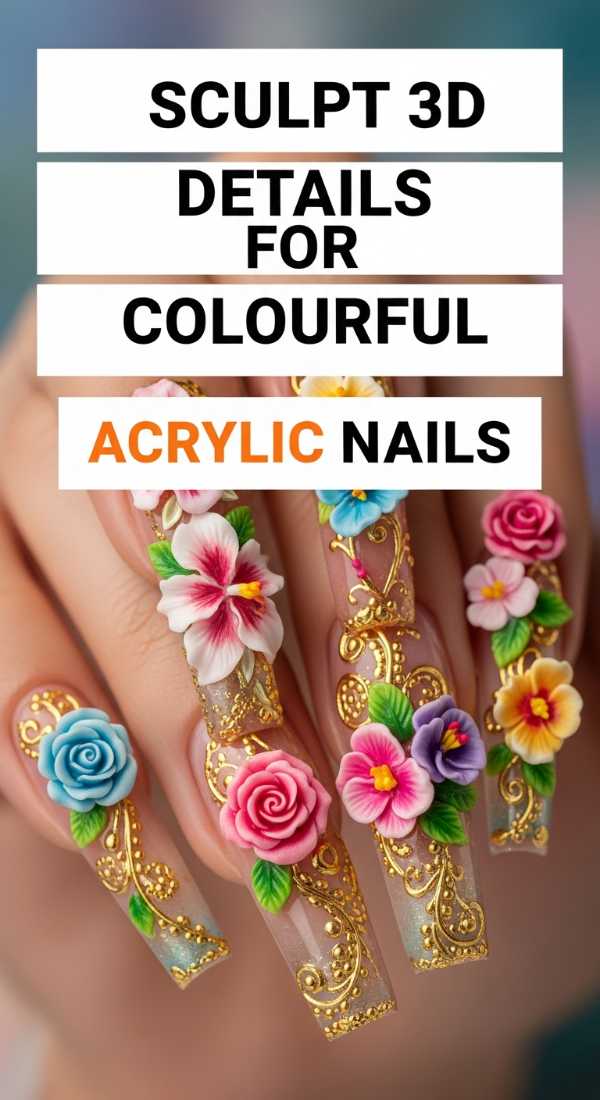
Sculpting 3D Acrylic Dreams
Why to love this recipe:
Adding texture to your nails is like adding embroidery to a soft sweater—it adds depth and a touch of magic. Sculpting 3D details allows you to touch your art, creating a tactile experience that is as satisfying as it is beautiful.
Essential Ingredients:
- Acrylic powder (colored)
- Monomer liquid
- Size 2 3D sculpting brush
- Small dappen dish
How to Prepare:
- Dip your brush into the monomer, then into the colored powder to create a small bead.
- Place the bead onto the cured acrylic nail surface.
- Gently press and shape the bead into a petal, heart, or bow shape using the tip of the brush.
Budget Range
- Mia Secret Colored Acrylic Powder ($6 each)
- Saviland 3D Nail Art Brush ($8)
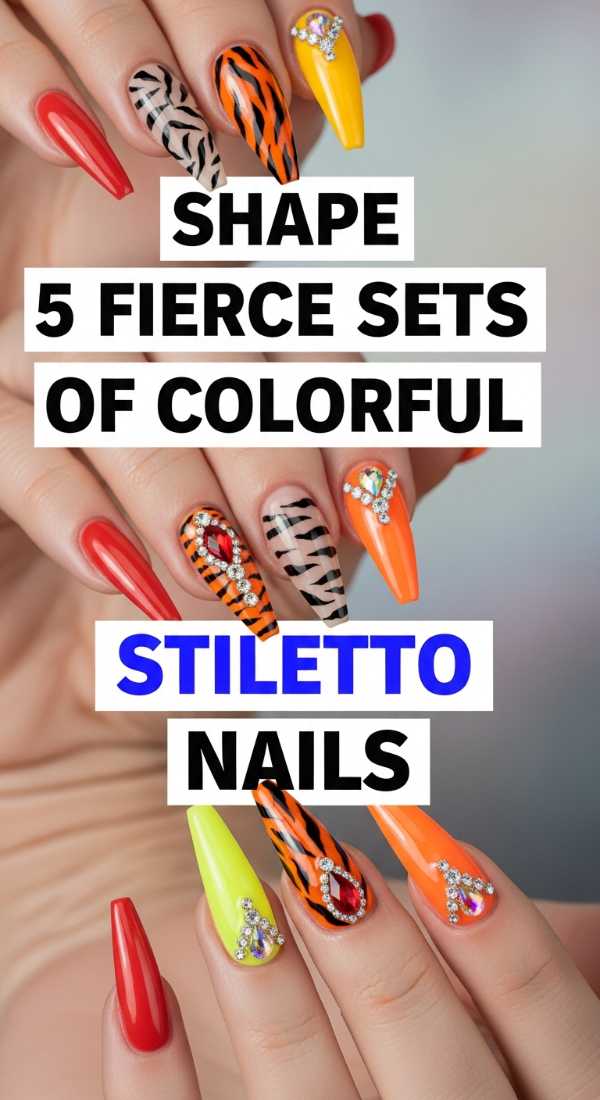
Five Fierce Stiletto Shapes
Why to love this recipe:
The stiletto shape is all about reclaiming your power, darling. It’s fierce, it’s long, and it provides the perfect canvas for maximalist expression. These five sets are designed to make you feel like the goddess you are, ready to take on the world with grace.
Essential Ingredients:
- Long stiletto nail tips
- Strong nail glue
- Heavy-duty nail file (100/180 grit)
- Electric nail drill (optional)
How to Prepare:
- Sunset Set: A vertical gradient of orange, pink, and yellow.
- Electric Ocean: Deep blues with silver foil accents.
- Gem-Encrusted: A full nail of multi-sized crystals.
- Glitter Bomb: Chunky holographic glitter from base to tip.
- Abstract Line Work: Stark black lines over a neon rainbow base.
Budget Range
- Aproca Stiletto Nail Tips ($12)
- MelodySusie Electric Nail Drill ($25)
Neon Texture Triple Threat
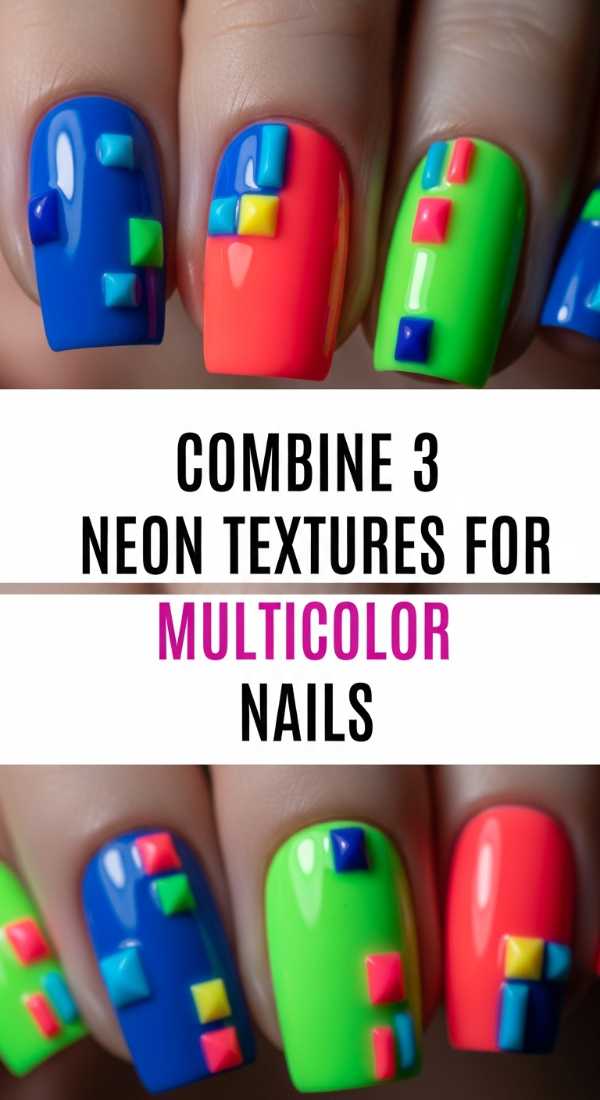
Why to love this recipe:
Why choose one finish when you can have three? Combining textures is a sophisticated way to play with maximalism. It’s a sensory delight—the contrast between matte and gloss is like the balance between a soft whisper and a joyful shout.
Essential Ingredients:
- Neon polish
- Matte top coat
- Sugar effect powder (fine glitter)
- Glossy top coat
How to Prepare:
- Paint your nails with your favorite neon shade.
- Apply matte top coat to the index and pinky fingers.
- Apply glossy top coat to the thumb and middle finger.
- While the ring finger is wet with top coat, sprinkle the sugar powder over it for a textured finish.
Budget Range
- OPI Matte Top Coat ($11)
- Born Pretty Sugar Powder ($7)
Soft Pastel Gradient Blending
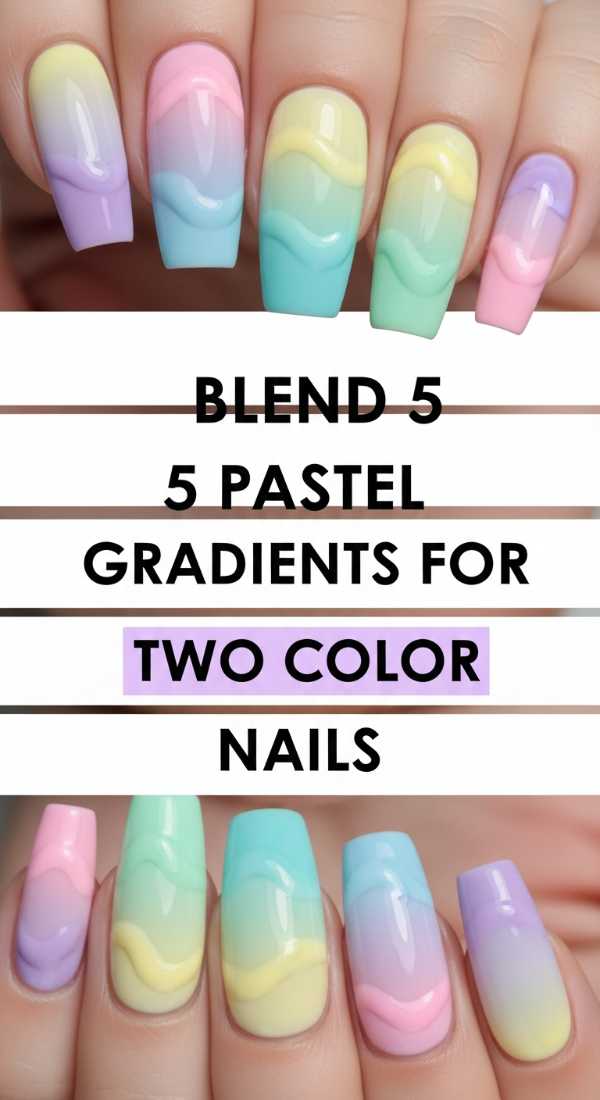
Why to love this recipe:
For my loves who want maximalism with a gentle touch, pastel gradients are like a soft cloud-soft embrace. It’s a transition of colors that feels peaceful and harmonious, proving that bold art can also be incredibly soothing.
Essential Ingredients:
- 5 pastel shades (mint, lavender, peach, baby blue, soft pink)
- Wedge sponges
- Liquid latex (for easy cleanup)
How to Prepare:
- Apply liquid latex around the skin of your nails.
- Paint the pastel colors in stripes onto the makeup sponge.
- Dab the sponge onto the nail repeatedly to build the color and blend the lines.
- Peel the latex and apply a glossy top coat to smooth out the texture.
Budget Range
- Pueen Liquid Latex ($9)
- Zoya Pastel Polish Collection ($12 each)
Four Pro Acrylic Finishes
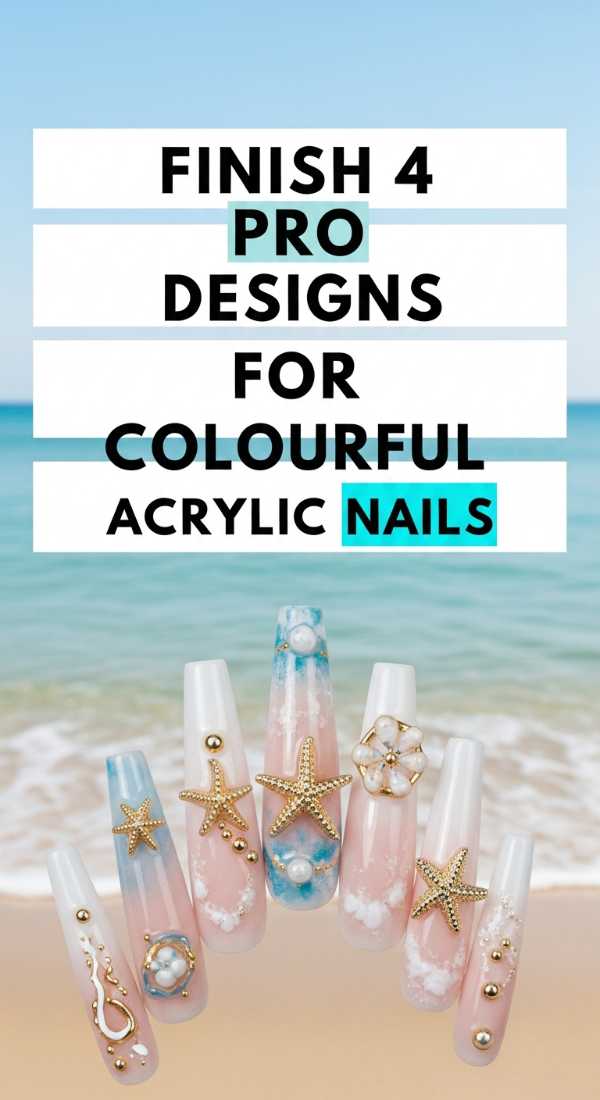
Why to love this recipe:
Ending our journey with these professional finishes is like putting the final ribbon on a beautiful gift. These designs are high-impact and show the world that you are a master of your own aesthetic. You deserve to feel this polished and powerful!
Essential Ingredients:
- Clear encapsulation acrylic
- Dried flowers or gold leaf
- Fine detail liners
- Buffing blocks
How to Prepare:
- Marbling: Swirl two colors of wet acrylic on the nail before they set.
- Ombre: Blend a colored tip into a nude base for a seamless transition.
- Encapsulation: Place gold leaf on a thin layer of acrylic, then cover with clear acrylic.
- Hand-Painted Florals: Use a fine brush to add intricate botanical details over a finished nail.
Budget Range
- Young Nails Core Acrylic Kit ($45)
- Real Dried Flowers for Nails ($6)
A Warm Note from My Heart to Yours
Oh, sweet friends, I hope this guide has filled your heart with as much inspiration as it has mine. Remember, your nails are just another way to let your beautiful inner light shine on the outside. There is no such thing as ‘too much’ when it comes to expressing who you are. Whether you choose one tiny rhinestone or a full set of neon stilettos, do it with love for yourself. You are a masterpiece, and your nails are just the frame. Go out there and sparkle, loves!