
From TikTok to Your Table: Mastering the Viral Simple Board Trend
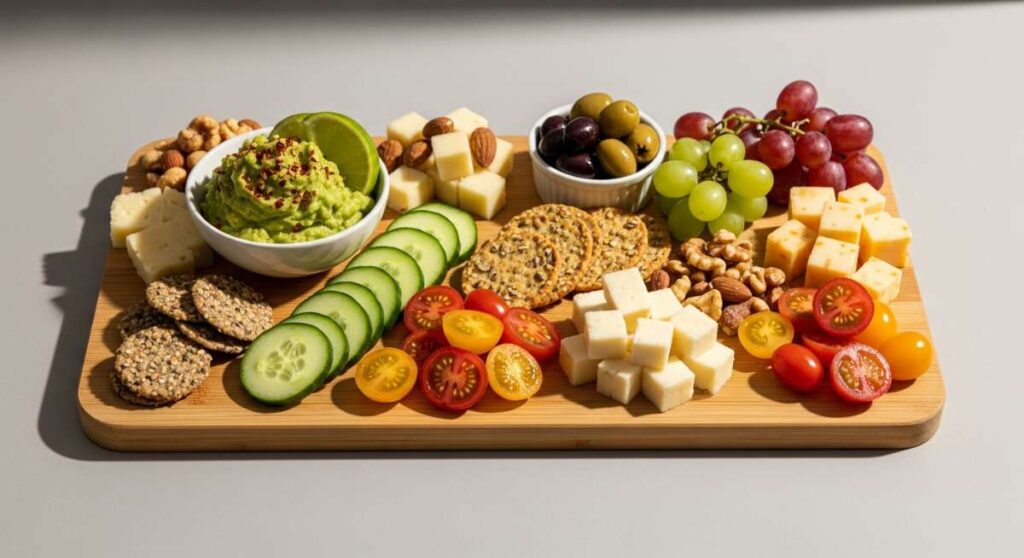
There is something inherently magical about the way a simple wooden board can transform a collection of ingredients into a communal masterpiece. We’ve all seen them scrolling through our feeds—those effortless, vibrant spreads that seem to whisper of long summer afternoons and laughter-filled evenings. It’s not just about the food; it’s about the feeling of togetherness, the clink of glasses, and the shared joy of reaching for that one perfect bite among a sea of colors and textures.
Bringing these viral trends into your own kitchen doesn’t require a culinary degree or a professional styling team. It’s about embracing the beauty of fresh, seasonal ingredients and the warmth of home cooking. Whether you’re hosting a backyard bash or simply looking to elevate a weeknight meal, these recipes are designed to be approachable, beautiful, and undeniably delicious. Let’s dive into the art of the simple board and reclaim the joy of eating well together.
How to make the creamiest rotel dip?

Why we love this
This dip is the ultimate comfort food, a velvety sea of melted cheese spiked with the perfect amount of heat and acidity from diced tomatoes and green chilies. There is a nostalgic warmth in every scoop, as the smooth texture coats a crunchy tortilla chip in a way that feels both indulgent and familiar. The aroma of simmering sausage and melting cheese wafting through the kitchen is enough to draw anyone to the table, creating an instant hub for conversation and snacking that lasts until the very last bit is scraped from the bowl.
Ingredients
- 1 lb ground breakfast sausage or chorizo
- 1 block (16 oz) Velveeta or high-quality melting cheese, cubed
- 2 cans (10 oz each) Ro-Tel diced tomatoes and green chilies, undrained
- 1/2 cup heavy cream (for extra silkiness)
- 1/4 cup chopped fresh cilantro
- Optional: sliced jalapeños for extra heat
How to make it
- Begin by browning your choice of sausage in a large skillet or heavy-bottomed pot over medium-high heat. Use a wooden spoon to break the meat into small, uniform crumbles. Cook until no pink remains and the meat has developed a slightly crispy, golden-brown exterior, which usually takes 7-10 minutes.
- Drain the excess grease from the pan, leaving just a hint for flavor. Reduce the heat to low-medium to ensure the cheese doesn’t scorch or separate.
- Add the cubed cheese into the pot along with both cans of Ro-Tel (keep the liquid from the cans as it provides essential flavor and moisture). Stir continuously with a silicone spatula, moving the cheese around until it is about 75% melted.
- Slowly pour in the heavy cream. This is the secret step for that professional, pourable consistency. Continue to stir until the mixture is completely smooth and homogeneous.
- Keep the dip on the lowest possible heat setting or transfer to a small slow cooker on ‘warm’ to maintain that liquid gold texture. Garnish with fresh cilantro and jalapeños right before serving to add a pop of brightness.
How to make fresh summer salad?

Why we love this
A fresh summer salad is like a garden on a plate, offering a crisp, refreshing crunch that instantly cools you down on a sweltering day. We love the interplay of sweet peak-season fruits against the earthy bitterness of leafy greens, all tied together by a zesty, homemade vinaigrette. Every forkful delivers a burst of hydration and a symphony of textures—from the snap of a cucumber to the creaminess of crumbled goat cheese—making it a light yet satisfying centerpiece for any viral food board.
Ingredients
- 4 cups mixed baby greens or arugula
- 1 cup fresh strawberries, sliced
- 1/2 cup blueberries
- 1 cucumber, thinly sliced into half-moons
- 1/4 cup toasted pecans or walnuts
- 2 oz honey goat cheese, crumbled
- Dressing: 3 tbsp olive oil, 1 tbsp balsamic glaze, 1 tsp honey, salt, and pepper
How to make it
- Start by washing your greens in cold water and using a salad spinner to ensure they are bone-dry. Any excess moisture will prevent the dressing from adhering to the leaves and lead to a soggy salad.
- In a small glass jar, combine the olive oil, balsamic glaze, honey, salt, and pepper. Shake vigorously until the oil and vinegar emulsify into a thick, glossy dressing.
- Place the dried greens in a large wooden bowl. Drizzle half of the dressing over the leaves and toss gently with your hands or large tongs to ensure every leaf is lightly coated.
- Layer the sliced strawberries, blueberries, and cucumbers over the top of the greens. Do not toss again yet; layering keeps the fruit from sinking to the bottom and maintains the visual appeal.
- Finish by sprinkling the toasted nuts and crumbled goat cheese over the top. Drizzle the remaining dressing just before serving. For a pro tip: toast your nuts in a dry pan over medium heat for 3 minutes until they become fragrant to unlock their full flavor profile.
How to make chicken caesar wraps?

Why we love this
The chicken Caesar wrap is a masterclass in handheld satisfaction, combining the savory depth of grilled chicken with the iconic tang of Caesar dressing. We love the contrast between the soft, pliable flour tortilla and the explosive crunch of romaine lettuce and golden croutons tucked inside. It feels like a complete meal that you can enjoy while mingling, offering a salty, garlicky punch that is balanced by the coolness of the wrap, making it an essential addition to any social dining experience.
Ingredients
- 2 large flour tortillas
- 1 cup grilled chicken breast, sliced into strips
- 2 cups romaine lettuce, chopped into bite-sized pieces
- 1/4 cup shaved Parmesan cheese
- 1/2 cup crushed croutons
- 1/3 cup creamy Caesar dressing
- 1/2 tsp cracked black pepper
How to make it
- Warm your flour tortillas for about 10-15 seconds in a dry pan or microwave. This makes them much more flexible and prevents them from tearing when you fold them.
- In a medium mixing bowl, combine the chopped romaine, sliced chicken, Parmesan cheese, and crushed croutons. Pour the Caesar dressing over the mixture and toss thoroughly. You want every component to be well-coated so that every bite is flavorful.
- Lay the warm tortilla flat on a clean surface. Place half of the chicken mixture in the lower center of the tortilla, leaving about two inches of space at the bottom and sides.
- Fold the bottom of the tortilla up over the filling, then tuck in the sides tightly. Continue rolling upward while applying gentle pressure to keep the wrap compact.
- For a gourmet touch, place the finished wrap seam-side down in a hot skillet for 30 seconds to sear it shut. Slice diagonally with a sharp serrated knife to show off the beautiful cross-section of ingredients.
How to make tomato cucumber salad?

Why we love this
This salad is the epitome of simplicity, celebrating the raw, vibrant flavors of peak-summer produce. There is a rustic charm in the way the tomato juices mingle with the vinegar to create a natural sauce that begs to be soaked up with a piece of crusty bread. The sharp bite of red onion provides a perfect counterpoint to the cooling cucumber, while fresh herbs fill the air with an intoxicating, grassy aroma that signals the height of the season.
Ingredients
- 3 large heirloom tomatoes or 2 cups cherry tomatoes, halved
- 2 English cucumbers, sliced into thick rounds
- 1/2 red onion, very thinly sliced
- 1/4 cup fresh parsley or dill, chopped
- 2 tbsp extra virgin olive oil
- 1 tbsp red wine vinegar
- Flaky sea salt and cracked black pepper to taste
How to make it
- If using large tomatoes, core them and cut them into irregular, bite-sized wedges. This creates more surface area for the dressing to cling to. If using cherry tomatoes, a simple slice down the middle is sufficient.
- Place the cucumbers and tomatoes in a shallow bowl. Add the thinly sliced red onions. To take the “bite” out of the onions, you can soak the slices in ice water for 10 minutes before adding them to the salad.
- Whisk the olive oil and red wine vinegar together in a small bowl until combined. Pour the dressing over the vegetables.
- Add the fresh herbs and a generous pinch of flaky sea salt. The salt is crucial here; it draws out the moisture from the tomatoes, creating a delicious “pot liquor” at the bottom of the bowl.
- Toss very gently to avoid bruising the tomatoes. Let the salad sit at room temperature for at least 15 minutes before serving. This resting period allows the flavors to marinate and develop their full complexity.
How to make fresh watermelon salad?

Why we love this
Watermelon salad is a revelation for the palate, offering a surprising and sophisticated balance of sweet, salty, and minty notes. The icy, refreshing texture of the fruit is the perfect canvas for the creamy, briny crumbles of feta cheese. It’s visually stunning on a board, with its bright pink hues contrasted against deep green mint and white cheese, making it the ultimate conversation starter and the most refreshing bite of the entire summer.
Ingredients
- 6 cups seedless watermelon, cubed into 1-inch squares
- 1/2 cup feta cheese, crumbled
- 1/4 cup fresh mint leaves, torn or chiffonade
- 1 tbsp lime juice
- 1 tbsp extra virgin olive oil
- Optional: Balsamic glaze for drizzling
How to make it
- Cube the watermelon into uniform 1-inch squares. For the best texture, ensure the watermelon has been chilled in the refrigerator for at least 4 hours prior to cutting. Cold watermelon provides a much better structural snap.
- Spread the watermelon cubes out on a large flat platter or board. Avoid stacking them too high so each piece can be garnished.
- Squeeze fresh lime juice evenly over the fruit. The acidity of the lime enhances the natural sweetness of the watermelon and provides a zesty bridge to the salty cheese.
- Sprinkle the crumbled feta and fresh mint over the top. Tearing the mint leaves by hand just before serving releases the essential oils and provides a much more potent aroma than pre-cutting them.
- Finish with a very light drizzle of high-quality olive oil and, if desired, a few decorative zig-zags of balsamic glaze. Serve immediately, as watermelon will begin to release its juices quickly once salted or dressed.
How to make marinate grilled chicken?

Why we love this
Properly marinated grilled chicken is the backbone of a great food board, offering a smoky, juicy protein that pairs beautifully with almost anything. We love the way a well-crafted marinade permeates the meat, ensuring every bite is tender and infused with garlic, herbs, and citrus. The charred edges from the grill add a complex bitterness that balances the richness of the meat, creating a sensory experience that is as much about the tempting aroma of the grill as it is about the succulent flavor.
Ingredients
- 1.5 lbs chicken thighs or breasts
- 1/3 cup olive oil
- 1/4 cup lemon juice
- 3 cloves garlic, minced
- 1 tbsp dried oregano
- 1 tsp smoked paprika
- 1 tsp salt and 1/2 tsp black pepper
How to make it
- In a large resealable bag or shallow glass dish, whisk together the olive oil, lemon juice, minced garlic, oregano, paprika, salt, and pepper. This creates an acidic and flavorful environment that will break down the muscle fibers for tenderness.
- Add the chicken to the marinade. If using breasts, pound them to an even thickness first to ensure they cook at the same rate. Ensure every piece of meat is fully submerged or coated.
- Refrigerate for at least 30 minutes, though 2-4 hours is ideal for maximum flavor penetration. Do not exceed 12 hours, as the lemon juice can start to “cook” the meat and make the texture mealy.
- Preheat your grill to medium-high heat (about 400°F). Clean and oil the grates to prevent sticking. Place the chicken on the grill and leave it undisturbed for 5-6 minutes to develop deep sear marks.
- Flip the chicken and cook for another 5-8 minutes, or until the internal temperature reaches 165°F (74°C). Remove the chicken from the grill and let it rest for a full 10 minutes before slicing. This resting period is non-negotiable; it allows the juices to redistribute so the meat stays moist on your board.
How to make summer pasta?

Why we love this
Summer pasta is all about lightness and the celebration of the “no-sauce” sauce. We love how a simple base of high-quality olive oil and starchy pasta water can transform garlic and seasonal vegetables into a silky, elegant coating for every strand of noodles. It feels sophisticated yet effortless, providing a warm, comforting element to the board that doesn’t feel heavy, allowing the natural sweetness of sautéed zucchini or burst tomatoes to shine through with every forkful.
Ingredients
- 12 oz spaghetti or linguine
- 1/4 cup extra virgin olive oil
- 4 cloves garlic, thinly sliced
- 2 cups cherry tomatoes
- 1 medium zucchini, sliced into ribbons
- 1/2 cup fresh basil leaves
- 1/2 cup grated Pecorino Romano or Parmesan
- Red pepper flakes to taste
How to make it
- Bring a large pot of heavily salted water to a boil. Cook the pasta according to the package instructions until it is “al dente” (firm to the bite). Crucially, reserve 1 cup of the starchy pasta water before draining the noodles.
- While the pasta cooks, heat the olive oil in a large skillet over medium heat. Add the sliced garlic and red pepper flakes. Sauté for 1-2 minutes until the garlic is golden and fragrant, being careful not to let it burn.
- Add the cherry tomatoes to the skillet. Cook for 5-7 minutes, stirring occasionally, until the skins begin to blister and burst, releasing their juices into the oil.
- Add the zucchini ribbons to the pan and sauté for just 2 minutes until they are slightly softened but still retain their vibrant green color.
- Toss the drained pasta into the skillet. Pour in half of the reserved pasta water and the grated cheese. Toss vigorously with tongs over medium heat. The cheese and water will emulsify with the oil to create a light, creamy sauce. Add more pasta water if the mixture looks too dry. Finish with fresh basil and serve immediately.
How to bake banana bread?

Why we love this
The scent of banana bread baking in the oven is the ultimate olfactory hug, filling the home with notes of caramelized sugar, warm cinnamon, and ripened fruit. We love the dense, moist crumb that yields perfectly to a smear of salted butter, and the way it works just as well as a morning treat as it does a late-night snack. It’s a rustic, soulful addition to a food board that adds a touch of sweetness and a homemade feel that guests find completely irresistible.
Ingredients
- 3 very ripe bananas, mashed
- 1/3 cup melted butter (unsalted)
- 3/4 cup granulated sugar
- 1 large egg, beaten
- 1 tsp vanilla extract
- 1 tsp baking soda
- Pinch of salt
- 1.5 cups all-purpose flour
- 1/2 tsp cinnamon
How to make it
- Preheat your oven to 350°F (175°C) and grease a 4×8-inch loaf pan thoroughly with butter or non-stick spray.
- In a large mixing bowl, mash the ripe bananas with a fork until they are mostly smooth with just a few small lumps remaining. Use bananas that are covered in brown spots for the best flavor and moisture content.
- Stir the melted butter into the mashed bananas. Add the sugar, beaten egg, and vanilla extract. Mix until well combined and smooth.
- Sprinkle the baking soda, salt, and cinnamon directly over the wet mixture and stir. Finally, gently fold in the flour. Stop mixing as soon as no white streaks of flour remain—overmixing will result in a tough, rubbery loaf.
- Pour the batter into the prepared pan. Bake for 50 to 60 minutes. Check for doneness by inserting a toothpick into the center; it should come out clean or with just a few moist crumbs. Let the bread cool in the pan for 10 minutes before transferring to a wire rack. Slicing it while warm is tempting, but letting it cool completely helps the structure set and the flavors deepen.
How to make tortellini salad?
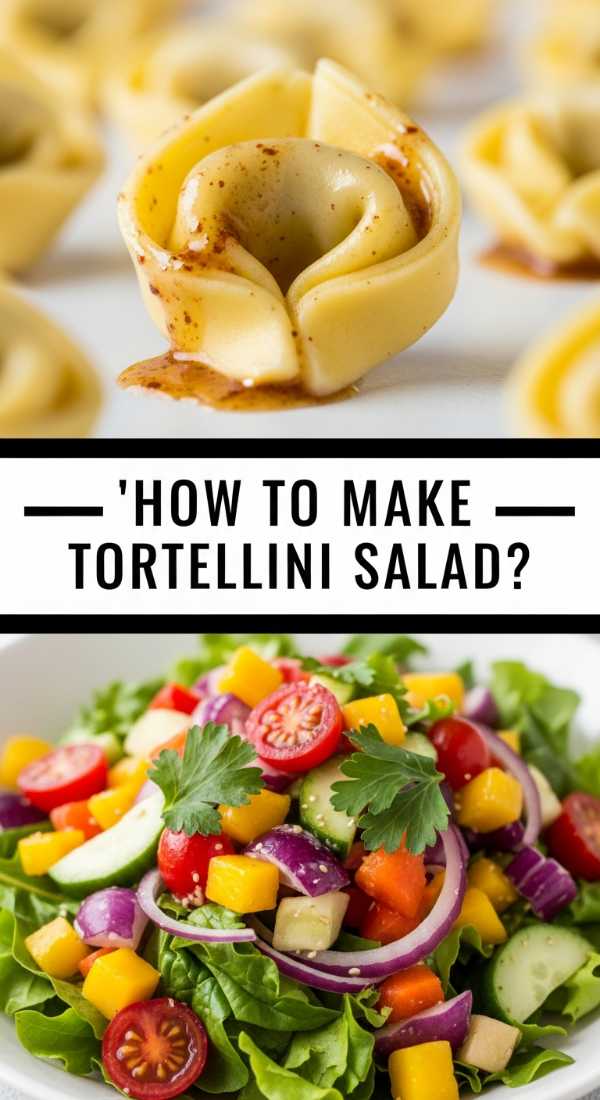
Why we love this
Tortellini salad is the ultimate “hearty salad” that bridges the gap between a side dish and a main event. We love the chewy, cheese-filled pasta pockets that act as little flavor sponges for a zesty Italian vinaigrette. Mixed with salty salami, sharp cheese, and crisp vegetables, it offers a diverse range of textures and bold, savory flavors in every bite. It’s a crowd-pleaser that stays fresh for hours, making it the perfect durable addition to a viral food board.
Ingredients
- 1 lb cheese tortellini (fresh or frozen)
- 1/2 cup hard salami, cubed or sliced
- 1/2 cup fresh mozzarella pearls
- 1/2 cup black olives, sliced
- 1/2 cup roasted red peppers, chopped
- 1/4 cup red onion, finely diced
- 1/2 cup Italian dressing
- Fresh parsley for garnish
How to make it
- Cook the tortellini in a large pot of boiling salted water. Be careful to follow the package directions closely, usually cooking for only 2-4 minutes until they float. Overcooked tortellini will fall apart when tossed with the other ingredients.
- Immediately drain the pasta and rinse it under cold running water. This stops the cooking process and prevents the pasta from becoming gummy.
- In a large bowl, combine the chilled tortellini, salami, mozzarella pearls, olives, roasted red peppers, and red onion.
- Pour the Italian dressing over the salad. Toss gently but thoroughly to ensure the dressing gets into the crevices of the tortellini.
- Cover and refrigerate for at least 1 hour before serving. This allows the pasta to absorb the flavors of the dressing. Give it one final toss before plating on your board and garnish with fresh parsley for a burst of color.
How to make summer desserts?

Why we love this
Summer desserts should feel like a celebration of the sun, focusing on chilled temperatures and the natural brilliance of fruit. We love the effortless elegance of a berry-loaded parfait or a simple fruit galette that doesn’t require hours in a hot kitchen. These treats provide a light, refreshing finish to a meal, offering a sweet lingering note that isn’t overly heavy. There’s a certain magic in the simplicity of cream, sugar, and ripe berries that perfectly encapsulates the ease of summer living.
Ingredients
- 2 cups fresh mixed berries (raspberries, blackberries, blueberries)
- 1 cup heavy whipping cream
- 2 tbsp powdered sugar
- 1 tsp vanilla bean paste
- Shortbread cookies or graham crackers, crushed
- Fresh mint for garnish
How to make it
- Place a metal or glass mixing bowl and your whisk attachment in the freezer for 10 minutes. A cold bowl is the secret to achieving stiff, stable peaks in your whipped cream.
- Pour the heavy cream, powdered sugar, and vanilla bean paste into the chilled bowl. Beat on medium-high speed until stiff peaks form. Stiff peaks mean the cream holds its shape when the whisk is lifted.
- In small glasses or jars, start by placing a layer of crushed cookies or crackers at the bottom to provide a crunchy base.
- Add a generous dollop of the whipped cream, followed by a handful of fresh mixed berries. Repeat the layers until the glass is full.
- Top with one perfect berry and a small mint leaf. Serve these immediately, or keep them chilled in the refrigerator for up to 2 hours. This “no-bake” approach keeps the kitchen cool and puts the focus entirely on the quality of the seasonal fruit.
Conclusion: Your Board, Your Rules
Mastering the viral simple board trend isn’t about perfection; it’s about the assembly of flavors that make you and your loved ones happy. These recipes are your foundation, but the true beauty lies in how you arrange them, the small garnishes you add, and the memories you create while sharing them. So, grab your largest board, pick a few of these summer favorites, and start building your own edible work of art. Happy hosting!