
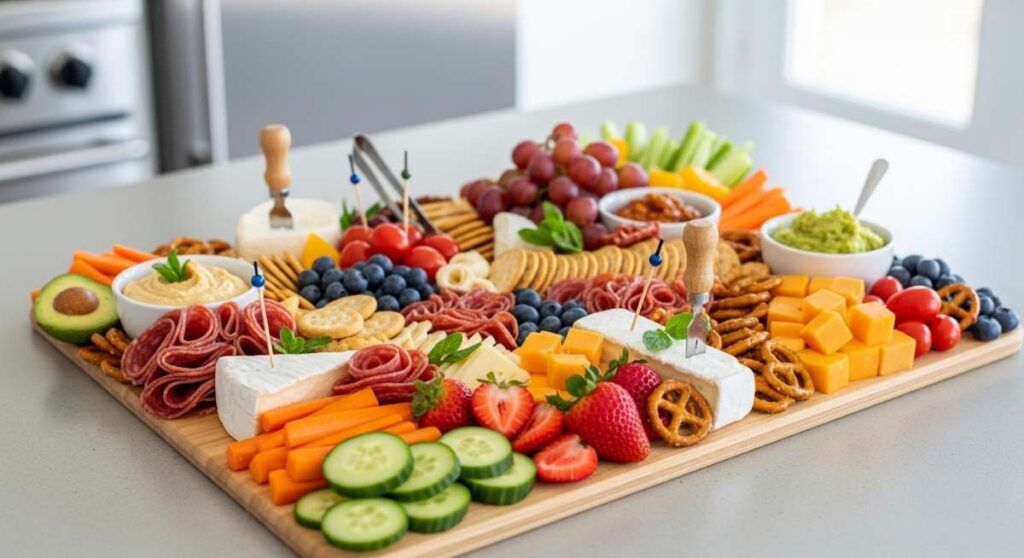
There is something undeniably magical about the way a simple wooden board can transform an ordinary afternoon into a curated experience. We’ve all been there—scrolling through TikTok at midnight, mesmerized by the rhythmic sound of a knife hitting a cutting board and the aesthetic arrangement of vibrant fruits, cheeses, and artisanal breads. These viral food boards aren’t just about the food; they are about the feeling of togetherness, the art of slow living, and the joy of sharing something beautiful with the people we love most.
Bringing these trends from your phone screen to your kitchen table is easier than it looks, and honestly, it’s a form of therapy. Whether you’re hosting a sun-drenched garden party or just want to elevate your Tuesday night dinner, mastering the food board aesthetic is about embracing color, texture, and seasonal freshness. In this guide, we are diving deep into ten viral ways to celebrate the seasons, from the delicate florals of spring to the sun-soaked flavors of summer, all served up with that signature blogger flair.
How to style spring cakes?

Why we love this
There is nothing quite like the sight of a spring cake standing tall on a marble board, adorned with the first blooms of the season. We love the contrast between a velvety, cloud-like buttercream and the rustic, organic look of edible pansies and pressed herbs. When you slice into it, the aroma of bright lemon zest and sweet vanilla fills the air, instantly making the room feel lighter and more joyful. It’s a sensory celebration of new beginnings, feeling both sophisticated and incredibly cozy at the same time.
Ingredients
- 2 1/2 cups All-purpose flour
- 1 1/2 cups Granulated sugar
- 1 tbsp Baking powder
- 1/2 tsp Salt
- 3/4 cup Unsalted butter (room temperature)
- 1 cup Whole milk
- 1 tbsp Vanilla bean paste
- 3 Large eggs
- Zest of 2 lemons
- Edible flowers (pansies, violas, or chamomile)
- Swiss meringue buttercream
How to make it
- Begin by preheating your oven to 350°F (175°C) and greasing two 8-inch round cake pans. Line the bottoms with parchment paper to ensure a clean release later; this is a professional secret for perfectly smooth sides.
- In a large bowl, sift together your flour, sugar, baking powder, and salt. Sifting is crucial here as it aerates the flour, resulting in that signature spring-light crumb texture.
- Using a stand mixer fitted with the paddle attachment, cream the softened butter and lemon zest together until the mixture is pale and fluffy, usually about 3 to 4 minutes. The friction releases the lemon oils for maximum fragrance.
- Add the eggs one at a time, beating well after each addition. Then, alternate adding your dry ingredients and the milk/vanilla mixture, starting and ending with the dry. Do not overmix; stop as soon as the last streak of flour disappears to keep the cake tender.
- Divide the batter evenly and bake for 30-35 minutes. You’ll know they are done when a toothpick inserted into the center comes out with just a few moist crumbs and the edges have slightly pulled away from the pan.
- Once cooled completely, apply a thin crumb coat of buttercream. For styling, use an offset spatula to create a semi-naked look, then gently press your edible flowers into the frosting in a cascading vine pattern for that viral TikTok aesthetic.
How to make summer salads?

Why we love this
Summer salads on a board are a revelation, moving away from soggy bowls to a vibrant landscape of crunch and color. We love the explosion of flavors—the salty kick of feta paired with the honeyed sweetness of a ripe peach, all tied together with the cooling fragrance of torn mint leaves. Every bite feels like a refreshing dip in a cold pool on a humid July afternoon, offering a perfect balance of hydration and indulgence that makes healthy eating feel like a true luxury.
Ingredients
- 4 cups Arugula or baby spinach
- 2 large Peaches, sliced and grilled
- 1 cup Fresh blueberries
- 1/2 cup Feta cheese, crumbled
- 1/4 cup Toasted pecans
- Fresh mint and basil leaves
- Balsamic glaze
- Extra virgin olive oil
- Flaky sea salt and cracked pepper
How to make it
- Start by preparing your stone fruit. Slice the peaches into thick wedges and lightly brush them with olive oil. Sear them on a hot grill pan for 2 minutes per side until distinct char marks appear; this caramelizes the natural sugars and adds a smoky depth.
- On a large wooden serving board, create a bed using the arugula. Instead of tossing it, scatter it loosely to maintain volume and prevent bruising the delicate leaves.
- Layer the grilled peaches and blueberries over the greens. Distribute them evenly so every guest gets a bit of fruit in every serving.
- Sprinkle the crumbled feta and toasted pecans over the top. The pecans provide a necessary textural contrast to the soft fruit and tender greens.
- Just before serving, tear the mint and basil leaves by hand—bruising them slightly as you do to release their aromatic oils—and scatter them over the board.
- Drizzle generously with high-quality olive oil and a thick balsamic glaze. Finish with a pinch of flaky sea salt to make the fruit flavors pop, and serve immediately while the peaches are still slightly warm.
How to make dirty spaghetti?

Why we love this
Dirty spaghetti—often known as Spaghetti all’Assassina—is the ultimate viral comfort food that challenges everything you know about pasta. We love it for its rebellious nature; instead of boiling the noodles in water, you char them in a pan until they are spicy, crispy, and infused with an intense tomato umami. The aroma is intoxicating, reminiscent of a wood-fired pizza oven, and the texture is a thrilling mix of tender chew and addictive crunch that keeps you coming back for more.
Ingredients
- 400g Spaghetti (dried)
- 3 cups Spicy tomato broth (diluted tomato paste/puree)
- 4 tbsp Extra virgin olive oil
- 3 cloves Garlic, thinly sliced
- 1-2 tsp Red pepper flakes (adjust for heat)
- Salt to taste
- Fresh parsley for garnish
How to make it
- In a separate pot, keep your tomato broth simmering on low heat. This broth is the “cooking liquor” that will flavor the pasta from the inside out.
- In a large, heavy-bottomed iron skillet (this is non-negotiable for the right char), heat the olive oil over medium-high heat. Sauté the garlic and red pepper flakes until the garlic is golden but not burnt.
- Place the raw, dry spaghetti directly into the hot oil. This feels wrong, but trust the process! Let the pasta fry for 2-3 minutes until the bottom strands start to brown and become brittle.
- Flip the pasta carefully and add two ladles of the hot tomato broth. It will sizzle violently. Let the liquid reduce completely until you hear a frying sound again.
- Repeat this process, adding broth and letting it sizzle down and char the pasta, for about 12-15 minutes. You are looking for “burnt” spots on the noodles—this is where the flavor lives.
- Once the pasta is al dente and coated in a thick, concentrated red sauce with plenty of crispy bits, transfer it to a board or platter, garnish with parsley, and serve with a warning that it’s spicy!
How to bake spring cookies?

Why we love this
Spring cookies are like little edible pieces of art, characterized by their delicate snap and bright, floral infusions. We love the way a simple shortbread can be elevated with the herbal notes of lavender or the zesty punch of lime, creating a treat that feels sophisticated enough for a tea party but simple enough for a Sunday bake. The golden edges and the buttery scent that fills the kitchen create an atmosphere of pure, domestic bliss that signals the end of winter’s chill.
Ingredients
- 1 cup Unsalted butter (softened)
- 1/2 cup Powdered sugar
- 2 cups All-purpose flour
- 1 tbsp Dried culinary lavender (optional)
- Zest of 1 lime
- 1/2 tsp Vanilla extract
- Pinch of salt
- Granulated sugar for rolling
How to make it
- Cream the softened butter and powdered sugar together in a bowl until the mixture is smooth and creamy. Using powdered sugar instead of granulated ensures a melt-in-your-mouth, short texture.
- Stir in the vanilla extract, lime zest, and the culinary lavender. If using lavender, crush it slightly between your fingers first to wake up the oils.
- Gradually add the flour and salt, mixing on low speed until a soft dough forms. Wrap the dough in plastic wrap and chill in the refrigerator for at least 30 minutes; this prevents the cookies from spreading too much in the oven.
- Preheat your oven to 325°F (160°C). Roll the chilled dough into 1-inch balls, then roll each ball in granulated sugar for a sparkly, crunchy exterior.
- Place the balls on a parchment-lined baking sheet and use the bottom of a glass to gently flatten them into discs about 1/2 inch thick.
- Bake for 12-15 minutes. The key is to remove them before they brown; you want them to remain pale with just the slightest hint of gold on the bottom. Let them cool on the sheet for 5 minutes before moving to a wire rack to firm up.
How to make spring soup?
Why we love this
Spring soup is the ultimate transition meal, offering the warmth of a bowl of comfort while celebrating the vibrant, light energy of the season. We love its brilliant emerald green color, usually derived from fresh peas and leeks, and the way a swirl of crème fraîche makes it feel incredibly indulgent. It’s light, airy, and tastes like a garden in a bowl, providing a hit of vitamins and freshness that makes you feel rejuvenated and ready for the sunny days ahead.
Ingredients
- 2 cups Fresh or frozen peas
- 2 large Leeks, white and light green parts only, sliced
- 1 large Potato, peeled and diced
- 4 cups Vegetable broth
- 2 tbsp Butter
- Handful of fresh mint
- 1/2 cup Crème fraîche or heavy cream
- Lemon juice
- Salt and white pepper
How to make it
- In a large pot, melt the butter over medium heat. Add the sliced leeks and sauté gently for 5-7 minutes. You want them soft and translucent, not browned, to maintain the soup’s bright color.
- Add the diced potato and vegetable broth. Bring to a boil, then reduce heat and simmer for about 10 minutes until the potato chunks are fork-tender.
- Stir in the peas and fresh mint. Cook for only 2-3 minutes; peas lose their vibrant green color if overcooked, so this step must be quick.
- Remove the pot from the heat. Use an immersion blender to puree the soup until it is completely smooth and silky. For an extra professional touch, pass the soup through a fine-mesh sieve.
- Whisk in the crème fraîche and a squeeze of fresh lemon juice. The acidity of the lemon cuts through the creaminess and makes the pea flavor sing.
- Season with salt and white pepper. Serve in shallow bowls with a drizzle of olive oil and a few pea shoots for a TikTok-ready presentation.
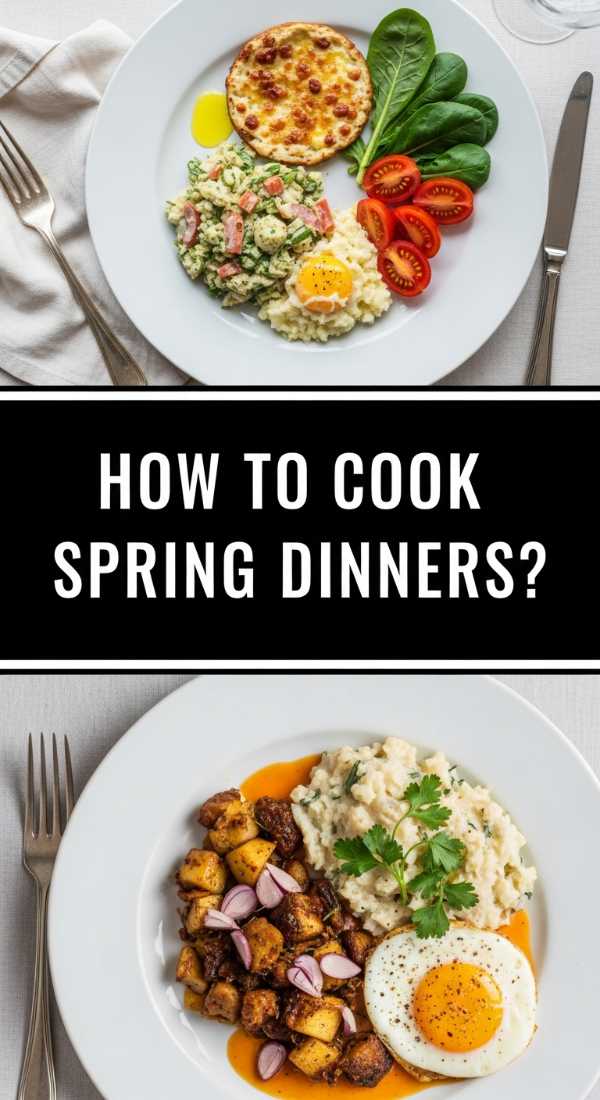
How to cook spring dinners?

Why we love this
Spring dinners are all about “sheet pan elegance”—minimal effort for maximum visual impact. We love the combination of tender proteins like lamb chops or salmon paired with the snappy, bright greens of asparagus and radishes. There’s a certain rusticity to serving a whole roasted meal on a large board in the center of the table, encouraging everyone to dig in and pass the plates. It feels wholesome, nourishing, and perfectly aligned with the breezy, effortless vibe of the season.
Ingredients
- 1 lb Small new potatoes, halved
- 1 bunch Asparagus, trimmed
- 1 lb Salmon fillets or Lamb chops
- 1 Lemon, thinly sliced
- 3 tbsp Olive oil
- 3 cloves Garlic, minced
- Fresh dill and parsley
- Salt and cracked black pepper
How to make it
- Preheat your oven to 400°F (200°C). On a large rimmed baking sheet, toss the halved new potatoes with 1 tablespoon of olive oil, salt, and pepper. Roast them alone for 15-20 minutes, as they take longer than the other ingredients.
- While the potatoes roast, prepare a herb rub by mixing the remaining olive oil, minced garlic, and chopped fresh herbs in a small bowl.
- Remove the tray from the oven and push the potatoes to the edges. Place the salmon fillets (or lamb) in the center and tuck the asparagus spears and lemon slices into the gaps.
- Drizzle the herb rub over the protein and vegetables. Ensure the asparagus is well-coated so it gets crispy rather than just steamed.
- Return the tray to the oven and bake for 10-12 minutes. For salmon, you are looking for an internal temp of 145°F and meat that flakes easily. For lamb, aim for a rosy medium-rare.
- To serve, arrange everything on a large wooden board. Garnish with more fresh herbs and serve with a side of garlicky yogurt or hollandaise sauce for a truly viral-worthy feast.
How to use sourdough discard?

Why we love this
Sourdough discard is the secret weapon of the sustainable kitchen, and we love the tangy, complex depth it adds to almost any recipe. It’s incredibly satisfying to take something that is usually thrown away and turn it into golden, crispy crackers or fluffy pancakes that boast a unique fermented flavor. The slight acidity balances out fats and sugars perfectly, making your baked goods feel more intentional and artisanal. Plus, the bubbling texture of the discard is just so satisfying to work with!
Ingredients
- 1 cup Sourdough discard (unfed)
- 1/2 cup All-purpose flour
- 2 tbsp Melted butter or olive oil
- 1 tsp Dried herbs (rosemary or thyme)
- 1/2 tsp Sea salt
- Optional: Everything bagel seasoning
How to make it
- Preheat your oven to 325°F (160°C) and line a large baking sheet with parchment paper or a silicone mat. This is for making discard crackers, which are the ultimate addition to a food board.
- In a medium bowl, whisk together the sourdough discard, melted butter, and dried herbs. The consistency should be similar to a thick pancake batter.
- Pour the mixture onto the prepared baking sheet. Use an offset spatula to spread it as thinly and evenly as possible. The thinner you go, the crispier the crackers will be—aim for almost translucent.
- Sprinkle the sea salt and optional seasoning over the top. Bake for 10 minutes to set the batter slightly.
- Remove from the oven and use a pizza cutter to score the dough into squares or diamonds. This ensures they break into neat shapes later.
- Return to the oven for another 20-30 minutes until the crackers are golden brown and completely dry to the touch. Let them cool entirely on the sheet to reach maximum crunch before breaking them apart and serving.
How to make summer pasta?

Why we love this
Summer pasta is the antithesis of heavy, winter sauces; it’s all about heat, oil, and the freshest produce imaginable. We love the simplicity of a “no-cook” sauce where the heat of the pasta gently wilts cherry tomatoes and softens cloves of garlic until they are buttery and mild. The aroma of fresh basil being torn over a warm plate is the literal scent of summer, and the lightness of the dish means you can enjoy a full bowl and still feel energized for a sunset stroll.
Ingredients
- 1 lb Linguine or Angel Hair pasta
- 2 cups Cherry tomatoes, halved
- 1/2 cup Extra virgin olive oil
- 4 cloves Garlic, very thinly sliced
- 1/2 tsp Red pepper flakes
- 1 cup Fresh basil leaves
- 1/2 cup Grated Parmesan or Pecorino
- Zest of 1 lemon
How to make it
- In a large bowl, combine the halved cherry tomatoes, olive oil, sliced garlic, red pepper flakes, and a generous pinch of salt. Let this sit at room temperature for at least 30 minutes. This “marinating” phase allows the salt to draw out the tomato juices, creating a raw sauce base.
- Bring a large pot of heavily salted water to a boil. Cook your pasta according to package directions, but pull it out 1 minute before it’s officially al dente.
- Reserve 1/2 cup of the starchy pasta water—this is the “liquid gold” that will help your oil and tomato juices emulsify into a silky sauce.
- Add the hot pasta directly into the bowl with the raw tomato mixture. Toss vigorously with tongs, adding the reserved pasta water a tablespoon at a time. The heat from the pasta will slightly cook the garlic and soften the tomatoes.
- Fold in the fresh basil leaves and lemon zest. The basil should just barely wilt, keeping its bright green color.
- Finish with a heavy dusting of grated cheese. Serve directly from the bowl or spread it out on a platter topped with a few more glugs of olive oil for that glossy, viral look.
How to make summer meals?

Why we love this
Summer meals are best when they feel like an assembly job rather than a chore. We love the “deconstructed” approach, where grilled proteins, charred corn, and cool dips are laid out for everyone to customize their own plates. It’s the ultimate way to eat during a heatwave—no one wants to be stuck over a stove, so the focus shifts to high-quality ingredients and quick cooking methods like grilling. It’s casual, communal, and perfectly captures the relaxed spirit of a summer evening.
Ingredients
- Grilled Chicken skewers or Halloumi
- 4 ears of Corn, husks removed
- 1 cup Hummus or Tzatziki
- Warm pita bread or flatbreads
- Sliced cucumbers and radishes
- Pickled red onions
- Lemon wedges
How to make it
- Heat your grill to high. Lightly oil the corn and chicken skewers. Grill the corn, turning frequently, until charred in spots all over (about 8-10 minutes). Grill the chicken until cooked through and slightly charred.
- While the main components are grilling, prepare your “cool” elements. Slice the cucumbers into rounds and prep the radishes. Place the dips into small, aesthetic bowls.
- Toast the pita bread directly on the grill for 30 seconds per side until they have grill marks and are pliable.
- To assemble the meal board, place the bowls of dip in opposite corners to create balance. Arrange the grilled chicken and corn in the center.
- Fill the remaining gaps with the fresh vegetables, pickled onions, and lemon wedges. The goal is to have no empty space on the board, creating a “bountiful” look.
- Serve with plenty of napkins and encourage guests to build their own wraps or bowls, making for a fun, interactive dining experience.
How to prepare spring brunch?
[IMAGE_10]
Why we love this
Spring brunch is the crown jewel of the weekend, a time to slow down and enjoy the soft morning light. We love the mixture of sweet and savory—think fluffy Dutch babies topped with berries alongside perfectly poached eggs on avocado toast. It’s a meal that begs for a floral centerpiece and a carafe of something sparkling. The atmosphere is always lighthearted and hopeful, making it the perfect setting for catching up with friends or celebrating a special family occasion.
Ingredients
- 1 loaf Sourdough bread, sliced and toasted
- 4 Ripe avocados
- 8 Eggs (for poaching or soft boiling)
- Smoked salmon
- Capers and thinly sliced red onion
- Fresh berries (strawberries, raspberries)
- Honey and Greek yogurt
- Microgreens for garnish
How to make it
- Start by prepping your “toast station.” Toast the sourdough slices until golden and rub each piece with a halved garlic clove while still warm for a subtle flavor boost.
- In a small bowl, mash the avocados with a squeeze of lime juice and a pinch of chili flakes. Spread this generously over half of the toast slices.
- Poach your eggs in simmering water with a splash of vinegar for 3 minutes until the whites are set but the yolks are still runny. Place one egg on each avocado toast.
- On the remaining toast slices, layer the smoked salmon, red onion, and a sprinkle of capers. This provides a salty, savory alternative to the creamy avocado.
- On a large board, arrange the different toasts. In the center, place a large bowl of Greek yogurt topped with a mountain of fresh berries and a generous drizzle of honey.
- Scatter microgreens over the eggs and salmon for a pop of fresh green. Serve with chilled mimosas or a pot of floral Earl Grey tea to complete the spring vibe.
The Art of the Board
Mastering the viral food board trend is really about giving yourself permission to play with your food. There are no strict rules, only guidelines that help you highlight the natural beauty of seasonal ingredients. By focusing on textures, heights, and a vibrant color palette, you turn a simple meal into an unforgettable memory. So, grab your favorite wooden board, head to the farmer’s market, and start creating your own edible masterpiece!
Frequently Asked Questions
What is the best type of board to use?
A large, food-safe wooden board is classic, but marble or slate can also work beautifully, especially for cold items like cheese or fruit.
How do I keep my food from sliding around?
Use small bowls for dips, nuts, or olives. These act as “anchors” on the board that you can then pile other ingredients against.
Can I make these boards ahead of time?
You can prep the individual components (slicing fruit, making dips) ahead of time, but it’s best to assemble the board right before serving to keep everything fresh and crisp.