

From TikTok to Tabletop: The Ultimate Guide to Viral Home Styling
Have you ever found yourself scrolling through your feed at 2 AM, mesmerized by the way a soft linen curtain catches the golden hour light or the satisfying crunch of fresh wood shavings in a Pinterest-perfect chicken coop? We’ve all been there—caught in the spell of a curated life that feels both impossibly beautiful and deeply desirable. There is a specific magic in transforming those digital pixels into a physical reality that you can touch, smell, and inhabit every single day. It’s about moving beyond the screen and bringing that ‘main character energy’ into your own home and digital footprint.
This journey from ‘viral inspiration’ to ‘lifestyle reality’ isn’t just about aesthetics; it’s about the feeling of peace that comes with an organized space and the joy of creating something with your own two hands. Whether you are tending to your backyard flock or redesigning your personal website, these viral trends are more than just fleeting moments—they are blueprints for a more intentional, beautiful way of living. Let’s dive into how you can bring these dreamy aesthetics to life in your own world, step by gorgeous step.
How to Build a Cleaner Coop for Happy Healthy Hens

Why we love this
There is nothing quite like the rustic, wholesome aroma of fresh pine and dried lavender wafting from a well-maintained chicken coop on a crisp autumn morning. Walking out to collect warm, pastel-colored eggs nestled in clean, soft bedding provides a sense of self-sufficiency that is truly unmatched in modern life. The sight of happy hens scratching through a pristine environment, their feathers glossy and eyes bright, turns a simple backyard chore into a meditative ritual that connects you deeply to the cycles of nature and the rewarding rhythm of farmstead living.
Essential Elements:
- Industrial-grade shop vacuum
- Large-flake kiln-dried pine shavings
- Organic nesting box herbs (lavender, rose, calendula)
- Non-toxic coop cleaner or white vinegar solution
- Stiff-bristled scrubbing brush
- Diatomaceous earth (food grade)
How to make it
- Begin by removing all existing bedding and waste from the coop; use a sturdy rake for the heavy lifting and follow up with a shop vacuum to get into the crevices where dust and mites hide.
- Mix a solution of one part white vinegar to two parts water and spray down all surfaces, including roosting bars and nesting boxes, letting the liquid sit for ten minutes to break down organic matter before scrubbing vigorously with a stiff brush.
- Open all windows and doors to allow for maximum cross-ventilation, ensuring the wood is completely bone-dry to the touch before proceeding, as trapped moisture is the primary cause of ammonia buildup and respiratory issues in birds.
- Sprinkle a thin, even layer of food-grade diatomaceous earth across the floor and in the corners to act as a natural deterrent against lice and mites, focusing especially on the areas under the roosts.
- Apply a thick, five-inch layer of kiln-dried pine shavings, spreading them evenly to provide a soft cushion that absorbs moisture and odors effectively throughout the week.
- Finish by scattering a handful of dried nesting herbs into each box, which not only smells heavenly but provides a calming environment for your hens to lay their daily bounty.
How to Style a Blue Aesthetic Profile for an Organized Digital Space

Why we love this
Stepping into a digital space draped in shades of cerulean, navy, and soft sky blue feels like a deep, cooling breath of fresh air for your mind. In a world of digital clutter, a cohesive blue aesthetic acts as a visual anchor, providing a sense of professional serenity and intellectual clarity that boosts productivity and reduces screen-time fatigue. The way the cool tones interact with crisp white borders creates a high-contrast yet soothing environment that makes every icon and folder feel like a deliberate piece of a larger, more peaceful puzzle.
Essential Elements:
- A curated palette of 5 blue tones (Hex codes: #E0F2F1, #81D4FA, #0288D1, etc.)
- Transparent PNG icons for mobile or desktop apps
- High-resolution minimalist blue wallpapers
- Custom widget Creator (like Widgetsmith or Shortcuts)
- Matching font family (Sans-serif for modern, Serif for classic)
How to make it
- Start by auditing your current digital assets; remove all unused apps and files from your home screen or desktop to create a ‘blank canvas’ that won’t distract from the new aesthetic.
- Select a primary wallpaper that features a soft gradient or a minimalist blue texture, ensuring the image is high-resolution (at least 300 DPI) so it remains crisp behind your icons.
- Use a shortcut or icon-theming app to replace standard colorful icons with custom versions that use your specific blue palette, maintaining a consistent line-weight across all symbols for a professional finish.
- Group your apps into folders labeled with lowercase text or simple emojis to maintain a clean, ‘un-cluttered’ look that allows the background color to shine through.
- Configure your widgets—such as calendars or weather updates—using a background color that matches your darkest blue shade and a text color that matches your lightest shade for maximum readability.
- Set your system-wide ‘Dark Mode’ or ‘Night Shift’ settings to lean slightly more toward the blue-light filtered side to keep the visual experience consistent even as the sun goes down.
How to Choose Modern Concrete Colors for an Elevated Backyard Oasis

Why we love this
Modern concrete isn’t just gray; it’s a sophisticated architectural statement that brings an industrial-chic elegance to any outdoor sanctuary. When you choose the right hue—perhaps a deep charcoal or a warm, sandy greige—the concrete takes on a velvety texture that feels incredibly luxurious underfoot and looks stunning against the vibrant green of manicured lawns. There is a grounding, permanent feeling to concrete that provides a stable foundation for your most cherished outdoor memories, from candlelit dinners to quiet mornings with a cup of coffee.
Essential Elements:
- Penetrating concrete stain or integral color pigments
- Concrete sealer (matte or high-gloss finish)
- Acid-based etching solution
- Professional-grade pressure washer
- Microfiber applicator pads and long-handled rollers
How to make it
- Thoroughly clean the existing concrete surface using a high-pressure washer to remove all oils, dirt, and previous sealants; any leftover debris will prevent the new color from bonding correctly.
- Apply an acid etching solution according to the manufacturer’s instructions, using a plastic watering can for even distribution, and scrub with a stiff broom to open the ‘pores’ of the concrete.
- Neutralize the acid with a mixture of baking soda and water, then rinse the surface three more times until the water runs completely clear, and let it dry for at least 24 to 48 hours.
- Apply your chosen concrete stain using a circular motion with a microfiber applicator to avoid lap marks, starting from the furthest corner and working your way toward an exit point.
- Wait for the first coat to dry completely—usually 4 to 6 hours—before deciding if a second coat is needed to deepen the saturation or create a more opaque, modern finish.
- Once the color has cured for 24 hours, apply two thin coats of a UV-resistant sealer to protect the color from fading and to provide that ‘wet look’ or ‘sophisticated matte’ finish that defines the modern aesthetic.
How to Create a Soft Coquette Aesthetic for Your Personal Web Layouts

Why we love this
The soft coquette aesthetic is a delicate celebration of hyper-femininity, blending vintage charm with a modern, playful twist that feels like a love letter to girlhood. Imagine digital pages adorned with tiny silk bows, whispers of pink lace, and a soft-focus glow that makes every blog post feel like a secret shared between friends. It’s a visual style that embraces ruffles, pearls, and pastel hues, creating a digital sanctuary that is as comforting as it is beautiful, inviting your visitors to linger in a world of whimsical elegance.
Essential Elements:
- Palette of cream, dusty rose, and baby blue
- Hand-drawn bow and ribbon assets (PNG)
- Lace-textured background patterns
- Elegant serif fonts (like Playfair Display or EB Garamond)
- Soft-glow CSS filters or overlays
How to make it
- Establish your base by setting a background color in a soft cream or very light blush, avoiding pure white to maintain that vintage, ‘aged paper’ warmth that defines the coquette style.
- Integrate lace textures by using a repeating pattern CSS background-image set to a low opacity (10-15%), which adds depth and a tactile feel to the screen without overwhelming the content.
- Place custom-drawn bow graphics at the corners of your main content containers or use them as ‘dividers’ between sections to provide a whimsical, decorative touch that guides the eye.
- Select an elegant serif font for your headers, increasing the letter-spacing slightly to create an airy, sophisticated feel that mimics high-end editorial layouts.
- Apply a subtle CSS ‘box-shadow’ with a soft pink or peach blur to your images and buttons, giving them a floating, dreamlike quality that matches the soft-focus photography typical of this aesthetic.
- Finish by adding a small, animated element—like a fluttering ribbon or a sparkling cursor effect—to give the site a sense of life and playfulness that delights every visitor.
How to Construct a Vertical Garden for a Lush Green Patio

Why we love this
Vertical gardens are the ultimate solution for urban dwellers looking to reclaim their connection to the earth, turning a cold brick wall into a living, breathing tapestry of emerald leaves. The sheer density of life in a vertical space creates a micro-climate of cool, oxygen-rich air that makes your patio feel like a hidden jungle oasis in the heart of the city. Watching a wall of ferns and succulents slowly knit together into a seamless carpet of green is an incredibly satisfying experience that provides both privacy and a stunning focal point for outdoor entertaining.
Essential Elements:
- Wall-mounted planter system or pocket felt liners
- Lightweight, high-nutrient potting mix
- Automatic drip irrigation kit
- Assortment of trailing and upright plants (Pothos, Ferns, Ivy)
- Stud finder and heavy-duty masonry screws
How to make it
- Identify a load-bearing wall or sturdy fence that receives appropriate light for your chosen plants, ensuring the structure can handle the weight of wet soil and foliage.
- Secure the vertical planter frames or felt pockets using a level to ensure they are perfectly horizontal, using masonry anchors if you are mounting directly into brick or concrete for maximum safety.
- Install a simple drip irrigation line along the top of the system, threading the small emitters into each pocket or container so that gravity helps water the lower levels as the top levels are saturated.
- Fill each pocket two-thirds full with a lightweight potting mix specifically formulated for containers, which will prevent the structure from becoming too heavy while providing excellent drainage.
- Arrange your plants by placing ‘thrillers’ (upright plants) at the top and ‘spillers’ (trailing plants like ivy or creeping jenny) at the bottom and sides to eventually hide the structure itself.
- Firmly tuck the root balls into the soil, add a final layer of moss or mulch to retain moisture, and turn on your irrigation system to check that every plant is receiving a gentle, consistent flow of water.
How to Maintain a Fresh Chicken Home for the Best Farmstead Mornings

Why we love this
There is a profound sense of peace that comes with a perfectly maintained chicken home, where every morning feels like a fresh start in a rural paradise. The sound of happy clucking as your hens explore a clean run, combined with the sight of sunlight hitting a freshly swept coop floor, sets a productive and joyful tone for the entire day. A fresh chicken home isn’t just about hygiene; it’s about creating an environment where your animals can thrive, rewarding you with the highest quality eggs and a garden that benefits from their natural, composted contributions.
Essential Elements:
- Sturdy metal rake and hand trowel
- Hanging galvanized steel feeders and waterers
- Food-grade citrus-based coop deodorizer
- Fresh pine flakes and straw
- Stall dry or zeolite granules
How to make it
- Perform a ‘daily spot check’ every morning when you collect eggs, removing any visible waste from the nesting boxes and under the roosts to prevent the buildup of odors before they start.
- Empty the waterers completely and scrub the interiors with a splash of apple cider vinegar once a week to prevent algae growth and keep the water supply pristine for your flock.
- Apply a layer of zeolite granules or ‘stall dry’ beneath the fresh bedding every two weeks to neutralize ammonia gases at a molecular level, keeping the air quality safe for the birds’ sensitive lungs.
- Rotate the bedding in the run area using a rake to bring fresh soil to the top and bury older waste, which speeds up the natural decomposition process and keeps the ground from becoming compacted.
- Twice a year, perform a ‘deep litter’ reset where you remove all material, scrub the entire structure with a non-toxic citrus cleaner, and let it sun-dry for a full day to kill off any lingering bacteria.
- Finish your weekly maintenance by refilling the dust bath area with a fresh mix of sand and wood ash, ensuring your hens have the tools they need to maintain their own feather health naturally.
How to Refinish Your Garden Walkway for a Sleek Contemporary Feel
Why we love this
A refinished walkway acts as the ‘red carpet’ for your home, guiding guests through your garden with a sense of modern intentionality and architectural grace. The transformation from a cracked, mossy path to a sleek, uniform surface provides an instant boost to your home’s curb appeal that feels both polished and welcoming. There is a tactile joy in walking across a smooth, perfectly finished path where every stone or concrete slab feels deliberate, reflecting the care and attention you pour into your outdoor sanctuary.
Essential Elements:
- Polymeric sand (for paver gaps)
- High-quality concrete or stone stain
- Commercial-grade power washer
- Paver sealer with an ‘enhanced’ or ‘wet look’ finish
- Long-handled squeegee or roller
How to make it
- Begin by clearing all weeds and debris from the gaps between your pavers or stones using a specialized crevice tool, then power wash the entire surface to reveal the original texture of the material.
- If your walkway is concrete, apply a modern stain in a slate gray or deep charcoal, using a sprayer for a seamless, professional-grade application that mimics the look of high-end stone.
- Once the surface is dry, sweep polymeric sand into the joints, using a push broom to ensure every gap is filled to within an eighth of an inch of the surface to prevent weed growth and shifting.
- Use a leaf blower on its lowest setting to gently remove any excess sand from the surface of the stones, as any remaining grains will be permanently stuck once the next step begins.
- Lightly mist the sand with water to activate the binding polymers, following the specific timing instructions on the package to ensure a rock-hard seal that remains flexible enough for seasonal changes.
- Apply a final coat of UV-protective sealer using a long-handled roller, working in small sections to ensure even coverage that will keep your walkway looking ‘just finished’ for years to come.
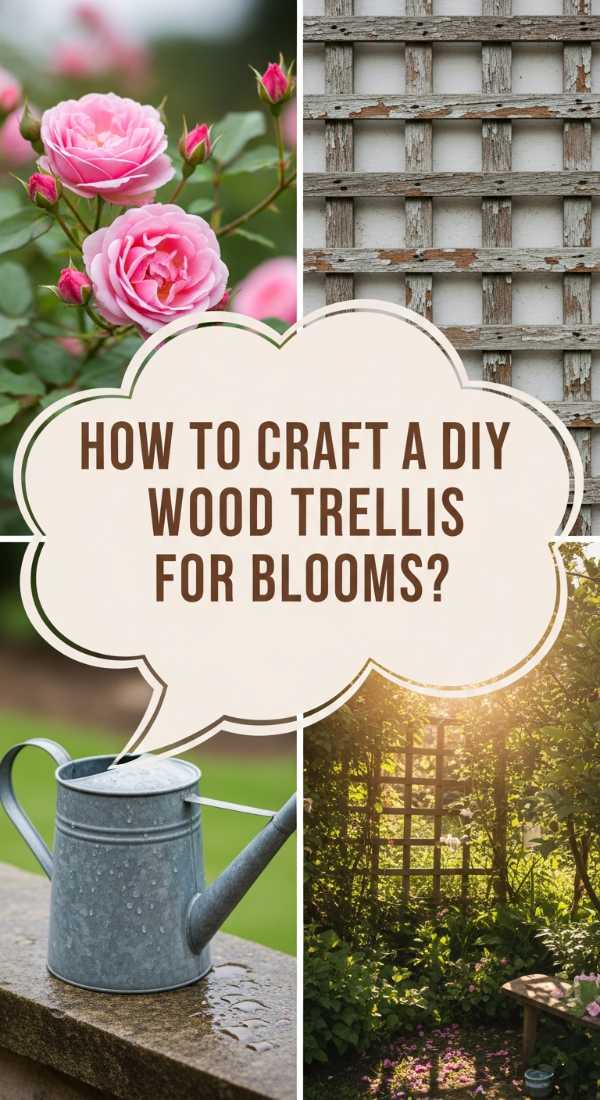
How to Grow Climbing Roses for a Romantic Cottage Yard

Why we love this
Climbing roses are the crowning jewel of a romantic garden, draping your home in a cascade of velvet petals and an intoxicating fragrance that lingers in the warm summer air. There is something deeply poetic about watching a rose bush slowly claim a trellis, its thorny stems turning into a lush wall of color that feels like it belongs in a Victorian fairytale. The way the light filters through the layers of petals at dusk creates a soft, romantic glow that turns any ordinary backyard into a sanctuary of beauty and timeless elegance.
Essential Elements:
- Vigorous climbing rose variety (e.g., ‘Eden’ or ‘Cecile Brunner’)
- Heavy-duty wooden or metal trellis
- Slow-release organic rose fertilizer
- Sharp, bypass pruning shears
- Soft garden twine or plant clips
How to make it
- Select a planting site that receives at least six to eight hours of direct sunlight, ensuring the soil is well-draining and enriched with organic compost to give the young rose the best possible start.
- Install your trellis or support structure at least two inches away from the wall to allow for essential air circulation, which prevents fungal diseases like black spot and powdery mildew.
- Plant the rose at the base of the support, angling the root ball slightly toward the trellis so the new canes naturally grow toward their permanent home.
- As the canes grow, ‘train’ them horizontally rather than vertically; this technique encourages the rose to produce more ‘laterals,’ resulting in a wall of flowers from the bottom to the top of the plant.
- Secure the canes loosely with soft garden twine, leaving enough room for the stem to thicken without being choked by the tie as it matures throughout the season.
- Prune only dead or diseased wood during the first two years, allowing the plant to establish its structural ‘main canes’ before you begin shaping it into the romantic masterpiece of your dreams.
How to Curate Serene Coastal Vibes for Your Online Portfolio

Why we love this
A coastal-themed portfolio brings the effortless tranquility of the seaside to your professional work, creating a digital experience that feels as light and refreshing as a salt-misted breeze. The combination of bleached wood textures, sandy neutrals, and varying shades of seafoam green communicates a brand identity that is both sophisticated and approachable. It allows your work to take center stage in a setting that feels expansive and calm, immediately putting potential clients or collaborators at ease as they navigate your creative journey.
Essential Elements:
- Palette of sand, salt, driftwood, and seafoam
- High-resolution lifestyle photography with natural lighting
- Minimalist grid layout with generous white space
- Soft, rounded UI elements (buttons, cards)
- Subtle grain or linen texture overlays
How to make it
- Start with a base background color of ‘warm salt’—a white that leans slightly toward cream—to avoid the harshness of a standard digital white and mimic the look of sun-bleached linen.
- Use high-resolution hero images that feature natural light and ‘beachy’ elements, such as a desk overlooking a window or a piece of driftwood, to set the thematic tone immediately.
- Select a font pairing that balances a structured, modern sans-serif for body text with a more relaxed, ‘handwritten-style’ serif for accent quotes, evoking a sense of personal, coastal charm.
- Incorporate ‘white space’ (or in this case, ‘sand space’) generously between project blocks to give each piece of work room to breathe, preventing the layout from feeling crowded or hectic.
- Use a soft, seafoam green for ‘hover’ states on links and buttons, providing a gentle visual cue that feels organic and connected to the broader coastal theme.
- Apply a very subtle ‘noise’ or ‘grain’ filter to your images to give them a film-like, tactile quality that mimics the organic imperfections found in nature, adding a layer of sophisticated warmth to the digital screen.
How to Design Dreamy Vintage Lace Accents for a Feminine Space
[IMAGE_10]
Why we love this
Vintage lace accents bring a layer of history and delicate craftsmanship into a room, softening hard edges and adding a touch of heirloom mystery to your home. The way sunlight filters through an intricate lace curtain creates a dance of shadows on the floor that feels like a quiet, timeless ritual of beauty. Whether it’s a runner on a dark wood table or a lace trim on a linen pillow, these accents add a tactile richness and a sense of refined femininity that makes any space feel cherished, curated, and deeply personal.
Essential Elements:
- Thrifted or heirloom lace doilies and runners
- Fabric stiffener or spray starch
- Antique brass frames or shadow boxes
- Soft linen or velvet base fabrics
- Delicate sewing needles and ivory silk thread
How to make it
- Source authentic vintage lace from estate sales or thrift shops, looking for pieces with intricate patterns and minimal staining; soak them in a gentle oxygen-based cleaner to restore their original ivory glow.
- Use a lace runner as the ‘soul’ of a tabletop display, layering it over a heavier linen cloth in a contrasting tone like sage or dusty blue to make the delicate patterns pop.
- For a modern twist, mount smaller pieces of exquisite lace inside antique brass frames, using a dark velvet background to highlight the geometry of the hand-stitched threads.
- Incorporate lace into your window treatments by using lace panels as the inner layer of your curtains, allowing them to provide privacy while still letting a soft, patterned light flood the room.
- Attach lace trim to the edges of simple cotton pillowcases using a hidden slip stitch, transforming a basic bedding set into a custom, vintage-inspired collection.
- Use a light mist of lavender water on your lace accents once a week; the fabric holds scent beautifully, adding a subtle, sensory dimension to the visual elegance of the room.
The Final Touch: Living Your Aesthetic Every Day
Creating a viral-worthy home and lifestyle isn’t about being perfect; it’s about the joy of the process and the intention behind every choice. From the way your chickens cluck in their clean coop to the way your digital portfolio reflects your inner calm, these aesthetics are tools to help you build a life that feels as good as it looks. So, pick one project, dive in with all your heart, and remember that the most beautiful part of any ‘lifestyle’ is the person living it. Happy styling!