
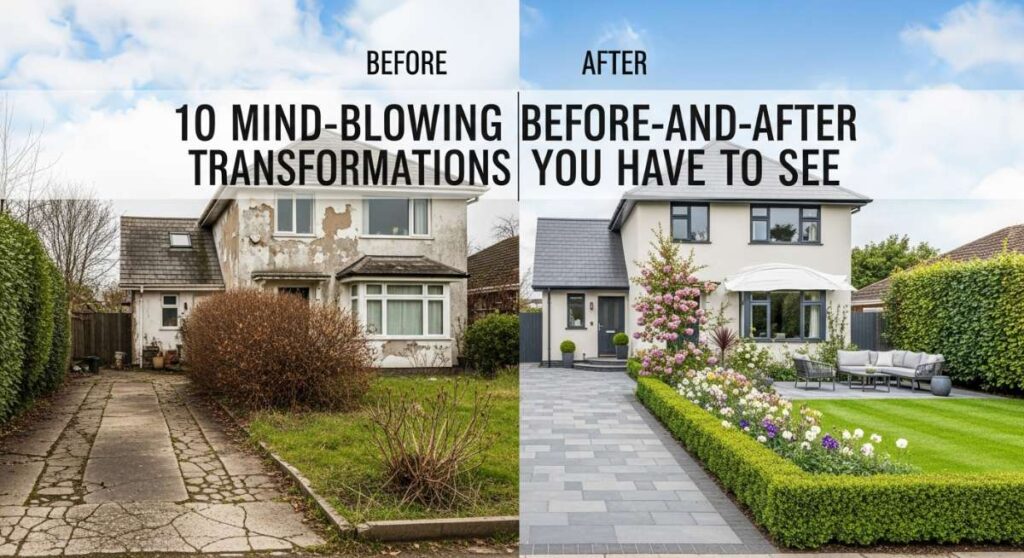
Have you ever walked through your own front door and felt like something was just… missing? We’ve all been there—staring at a patchy lawn, a dated patio, or a room that feels stuck in a time capsule. There is something deeply emotional and satisfying about witnessing a space evolve from a neglected corner into a breathtaking sanctuary. It’s more than just wood and stone; it’s about creating a home that reflects the warmth and joy of the people living inside it.
In this post, I’ve gathered ten of the most viral, jaw-dropping transformations that prove you don’t need a massive budget to make a massive impact. These projects range from simple weekend garden upgrades to complete exterior overhauls that will make you do a double-take. Whether you’re looking to boost your curb appeal or create a secret oasis in your backyard, these ideas are designed to spark that ‘I can do this’ fire in your soul.
So, grab a cup of coffee, settle into your favorite chair, and let’s dive into these incredible transformations. We’re going to look at exactly why these designs work, the materials you’ll need to replicate the look, and a step-by-step guide to bringing these visions to life in your own home. Your dream space is closer than you think!
How to Design Rock Flower Beds for an Elegant Curb Appeal
Why we love this
There is a grounded, timeless beauty in the texture of smooth river stones and craggy granite nestled against vibrant green foliage. When you walk up to a home with well-designed rock flower beds, you immediately feel a sense of permanence and order. The way the cool, grey tones of the rocks contrast with the earthy aroma of damp mulch and the sweet fragrance of blooming lavender creates a multi-sensory experience that is both sophisticated and low-maintenance. It feels like a high-end resort entrance, offering a crisp, clean aesthetic that stays beautiful through every season.
Essential Elements:
- Multi-sized river rocks or Mexican beach pebbles
- Heavy-duty landscape fabric
- Steel or stone edging
- Drought-tolerant perennials (Hostas, Lavender, Boxwoods)
- Solar-powered accent lighting
How to make it
- Outline your bed shape using a garden hose to create natural, flowing curves rather than rigid straight lines.
- Excavate the area to a depth of about 3-4 inches, removing all grass and weeds to ensure a level base.
- Install professional-grade landscape fabric, overlapping seams by at least 6 inches and securing with garden staples to prevent future weed growth.
- Place your larger specimen plants first, digging holes through the fabric and amending the soil with organic compost for healthy root development.
- Install your edging material—metal creates a modern, thin profile while stone blocks offer a more traditional, chunky look.
- Pour your rocks into the bed, spreading them evenly with a rake to a thickness of 2-3 inches, ensuring no fabric is visible and the coverage is dense.
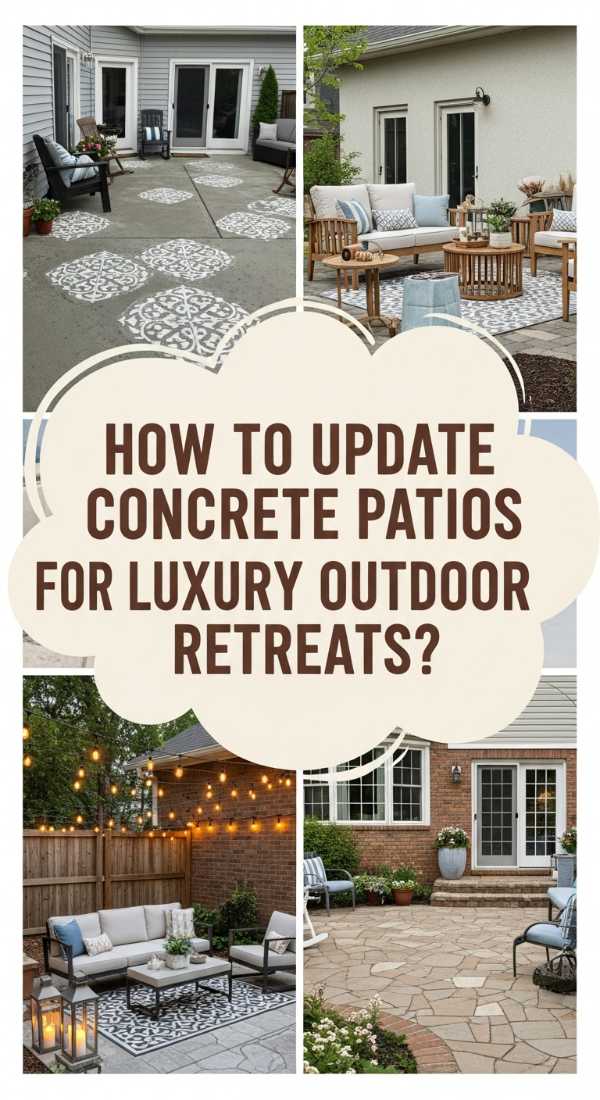
How to Update Your Concrete Patio for a Luxurious Outdoor Retreat

Why we love this
Transforming a cold, cracked concrete slab into a luxurious retreat is like adding a whole new wing to your home. We love the way a fresh, stenciled pattern or a rich concrete stain can mimic the look of expensive Mediterranean tile or natural slate. Imagine stepping out onto a surface that feels velvety underfoot, surrounded by the soft glow of string lights and the gentle rustle of potted palms. The transformation is purely psychological; it turns a utilitarian space into a destination for morning espressos and sunset wine pours, filled with the aroma of fresh air and relaxation.
Essential Elements:
- Concrete cleaner and degreaser
- Concrete patch compound for cracks
- Exterior concrete paint or acid stain
- Large-scale geometric or Moroccan stencils
- High-gloss or matte outdoor sealer
How to make it
- Pressure wash the entire surface thoroughly to remove dirt, oil, and old paint, allowing it to dry for at least 24 hours.
- Fill any visible cracks or pits with a high-quality concrete filler, smoothing it with a putty knife and sanding flat once cured.
- Apply a base coat of porch and patio paint using a long-nap roller, ensuring even coverage across the entire surface; let dry completely.
- Secure your stencil with painter’s tape and apply your secondary color using a dense foam roller, using a “dry brush” technique to avoid bleeding under the edges.
- Repeat the pattern across the patio, checking alignment frequently to maintain a professional, seamless look.
- Seal the entire patio with two coats of clear concrete sealer to protect against UV rays and foot traffic, waiting for the surface to be non-tacky between coats.
How to Build a Planter Privacy Wall for a Secluded Garden Oasis

Why we love this
There is nothing quite like the feeling of absolute privacy in your own backyard. This planter wall offers a living, breathing barrier that replaces harsh fences with a lush tapestry of green. We love the tactile contrast between the warm, rough-hewn cedar wood and the soft, trailing vines of jasmine or ivy. The air around this wall smells faintly of cedar and fresh blossoms, creating a micro-climate that feels cool and sheltered. It’s a brilliant way to block out the noise of the neighborhood and replace it with a visual sanctuary that grows more beautiful with each passing month.
Essential Elements:
- Pressure-treated 4×4 posts and cedar 2×4 boards
- Heavy-duty landscape liner
- Vertical garden pockets or built-in wooden troughs
- Galvanized screws and wood glue
- Climbing plants (Clematis, Honeysuckle, or Star Jasmine)
How to make it
- Determine the location and dig post holes at least 2 feet deep, setting your 4×4 posts in quick-set concrete to ensure a perfectly plumb and sturdy foundation.
- Frame out the wall structure by attaching horizontal 2×4 supports at the top, middle, and bottom between the posts.
- Construct rectangular planter boxes using cedar planks, ensuring they are deep enough (at least 10 inches) for healthy root growth.
- Line each box with landscape fabric to protect the wood and retain moisture while still allowing for drainage through small pre-drilled holes.
- Attach the boxes to the frame at varying heights or in a uniform grid for a modern look, ensuring they are level and securely fastened.
- Fill with high-quality potting mix and plant your climbers at the base and trailing greens in the upper tiers for immediate visual density.
How to Install a Rock River Bed for Functional and Beautiful Drainage
Why we love this
Function meets high-art in the rock river bed. We love how it solves the practical problem of backyard puddles while creating a stunning visual feature that mimics a dry creek bed found in nature. There’s something incredibly soothing about the sight of varying sizes of river stones—from tiny pebbles to large, moss-covered boulders—meandering through a landscape. When it rains, the sound of water trickling through the stones is musical, and the earthy, wet-stone scent brings a touch of the mountain wilderness right to your back door.
Essential Elements:
- A mix of cobbles, river rocks, and large decorative boulders
- Non-woven geotextile fabric
- Small shrubs and ornamental grasses
- Shovel and plate compactor (optional)
- PVC drainage pipe (if hidden drainage is required)
How to make it
- Map out the natural path of water runoff in your yard and dig a trench along this path that is roughly twice as wide as it is deep.
- Create gently sloping sides to the trench rather than vertical walls to make the river bed look more natural and integrated into the slope.
- Lay down heavy-duty landscape fabric, pinning it securely so it covers the bottom and the sides of the entire trench.
- Place the largest boulders first in the “bends” of your river to act as anchors and create a realistic flow pattern.
- Fill in around the boulders with medium-sized cobbles, and then use smaller river rocks to fill the gaps and the center of the “stream.”
- Plant moisture-loving grasses or ferns along the edges to soften the rock line and blend the feature into your existing garden.
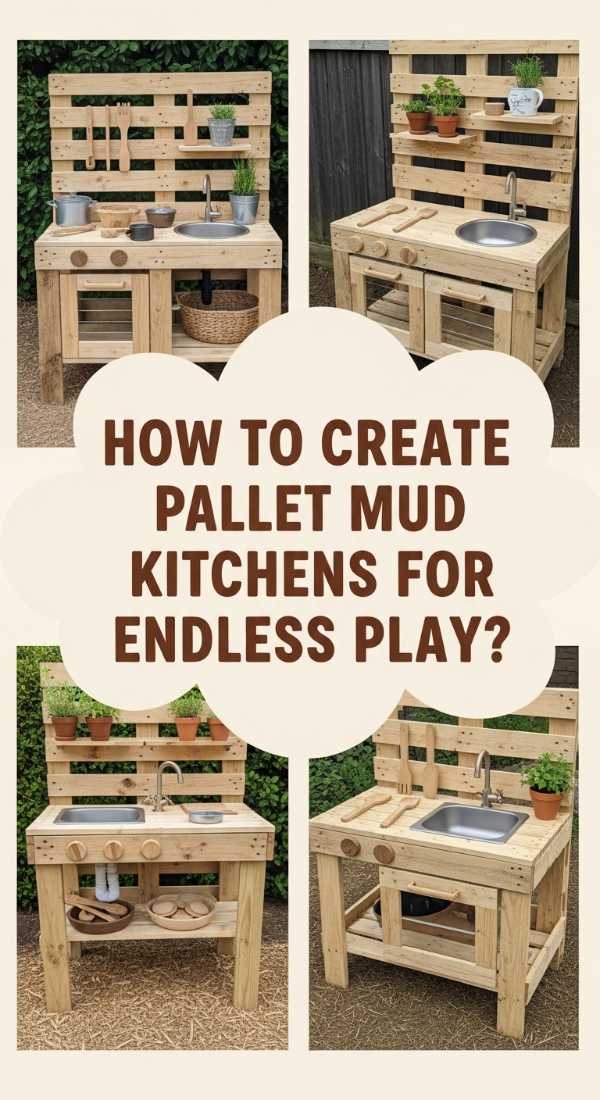
How to Create a Pallet Mud Kitchen for Endless Outdoor Play

Why we love this
This project is all about the magic of childhood and the sensory joy of getting messy. A mud kitchen built from reclaimed pallets smells of pine and sun-warmed wood, evoking a nostalgic, rustic charm that looks beautiful in any garden corner. We love the clinking sound of old metal spoons against stainless steel bowls and the sight of “mud pies” topped with dandelion yellow and clover green. It’s a sustainable, creative space that encourages kids to connect with the earth, providing a tactile playground where imagination is the only ingredient required.
Essential Elements:
- Heat-treated (HT) wood pallets
- Stainless steel mixing bowls (to serve as sinks)
- Old kitchen faucets or knobs
- Hooks for hanging utensils
- Outdoor-safe wood stain or colorful paint
How to make it
- Disassemble your pallets carefully, removing all nails and sanding the wood thoroughly to eliminate any splinters or rough edges.
- Build a sturdy base frame using the thicker pallet runners, setting the counter height at about 20-24 inches for toddlers or higher for older children.
- Create the countertop by slats of pallet wood placed side-by-side, leaving a cutout perfectly sized for your stainless steel bowls to drop in.
- Add a backboard using more pallet slats; this is where you can mount your old faucet and hooks for spoons and whisks.
- Construct a lower shelf for storing “pots and pans” (old thrift store finds) and pails of dirt or sand.
- Finish with a non-toxic, water-resistant outdoor sealer to protect the wood from the inevitable water and mud play.
How to Style a Nostalgic Teen Room for a Creative Personal Sanctuary
Why we love this
Stepping into this room feels like a warm hug from the best parts of the 90s and early 2000s, updated with modern sophistication. We love the mix of textures—the plush velvet of a throw pillow against the crisp paper of a curated gallery wall and the soft, ethereal glow of LED strip lights. The room smells of vanilla candles and old books, creating a space where a teenager can truly decompress. It’s a sanctuary that honors personal history while providing a stylish, organized backdrop for making new memories, balancing cozy nostalgia with clean, functional lines.
Essential Elements:
- String lights or color-changing LED strips
- A gallery wall featuring vinyl records or polaroids
- Textured textiles (faux fur, chunky knits, velvet)
- Functional desk setup with ergonomic chair
- Storage ottomans or floating shelves
How to make it
- Start with a neutral base wall color like warm white or soft sage to allow the decorative elements to stand out without feeling cluttered.
- Incorporate “zones”: a cozy sleeping area, a dedicated study nook, and a “chill” corner with floor cushions or a bean bag chair.
- Layer your lighting—combine overhead lighting with warm bedside lamps and LED strips along the ceiling or behind the bed frame for mood control.
- Curate a personal gallery wall by using consistent frames or a specific color palette to keep a mix of posters and photos feeling cohesive.
- Add open shelving to display collections, books, and plants, which adds vertical interest and keeps the floor clear.
- Swap out standard hardware on dressers or desks for vintage-inspired brass or ceramic knobs to add a custom, high-end feel.
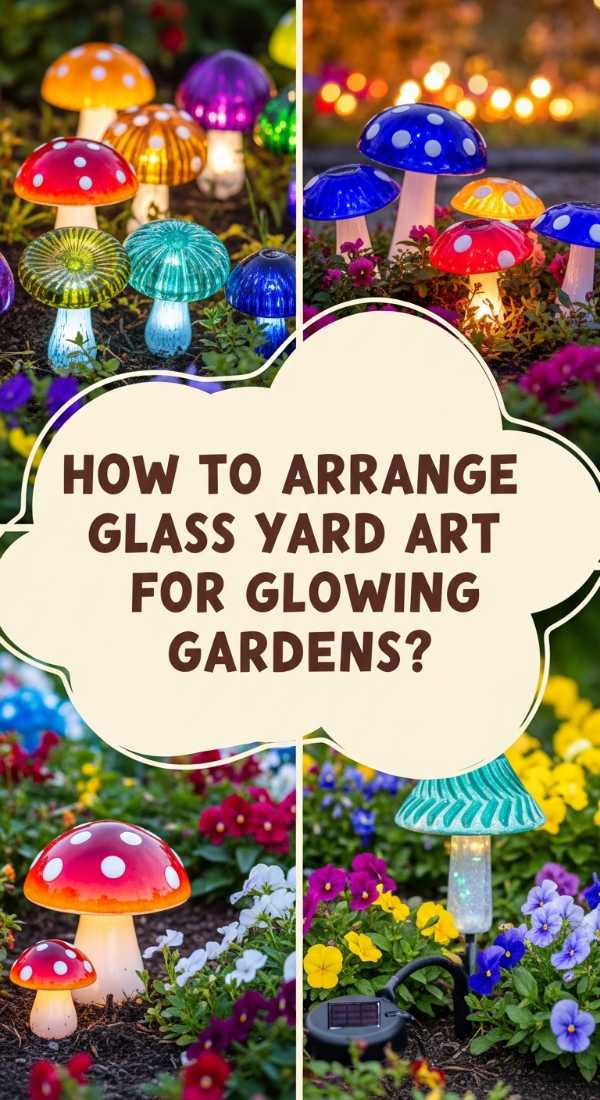
How to Arrange Glass Yard Art for a Magical Glowing Garden

Why we love this
There is something inherently magical about the way glass catches the light. We love the jewel-toned brilliance of cobalt blue, emerald green, and amber glass catching the morning dew or the golden hour sun. These pieces add a sculptural element to the garden that feels like hidden treasure among the leaves. When night falls and the garden lights hit the glass, the entire yard transforms into a glowing, ethereal wonderland. It’s a whimsical, artistic way to add color to your landscape even during the dormant winter months.
Essential Elements:
- Colorful glass bottles, marbles, or hand-blown globes
- Rebar or copper stakes for mounting
- Epoxy or waterproof glass adhesive
- Spotlight or solar uplights
- Metal spacers or decorative wire
How to make it
- Select a variety of glass shapes and sizes, focusing on colors that complement your home’s exterior or your favorite flowers.
- For “bottle trees,” secure a sturdy wooden post or metal frame into the ground and slide the bottles over the “branches” for an instant burst of color.
- To create glass towers, use a strong, weather-resistant epoxy to stack glass bowls and vases on top of one another, allowing 24 hours to cure.
- Position your glass art in areas where they will receive maximum sunlight during the day to create “light play” on the surrounding grass.
- Integrate lighting by placing small solar puck lights at the base of the glass pieces so they glow from within after the sun sets.
- Group pieces in odd numbers (3 or 5) at varying heights to create a professional, balanced visual composition.
How to Construct a Floating Deck for the Ultimate Summer Grill Station
Why we love this
The floating deck is the ultimate weekend warrior project that yields high-end results. We love the clean, architectural lines it adds to a flat yard, creating a designated “zone” for grilling and gathering. There’s a specific, wonderful aroma of cedar and charcoal smoke that hangs around a well-built deck, signaling the start of summer. The feeling of the level, sturdy wood beneath your feet compared to uneven grass makes the whole backyard feel more organized and intentional, like a professional outdoor kitchen at a luxury estate.
Essential Elements:
- Pressure-treated 2×6 joists and decking boards
- Concrete deck blocks
- Galvanized deck screws
- Level and speed square
- Weather-proof wood stain
How to make it
- Clear the area and lay down landscape fabric topped with gravel to prevent plant growth and ensure proper drainage under the deck.
- Position your concrete deck blocks in a grid, typically every 4-5 feet, ensuring they are perfectly level with one another using a long straight-edge and a level.
- Build the outer frame of the deck using 2×6 boards, setting them into the notches of the deck blocks.
- Install the interior joists 16 inches apart (on center) to provide a solid, bounce-free foundation for the decking boards.
- Lay your decking boards across the joists, using spacers to maintain a consistent gap for water drainage and wood expansion.
- Trim the edges of the boards with a circular saw for a perfectly flush finish, then apply a high-quality stain to protect the wood from moisture and sun damage.
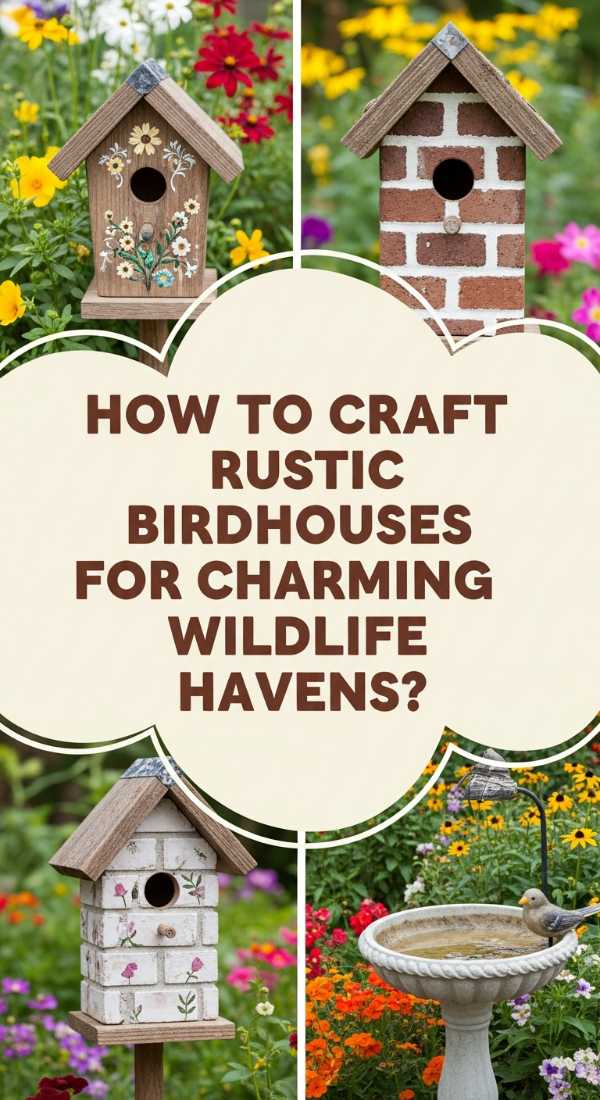
How to Craft Rustic Birdhouses for a Charming Wildlife Haven
![]()
Why we love this
Inviting nature into your garden brings a layer of life and sound that no renovation can match. We love the rustic, weathered look of these birdhouses—the way the rough cedar or reclaimed barn wood feels under your hand and the earthy scent of dry moss and wood chips. There is a deep sense of peace that comes from watching birds flit back and forth, their cheerful songs filling the air. These little structures act as charming focal points, adding a sense of story and care to your outdoor space, making it feel like a true sanctuary for all living things.
Essential Elements:
- Cedar or redwood boards (naturally rot-resistant)
- 1-1/2 inch hole saw (specific to the bird species you want to attract)
- Outdoor wood glue and finishing nails
- Decorative hinges or salvaged metal for roofs
- Natural moss or stones for accents
How to make it
- Cut your wood into six pieces: front, back, two sides, a roof, and a floor, ensuring the floor has small holes in the corners for drainage.
- Drill an entrance hole in the front piece; for bluebirds, 1.5 inches is standard, while chickadees prefer a smaller 1.125-inch opening.
- Assemble the walls and floor using wood glue and nails, making sure one side or the roof is attached with a hinge for easy seasonal cleaning.
- Add a slight overhang to the roof to protect the entrance from rain and prevent predators from reaching inside.
- Decorate the exterior with natural elements like glued-on pebbles or a corrugated metal roof to give it that “rustic-chic” look.
- Mount the birdhouse on a pole or a tree at a height of 5-10 feet, facing an open area to make it easy for birds to navigate.
How to Remodel a Ranch Exterior for a Stunning Modern Transformation
[IMAGE_10]
Why we love this
The transformation of a standard 1970s ranch into a modern masterpiece is nothing short of breathtaking. We love the dramatic shift from dated, beige siding to bold, dark charcoals or crisp whites paired with warm wood accents. The home suddenly feels taller, sleeker, and more expensive. You can almost smell the fresh paint and the new cedar siding as it catches the afternoon sun. It’s a total reimagining of what a “family home” looks like, blending classic suburban comfort with the clean, minimalist aesthetic of contemporary design.
Essential Elements:
- High-quality exterior paint (dark hues like charcoal or navy)
- Vertical wood siding or slat accents
- Modern black-frame windows
- Updated front door (natural wood or bold color)
- Minimalist landscaping with structured plants
How to make it
- Begin by removing dated shutters, old awnings, and overgrown bushes to reveal the clean lines of the house’s silhouette.
- Pressure wash the siding and brick, then apply a high-quality masonry or siding primer to ensure a long-lasting finish for your new color.
- Paint the main body of the house a modern neutral; using a matte finish can help hide imperfections in older siding or brick.
- Install vertical cedar slats over a portion of the exterior (like the entryway or a bump-out) to add warmth and a high-end architectural feel.
- Replace the front door with a modern design featuring clean glass panes, and swap out old hardware for sleek black or brushed gold handles.
- Finish the look by installing modern, linear outdoor lighting fixtures and using black mulch in the garden beds to tie the modern aesthetic together.
The Power of a Fresh Perspective
As we’ve seen, the most incredible transformations don’t happen overnight, but they do happen with a bit of vision and a lot of heart. Whether it’s the simple addition of a birdhouse or the massive undertaking of an exterior remodel, every change you make adds a layer of personality and comfort to your home. I hope these projects have inspired you to look at your own space not for what it is, but for what it could become. Remember, home is a journey, not a destination—so enjoy every step of the creative process!
Frequently Asked Questions
Check out some of the most common questions about these transformations below!