
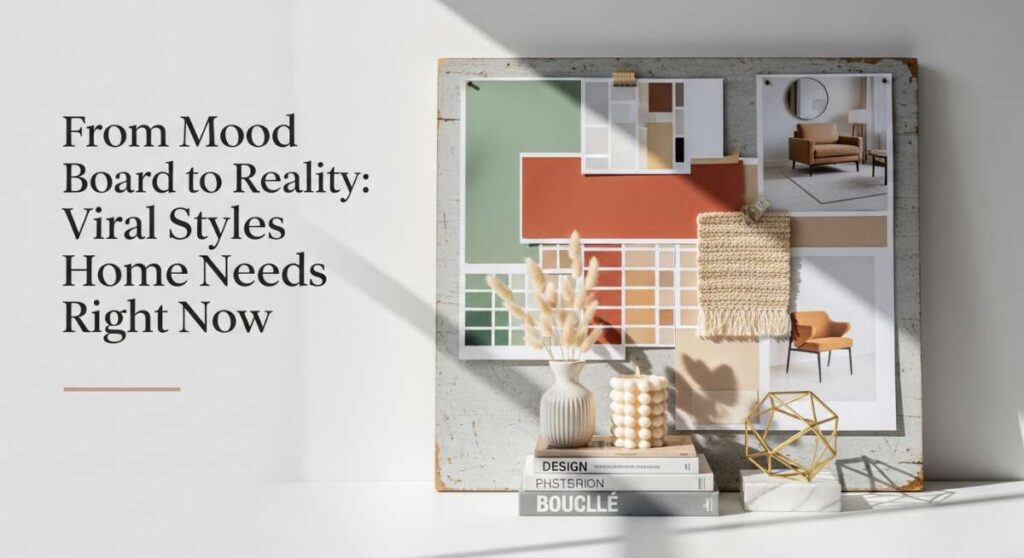
Have you ever spent hours scrolling through Pinterest, hearting every sun-drenched nook and perfectly curated shelf, only to look up at your own space and feel a little bit stuck? We’ve all been there, caught in that gap between the dream board and the reality of our living rooms. There is a certain magic in seeing a lifestyle trend go viral—it’s like a collective spark of inspiration that reminds us that our homes are more than just four walls; they are the canvases of our daily lives.
Today, we are bridging that gap. I’ve rounded up the absolute best, most-talked-about viral styles that are currently taking over our feeds and turning them into actionable, beautiful projects for your own sanctuary. Whether you’re craving the quiet peace of a coastal retreat or the bold energy of a modern entryway, these ideas are designed to be approachable, soulful, and deeply personal. Let’s stop scrolling and start creating.
Every home has a story to tell, and these trends are the perfect vocabulary to help you express yours. From the tactile warmth of a DIY grill station to the serene layers of a ‘Crabsjoon’ aesthetic, we’re diving deep into the details that make a house feel like a curated home. Grab your coffee, find a cozy spot, and let’s turn those mood boards into your new reality.
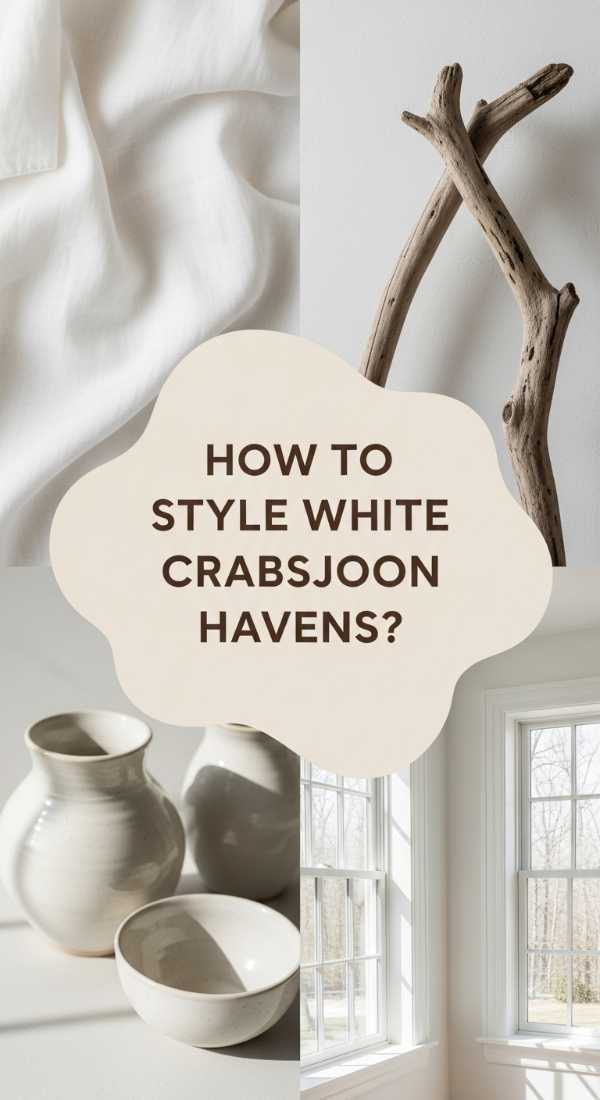
How to Style a White Crabsjoon Aesthetic for Coastal Serenity
Why we love this
The White Crabsjoon aesthetic is the ultimate evolution of coastal chic, blending the minimalist purity of Scandinavian design with the weathered, salt-kissed textures of a Mediterranean villa. Imagine walking into a room where the air feels lighter; you’re greeted by the scent of clean linen and dried seagrass, while the tactile sensation of lime-washed walls and chunky knit throws grounds you in the present moment. This style is less about ‘beach decor’ and more about the feeling of a quiet morning by the shore—ethereal, bright, and deeply restorative for the soul.
Essential Elements:
- Monochromatic white and cream color palette
- Natural wood accents (driftwood or light oak)
- Textured linens and organic cottons
- Ceramic vessels with organic, irregular shapes
- Dried botanicals like pampas grass or palm leaves
- Layered jute or sisal rugs
How to make it
- Start by clearing the space to a minimalist baseline; the Crabsjoon look thrives on visual breathing room and a lack of clutter.
- Apply a fresh coat of warm-toned white paint to the walls; look for shades with a slight yellow or peach undertone to avoid a sterile, clinical hospital feel.
- Layer your window treatments using sheer linen curtains that allow natural light to filter through while providing a soft, blurred texture to the frame.
- Introduce furniture pieces with rounded edges and matte finishes; avoid high-gloss surfaces that reflect light too harshly.
- Incorporate ‘living’ textures by adding a large ceramic floor vase filled with tall, dried grasses to create height and movement in the corners of the room.
- Finish the look with tonal layering: use three different shades of white (cream, eggshell, and bone) in your pillows and throws to create depth without introducing new colors.
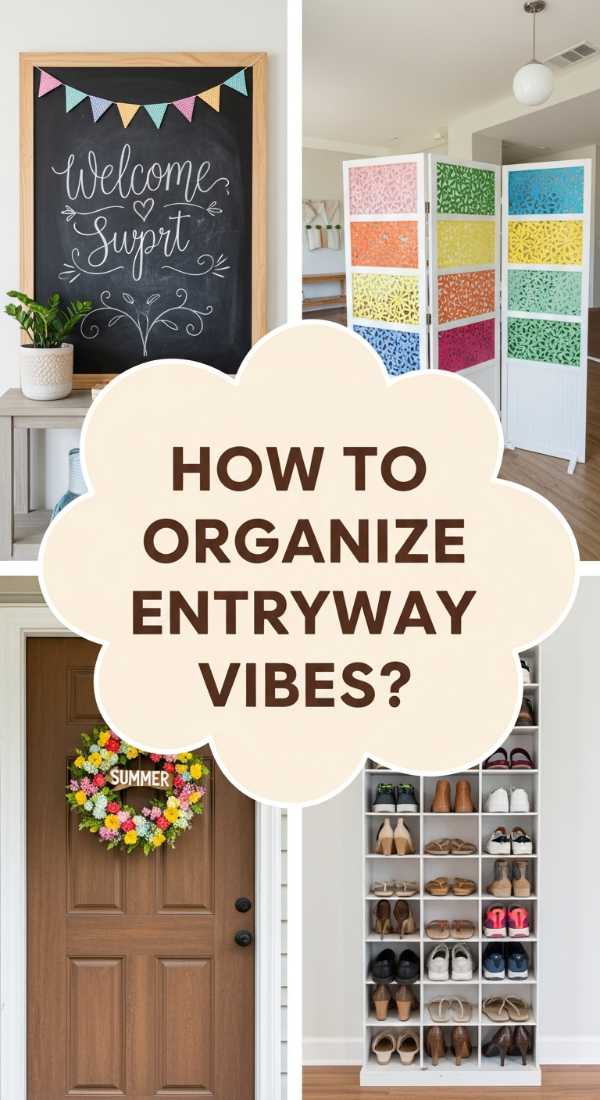
How to Design a Spring Chalkboard for Seasonal Charm

Why we love this
There is something incredibly nostalgic about the sound of chalk against a board, a tactile reminder of simpler times that brings an instant sense of warmth to a kitchen or mudroom. A spring-themed chalkboard acts as a rotating gallery for your home, capturing the fleeting beauty of cherry blossoms and the energetic buzz of a garden waking up. When you catch a glimpse of hand-lettered quotes or whimsical floral sketches while brewing your morning tea, it serves as a gentle invitation to celebrate the current season and the fresh starts it brings.
Essential Elements:
- Large framed chalkboard or chalkboard-painted wall
- High-quality dustless chalk or liquid chalk markers
- Damp microfiber cloth and Q-tips for detailing
- Stencils (optional for those less confident in freehand)
- A collection of spring-inspired quotes or botanical references
How to make it
- Prime your chalkboard surface if it’s new by rubbing the side of a piece of chalk over the entire board and then wiping it off; this prevents ‘ghosting’ of your first drawing.
- Sketch your layout lightly with a pencil or very faint chalk lines to establish your margins and the placement of your central text.
- Focus on your typography first; use a mix of serif and script fonts to create visual interest, ensuring your main ‘Spring’ message is the largest element.
- Add botanical illustrations around the border—think simple tulips, lavender sprigs, or fluttering butterflies—using layered shading to give them a 3D effect.
- Use a damp Q-tip to clean up any messy edges or to ‘erase’ parts of your drawing to create highlights and sharp contrasts.
- Set the scene by hanging a small eucalyptus wreath over the corner of the board to blend the 2D art with 3D organic texture.
How to Curate a Cute Small Porch for Cozy Morning Coffee

Why we love this
A small porch is often an overlooked transition space, but with the right curation, it becomes a private sanctuary where the world slows down for just a moment. Imagine stepping out into the crisp morning air, the steam from your mug rising to meet the soft glow of the sun, surrounded by the lush green of potted ferns and the softest outdoor cushions. It’s about reclaiming those few square feet of outdoor space and transforming them into a high-vibe destination that makes your daily caffeine ritual feel like a luxury retreat.
Essential Elements:
- Weather-resistant bistro set (two chairs and a small table)
- Outdoor area rug to define the footprint
- Layered lighting (string lights or solar lanterns)
- Potted plants of varying heights
- Soft textiles like outdoor-rated throw pillows and a lightweight blanket
How to make it
- Deep clean the porch floor and railings to create a fresh foundation; a pressure washer or stiff brush with soapy water works wonders.
- Place a patterned outdoor rug first; ensure it is large enough that the front legs of your chairs sit on it, which visually expands the small area.
- Select a bistro set that fits the scale; for very tight spaces, look for folding styles that can be tucked away or slim-profile metal frames.
- Arrange your greenery in ‘threes’—a tall snake plant for height, a medium fern for fullness, and a trailing ivy to spill over the edge of the table or railing.
- Install outdoor string lights across the ceiling or wrap them around the railing; use warm-white LED bulbs to mimic the cozy amber glow of a café.
- Add a small side table or a sturdy garden stool if space allows, providing extra surface area for books, snacks, or a second pot of coffee.
How to Build a DIY Grill Station for Affordable Outdoor Cooking

Why we love this
The DIY grill station is the heart of the backyard, a place where the scent of charcoal and seared steak mingles with the laughter of friends on a warm evening. There is a profound sense of pride in building a functional workspace with your own hands, moving beyond a lone grill on a patio to a full-fledged outdoor kitchen setup. This project is about elevating the utilitarian act of cooking into a social experience, providing the counter space and organization needed to keep the ‘chef’ part of the party instead of running back and forth to the kitchen.
Essential Elements:
- Pressure-treated lumber or cedar for the frame
- Food-safe countertop material (concrete, tile, or stainless steel)
- Heavy-duty casters for mobility
- Hooks for grilling tools and a built-in bottle opener
- Lower shelving for charcoal or propane storage
How to make it
- Design your frame dimensions based on the height of your grill and your own ergonomic comfort; a standard 36-inch counter height is usually ideal.
- Construct the base frame using 4×4 posts for the legs and 2x4s for the shelving supports, securing everything with exterior-grade wood screws.
- Sand all wood surfaces thoroughly to prevent splinters and apply a high-quality outdoor stain or sealant to protect against moisture and UV damage.
- Install the countertop; if using wood, ensure it is treated with a food-safe oil, or secure a piece of pre-cut granite or heavy-duty tile for a heat-resistant surface.
- Attach locking swivel casters to the bottom of the legs, allowing you to move the station into the shade or under cover during the off-season.
- Mount stainless steel hooks along the front or sides to hang tongs, brushes, and towels, keeping your workspace clear and organized.
How to Use an Orange Entryway Divider for Bold Space Definition

Why we love this
In the world of open-concept living, the orange entryway divider is a masterclass in ‘dopamine decor,’ bringing a shot of high-energy color exactly where you need it most. Walking through the front door and being greeted by a vibrant, citrusy hue instantly resets your mood, signaling that you have left the gray outside world and entered a space of creativity and warmth. This divider isn’t just a physical barrier; it’s a visual statement that defines the ‘arrival’ experience, offering a sophisticated nod to mid-century modern aesthetics while maintaining a playful, contemporary edge.
Essential Elements:
- Slatted wood room divider or a repurposed vintage screen
- Semi-gloss or satin paint in a bold orange (burnt sienna or bright tangerine)
- Integrated shelving or hooks for functionality
- Minimalist floor lamp to highlight the color at night
- Contrasting neutral decor (black or white) to balance the vibrance
How to make it
- Select a slatted or ‘see-through’ divider design to ensure that while you are defining the space, you aren’t blocking the flow of natural light between rooms.
- Prepare the surface by lightly sanding the wood or metal and applying a high-adhesion primer, which is crucial for making bold pigments like orange pop.
- Apply the orange paint in thin, even coats using a high-density foam roller to avoid brush marks and ensure a professional, factory-like finish.
- Position the divider perpendicular to the front door to create a dedicated ‘foyer’ zone, even in a room that lacks a traditional hallway.
- Style the divider with one or two trailing plants; the green leaves create a stunning, high-contrast visual against the orange background.
- Anchor the base of the divider with a heavy rug or a low bench to prevent it from tipping and to integrate it firmly into the room’s floor plan.
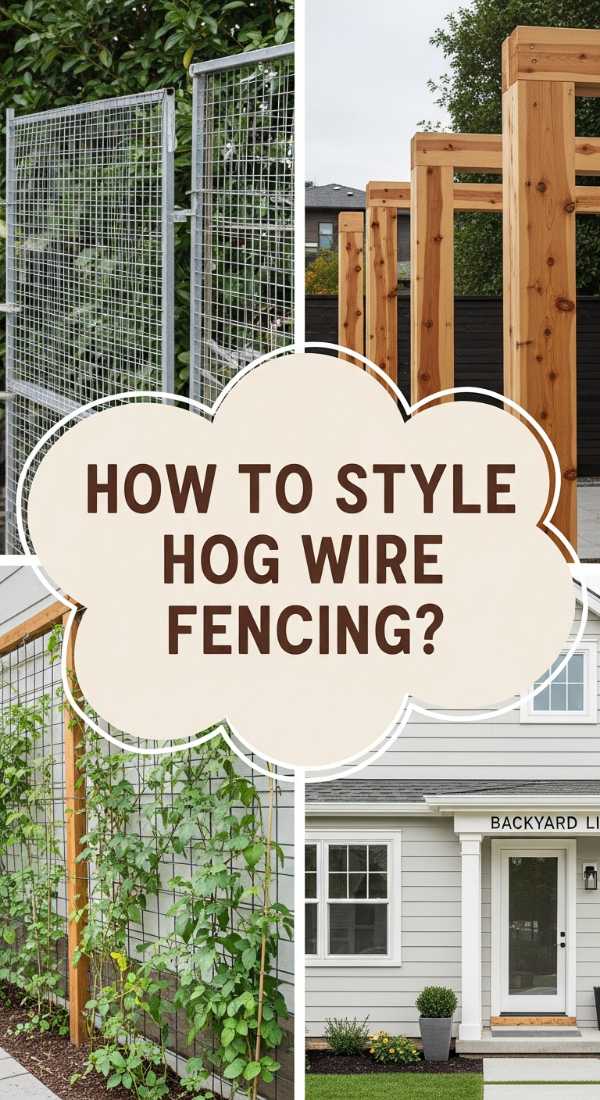
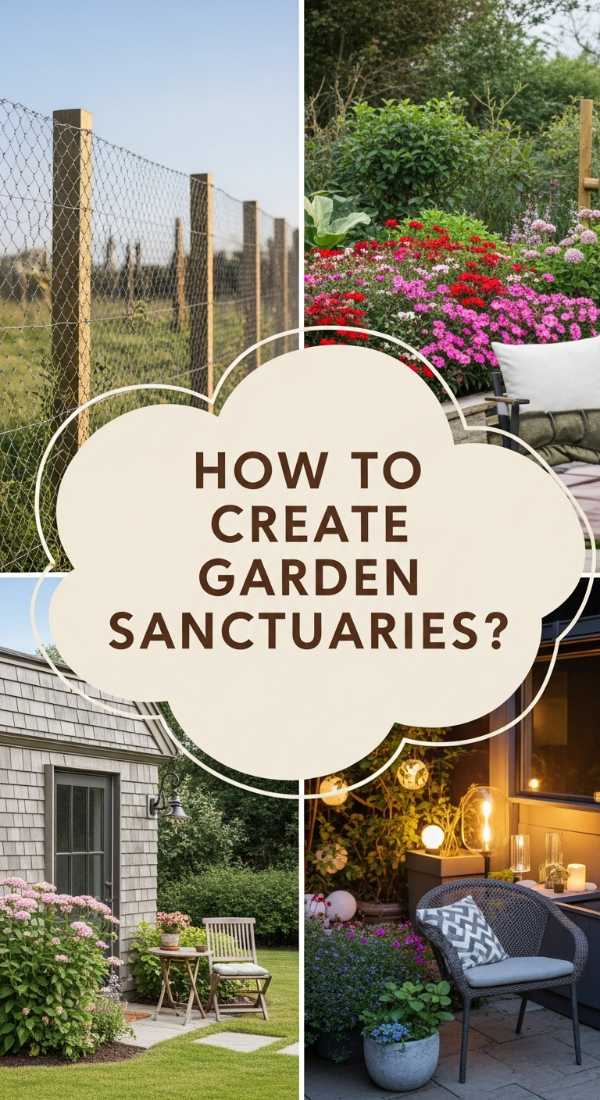
How to Install Hog Wire Fencing for Modern Garden Security
Why we love this
Hog wire fencing is the perfect marriage of industrial strength and rustic charm, offering a sleek, transparent boundary that keeps your garden safe without hiding its beauty. There is a satisfying rhythm to the grid pattern of the heavy-gauge wire, framed by warm cedar or cool pressure-treated pine, that feels both architectural and organic. It’s the ideal solution for the modern gardener who wants to keep the local wildlife out while still being able to watch the sun set through the vines of climbing roses or ripening tomatoes.
Essential Elements:
- Hog wire panels (typically 4-gauge galvanized steel)
- 4×4 wooden posts for the main structure
- 2×4 wooden rails for the top and bottom framing
- Heavy-duty fence staples or U-nails
- Level, post-hole digger, and quick-set concrete
How to make it
- Mark your fence line and dig post holes every 6 to 8 feet, ensuring they are at least 2 feet deep to provide a stable foundation against wind and weight.
- Set the 4×4 posts in the holes using quick-set concrete, checking each one with a level to ensure they are perfectly vertical as the concrete hardens.
- Measure and cut your 2×4 horizontal rails to fit snugly between the posts; install one at the bottom (2 inches off the ground) and one at the top.
- Cut the hog wire panels to size using heavy-duty wire snips or an angle grinder, making sure there are no sharp edges protruding.
- Tension the wire panel against the wooden frame and secure it using fence staples every 6 inches along the top, bottom, and sides.
- Finish by adding a 2×6 ‘cap’ rail along the top of the entire fence line for a polished, finished look that also protects the post tops from rain.
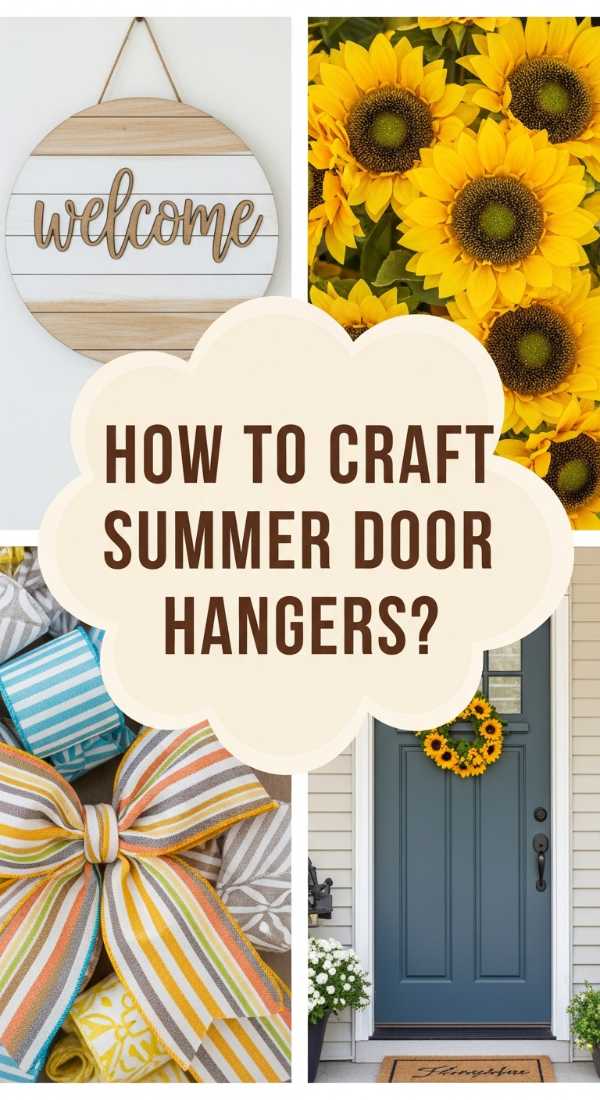
How to Craft a Summer Door Hanger for Welcoming Curb Appeal
Why we love this
A summer door hanger is like a warm hug for your home’s exterior, a burst of seasonal joy that greets every guest before they even knock. Think of the vibrant colors of a summer sunset—pinks, corals, and bright yellows—woven into a design that feels handmade and heartfelt. As the breeze catches the ribbons and the scent of faux (or real!) citrus and berries wafts toward the porch, it creates an immediate sense of hospitality and care, turning a standard front door into a focal point of neighborhood charm.
Essential Elements:
- Wooden round (15-18 inches) or a wire wreath form
- Acrylic paints or wood stain
- High-quality faux florals (peonies, sunflowers, or eucalyptus)
- Burlap or wired ribbon for a decorative bow
- Strong twine or a metal hook for hanging
How to make it
- Sand your wooden round until smooth and apply a base coat of outdoor-rated paint; white or a light wood stain works best to make colorful florals pop.
- Use a stencil or freehand a welcoming message like ‘Hello Summer’ or ‘Sweet Sunshine’ using a permanent paint marker or vinyl lettering.
- Layout your floral arrangement on the bottom third or one side of the round to create an asymmetrical, modern look.
- Secure the florals using a hot glue gun or small staples, layering the larger blooms first and tucking smaller filler leaves and berries around them.
- Create a multi-loop bow using wired ribbon; the wire is essential for keeping the bow’s shape against the wind and humidity of summer.
- Attach a heavy-duty twine loop to the back of the round using a staple gun, ensuring it is centered so the hanger sits level on your door.
How to Plant a Low Maintenance Flower Bed for Year Round Beauty

Why we love this
The true luxury of a low-maintenance flower bed is the gift of time—it’s the ability to enjoy a lush, flowering landscape without spending every weekend weeding and pruning. There is a deep, quiet satisfaction in watching your garden evolve through the seasons, from the first brave crocuses of spring to the structural beauty of dried hydrangeas in the winter frost. By choosing plants that thrive in your specific climate and layering them with intention, you create a living tapestry that feels effortless, fragrant, and perpetually full of life.
Essential Elements:
- Drought-tolerant perennials (Lavender, Coneflowers, Sedum)
- Evergreen shrubs for winter structure (Boxwood or Yew)
- High-quality organic mulch
- Landscape fabric (optional but helpful for weed suppression)
- Soaker hoses for efficient deep watering
How to make it
- Clear the area of all existing weeds and grass, then turn the soil to a depth of 12 inches, mixing in compost to ensure a nutrient-rich environment.
- Map out your planting zones: place taller evergreens at the back, medium-height perennials in the center, and low-growing groundcovers at the front edge.
- Dig holes twice as wide as the plant’s root ball, ensuring the top of the root ball is level with the soil surface to prevent stem rot.
- Install a soaker hose system throughout the bed, snaking it around the base of the plants to deliver water directly to the roots where it’s needed most.
- Apply a 3-inch layer of hardwood mulch over the entire bed; this is the ‘secret sauce’ for moisture retention and preventing weed seeds from germinating.
- Choose ‘self-cleaning’ varieties of flowers that don’t require deadheading, allowing the garden to maintain its tidy appearance with minimal intervention from you.
How to Arrange a Functional Entryway for a Stunning First Impression
Why we love this
An entryway is the ‘handshake’ of your home; it sets the tone for everything that lies beyond the threshold. When it’s arranged with both function and beauty in mind, it transforms the daily chaos of coming and going into a seamless, choreographed transition. The feeling of dropping your keys into a beautiful brass bowl, hanging your coat on a sturdy hook, and checking your reflection in a grand mirror creates a sense of order that settles the mind. It’s the perfect blend of practical storage and high-end styling that makes every arrival feel special.
Essential Elements:
- A slim console table or a sturdy storage bench
- Large wall-mounted mirror to reflect light
- Dedicated tray or bowl for small items (keys, mail)
- Baskets for shoes or umbrella storage
- Wall hooks or a stylish coat rack
How to make it
- Identify the ‘drop zone’—the natural spot where you and your guests tend to pile things—and center your console table or bench in that area.
- Hang a large mirror at eye level above the table; this not only helps with last-minute hair checks but also makes a narrow hallway feel twice as wide.
- Use ‘vertical real estate’ by installing a row of decorative hooks at varying heights; high hooks for coats and lower ones for bags or children’s gear.
- Incorporate ‘hidden’ storage, such as wicker baskets tucked under the console table, to keep shoes and sports equipment out of the direct line of sight.
- Add a personal touch with a small lamp or a scented candle; a warm glow and a signature home fragrance create an immediate ‘welcome home’ vibe.
- Keep the surface area 50% clear; a crowded entryway feels stressful, so choose only your most beautiful and functional items to display.
How to Design a Backyard Sanctuary for Ultimate Relaxation
Why we love this
A backyard sanctuary is more than just an outdoor space; it’s a physical manifestation of a deep breath. Imagine the soft trickle of a water feature masking the distant hum of the city, the gentle sway of a hammock under the shade of a willow tree, and the warm, golden glow of lanterns as twilight settles in. This is about creating a sensory escape where the textures are soft, the colors are muted, and the only agenda is to rest. It’s a place where you can disconnect from the digital world and reconnect with the simple rhythm of nature right outside your back door.
Essential Elements:
- Comfortable, deep-seated lounge furniture
- A focal point water feature (fountain or small pond)
- Privacy screening (tall plants, trellis, or outdoor curtains)
- Soft ambient lighting (solar path lights or hanging lanterns)
- Fire pit or outdoor heater for cooler evenings
How to make it
- Define the ‘sanctuary’ zone by using tall potted bamboo or a wooden trellis covered in climbing jasmine to create a sense of enclosure and privacy.
- Incorporate a sound element; even a small, plug-in tabletop fountain can provide enough white noise to drown out neighborhood distractions.
- Invest in high-quality outdoor fabrics; choose oversized floor pillows and plush cushions in neutral, earthy tones like sage green or slate gray.
- Arrange your seating in a circular or semi-circle pattern around a central fire pit to encourage conversation and provide a cozy focal point.
- Layer your lighting by placing solar-powered spotlights at the base of trees and stringing Edison bulbs overhead to create ‘ceilings’ of light.
- Add a final layer of comfort with an outdoor rug that feels soft underfoot, making the space feel like a true extension of your indoor living room.
Creating Your Viral-Inspired Home
Bringing these viral styles into your home isn’t about achieving perfection—it’s about creating a space that resonates with your personal energy and lifestyle. Whether you start small with a spring chalkboard or go big with a backyard sanctuary, the goal is to make your home a place where you feel fully yourself. Remember, the best ‘aesthetic’ is the one that makes you want to stay a little longer, breathe a little deeper, and enjoy the beauty of the everyday.
Frequently Asked Questions
How can I achieve these looks on a tight budget?
The beauty of many viral trends is that they rely on creativity rather than cost. For the grill station or entryway divider, look for second-hand materials or upcycle furniture from thrift stores. Paint is the most affordable way to transform a space, and DIY projects like the door hanger or chalkboard only require basic craft supplies.
Are these styles high-maintenance?
We purposefully selected several styles, like the low-maintenance flower bed and the functional entryway, that are designed to make your life easier. For the more decor-heavy styles like the Crabsjoon aesthetic, the key is to choose durable, washable fabrics and minimalist layouts that are easy to dust and keep organized.
What if my home is very small?
Most of these ideas are highly scalable! The small porch curation and the functional entryway arrangement are specifically designed for compact spaces. Use vertical storage, mirrors to create the illusion of space, and multi-functional furniture to get the viral look without the clutter.