

There is a special kind of magic that happens when you finally look around your home and see a space that truly reflects your soul. Lately, my social media feeds have been bursting with incredible inspiration that proves you don’t need a massive renovation budget to create a sanctuary; you just need a bit of creativity and the courage to try something new. From the way light hits a freshly tiled pool to the comforting rustle of a summer wreath against a front door, these trends are all about elevating the everyday moments.
I’ve spent the last few months bookmarking the most viral, heart-tugging home decor ideas that are taking the internet by storm. These aren’t just passing fads; they are lifestyle shifts that focus on making our homes more functional, beautiful, and uniquely ours. Whether you’re living in a cozy mobile home or looking to turn your backyard into a five-star resort, there is something here that will spark that ‘I have to do this’ feeling in your heart.
In this post, I’m breaking down the top trends of the year with detailed guides on how you can bring these looks into your own space. Let’s dive into the textures, colors, and projects that are making waves and transforming houses into homes across the globe.
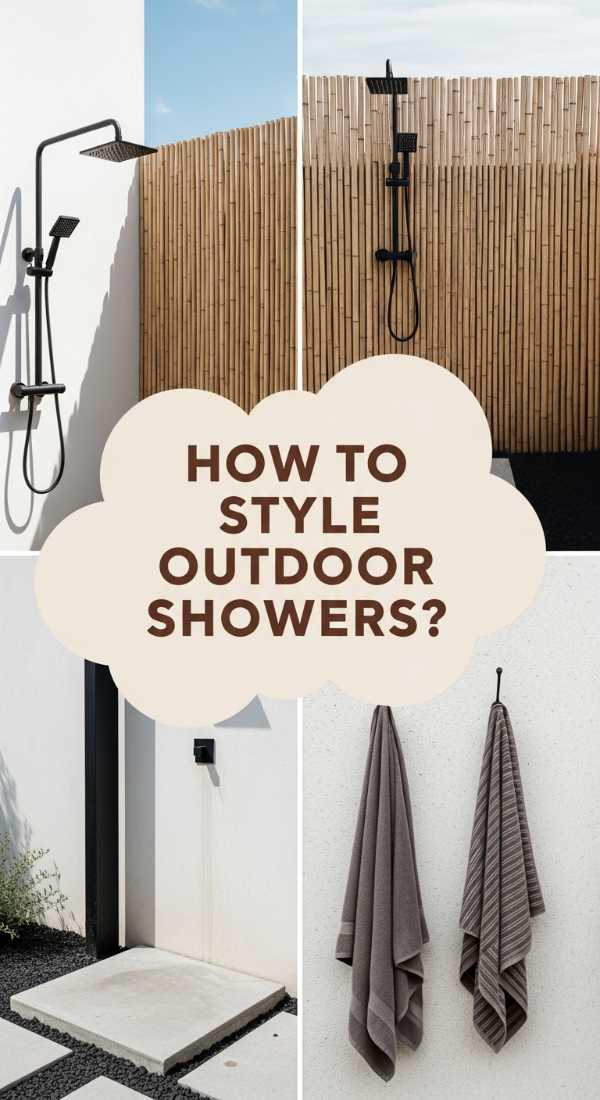
How to Build a Simple Outdoor Shower for Refreshing Summer Mornings

Why we love this
There is nothing quite like the sensory liberation of showering under the open sky, feeling the cool morning breeze mingle with the steam of warm water. The scent of cedar wood dampening under the spray creates an immediate spa-like atmosphere, transporting you to a remote forest retreat right in your own backyard. It’s a functional piece of art that invites a slower, more intentional start to your day, washing away the heat of the sun and leaving you with the earthy, refreshing aroma of the great outdoors.
Essential Elements:
- Pressure-treated 4×4 posts for structural integrity
- Cedar or reclaimed wood slats for privacy panels
- Outdoor-rated shower head and faucet kit
- PEX piping or heavy-duty garden hose adapter
- Crushed gravel or river stones for drainage
- Stainless steel screws and brackets
How to make it
- Level the ground in a private corner of your yard and excavate a 3×3 foot area about 6 inches deep, filling it with crushed gravel to ensure water doesn’t pool at your feet.
- Set four 4×4 pressure-treated posts into the ground using fast-setting concrete, ensuring they are perfectly vertical and spaced 3 feet apart to create a square frame.
- Mount horizontal cedar slats to three sides of the posts, leaving a 1/2-inch gap between each board to allow for airflow and a peek of natural light while maintaining complete privacy.
- Install your outdoor shower kit by mounting the faucet assembly to the center post, ensuring the shower head is at least 7 feet high for a comfortable drenching experience.
- Connect your water source—either by tapping into your home’s exterior plumbing or using a high-quality hose adapter—and check all fittings for leaks before sealing the wood with a water-resistant finish.
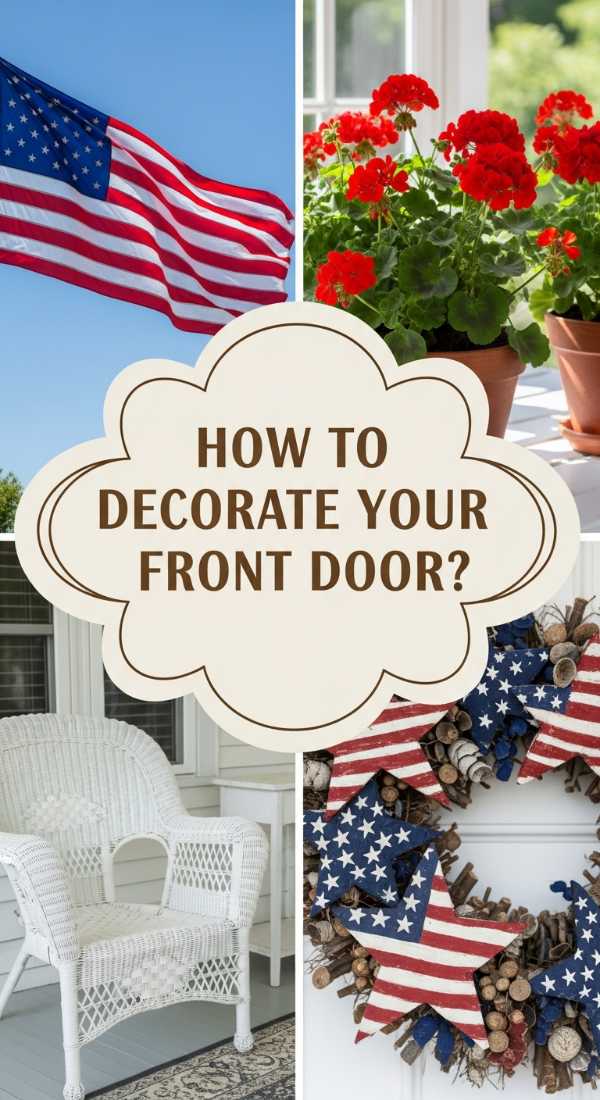
How to Design Patriotic Front Door Wreaths for a Festive Welcome
Why we love this
A patriotic wreath is more than just decor; it’s a vibrant salute to the spirit of celebration that defines the summer months. We love the tactile mix of rough-hewn burlap against the smooth, crisp lines of grosgrain ribbons in deep navy and crimson red. The sight of it swaying gently in the wind evokes memories of neighborhood parades and evening fireworks, providing a cheerful, high-contrast pop against your front door that instantly warms the hearts of guests before they even step inside.
Essential Elements:
- 18-inch grapevine or wire wreath form
- Red, white, and blue wired ribbon (various widths)
- Faux white hydrangeas or star-shaped accents
- Miniature wooden stars or an ‘USA’ sign
- Floral wire and hot glue gun
- Protective UV-clear spray
How to make it
- Begin with your grapevine base and use a 2.5-inch navy ribbon to create a large, multi-looped bow, securing it to the upper left quadrant with floral wire for a classic asymmetrical look.
- Layer in your red and white elements by weaving strips of crimson ribbon through the vines, creating soft loops that mimic the waving of a flag.
- Attach clusters of faux white hydrangeas using hot glue, tucking them behind the navy bow to provide a soft, floral texture that breaks up the bold colors.
- Wire several painted wooden stars into the grapevine, staggering them across the right side of the wreath to balance the visual weight of the bow.
- Spray the entire piece with a UV-resistant clear coat to prevent the sun from fading the vibrant reds and blues, ensuring your festive welcome lasts all season long.
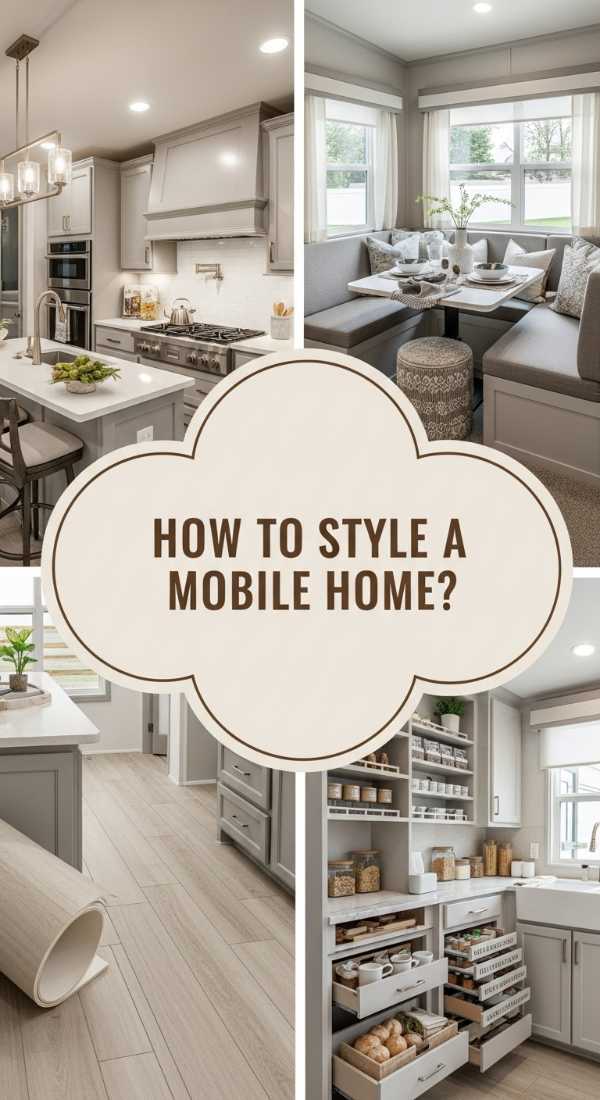
How to Elevate Singlewide Mobile Home Spaces for a Luxe Aesthetic
Why we love this
We are absolutely obsessed with the way strategic design can completely erase the boundaries of a space, turning a standard mobile home into a high-end sanctuary. The secret lies in the richness of architectural details—think the smooth, matte finish of crown molding against walls painted in ‘expensive’ neutrals like taupe or mushroom. When you walk into an elevated space like this, it feels grounded and substantial, with every plush textile and gold-toned fixture whispering a story of curated luxury and thoughtful living.
Essential Elements:
- Lightweight polyurethane crown molding and baseboards
- High-quality peel-and-stick vinyl plank flooring
- Modern, slim-profile LED light fixtures
- Neutral, warm-toned paint palette (eggshell or satin finish)
- Floor-to-ceiling velvet or linen drapery
- Architectural wall panels or shiplap
How to make it
- Start by removing the standard thin plastic trim and replacing it with 4-inch polyurethane crown molding and wider baseboards to instantly create the illusion of thick, permanent walls.
- Apply a fresh coat of high-quality paint in a cohesive neutral shade throughout the main living area, using a satin finish to help bounce light and make the ceilings feel significantly higher.
- Install luxury vinyl plank flooring directly over the existing subfloor, choosing a wide-plank oak or walnut finish to provide a high-end, grounded foundation for your furniture.
- Replace dated boob-lights with modern, gold or matte black flush-mount fixtures that provide warm, layered lighting rather than harsh overhead glares.
- Hang floor-to-ceiling drapes at least 6 inches above the window frame to draw the eye upward and add a soft, expensive-feeling texture to the room’s perimeter.
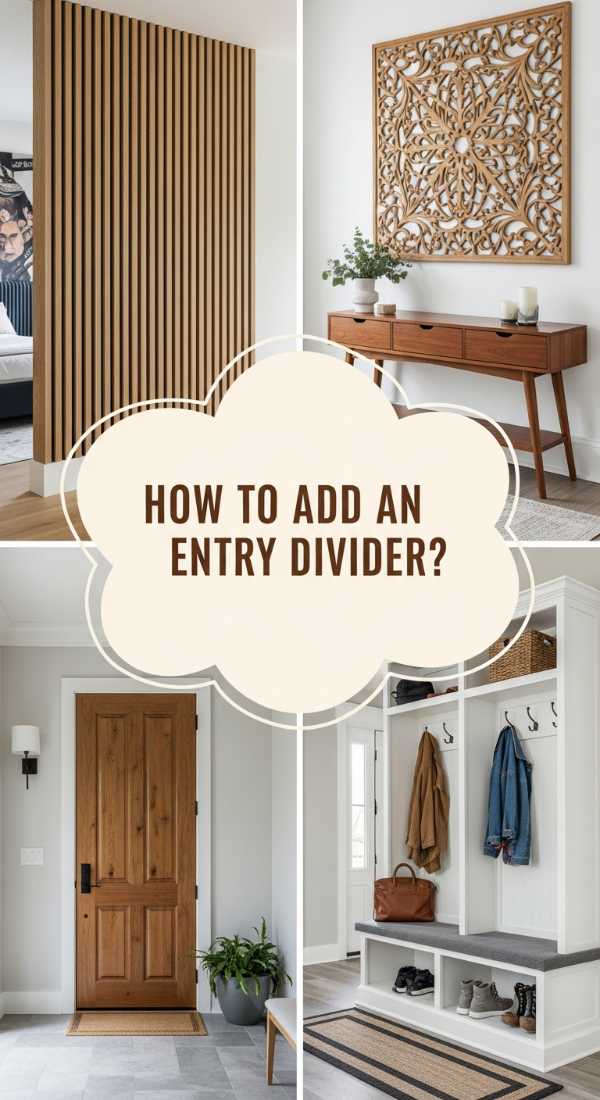
How to Install a Stylish Entry Divider for Improved Home Flow
Why we love this
An entry divider is the ultimate ‘chic’ solution for open-concept homes that lack a formal foyer. It creates a beautiful sense of mystery and transition without blocking the precious flow of natural light. We love the rhythmic shadow patterns created by vertical wooden slats—it adds a modern, architectural texture that feels both airy and grounding. It’s the perfect spot to lean against while kicking off your shoes, providing a physical boundary that helps your brain switch from ‘outside world’ to ‘home sweet home’.
Essential Elements:
- 1×2 or 2×2 clear pine or oak boards (cut to ceiling height)
- Heavy-duty wood glue and finish nails
- L-brackets or a custom recessed floor/ceiling track
- Wood stain or matte black paint
- Level and spacers (1-inch thick)
How to make it
- Measure the exact distance from your floor to your ceiling and cut your vertical slats to size, subtracting 1/4 inch to allow for easy positioning during the install.
- Sand each board thoroughly and apply a high-quality stain or paint; doing this before installation ensures a professional, drip-free finish on all sides.
- Mark a straight line on the floor and ceiling using a chalk line or laser level to ensure your divider sits perfectly perpendicular to the walls.
- Secure a top and bottom ‘runner’ board to the ceiling joists and floor, then begin attaching your vertical slats one by one, using 1-inch spacers to ensure perfect, even gaps.
- Use a finish nailer to secure the slats into the runners at an angle, then fill the nail holes with matching wood putty for a seamless, high-end look.
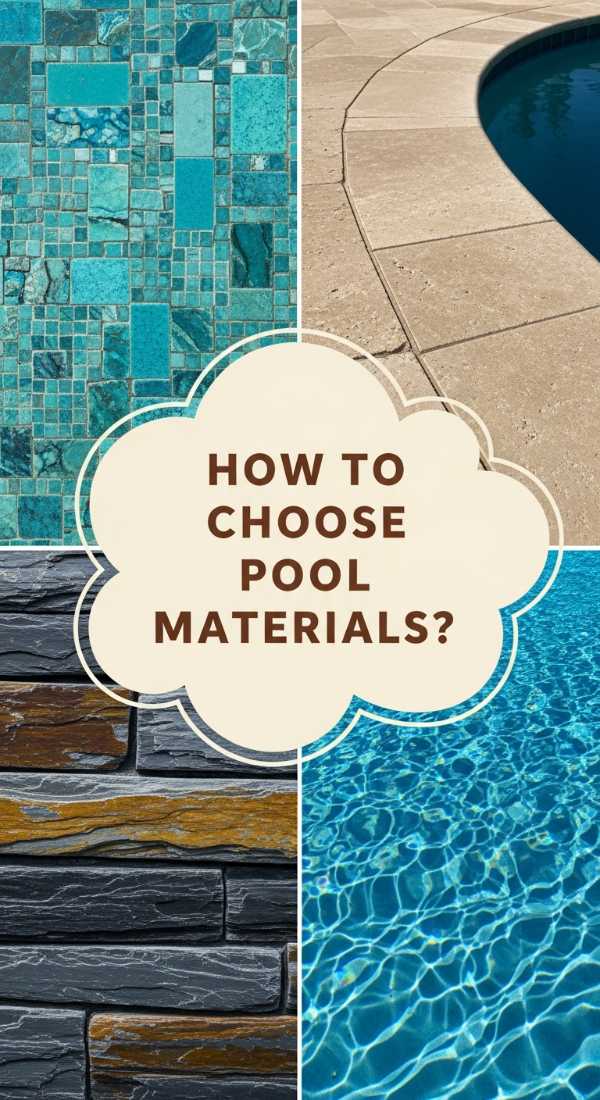
How to Select Pool Stone and Tile for a Backyard Oasis

Why we love this
Choosing the right pool materials is like selecting jewelry for your backyard; it’s where texture meets the sparkling fluidity of water. We love the contrast between the cool, matte touch of tumbled travertine and the iridescent shimmer of glass mosaic tiles. When the sun hits the waterline, the interplay of light against the stone creates a mesmerizing dance of shadows that makes the water look deeper and more inviting, turning a simple swim into a sensory immersion in luxury.
Essential Elements:
- Travertine or limestone pavers (slip-resistant)
- Glass mosaic waterline tiles
- Anti-slip stone sealant
- High-bond thin-set mortar
- Waterproof grout in a coordinating shade
How to make it
- Order samples of both stone and tile and place them in your backyard to see how the colors shift under full sun and in the shade of the evening; look for stones that stay cool to the touch.
- Select a ‘cool-deck’ stone like silver travertine for the perimeter, ensuring it has a honed or tumbled finish to provide adequate grip for wet feet.
- Choose a 1×1 inch glass mosaic tile for the waterline that features at least three shades of blue or green to mimic the natural variations of the ocean.
- Ensure the concrete pool shell is properly cured and waterproofed before applying a thick layer of high-bond thin-set to the waterline area.
- Lay the tile in 12-inch sheets for speed and accuracy, then finish with a polymer-modified grout that resists chemicals and fading from chlorine or salt water.
How to Master a Soft Color Palette for a Calming Living Space
Why we love this
There is a profound psychological shift that happens when you step into a room draped in soft, muted tones. We love how a palette of sage, cream, and dusty rose can quiet the noise of a busy day, acting as a visual deep breath. The lack of harsh contrast allows the textures of the room—the knobby wool of a rug or the smooth grain of light oak—to take center stage, creating a cocoon of comfort that feels both sophisticated and incredibly approachable.
Essential Elements:
- Flat or eggshell paint in ‘greige’ or pale sage
- Cream-colored linen throw pillows
- Light-toned wood furniture (ash or white oak)
- Woven jute or wool area rugs
- Warm-toned 2700K LED light bulbs
How to make it
- Clear the room of all bold, primary colors and start with a blank canvas by painting the walls in a soft, warm neutral like ‘Alabaster’ or a very pale, earthy green.
- Layer your largest furniture pieces first, choosing sofas and chairs in oatmeal or light grey fabrics to keep the visual weight of the room feeling light.
- Introduce texture through textiles; mix a chunky knit cream throw with smooth linen pillows to add depth without needing to add bright colors.
- Swap out any cool-toned ‘daylight’ bulbs for warm-toned LEDs, as the yellow-warm light is essential for making a soft palette feel cozy rather than sterile.
- Add one ‘grounding’ element in a slightly darker but still muted tone, like a charcoal ceramic vase or a dark wood picture frame, to prevent the room from looking washed out.
How to Style a Simple Outdoor Rinse Station for Minimalist Backyard Vibes
Why we love this
Minimalism meets utility in the outdoor rinse station, and we are here for it. This isn’t a full shower; it’s a sleek, streamlined copper pipe standing against a backdrop of green leaves, designed for a quick rinse after a dip in the pool or a day in the garden. We love the industrial beauty of the copper as it slowly patinas over time, turning from a bright penny-orange to a sophisticated verdigris, blending perfectly with the organic textures of your backyard.
Essential Elements:
- 1/2 inch copper piping and elbows
- Wall-mounted copper garden faucet
- Polished river stones for a drainage bed
- Simple wooden deck tile or concrete paver
- Outdoor-grade sealant
How to make it
- Pick a spot near your existing outdoor spigot and install a single concrete paver or a 2×2 slatted wood tile to serve as a clean standing platform.
- Assemble your copper pipe vertical ‘standpipe’ using plumbing solder or high-strength epoxy designed for metal, keeping the lines straight and minimalist.
- Secure the pipe to an exterior wall or a dedicated wooden post using copper C-clamps, ensuring it is rigid and won’t rattle when the water is turned on.
- Attach a simple high-flow faucet head at waist height for rinsing hands and feet, or at chest height for a quick body rinse.
- Surround the standing platform with 2 inches of polished river stones to hide the drainage area and add a natural, zen-like aesthetic to the station.
How to Arrange Patriotic Porch Decor for Ultimate Seasonal Curb Appeal
![]()
Why we love this
The front porch is the face your home shows to the world, and patriotic decor is the ultimate way to celebrate with grace. We love the classic, timeless feel of pleated cotton bunting draped over a white railing—it feels nostalgic and grand all at once. The smell of fresh potting soil from red geraniums paired with the crisp snap of a flag in the breeze creates an inviting, high-energy atmosphere that makes every neighbor feel like they’re invited to the party.
Essential Elements:
- Pleated cotton flag bunting
- Large American flag with a sturdy wall-mount pole
- Red geraniums or blue hydrangeas in white ceramic pots
- Navy blue outdoor rug or doormat
- White wicker or wooden rocking chairs
How to make it
- Install your main flag pole at a 45-degree angle near the front pillar or door, ensuring the flag has enough clearance to wave without hitting the roofline.
- Attach pleated bunting to the porch railing, using zip ties hidden behind the folds to keep the fabric taut and evenly spaced across the entire length.
- Create a symmetrical entrance by placing two large white planters on either side of the door, filled with vibrant red geraniums and a ‘spike’ plant for height.
- Layer a navy-and-white striped rug under a natural coir doormat to give the floor space texture and tie in the patriotic color scheme.
- Arrange a pair of white rocking chairs with navy blue throw pillows to create a cozy ‘vignette’ that encourages sitting back and enjoying the summer breeze.
How to Transform Singlewide Mobile Home Interiors for Modern Living

Why we love this
Modern living is all about maximizing function without sacrificing style, and mobile home interiors are the perfect canvas for this. We love the challenge of turning a narrow layout into an airy, open-concept masterpiece through the use of ‘invisible’ furniture and smart storage. The feeling of a space that works *for* you—where every mirror reflects a view and every cabinet is hidden behind a sleek, handle-less door—is incredibly empowering and proves that style is about intention, not square footage.
Essential Elements:
- Light-colored, low-profile furniture
- Large wall mirrors to create depth
- Integrated smart storage solutions (hidden cabinets)
- Matte black hardware and faucets
- Sheer, light-filtering window treatments
How to make it
- Remove any bulky, dark furniture and replace it with pieces that feature ‘legs’ (exposed undersides), which allows the eye to see more floor space and makes the room feel larger.
- Mount a large, oversized mirror on the longest wall of the living area to visually double the width of the home and bounce natural light into the kitchen.
- Update all interior door handles and cabinet pulls to a modern matte black finish to provide a consistent, high-end design thread throughout the entire home.
- Swap heavy blinds for sheer white curtains hung high and wide; this softens the walls and hides the standard mobile home window frames.
- Utilize vertical space by installing floating shelves in the kitchen and bathroom, keeping the floor clear and creating a modern, curated gallery feel.
How to Pair Pool Stone and Tile for a High-End Resort Look
[IMAGE_10]
Why we love this
The perfect pairing of stone and tile is the hallmark of a luxury resort, and bringing that look home is a total game-changer. We love the sophisticated ‘cool’ of silver-grey slate paired with deep emerald green tiles—it feels like a hidden lagoon in the middle of a city. The visual weight of the heavy stone provides a sense of permanence and grandeur, while the glossy tile adds a layer of glamour and ‘sparkle’ that makes the water feel crystal clear and perpetually refreshing.
Essential Elements:
- Dark grey slate or anthracite granite coping
- Emerald green or deep cobalt 2×2 inch porcelain tiles
- Dark charcoal grout for a seamless look
- LED pool lighting (color-changing)
- High-gloss stone enhancer sealant
How to make it
- Select a dark, moody stone for the pool’s ‘coping’ (the edge piece) to create a sharp, defined border that contrasts beautifully with the blue of the water.
- Choose a pool tile in a deep, saturated jewel tone rather than the standard light blue; this creates a ‘mirror’ effect on the water’s surface that looks incredibly expensive.
- Use a dark-colored grout that matches your tile to minimize the ‘grid’ look and create a continuous wash of color along the waterline.
- Apply a stone enhancer sealant to the coping after installation; this will darken the stone and give it a ‘wet’ look that remains vibrant even when dry.
- Install underwater LED lights that can be set to a warm white or a soft teal to highlight the rich textures of your stone and tile pairing after the sun goes down.
Conclusion
Transforming your home into a viral-worthy sanctuary is all about the details and the love you pour into each project. Whether you’re building a simple rinse station or completely reimagining your interior, remember that the most beautiful trend is a home that makes you feel at peace. I can’t wait to see which of these trends you bring to life in your own space—happy decorating!