
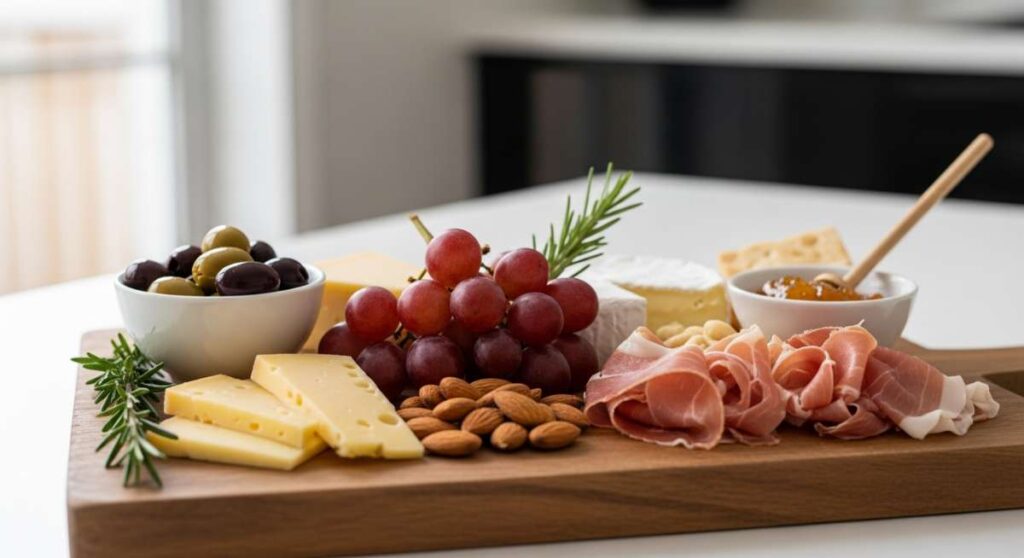
From Fridge to Table: Simple Food Boards That Look Gourmet
There is something undeniably magical about the moment friends gather around a table, the air buzzing with laughter and the clinking of glasses. For years, I thought hosting meant spending hours hunched over a stove, missing out on the very memories I was trying to create. But then I discovered the art of the ‘board’—a curated, effortless way to turn simple fridge staples into a gourmet experience that looks like it stepped right off a Pinterest feed.
The secret isn’t in expensive ingredients or professional culinary training; it’s in the assembly and the love you pour into the little details. Whether it’s a weekday lunch or a weekend celebration, these simple food boards invite people to graze, linger, and enjoy. Today, I’m sharing my favorite viral tricks to elevate your home cooking and styling so you can spend less time stressed in the kitchen and more time enjoying the glow of a well-fed table.
How to make crispy potatoes?

Why we love this
There is a specific, primal joy in biting into a potato that shattered with a loud crunch, revealing a center as fluffy as a cloud. These aren’t just side dishes; they are the golden, salty stars of any grazing board. The aroma of roasted garlic and rosemary clinging to the craggy, oil-crisped edges is enough to draw anyone into the kitchen. Each bite offers a perfect contrast of textures—the rustic, rugged exterior giving way to a buttery, melt-in-your-mouth interior that feels like a warm hug on a plate.
Ingredients
- 2 lbs Yukon Gold potatoes, chopped into 1-inch cubes
- 1/4 cup extra virgin olive oil
- 1 tsp baking soda
- 3 cloves garlic, minced
- 1 tbsp fresh rosemary, finely chopped
- Flaky sea salt and cracked black pepper
How to make it
- Start by parboiling your cubed potatoes in a large pot of heavily salted water. Add the baking soda to the water; this breaks down the exterior starch, creating a fuzzy surface that will eventually turn into that signature extra-crunchy crust.
- Boil for about 8-10 minutes until the edges are tender but the potatoes are still holding their shape. Drain them thoroughly and let them steam dry in the colander for 2 minutes—moisture is the enemy of crispiness.
- Shake the potatoes vigorously in the pot to roughen up the edges. This ‘potato fluff’ is essential for texture.
- Preheat your oven to 425°F (220°C). Pour the olive oil onto a large rimmed baking sheet and place it in the oven for 5 minutes to get the oil shimmering hot.
- Carefully spread the potatoes onto the hot tray in a single layer. Roast for 20 minutes, then flip them. Add the garlic and rosemary at this stage so they infuse without burning.
- Continue roasting for another 15-20 minutes until they are deep golden brown and audibly crunchy when tapped with a spatula. Sprinkle with flaky salt immediately while the oil is still bubbling.
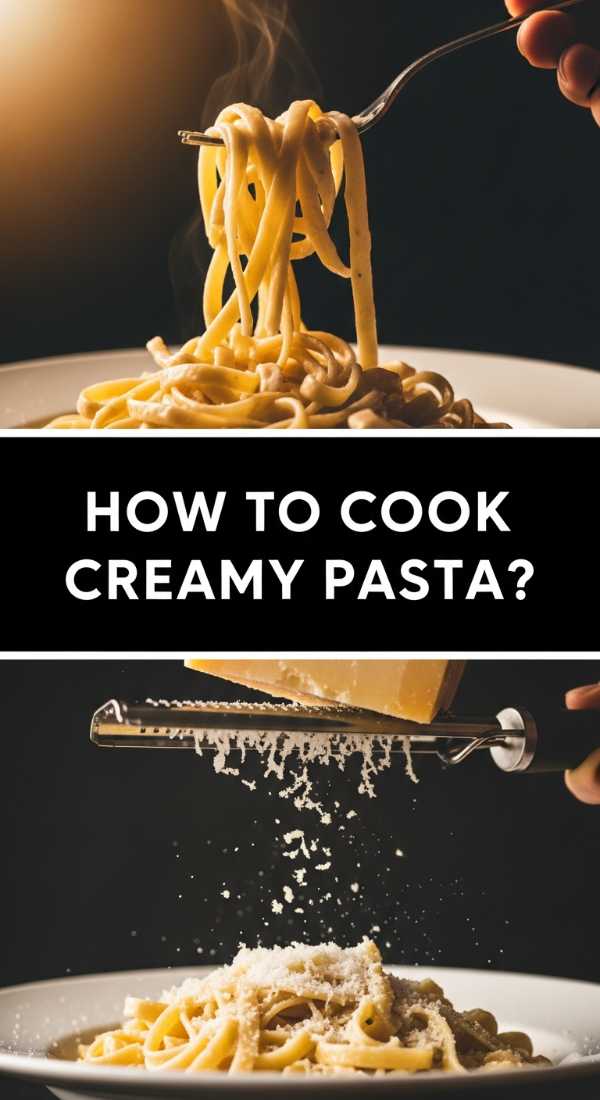
How to cook creamy pasta?
Why we love this
Few things feel as luxurious as a plate of pasta coated in a silk-smooth, glossy sauce that clings to every curve. The scent of nutty Parmesan melting into a backdrop of garlic and butter is the ultimate sensory invitation to the dinner table. This dish is all about the ’emulsion’—that scientific magic where starchy water and fat become a velvety coat. It feels indulgent and elegant, yet it’s built from the simplest pantry staples, proving that gourmet dining is often just about mastering the right technique.
Ingredients
- 1 lb long pasta (Linguine or Bucatini)
- 4 tbsp unsalted butter
- 1 cup freshly grated Parmigiano-Reggiano
- 2 cloves garlic, thinly sliced
- 1 cup reserved pasta water
- Fresh cracked black pepper and lemon zest
How to make it
- Bring a large pot of water to a boil, but use less water than usual to ensure the starch concentration is very high. Salt the water until it tastes like the sea.
- Drop your pasta and cook it until it is ‘molto al dente’—about 2 minutes shy of the package instructions. It will finish cooking in the sauce.
- While the pasta boils, melt butter in a large skillet over medium-low heat. Add the sliced garlic and cook slowly until it is soft and fragrant, but do not let it brown or become bitter.
- Using tongs, transfer the pasta directly from the boiling water into the skillet. Do not drain the pasta water yet!
- Add half a cup of the starchy pasta water to the skillet. Increase the heat to medium and toss vigorously. The agitation helps the starch and butter unite into a creamy base.
- Remove from heat and gradually whisk in the grated cheese, adding more pasta water a tablespoon at a time if it looks too dry. The goal is a glossy, tight sauce that coats the noodles perfectly. Finish with a heavy hand of black pepper and a bright zing of lemon zest.
How to use crock pots?

Why we love this
The crock pot is the unsung hero of the modern kitchen, a vessel of patience that transforms tough cuts of meat and humble vegetables into a symphony of tender flavors. There is a nostalgic comfort in coming home to a house filled with the savory, slow-simmered aroma of a meal that has been developing all day. It’s the feeling of ‘future you’ taking care of ‘present you,’ providing a rich, deeply flavored dish with minimal effort and maximum heart.
Ingredients
- 3 lbs chuck roast or pork shoulder
- 2 cups beef or vegetable stock
- 3 carrots, cut into large chunks
- 1 large onion, quartered
- 4 sprigs fresh thyme
- 2 tbsp tomato paste
How to make it
- The most important rule of slow cooking is the sear. Before anything goes into the crock pot, heat a splash of oil in a heavy skillet over high heat. Season your meat generously and sear on all sides until a deep, dark brown crust forms. This develops the Maillard reaction that a slow cooker cannot achieve on its own.
- Deglaze your searing pan with a splash of stock, scraping up all the brown bits (the fond), and pour that liquid into the crock pot.
- Layer your hard vegetables (like carrots and onions) at the bottom of the pot. They act as a trivet for the meat and cook better when in direct contact with the heating element.
- Place the seared meat on top of the vegetables and add your aromatics like thyme and tomato paste.
- Pour in your liquid until it reaches about halfway up the meat. Do not submerge the meat entirely; slow cookers retain moisture, and too much liquid will result in boiled meat rather than braised.
- Set to ‘Low’ for 8 hours. Resist the urge to open the lid; every time you ‘peek,’ you lose 15-20 minutes of heat and moisture. The meat is done when it yields effortlessly to a fork.
How to bake chewy cookies?

Why we love this
A truly great cookie is a study in contrasts: a slightly crisp, caramelized edge that gives way to a center so soft and chewy it almost feels like fudge. The smell of browning butter and vanilla bean wafting through the house creates an instant sense of sanctuary. These are the cookies that disappear from the board first—pools of dark chocolate still glistening and a faint sparkle of sea salt on top to balance the sweetness. It’s a nostalgic treat elevated to a gourmet art form.
Ingredients
- 1 cup unsalted butter, browned and cooled
- 1 cup brown sugar (packed) and 1/2 cup white sugar
- 2 cups all-purpose flour
- 1 tsp baking soda
- 2 tsp vanilla bean paste
- 1.5 cups high-quality chocolate chunks
How to make it
- Brown your butter in a saucepan over medium heat until it smells nutty and has golden-brown specks at the bottom. Let it cool until it reaches a soft solid state. This step adds a deep, toffee-like flavor profile.
- Cream the butter and sugars together for at least 3-5 minutes. You want the mixture to look pale and fluffy, which ensures a soft structure.
- Mix in your egg and vanilla bean paste until just combined. Fold in your dry ingredients (flour and baking soda) by hand using a spatula. Do not overmix, as this develops gluten and makes the cookies tough instead of chewy.
- Fold in the chocolate chunks. Now, the critical step: Chill the dough for at least 12-24 hours. This hydrates the flour and concentrates the flavors.
- Scoop large mounds of dough (about 3 tablespoons each) onto a parchment-lined sheet. Preheat your oven to 350°F (175°C).
- Bake for 9-11 minutes. The key is to take them out when the edges are just set but the centers still look slightly underdone and ‘wet.’ They will finish setting on the hot pan, resulting in that perfect chewy texture.
How to prep berry salad?

Why we love this
A berry salad is a vibrant explosion of color and freshness that acts as the perfect palate cleanser on any food board. Imagine the tart snap of a blackberry paired with the honeyed sweetness of a sun-ripened strawberry, all tied together with a whisper of fresh mint. The textures are varied—some soft, some seedy, some juicy—providing a refreshing counterpoint to heavier cheeses or meats. It looks like a bowl of jewels and tastes like the very essence of a bright, breezy summer afternoon.
Ingredients
- 2 cups strawberries, hulled and quartered
- 1 cup blueberries
- 1 cup raspberries
- 1 tbsp honey or agave
- Fresh mint leaves, chiffonade
- 1 tsp lime zest and juice
How to make it
- Start by washing your berries very gently in cold water. Berries are delicate; don’t use a high-pressure tap. Pat them completely dry with a paper towel.
- Hull the strawberries (remove the green stem) and cut them into quarters so they are a similar size to the other berries. This ensures a balanced bite.
- In a small bowl, whisk together the lime juice, lime zest, and honey. This is your ‘macerating’ liquid. The acid in the lime helps draw out the natural juices of the berries without making them mushy.
- Place the berries in a glass bowl and drizzle the dressing over them. Gently toss with your hands or a rubber spatula to avoid bruising the fruit.
- Let the salad sit at room temperature for about 15 minutes before serving. This allows the flavors to meld and the juices to form a light syrup.
- Just before serving, sprinkle with the freshly cut mint. Adding the herbs too early will cause them to wilt and turn black from the acid in the lime.
How to sear juicy steak?

Why we love this
There is nothing quite as impressive as a perfectly seared steak, its exterior a dark, savory mahogany crust and its interior a glowing, tender pink. The aroma of rendered beef fat and scorched thyme is intoxicating, signaling a meal of substance and skill. When sliced thinly against the grain, it becomes the ultimate centerpiece for a board, offering a rich, umami-packed experience that feels like a celebration in every bite. It’s bold, sophisticated, and incredibly satisfying.
Ingredients
- 2 thick-cut Ribeye or New York Strip steaks
- 3 tbsp high-smoke point oil (like grapeseed)
- 4 tbsp unsalted butter
- 3 cloves garlic, smashed
- Fresh rosemary and thyme sprigs
- Coarse Kosher salt
How to make it
- Take your steaks out of the fridge at least 45 minutes before cooking. A cold steak will not cook evenly. Pat them extremely dry with paper towels; any surface moisture will steam the meat instead of searing it.
- Season aggressively with Kosher salt on all sides, including the edges. The salt needs time to penetrate the fibers.
- Heat a heavy cast-iron skillet over high heat until it is smoking slightly. Add the oil.
- Carefully lay the steaks away from you in the pan. Press down slightly to ensure full contact. Sear undisturbed for 3-4 minutes until a thick, dark crust forms.
- Flip the steaks. Immediately add the butter, smashed garlic, and herbs to the pan.
- As the butter melts and foams, tilt the pan and use a large spoon to continuously baste the steaks with the hot, flavored butter. This is the secret to a juicy, professional-grade steak. Cook until the internal temperature reaches 130°F (54°C) for medium-rare.
- Remove the steaks to a cutting board and let them rest for at least 10 minutes. This allows the juices to redistribute so they don’t run out when you slice it.
How to bake stuffed shells?

Why we love this
Stuffed shells are the ultimate comfort food, presenting like little edible parcels of joy. There is something so satisfying about the way the jumbo pasta shells cradle a rich, creamy ricotta filling, all blanketed under a bubbling layer of molten mozzarella and vibrant marinara. The edges of the pasta get slightly crispy in the oven, providing a lovely textural contrast to the soft, cheesy interior. It’s a dish that looks laborious and artisanal but is actually incredibly approachable and perfect for sharing.
Ingredients
- 1 box Jumbo Pasta Shells
- 15 oz Ricotta cheese
- 1 egg, lightly beaten
- 1/2 cup grated Parmesan
- 2 cups shredded Mozzarella
- 3 cups high-quality Marinara sauce
- 1 tsp dried oregano and fresh parsley
How to make it
- Boil your jumbo shells in salted water. Cook them for 2 minutes less than the ‘al dente’ time on the box. They need to be firm enough to handle without tearing and will finish softening in the sauce. Drain and rinse with cool water to stop the cooking.
- In a medium bowl, mix the ricotta, beaten egg, Parmesan, oregano, and half of the mozzarella. The egg acts as a binder to keep the filling from running out.
- Pour 1 cup of marinara sauce into the bottom of a 9×13 baking dish to create a non-stick, flavorful base.
- Using a small spoon or a piping bag, generously fill each shell with the ricotta mixture and nestle them into the baking dish.
- Top with the remaining marinara and the rest of the mozzarella cheese.
- Cover with foil (don’t let it touch the cheese!) and bake at 375°F (190°C) for 20 minutes. Remove the foil and bake for another 10-15 minutes until the cheese is bubbling and has golden brown spots. Let sit for 5 minutes before serving so the cheese sets.
How to style cooking clothes?

Why we love this
Cooking is as much a creative performance as it is a chore, and dressing the part changes your entire energy in the kitchen. We love the ‘chef-chic’ aesthetic because it blends utility with effortless style. Think breathable linens, soft cottons, and an apron that feels like an accessory rather than a uniform. When you feel put-together, the process of chopping and sautéing feels more like a ritual and less like a task. It’s about celebrating the lifestyle of the home cook with grace and comfort.
Ingredients
- 1 linen or heavy cotton apron in a neutral tone
- A high-quality white tee or a striped breton shirt
- Comfortable, non-slip leather mules or clogs
- A simple linen hair tie or bandana
- Natural fiber trousers with a bit of stretch
How to make it
- Start with a base of natural fibers. Linen and cotton are breathable and will keep you cool near a hot stove, while also being durable enough to withstand frequent washing.
- Choose a color palette that mirrors your kitchen. Earthy tones like sage, cream, or charcoal look professional and hide small flour dustings or splashes better than bright colors.
- The Apron is the hero piece. Opt for a cross-back style rather than a neck-tie to distribute weight evenly and prevent neck strain during long prep sessions. Look for deep pockets to hold your phone or a kitchen towel.
- Roll your sleeves! A crisp roll to the elbow is practical (keeps them out of the sauce) and instantly creates a purposeful, ‘ready to work’ silhouette.
- Keep jewelry minimal. A simple pair of studs or a flat wedding band is fine, but avoid dangling bracelets or rings with high settings that can catch on tools or trap food.
- Finish with functional footwear. You’ll be on your feet on hard surfaces, so choose something with support. Leather clogs add a touch of rustic European charm to the look.
How to assemble breakfast toast?

Why we love this
Breakfast toast is a canvas for morning creativity, turning a humble slice of bread into a gourmet masterpiece. There’s a specific crunch of well-toasted sourdough that provides the perfect stage for creamy avocados, runny egg yolks, or tangy feta. The beauty is in the layers—the heat of the toast slightly softening the toppings, the sprinkle of red pepper flakes for a wake-up call, and the finishing drizzle of olive oil. It’s a fast, nourishing way to start the day that looks beautiful on a breakfast board.
Ingredients
- Thick-cut Sourdough or Multigrain bread
- 1 ripe Avocado
- 2 Soft-boiled or poached eggs
- Radish slices and microgreens
- Everything Bagel seasoning or chili flakes
- Extra virgin olive oil
How to make it
- Toast your bread until it is deep golden brown and firm. A light toast will get soggy once the toppings are added. Use a toaster or, for extra flavor, griddle the bread in a pan with a little butter.
- Prepare your avocado by either thinly slicing it or mashing it in a bowl with a squeeze of lemon and a pinch of salt. Mashing it helps the other toppings ‘stick’ to the toast.
- Spread a thick layer of avocado onto the warm toast.
- Top with your egg of choice. For a soft-boiled egg, boil for exactly 6.5 minutes, then shock in an ice bath. Peel and halve to reveal a jammy center.
- Add your ‘texture’ layer. Thinly sliced radishes provide a peppery crunch, while microgreens add a delicate, earthy finish.
- The final flourish: Drizzle with high-quality olive oil and a generous sprinkle of seasoning. Serve immediately while the contrast between the hot toast and cool avocado is at its peak.
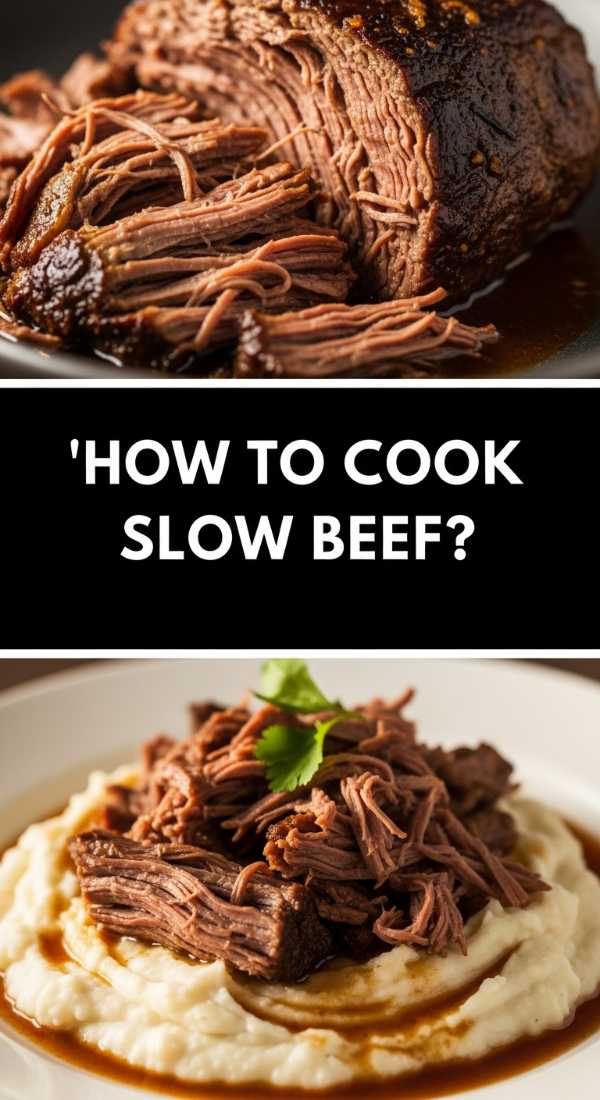
How to cook slow beef?
Why we love this
Slow-cooked beef is the embodiment of patience rewarded. As the meat braises in a bath of red wine and aromatics, the tough connective tissues melt into gelatin, resulting in a texture that literally falls apart at the suggestion of a fork. The sauce becomes a dark, glossy reduction that is the definition of umami. It’s a deeply soulful dish that fills the home with a sense of abundance and warmth, making it the perfect centerpiece for a rustic dinner board surrounded by mashed potatoes or crusty bread.
Ingredients
- 3-4 lbs Beef Chuck Roast, cut into large cubes
- 1 bottle dry red wine (Cabernet or Merlot)
- 2 cups beef bone broth
- 4 cloves garlic, crushed
- 2 tbsp flour (for dusting)
- Large sprigs of rosemary and bay leaves
How to make it
- Dry the beef cubes thoroughly with paper towels. Season with salt and pepper, then lightly dust with flour. The flour helps with browning and acts as a natural thickener for the sauce later.
- In a large Dutch oven, sear the beef in batches over medium-high heat. Do not crowd the pan, or the beef will steam. You want a dark, caramelized crust on all sides. Remove beef and set aside.
- Lower the heat and add garlic and any aromatics (like onions or celery if using). Sauté until fragrant.
- Pour in the entire bottle of red wine to deglaze the pan. Use a wooden spoon to scrape every bit of the ‘fond’ from the bottom—this is where the deep flavor lives.
- Return the beef to the pot and add the bone broth until the meat is mostly covered. Add your herbs.
- Cover with a tight-fitting lid and place in a 300°F (150°C) oven for 3 to 4 hours. Check at the 3-hour mark; the beef should be ‘fork-tender,’ meaning it breaks apart without resistance. If the sauce is too thin, simmer it on the stovetop uncovered for 10 minutes to reduce it to a silky glaze.
The Art of the Board
Creating a gourmet food board is about more than just the recipes; it’s about the arrangement and the intention. When you bring these dishes together—the crispy potatoes nestled next to the sliced steak, the berry salad providing a pop of color alongside the creamy pasta—you create a landscape of flavors. Remember to use various heights and textures, adding small bowls for sauces and sprigs of fresh herbs to fill the gaps. Your table is a reflection of your hospitality, and with these simple techniques, you’re ready to host with confidence and style.