

Move Over, Charcuterie: These Simple Food Boards Are the New Hosting Obsession
There is something inherently magical about the way a shared meal brings people together, but let’s be honest: the traditional formal dinner party can feel a bit stifling. Lately, I’ve found myself leaning away from stiff place settings and toward the ‘food board’ revolution. It’s more than just a trend; it’s a lifestyle shift that prioritizes connection over perfection. There’s no pressure to keep things plated perfectly when your guests are diving into a beautiful, communal spread that invites them to linger and laugh.
The secret to a viral-worthy food board isn’t just about the aesthetics; it’s about the soul of the food. We are talking about comfort-focused, accessible dishes that smell like home and taste like a celebration. Whether it’s the silkiness of a handmade pasta or the crunch of a perfectly roasted veggie, these boards are designed to be interactive, messy, and absolutely delicious. Let’s dive into the ultimate guide to mastering these modern hosting staples.
How to make creamy pasta?

Why we love this
There is nothing quite like the sight of a massive, steaming mound of creamy pasta nestled on a wooden board, decorated with fresh basil and curls of parmesan. The aroma is intoxicating—a blend of nutty garlic, sweet cream, and the earthy scent of semolina. When you take that first bite, the sauce should feel like velvet against your tongue, clinging to every ridge of the pasta. It’s the ultimate comfort food that feels high-end yet remains deeply rooted in the simple joy of a carb-heavy embrace, making it the perfect centerpiece for a cozy gathering.
Ingredients
- 1 lb Rigatoni or Penne pasta
- 2 cups heavy cream
- 1 cup freshly grated Parmigiano-Reggiano
- 4 cloves garlic, minced
- 2 tbsp unsalted butter
- 1 tsp red pepper flakes
- Fresh basil leaves for garnish
- Salt and cracked black pepper
How to make it
- Start by bringing a large pot of heavily salted water to a rolling boil. The water should taste like the sea to properly season the pasta from the inside out. Add your pasta and cook until it is ‘al dente’—about 2 minutes less than the package instructions.
- While the pasta cooks, melt the butter in a large skillet over medium-low heat. Add the minced garlic and sauté gently for 1-2 minutes. You want the garlic to become fragrant and translucent, but do not let it brown, as burnt garlic will turn the entire sauce bitter.
- Pour in the heavy cream and bring the mixture to a gentle simmer. Reduce the heat to low and let it bubble softly for about 5 minutes until it begins to slightly thicken. Stir in the red pepper flakes and a generous pinch of black pepper.
- Before draining the pasta, reserve exactly one cup of the starchy pasta water. This is liquid gold for your sauce! Drain the pasta and add it directly into the skillet with the cream.
- Turn the heat back up to medium. Gradually add the grated cheese while tossing the pasta constantly. If the sauce looks too thick or ‘clumpy,’ splash in the reserved pasta water a little at a time. The starch in the water helps the fat in the cheese and cream emulsify, creating a glossy, silk-like finish that coats every noodle.
- Serve immediately on a warmed board, garnished with hand-torn basil.
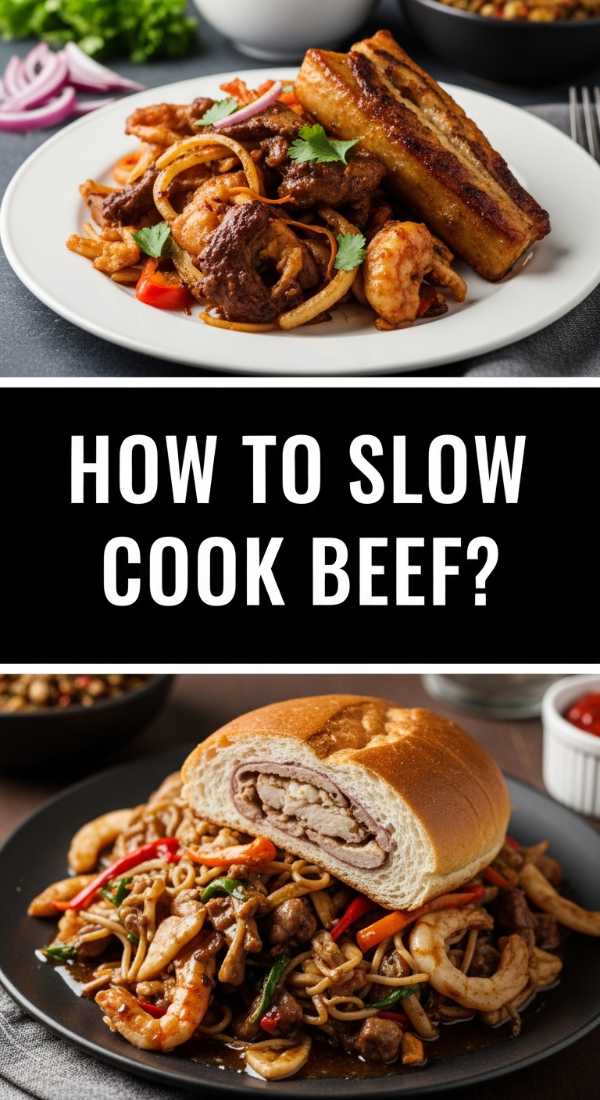
How to slow cook beef?
Why we love this
Slow-cooked beef is the epitome of patience rewarded. As the meat braises over several hours, the tough connective tissues break down into a rich, gelatinous silk that practically melts the moment it hits your palate. The kitchen fills with a deep, savory aroma of red wine, thyme, and seared beef that signals ‘home’ to anyone who walks through the door. It’s a rustic, hearty experience that feels incredibly indulgent, especially when piled high on a board with crusty bread to soak up every drop of the concentrated juices.
Ingredients
- 3 lb beef chuck roast, cut into large chunks
- 2 cups dry red wine (Cabernet or Merlot)
- 1 quart beef bone broth
- 3 large carrots, roughly chopped
- 2 onions, quartered
- 4 sprigs fresh thyme
- 3 tbsp tomato paste
- Kosher salt and avocado oil
How to make it
- Begin by patting your beef chunks completely dry with paper towels. This is a critical step; moisture on the surface of the meat prevents proper browning. Season aggressively with kosher salt.
- In a heavy Dutch oven, heat avocado oil over high heat until it just starts to shimmer. Sear the beef in small batches, ensuring you don’t crowd the pan. You are looking for a deep, dark brown crust on all sides—this ‘Maillard reaction’ is where all the deep flavor lives. Remove beef and set aside.
- Reduce heat to medium and add the onions and carrots to the same pot. Cook for 5 minutes until the edges are softened. Stir in the tomato paste and cook for 2 minutes, stirring constantly, until the paste turns a dark brick-red color.
- Deglaze the pan by pouring in the red wine. Use a wooden spoon to scrape up all the ‘fond’ (the brown bits) from the bottom of the pot. Let the wine reduce by half to concentrate the flavors.
- Return the beef to the pot along with the thyme and beef broth. The liquid should almost cover the meat. Cover with a tight-fitting lid.
- Place in a 300°F oven for 3.5 to 4 hours. You’ll know it’s finished when the beef shreds easily with the gentle pressure of a fork. Let the meat rest in the liquid for 20 minutes before serving to ensure maximum juiciness.
How to bake chocolate cookies?

Why we love this
There is a specific kind of nostalgia that only a warm chocolate chip cookie can evoke. Imagine a cookie with edges so crisp they snap, transitioning into a center that is soft, doughy, and punctuated by pools of molten, dark chocolate. The scent of browning butter and vanilla bean wafts through the air, creating an atmosphere of pure bliss. It’s the contrast of textures—the crunch of sea salt against the sweetness of the sugar—that makes these the ultimate addition to a dessert board that guests won’t be able to stop hovering over.
Ingredients
- 1 cup unsalted butter, browned and cooled
- 1 cup dark brown sugar, packed
- 1/2 cup granulated sugar
- 2 large eggs, room temperature
- 2 tsp vanilla bean paste
- 2 1/4 cups all-purpose flour
- 1 tsp baking soda
- 12 oz high-quality dark chocolate chunks
- Flaky sea salt for finishing
How to make it
- First, brown your butter. Melt it in a saucepan over medium heat, swirling until it foams and you see little brown specks at the bottom. It should smell nutty. Immediately pour it into a bowl and let it cool until it’s a soft solid consistency.
- In a stand mixer, cream the browned butter with both sugars for at least 3-5 minutes. You want the mixture to look pale and fluffy, which incorporates air for a better rise.
- Add the eggs one at a time, beating well after each addition, then stir in the vanilla bean paste.
- In a separate bowl, whisk together the flour, baking soda, and a pinch of salt. Slowly add the dry ingredients to the wet, mixing on the lowest speed just until no streaks of flour remain. Fold in the chocolate chunks by hand.
- Crucial step: Chill the dough. Wrap it and refrigerate for at least 12 hours. This hydrates the flour and develops a complex, toffee-like flavor.
- When ready to bake, scoop large rounds onto a parchment-lined sheet. Bake at 350°F for 10-12 minutes. The edges should be golden brown, but the centers should still look slightly underdone—they will firm up as they cool. Sprinkle with flaky salt immediately upon removal.
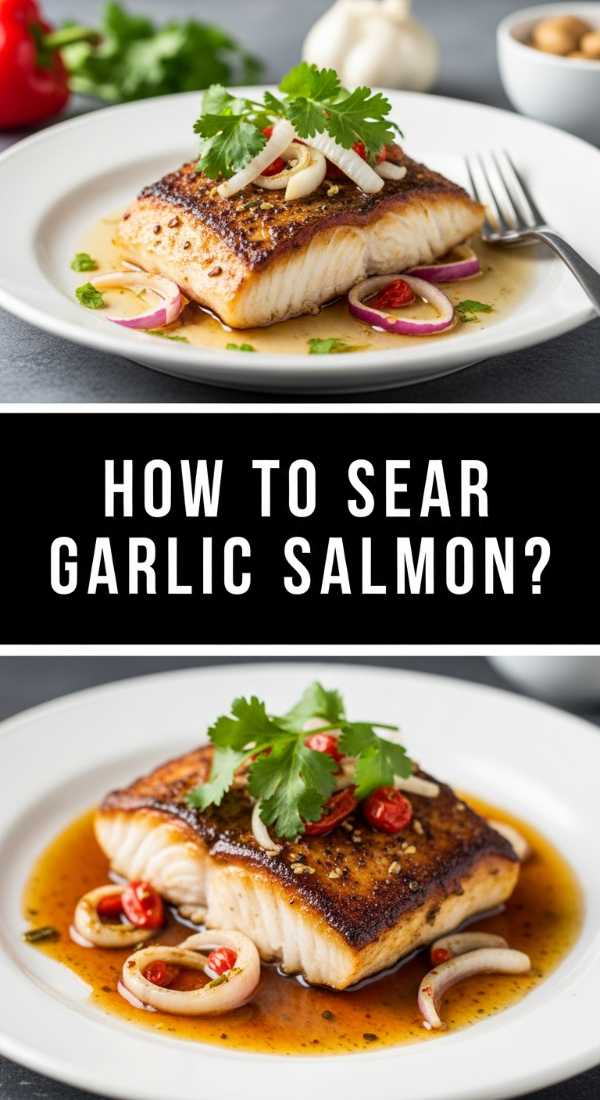
How to sear garlic salmon?
Why we love this
A perfectly seared salmon fillet is a work of art, boasting a glass-like, crispy skin and a tender, buttery interior that flakes away with the slightest touch. The aroma of sizzling garlic and bright lemon zest creates an immediate mouth-watering response. It’s a light yet luxurious protein that brings a vibrant pop of pink to any food board. Each bite provides a satisfying crunch followed by the rich, fatty goodness of the fish, balanced perfectly by the sharp, aromatic punch of the garlic butter glaze.
Ingredients
- 4 salmon fillets (6 oz each), skin-on
- 4 tbsp unsalted butter
- 3 cloves garlic, smashed and minced
- 1 tbsp fresh lemon juice
- 2 tbsp avocado oil (high smoke point)
- Fresh parsley, chopped
- Salt and lemon slices
How to make it
- Take the salmon out of the fridge 20 minutes before cooking to bring it to room temperature. This ensures even cooking. Pat the skin side extremely dry with a paper towel; any moisture will steam the fish instead of searing it.
- Season both sides generously with salt. Heat the avocado oil in a stainless steel or cast-iron skillet over medium-high heat until it is shimmering and just starting to smoke.
- Place the salmon fillets skin-side down in the pan. Press down firmly with a spatula for 10 seconds to ensure the skin makes full contact with the heat. Cook undisturbed for 5-6 minutes. You will see the color of the fish change from opaque to pale pink moving up the side of the fillet.
- Carefully flip the fillets. Immediately add the butter and minced garlic to the pan. As the butter melts and foams, tilt the pan and use a spoon to continuously baste the salmon with the hot garlic butter for about 1-2 minutes.
- Add the lemon juice to the butter at the very end. Remove the salmon when the internal temperature reaches 125°F for a perfect medium-rare.
- Garnish with parsley and serve skin-side up to maintain that incredible crunch.
How to prep crispy tacos?

Why we love this
The crispy taco board is the ultimate interactive hosting experience. There’s something so satisfying about the ‘crunch’ of a freshly fried shell shattering into a mix of seasoned meat, cool lime crema, and sharp radish. The smell of toasted corn and cumin-spiced beef creates an atmosphere of a summer street festival right in your dining room. It’s a sensory explosion—vibrant colors, varying temperatures, and the ability for every guest to customize their own perfect bite make this a viral favorite for a reason.
Ingredients
- 12 small corn tortillas
- 1 lb ground wagyu or lean beef
- 2 tbsp taco seasoning (cumin, chili powder, garlic powder)
- Vegetable oil for frying
- Shredded iceberg lettuce
- Pickled red onions and radishes
- Cilantro and lime wedges
How to make it
- Prepare the filling first. Brown the beef in a skillet over medium-high heat, breaking it into very small crumbles. Drain the excess fat, then add your seasonings and a splash of water. Simmer until the water has evaporated and the meat is deeply seasoned and moist.
- To make the shells crispy, heat about 1/2 inch of vegetable oil in a small skillet over medium heat. You’ll know it’s ready when a small piece of tortilla sizzles immediately.
- Using tongs, place a tortilla in the oil for 10 seconds until soft. Fold it in half and hold one side down in the oil for 30 seconds until golden and stiff, then flip to the other side for another 30 seconds. Drain on paper towels and immediately sprinkle with a tiny bit of salt.
- To assemble for a board, keep the shells upright by nesting them against each other.
- Fill each shell with a layer of beef, followed by the cold toppings. Pro tip: apply the lime crema directly onto the meat to act as a ‘glue’ for the lettuce and onions.
- Arrange on a large board with extra bowls of salsa and guacamole for a festive, ‘help-yourself’ vibe.
How to roast summer veggies?

Why we love this
Roasting summer vegetables transforms them from simple garden produce into caramelized, candy-like morsels of intense flavor. The high heat of the oven coaxes out the natural sugars in zucchini, bell peppers, and cherry tomatoes, creating charred edges that provide a smoky depth. The sight of a rainbow-colored veggie board, glistening with high-quality olive oil and sprinkled with fresh herbs, is as beautiful as any floral arrangement. It’s a celebration of the season that feels light, healthy, and incredibly sophisticated.
Ingredients
- 2 medium zucchini, sliced into half-moons
- 1 red bell pepper and 1 yellow bell pepper, sliced
- 1 pint cherry tomatoes
- 1 bunch asparagus, woody ends trimmed
- 3 tbsp extra virgin olive oil
- 1 tsp dried oregano
- Balsamic glaze for drizzling
How to make it
- Preheat your oven to 425°F. High heat is essential for roasting; if the oven is too cool, the vegetables will turn mushy instead of developing those delicious charred edges.
- Cut all your vegetables into relatively uniform sizes. This ensures that everything finishes cooking at the same time. Toss them in a large bowl with the olive oil, oregano, salt, and pepper until every piece is well-coated.
- Spread the vegetables out on a large rimmed baking sheet. Critical rule: Do not crowd the pan. If the veggies are touching or overlapping, they will steam. Use two pans if necessary to ensure there is space between each piece.
- Roast for 20-25 minutes. Halfway through, use a spatula to toss the vegetables so they brown evenly on all sides.
- The tomatoes should be bursting and the peppers should have small black charred spots.
- Arrange the roasted vegetables in ombre-style rows on your board and drizzle with a thick balsamic glaze just before serving to add a punch of acidity.
How to make chocolate treats?

Why we love this
A dessert board isn’t complete without handcrafted chocolate treats that look like they came from a high-end patisserie. Whether it’s dark chocolate-dipped apricots or sea salt truffles, these treats provide a glossy, sophisticated finish to your spread. The snap of tempered chocolate followed by a rich, melting interior is a textural delight. They offer a concentrated burst of cocoa that lingers on the tongue, making them the perfect ‘final bite’ for guests as the evening winds down.
Ingredients
- 8 oz high-quality dark chocolate (60% cacao or higher)
- 1 tsp coconut oil (for shine)
- Dried fruits (mango, apricots) or pretzels
- Crushed pistachios or freeze-dried raspberries for topping
How to make it
- Chop your chocolate into very small, uniform pieces. This ensures it melts evenly without scorching.
- Set up a double boiler: place a heat-proof glass bowl over a pot of simmering water. Ensure the bottom of the bowl does not touch the water. Add 2/3 of the chocolate and the coconut oil to the bowl.
- Stir constantly with a rubber spatula until the chocolate is smooth and reached about 115°F. Remove from heat and stir in the remaining 1/3 of the chopped chocolate. This ‘seeding’ method helps temper the chocolate, giving it a professional snap and shine.
- Dip your treats (fruits, nuts, or pretzels) halfway into the chocolate. Let the excess drip off.
- Place them on a parchment-lined tray. Before the chocolate sets, sprinkle with your toppings like crushed pistachios or sea salt.
- Refrigerate for 15 minutes to fully set the chocolate before arranging them in clusters on your food board.
How to stew savory chicken?

Why we love this
Savory stewed chicken is the definition of a ‘warm hug’ in food form. The chicken becomes so tender it effortlessly slides off the bone, bathed in a thick, golden gravy infused with aromatics like leeks and garlic. The scent is savory and deep, filling the home with a sense of security and comfort. Served on a board alongside fluffy mashed potatoes or thick slices of bread, it invites guests to dip, scoop, and savor every last drop of the herb-flecked sauce.
Ingredients
- 3 lbs chicken thighs, bone-in and skin-on
- 2 leeks, white parts only, sliced
- 3 cups chicken stock
- 1/2 cup heavy cream
- 2 tbsp flour
- Fresh rosemary and thyme
- 2 tbsp butter
How to make it
- Season the chicken thighs generously with salt and pepper. In a large heavy-bottomed pot, melt butter over medium-high heat and sear the chicken skin-side down until the skin is golden brown and crispy (about 7 minutes). Flip and sear for 2 minutes, then remove.
- In the same pot, add the leeks. Sauté for 3-4 minutes until softened. Sprinkle the flour over the leeks and stir for 1 minute to cook out the raw flour taste.
- Slowly whisk in the chicken stock, scraping the bottom of the pan to incorporate the brown bits. Bring to a boil, then reduce to a simmer.
- Nestle the chicken thighs back into the liquid, ensuring the crispy skin stays above the water line to remain crunchy. Add the fresh herbs.
- Cover and simmer on low for 45 minutes until the chicken internal temperature is 175°F (thighs are best when cooked higher than breasts).
- Remove the chicken, stir the heavy cream into the sauce to enrich it, then pour the sauce onto a lipped board or shallow platter, topping with the chicken.
How to garnish gourmet plates?

Why we love this
Garnishing is the ‘couture’ of the culinary world—it’s the final touch that transforms a simple dish into a viral masterpiece. It’s about more than just looks; it’s about adding layers of texture and micro-bursts of flavor. A sprinkle of microgreens adds a fresh, peppery snap, while a swirl of herb oil provides a silky mouthfeel and a punch of color. Proper garnishing makes a food board look intentional, luxurious, and professional, signaling to your guests that they are in for a truly special dining experience.
Ingredients
- Microgreens (radish, pea shoots, or arugula)
- Edible flowers
- Extra virgin olive oil or chili oil
- Toasted sesame seeds or crushed nuts
- Fresh soft herbs (chives, dill, cilantro)
How to make it
- Always garnish right before serving. Herbs and microgreens wilt quickly when exposed to heat or dressing.
- For ‘the swirl’: Fill a small squeeze bottle with high-quality oil. Start from the center of the dish and move outward in a steady circular motion. Don’t overthink it; a natural-looking drizzle is often more appealing than a rigid pattern.
- When using microgreens, use tweezers if you want precision, or gently drop small ‘clouds’ of greens in the negative spaces of the board. This creates height and dimension.
- Use ‘the rule of thirds.’ Instead of centering everything, place garnishes in three distinct areas to lead the eye across the board.
- For crunch, sprinkle toasted seeds from a height of about 12 inches. This ensures an even distribution rather than a concentrated clump in one spot.
- Always match the garnish to the flavor profile; don’t put cilantro on an Italian pasta board!
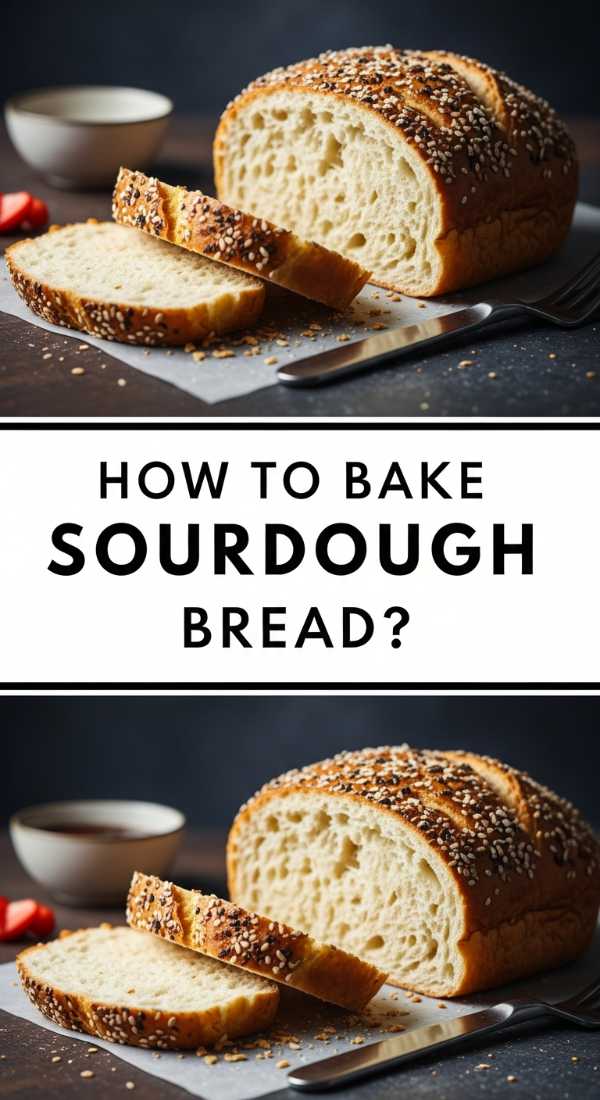
How to bake sourdough bread?
Why we love this
Sourdough is the king of the food board. There is something deeply primal and satisfying about breaking into a loaf with a crust so hard it crackles, revealing an interior that is airy, chewy, and tangily aromatic. The process of making it—fermenting flour and water over days—results in a complex flavor profile that store-bought bread simply cannot replicate. It’s the ultimate vessel for cheese, dips, and meats, providing a sturdy, flavorful base that anchors the entire board with its rustic charm.
Ingredients
- 100g active sourdough starter
- 350g warm water
- 500g bread flour
- 10g fine sea salt
- Rice flour (for dusting the proofing basket)
How to make it
- In a large bowl, whisk your active starter and warm water together until the starter is dissolved. Add the bread flour and salt, then mix by hand until a shaggy dough forms. Cover and let rest for 30 minutes (autolyse).
- Perform ‘stretch and folds.’ Every 30 minutes for 2 hours, grab the edge of the dough, pull it up, and fold it over itself. Rotate the bowl and repeat 4 times. This builds the gluten structure without kneading.
- Bulk Fermentation: Let the dough sit at room temperature for 6-8 hours until it has grown by about 50% and looks bubbly.
- Shape the dough gently into a round ball on a floured surface. Place it into a proofing basket dusted with rice flour. Cover and refrigerate for 12-15 hours (cold ferment). This develops the signature ‘sour’ flavor.
- Preheat a Dutch oven in a 450°F oven for 45 minutes. Carefully score the top of the cold dough with a sharp blade (lame) and place it into the hot pot.
- Bake with the lid on for 20 minutes (the steam helps it rise), then remove the lid and bake for another 20-25 minutes until the crust is a deep, dark mahogany brown. Let it cool completely before slicing to ensure the crumb sets perfectly.
Conclusion
Hosting doesn’t have to be a performance; it should be a shared experience. These food boards take the pretension out of the kitchen and put the focus back where it belongs: on the food and the people you love. By mastering these ten essential components, you’re not just making a meal; you’re creating a memory. So, clear off your largest wooden board, grab some wine, and let the flavors speak for themselves. Your guests will be talking about this spread long after the last crumb is gone.
Frequently Asked Questions
Q: How do I keep the food warm on a large board?
A: Warm your board in a low oven (if it’s oven-safe wood or stone) before assembly, and try to place hot items like pasta or chicken on the board last. You can also use small, heated ceramic bowls for liquid-based dishes.
Q: Can I prep these boards in advance?
A: You can prep individual components like the slow-cooked beef or the cookie dough ahead of time, but the assembly should happen just before guests arrive to keep textures (like crispy salmon skin or fresh greens) at their peak.
Q: What is the best type of board to use?
A: A large, food-grade maple or walnut board is ideal for its durability and aesthetic. For wetter dishes like stewed chicken, look for a board with a ‘juice groove’ around the edge to prevent messes.