

From Foliage to Frames: The Ultimate Guide to Botanical Gallery Walls
There is something inherently soul-soothing about the color green. We spend our lives hurrying through concrete jungles, but the moment we step into a room filled with lush, living leaves, our shoulders drop and our breath slows. A botanical gallery wall isn’t just about decoration; it’s about inviting the rhythm of nature back into our daily routines. It’s that quiet morning coffee spent watching the sunlight dance across a monstera leaf or the way a trailing ivy softens the sharp edges of a modern living room.
Creating a botanical sanctuary at home is a love letter to the outdoors. It’s a curated collection of memories, textures, and life that transforms a stagnant wall into a breathing masterpiece. Whether you are a seasoned plant parent or a beginner looking to add a touch of chlorophyll to your space, this guide will walk you through the art of blending art and life. Let’s dive into how you can turn your blank walls into an organic retreat that feels like a warm embrace every time you walk through the door.
How to Style a Plant Mural Wall for a Botanical Sanctuary
Why we love this
This approach turns your entire room into an immersive experience where the boundary between the indoors and the forest floor begins to blur. We love the deep, earthy aroma of fresh paint and damp moss that accompanies a large-scale mural, providing a visual depth that standard wallpaper simply cannot match. The texture of a hand-painted leaf or a high-quality mural offers a velvety richness that absorbs light beautifully, making the room feel like a cozy, hidden glade. It’s a bold statement of serenity that provides a permanent backdrop of growth and vitality regardless of the season outside.
Essential Elements:
- Large-scale botanical mural or hand-painted stencils.
- Neutral base paint in eggshell or matte finish.
- Painter’s tape and high-quality detail brushes.
- Assorted terracotta pots with varying heights.
- Integrated wall sconces for soft, directional lighting.
How to make it
- Prepare your surface by cleaning the wall thoroughly with a mild detergent and water; any dust or oils will prevent the mural from adhering or the paint from bonding correctly.
- Apply a high-quality primer to the wall to create a uniform ‘canvas’; wait at least 4 hours for the primer to set, ensuring it is no longer tacky to the touch before proceeding.
- Sketch your botanical design lightly with a graphite pencil, focusing on large-scale fronds and overlapping leaves to create a sense of three-dimensional depth.
- Begin layering your colors, starting with the darkest greens for the background shadows and moving toward the brighter, lime-toned highlights for the foreground elements.
- Once the mural is dry (usually 24 hours), install wall-mounted plant rings at varying heights, ensuring you drill into studs for maximum weight support.
- Place your ‘live’ elements—such as Pothos or Philodendrons—into the rings to create a physical layer that pops against the painted backdrop, completing the sanctuary feel.
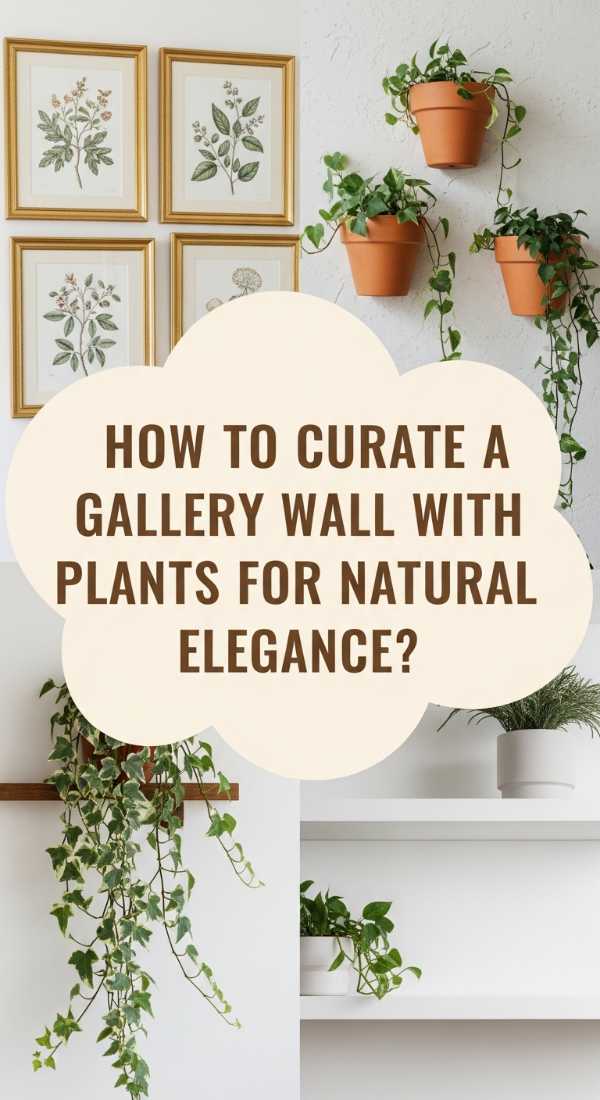
How to Curate a Gallery Wall with Plants for Natural Elegance

Why we love this
This style is the epitome of sophisticated charm, blending the structure of fine art with the wild, unpredictable beauty of nature. We love how the crisp lines of a wooden frame contrast with the soft, organic curves of a trailing heart-leaf vine, creating a visual dialogue that is both polished and approachable. There is a tactile satisfaction in touching the cool glass of a framed botanical print and then feeling the waxy, cool surface of a living leaf right next to it. It brings a sense of curated history to your home, making it feel like a professional botanical library designed for relaxation.
Essential Elements:
- A mix of framed botanical sketches and pressed leaf art.
- Floating wall shelves in natural oak or walnut.
- Small, elegant ceramic planters with drainage trays.
- Command strips or heavy-duty picture hooks.
- A spirit level for precise alignment.
How to make it
- Map out your layout on the floor first; place your largest frames in the center and arrange smaller frames and plant shelves around them to balance the visual weight.
- Measure the distance between each item, aiming for a consistent gap of 2 to 3 inches to maintain a clean, professional aesthetic.
- Install your wall shelves first, using a level to ensure they are perfectly horizontal; these will act as the anchors for your living plant elements.
- Hammer in your picture hooks for the framed art, starting from the center and working outwards, constantly checking your spacing against your floor map.
- Place lightweight, elegant plants like ‘String of Pearls’ or ‘Silver Falls’ on the shelves, allowing their delicate stems to drape over the edges of the frames.
- Adjust the lighting to ensure no direct glare hits the glass of the frames, which could distract from the vibrant greenery of the living plants.
How to Design a Leafy Accent Wall for an Organic Retreat

Why we love this
The leafy accent wall is all about creating a focal point that breathes life into a tired room, offering a lush canopy of green that feels incredibly restorative. We love the way the light catches the different shades of emerald and sage, creating a shimmering effect that mimics sunlight filtering through a forest canopy. The air even feels crisper around this installation, as the density of the foliage creates a micro-environment of humidity and freshness. It’s a sensory retreat that turns a simple wall into a living tapestry of texture and vibrant, life-affirming color.
Essential Elements:
- Variety of hanging plants (Spider plants, Ferns, Ivy).
- Decorative wall hooks or a wooden lattice.
- Lightweight plastic nursery pots inside decorative cachepots.
- Misting bottle for daily hydration.
- Natural jute or cotton macrame hangers.
How to make it
- Select a wall that receives bright, indirect light; the “doneness” of this project depends on the plants receiving the correct energy to thrive.
- Install a wooden lattice or a series of staggered hooks across the entire wall surface, ensuring they are anchored firmly to handle the weight of watered soil.
- Prepare your plants by checking for pests and ensuring they are well-watered so they are at their peak vibrancy before hanging.
- Hang your largest, fullest plants at the top of the wall to create a ‘top-heavy’ lushness that naturally draws the eye upward.
- Fill in the gaps with smaller hangers, using macrame of different lengths to create a staggered, tiered effect that hides the wall behind the leaves.
- Mist the entire wall lightly with room-temperature water to settle the dust and give the leaves a healthy, reflective glow that enhances the retreat atmosphere.
How to Arrange an Indoor Jungle for Instant Serenity
Why we love this
The indoor jungle is the ultimate expression of botanical maximalism, where the abundance of plants creates a cocoon-like environment of total peace. We love the sound of the leaves rustling against one another in a gentle breeze and the earthy, grounding scent of rich soil that permeates the air. It’s a textured masterpiece that uses height and volume to make a room feel expansive yet intimate at the same time. This arrangement doesn’t just look beautiful; it transforms the acoustics of a room, dampening noise and replacing it with the quiet, rhythmic energy of a forest floor.
Essential Elements:
- Floor-to-ceiling shelving units.
- Large floor plants (Fiddle Leaf Fig, Bird of Paradise).
- A collection of multi-sized propagation jars.
- LED grow lights for lower-light corners.
- Natural stones or pebbles for top-dressing pots.
How to make it
- Start by positioning your largest floor plants in the corners to define the boundaries of your jungle and provide a tall structural base.
- Set up your shelving units, ensuring they are securely tethered to the wall to prevent tipping under the weight of the greenery.
- Group plants with similar watering needs together; this creates ‘micro-climates’ that make maintenance easier and keeps the plants looking their best.
- Mix textures by placing a soft, feathery fern next to a broad, glossy Rubber Tree; the contrast in leaf shape is key to the jungle aesthetic.
- Introduce propagation jars on the middle shelves to add a sense of ongoing growth and ‘mad scientist’ botanical charm.
- Check the ‘saturation’ of the space—if you can still see too much of the wall, add more trailing plants to the top shelves to cascade down and fill the visual gaps.
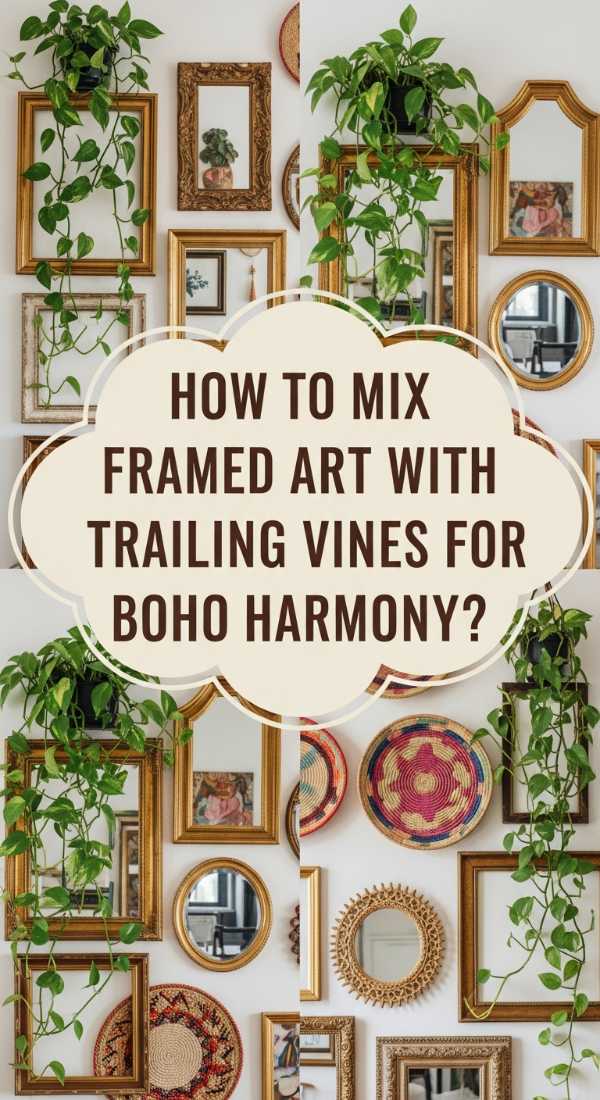
How to Mix Framed Art with Trailing Vines for Boho Harmony
Why we love this
This style celebrates the wild and free spirit of the bohemian lifestyle, where art and nature live in a messy, beautiful harmony. We love the way the vines aren’t contained by shelves but instead wander across the frames, “hugging” the art and connecting the different pieces into a single, flowing installation. It feels personalized and lived-in, with the vibrant colors of the artwork peeking through a curtain of green leaves. It’s a design that evolves over time as the vines grow, ensuring your gallery wall never looks the same two months in a row.
Essential Elements:
- Bohemian-style art prints (abstracts, landscapes, line art).
- Clear adhesive vine clips or small nails.
- Long-vined plants like Pothos, Scindapsus, or Hoya.
- Mismatched vintage frames in gold, wood, and white.
- Woven baskets used as planters.
How to make it
- Hang your artwork in an asymmetrical, ‘salon-style’ arrangement to establish a relaxed, boho foundation for the vines to interact with.
- Place your vined plants on high shelves or in wall-mounted baskets at the top or sides of your art cluster.
- Allow the vines to hang naturally for a few days to find their gravity and reveal their natural path.
- Using clear adhesive clips, gently guide the vines around the edges of the frames, being careful not to pinch the stems or block the artwork entirely.
- Loop the vines back on themselves if they become too long, creating a dense ‘braid’ of greenery that adds extra texture to the wall.
- Prune any yellowing leaves immediately to keep the display looking fresh and vibrant; the visual cue for a healthy boho wall is a deep, uniform green across all vines.
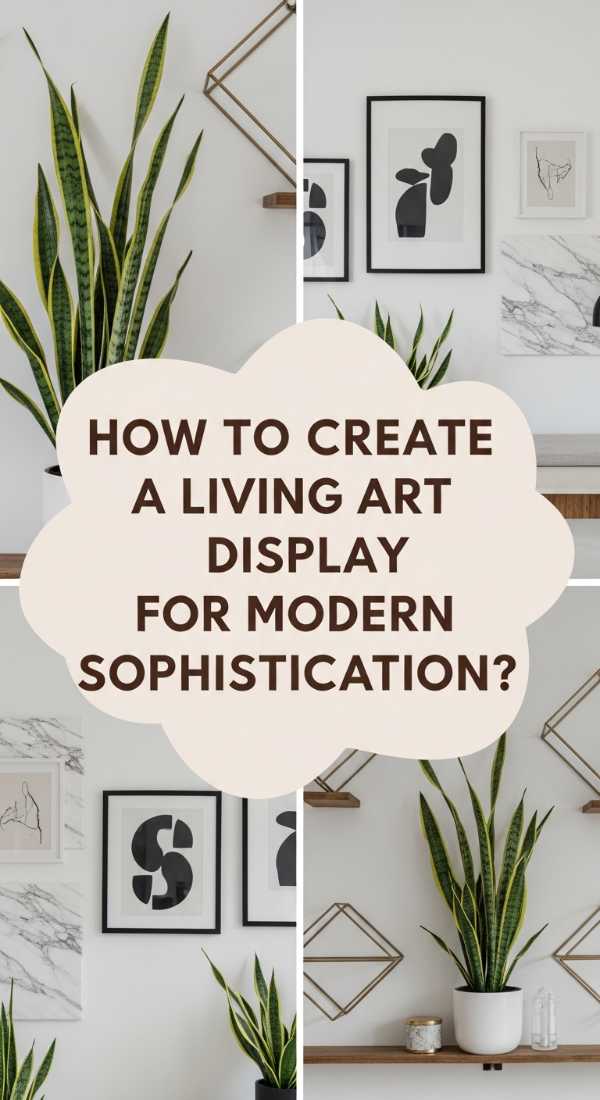
How to Create a Living Art Display for Modern Sophistication
Why we love this
Living art is where horticulture meets high-end gallery design, resulting in a display that is as sophisticated as it is organic. We love the clean, architectural feel of vertical planters that treat plants like paint on a canvas, focusing on color blocking and texture rather than individual pots. There is a mesmerizing quality to a wall that grows, offering a living sculpture that changes light and shadow throughout the day. It’s the perfect solution for modern homes that crave nature but want to maintain a sleek, clutter-free aesthetic that feels intentional and curated.
Essential Elements:
- Modular vertical garden kits or pocket planters.
- A selection of low-profile succulents or air plants.
- Automatic drip irrigation system (optional but recommended).
- Sleek metal or plastic framing for the planter unit.
- Moisture-resistant backing to protect the wall.
How to make it
- Measure your wall space precisely and install a moisture-proof barrier (like a sheet of PVC or heavy-duty plastic) to prevent any water damage to your drywall.
- Mount the modular vertical garden frame onto the wall, ensuring it is level and anchored into at least two studs for safety.
- Choose your plants based on leaf color to create a ‘gradient’ effect—for example, moving from dark purple succulents to light green air plants.
- Plant each pocket or module with high-drainage soil, ensuring the roots are fully submerged but not compressed too tightly.
- Run a small irrigation tube through the top of the unit or establish a strict manual watering schedule using a long-necked watering can.
- Trim the plants regularly to maintain the ‘framed’ shape, ensuring no single plant dominates the arrangement and ruins the modern, clean lines.
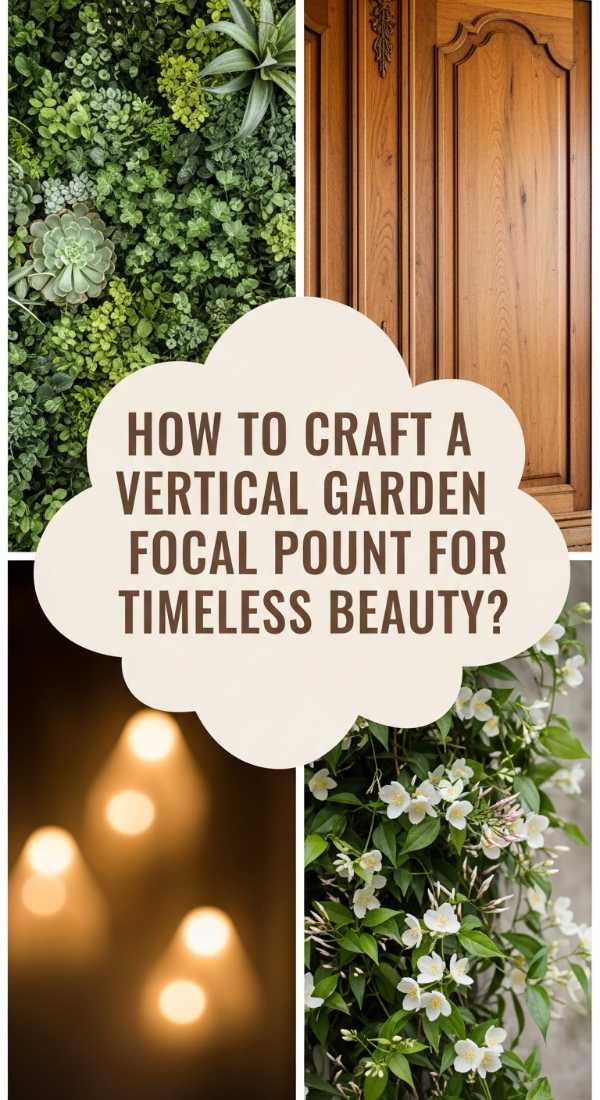
How to Craft a Vertical Garden Focal Point for Timeless Beauty
Why we love this
A vertical garden focal point acts as the heart of a room, providing a lush, dense centerpiece that never goes out of style. We love the sheer density of the greenery, which creates a feeling of being in a high-end botanical garden or a luxury hotel lobby. The variety of leaf shapes—from the serrated edges of a fern to the rounded leaves of a pilea—creates a visual feast that keeps the eye moving and exploring. It’s a timeless way to introduce a massive amount of nature into a small footprint, proving that you don’t need a backyard to have a majestic garden.
Essential Elements:
- Wall-mounted felt pocket system or wooden planter boxes.
- Tropical plants with varied leaf textures (Calatheas, Ferns, Marantas).
- High-quality potting mix with perlite for aeration.
- Dedicated spotlight or track lighting to highlight the ‘garden’.
- A catchment tray at the bottom for excess water.
How to make it
- Secure your planter boxes or felt pockets to the wall, starting from the bottom and working up to ensure each layer is properly supported.
- Line the bottom of each pocket with a thin layer of gravel or pebbles to improve drainage and prevent root rot.
- Add your potting mix, leaving enough room for the root balls of your chosen tropical plants.
- Place the most colorful or ‘dramatic’ plants in the center of the display to create a clear focal point that draws the eye.
- Tuck moss or coconut coir around the base of the plants to hide the soil and keep the moisture levels consistent within the pockets.
- Clean the leaves of your focal point once a week with a damp cloth; the ‘doneness’ of this project is signaled by the reflective, dust-free shine of the foliage.
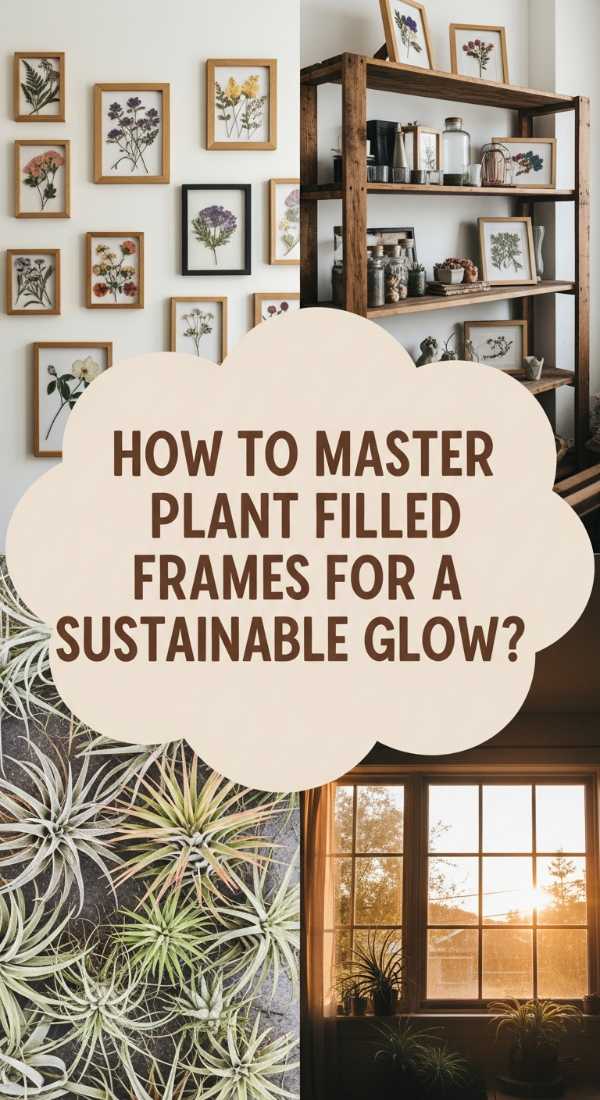
How to Master Plant Filled Frames for a Sustainable Glow
Why we love this
This unique DIY approach turns standard picture frames into miniature ecosystems, offering a sustainable and eco-friendly way to decorate. We love the way the plants seem to emerge directly from the frame, creating a 3D effect that traditional art can’t replicate. The use of preserved moss or hardy succulents means this display stays vibrant for a long time with minimal effort, providing a ‘sustainable glow’ that brightens up even the dimmest corners of a home. It’s a conversation starter that proves nature is the most talented artist of all.
Essential Elements:
- Deep shadow-box frames (at least 2 inches deep).
- Chicken wire or plastic mesh.
- Sphagnum moss and succulent-specific soil.
- Small succulents or cuttings with established roots.
- Floral pins or U-shaped wire.
How to make it
- Remove the glass from your shadow-box frame and line the back with a waterproof membrane or a thin layer of plastic.
- Fill the frame with a mixture of damp sphagnum moss and succulent soil, pressing it down firmly until it is level with the frame edge.
- Lay the chicken wire or mesh over the soil and staple it to the inside of the frame to keep the contents secure when hung vertically.
- Poke small holes through the mesh and insert your succulent cuttings or air plants, using floral pins to hold them in place if they feel loose.
- Lay the frame flat for 2 to 3 weeks; this is the ‘curing’ phase where the roots grow into the moss and secure the plants for vertical hanging.
- Once the plants are firmly rooted, hang the frame on the wall and mist once a week, ensuring the moss stays slightly damp but never soggy.
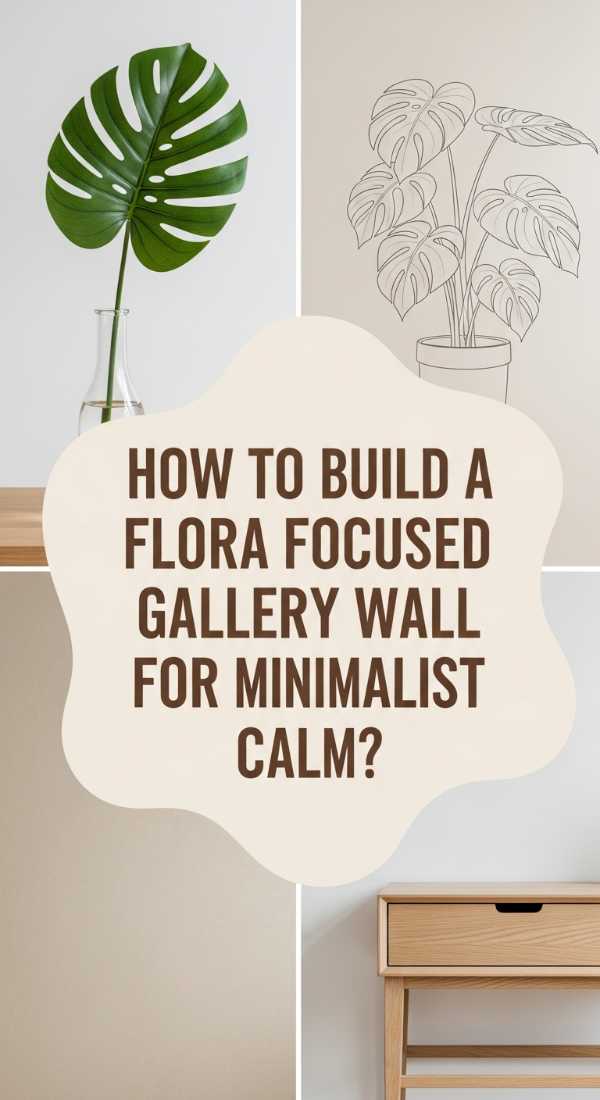
How to Build a Flora Focused Gallery Wall for Minimalist Calm
![]()
Why we love this
Minimalism doesn’t have to be cold, and a flora-focused gallery wall is the perfect way to add warmth without clutter. We love the use of negative space—the ‘breathing room’ between single stems or minimalist prints—that allows the eye to appreciate the unique beauty of every individual leaf. This style promotes a sense of calm and clarity, stripping away the chaos of the world and leaving only the essential, elegant forms of nature. It’s a design that feels intentional, quiet, and deeply restorative for the mind.
Essential Elements:
- Thin black or white gallery frames.
- Single-leaf botanical prints or pressed single stems.
- Small wall-mounted glass vases for single cuttings.
- A monochromatic or very limited color palette.
- Uniform spacing and alignment.
How to make it
- Choose a theme for your prints, such as ‘monochrome ferns’ or ‘eucalyptus stems,’ to maintain a cohesive and calm visual language.
- Select a symmetrical grid layout (e.g., 2×2 or 3×3) to provide the structural order that defines the minimalist aesthetic.
- Frame your prints or pressed leaves using large mats; the extra white space around the image is crucial for the ‘minimalist’ feel.
- Mount small, clear glass ‘test tube’ vases between the frames using discrete clips to hold fresh single-stem cuttings like a single Monstera leaf.
- Use a laser level to ensure every frame is perfectly aligned; in minimalism, the precision of the installation is just as important as the content.
- Keep the water in the vases crystal clear, changing it every few days to maintain the pristine, high-end look of the display.
How to Transform Blank Walls with Lush Murals for a Tropical Escape
[IMAGE_10]
Why we love this
Sometimes we just need to escape, and a lush tropical mural wall provides an instant vacation without leaving the house. We love the oversized scale of the banana leaves and palm fronds that make you feel small in the best way possible—as if you’ve been transported to a sun-drenched island. The vibrant greens and pops of hibiscus pink or bird-of-paradise orange create an energetic, joyful atmosphere that can cure any winter blues. It’s a bold, unapologetic celebration of life that turns a boring wall into a portal to a tropical paradise.
Essential Elements:
- Peel-and-stick tropical wallpaper or large-scale decals.
- Squeegee or smoothing tool for application.
- Large, architectural floor plants (Palm, Monstera).
- Rattan or wicker furniture accents.
- Warm, golden-toned lighting.
How to make it
- Clean the wall with an isopropyl alcohol solution to remove any oils that might prevent the peel-and-stick mural from adhering.
- Starting from the top left corner, peel back a small section of the mural’s backing and align it with the ceiling and side wall.
- Slowly work your way down, using a squeegee to push out any air bubbles from the center toward the edges; if a bubble persists, prick it with a tiny pin.
- Overlap subsequent panels by about 1/16th of an inch to ensure no gaps appear if the material shrinks slightly due to temperature changes.
- Once the mural is up, place large, real tropical plants in front of the mural to create a ‘foreground’ that makes the wallpaper look like a deep, unending forest.
- Add a warm-toned lamp nearby to cast a sunset-like glow over the leaves, completing the tropical escape vibe.
Cultivating Your Own Green Haven
Building a botanical gallery wall is more than just a home improvement project; it’s a journey toward creating a space that nurtures your spirit. As you watch your plants grow and your art collection evolve, you’ll find that your home becomes a reflection of the seasons and your own personal growth. Don’t be afraid to experiment, swap out prints, or move your plants around until the energy of the room feels just right. Your sanctuary is a living, breathing thing—treat it with love, and it will reward you with beauty and peace for years to come.