
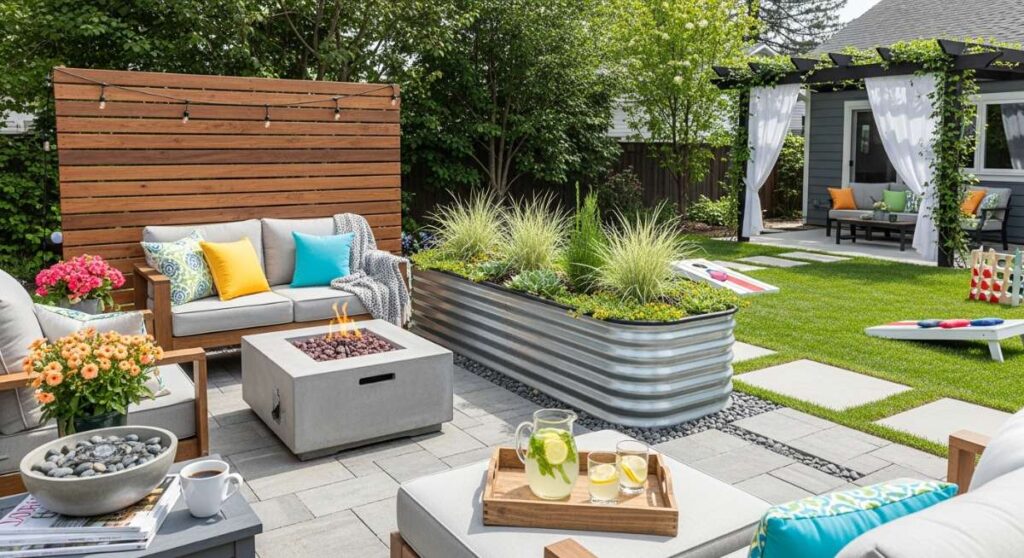
There is something truly transformative about stepping into a backyard that feels like a curated sanctuary rather than just a patch of grass. We’ve all spent those long afternoons scrolling through viral social media feeds, yearning for those boutique-style outdoor spaces that seem to glow with effortless charm and intentionality. The secret isn’t a massive renovation budget; it’s about those specific, soulful DIY projects that bring texture, life, and a sense of ‘home’ to the great outdoors.
Imagine waking up on a Saturday morning, coffee in hand, and knowing that by Sunday evening, your front porch or back deck will be the envy of the neighborhood. This weekend is about more than just ‘yard work’—it’s about crafting experiences. Whether you’re looking to invite nature in with a minimalist bird bath or create a sensory wonderland for your little ones, these trends are designed to turn your boring exterior into a high-end retreat that feels personal, warm, and utterly viral-worthy.
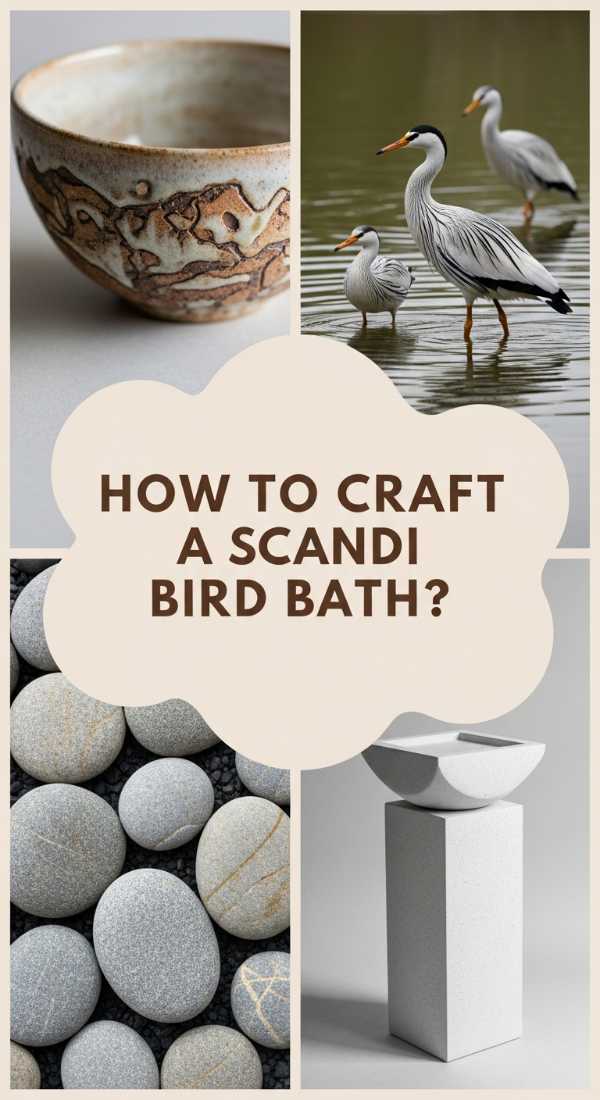
How to Craft a Scandi Bird Bath for a Peaceful Garden Retreat
Why we love this
This Scandi-inspired bird bath is the epitome of tranquil garden design, blending raw natural textures with a minimalist silhouette that feels both modern and timeless. We love the way the sunlight dances off the shallow water, creating shimmering reflections against the matte grey of the stone, while the gentle sound of birds splashing brings a rhythmic, organic soundtrack to your morning. It’s a sensory delight that smells of fresh rain and damp earth, offering a serene focal point that invites you to slow down and breathe in the crisp outdoor air.
Essential Elements:
- Large, shallow concrete or terracotta basin
- Smooth river stones in varied sizes
- A solar-powered fountain pump (optional)
- Clear waterproof sealant
- A sturdy pedestal or large flat rock for a base
How to make it
- Begin by cleaning your basin thoroughly to remove any dust or debris; if using terracotta, apply a thin, even coat of waterproof sealant to the interior to prevent water from seeping through the porous clay. Allow this to cure for at least 24 hours in a dry, shaded area.
- Position your base—whether it’s a reclaimed wooden stump or a sleek stone pedestal—in a level spot in your garden that receives a mix of sun and shade, ensuring the ground is packed firmly to avoid tilting.
- Place the basin on the base and arrange your river stones inside, clustering them on one side to create a ‘shallow end’ where smaller birds can safely land and bathe without being submerged.
- Fill the basin with fresh, cool water, stopping just below the rim to allow for displacement when the birds arrive.
- If using a solar pump, place the solar panel in a direct sun path nearby and submerge the fountain head in the center of the basin, securing it with stones to keep it upright for a gentle, continuous bubbling effect.
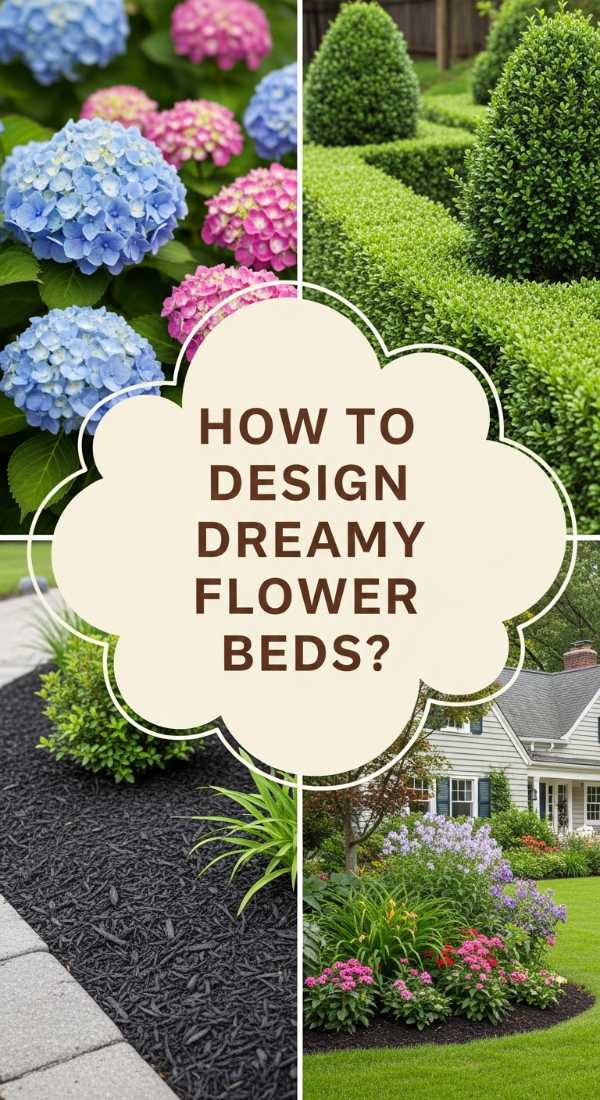
How to Design Front Yard Flower Beds for Instant Curb Appeal
Why we love this
There is nothing quite like the pride of pulling into your driveway and being greeted by a riot of color and the intoxicating scent of blooming jasmine or lavender. A well-designed flower bed acts as a warm embrace for your home, providing a lush, multi-dimensional frame that highlights your architecture and adds a tactile softness to hard walkways. The visual feast of layered heights—from creeping groundcovers to tall, swaying perennials—creates a dynamic landscape that feels alive with the hum of bees and the fluttering of butterflies.
Essential Elements:
- High-quality organic garden soil and compost
- Hardwood mulch (dark brown or black for a boutique look)
- Assorted perennials (Salvia, Lavender, Hostas)
- Spade and edging tool
- Landscape fabric (optional for weed suppression)
How to make it
- Define your bed’s shape by laying out a garden hose to create soft, organic curves rather than rigid straight lines; once satisfied, use a sharp spade to cut a crisp 4-inch deep edge along the hose line.
- Remove any existing grass or weeds within the perimeter, shaking the soil off the roots to preserve the nutrient-dense topsoil.
- Spread a 3-inch layer of organic compost over the area and till it into the existing soil to a depth of 6-8 inches, ensuring a loose, aerated texture that allows roots to breathe and expand.
- Arrange your plants while they are still in their nursery pots, placing taller varieties at the back (near the house) and shorter ones at the front to create a ‘stadium seating’ effect for maximum visibility.
- Dig holes twice as wide as the root balls, tease the roots gently, and plant them at the same depth they were in the pots; finish by spreading a generous 2-inch layer of mulch around the plants, keeping it a few inches away from the stems to prevent rot.
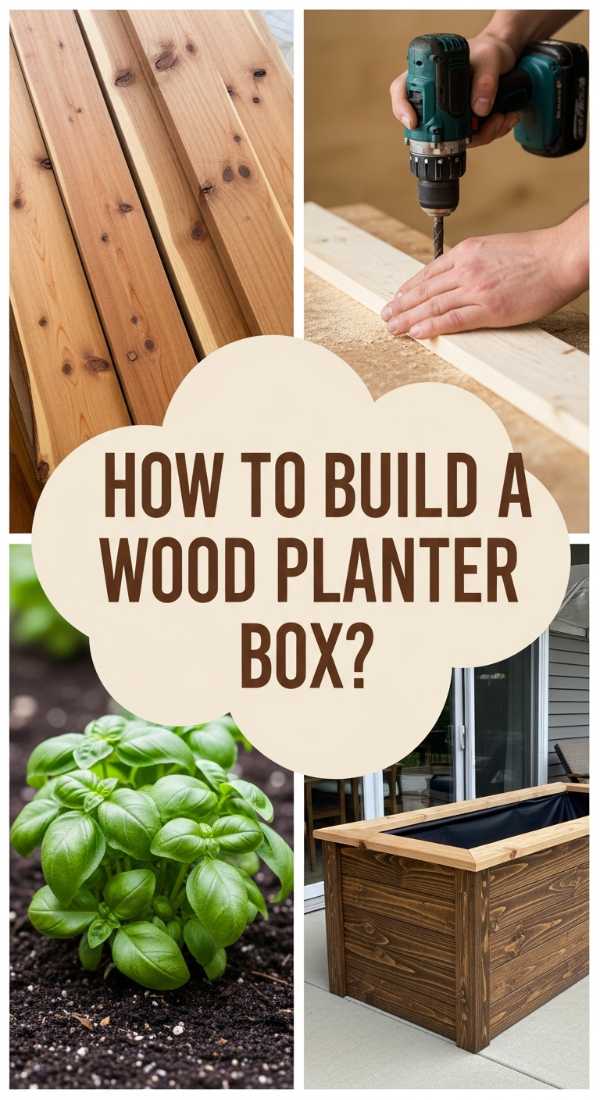
How to Build a Rustic Wood Planter Box for Your Fresh Herbs
Why we love this
A rustic wood planter box brings the ‘farm-to-table’ lifestyle directly to your doorstep, filling the air with the sharp, peppery aroma of basil and the earthy notes of rosemary. We adore the tactile contrast of the rough-hewn cedar against the soft, delicate leaves of the herbs, and the convenience of stepping out in your slippers to snip fresh garnishes for dinner. It’s a functional piece of art that ages beautifully, developing a silvery patina over time that tells a story of seasons past and culinary adventures yet to come.
Essential Elements:
- Cedar or redwood planks (naturally rot-resistant)
- Exterior-grade wood screws
- Power drill and saw
- Heavy-duty landscape liner
- Potting mix specifically for herbs
How to make it
- Measure and cut your wood into four side pieces (two long, two short) and one bottom piece, ensuring the bottom has 1/4-inch gaps or pre-drilled holes for essential drainage.
- Assemble the frame by pre-drilling pilot holes to prevent the wood from splitting, then secure the sides together using exterior-grade screws for a sturdy, weather-resistant bond.
- Attach the bottom piece, ensuring it sits flush within the frame; if you want a raised look, attach small wooden blocks or ‘feet’ to the corners to allow air to circulate underneath.
- Staple a piece of landscape liner to the interior walls of the box, which helps retain moisture and protects the wood from direct soil contact, prolonging its life.
- Fill with a high-quality potting mix and plant your herbs, grouping those with similar water needs together, such as sage and thyme in one corner and moisture-loving mint in another.
How to Curate an Outdoor Play Area for Happy Childhood Memories
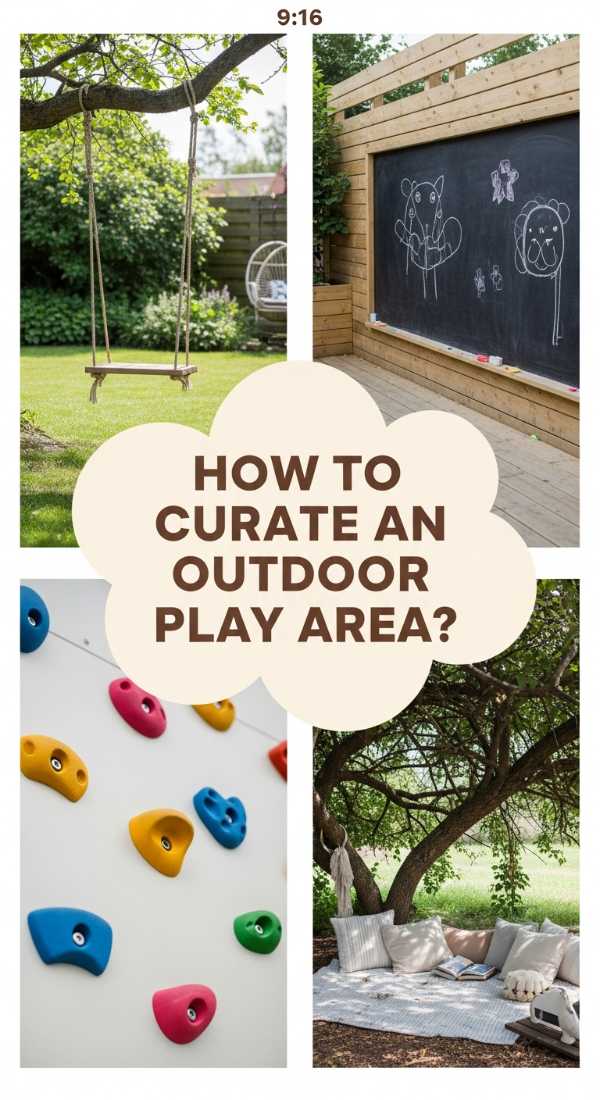
Why we love this
This play area isn’t just about equipment; it’s about creating a magical, nostalgic backdrop for the ‘golden hours’ of childhood. We love the way this design integrates natural elements—like soft grass and smooth wooden structures—to encourage open-ended, imaginative play away from screens. The air feels lighter here, filled with the sound of giggles and the sight of children exploring the textures of the great outdoors, creating a safe haven where the only limit is their own creativity.
Essential Elements:
- Washable outdoor rug or soft rubber mulch
- Weather-proof teepee or canvas tent
- Chalkboard paint and a wooden board
- Storage crates for outdoor toys
- String lights for evening magic
How to make it
- Select a level, shaded area of the yard and clear it of any sharp rocks or debris; lay down a heavy-duty outdoor rug or a 4-inch layer of rubber mulch to provide a soft landing zone for active play.
- Assemble a canvas teepee or playhouse as the central ‘anchor’ of the space, securing it to the ground with stakes to ensure it stays put during windy afternoons.
- Create a ‘creativity station’ by painting a large piece of plywood with three coats of exterior chalkboard paint; once dry, mount it to a fence or a sturdy wooden frame at a height accessible to small hands.
- Organize toys into labeled, weather-proof crates that can be easily tucked away at night, teaching children the value of a tidy ’boutique’ play space.
- Drape shatter-proof LED string lights over the area to extend the play hours into the twilight, creating a warm, inviting glow that makes the space feel like a fairytale glen.
How to Style Mud Kitchen Accessories for Creative Sensory Play

Why we love this
There is a rugged, tactile joy in mud kitchen play that connects children to the earth in the most delightful way. We love the clinking sound of vintage metal whisks against stainless steel bowls and the way ‘mud pies’ become canvases for found treasures like fallen petals and smooth acorns. This styling isn’t just about function; it’s about creating a visual and sensory feast that smells of pine needles and damp soil, turning a simple garden corner into a bustling, creative bistro for the imagination.
Essential Elements:
- Old metal pots, pans, and muffin tins
- Wooden spoons and spatulas
- Clear glass jars (for ‘potions’)
- Natural ‘ingredients’ (pinecones, flower petals, pebbles)
- Hooks for hanging accessories
How to make it
- Scour local thrift stores for stainless steel or cast iron kitchenware; these are superior to plastic as they provide a satisfying auditory experience and withstand the elements without cracking.
- Install a row of sturdy brass or black metal hooks along the backsplash of your mud kitchen to hang spoons and sieves, keeping the workspace clear and organized.
- Fill clear, shatter-resistant jars with ‘dry goods’ like dried lavender, colorful pebbles, and acorns, arranging them on a shelf to mimic a real apothecary or gourmet kitchen.
- Provide a large, deep basin for water play nearby, as water is the essential ‘secret ingredient’ that transforms dry dirt into the perfect consistency for mud-based culinary creations.
- Add a small chalkboard menu to the side where ‘specials of the day’ can be listed, encouraging literacy and role-play as children serve up their latest garden-inspired dishes.
How to Arrange a Cozy Hot Tub Area for the Ultimate Spa Evening

Why we love this
Turning a hot tub into a boutique spa retreat is all about the atmosphere—the rising steam catching the light of flickering candles and the feeling of soft, plush towels waiting just inches away. We love the way a well-styled spa area creates a private sanctuary where the stresses of the day melt into the bubbling water. It’s a multisensory experience: the warmth of the soak, the scent of eucalyptus oil diffusing in the air, and the visual calm of a secluded, green-screened oasis.
Essential Elements:
- Privacy screens or tall potted bamboo
- Outdoor-safe side table
- Waterproof LED candles
- Plush, oversized Turkish towels
- A wooden towel rack or hooks
How to make it
- Create a sense of enclosure by surrounding the tub with tall planters filled with bamboo or ornamental grasses; this provides a natural ‘green wall’ that blocks the wind and prying eyes.
- Place a weather-resistant side table within arm’s reach of the tub to hold drinks, candles, and a waterproof Bluetooth speaker for ambient sounds.
- Set the mood with a cluster of waterproof LED candles of varying heights; these provide the flickering romance of real fire without the risk of being extinguished by a stray splash.
- Install a wall-mounted wooden rack or a freestanding ladder nearby to keep towels off the ground and within easy reach, ensuring they stay dry and fluffy until the moment you exit the water.
- For the final boutique touch, place a basket of rolled-up washcloths and a bottle of essential oil spray nearby, allowing you to create a spa-like aromatic experience as the steam rises.
How to Assemble a Pallet Mud Kitchen for Sustainable Garden Fun
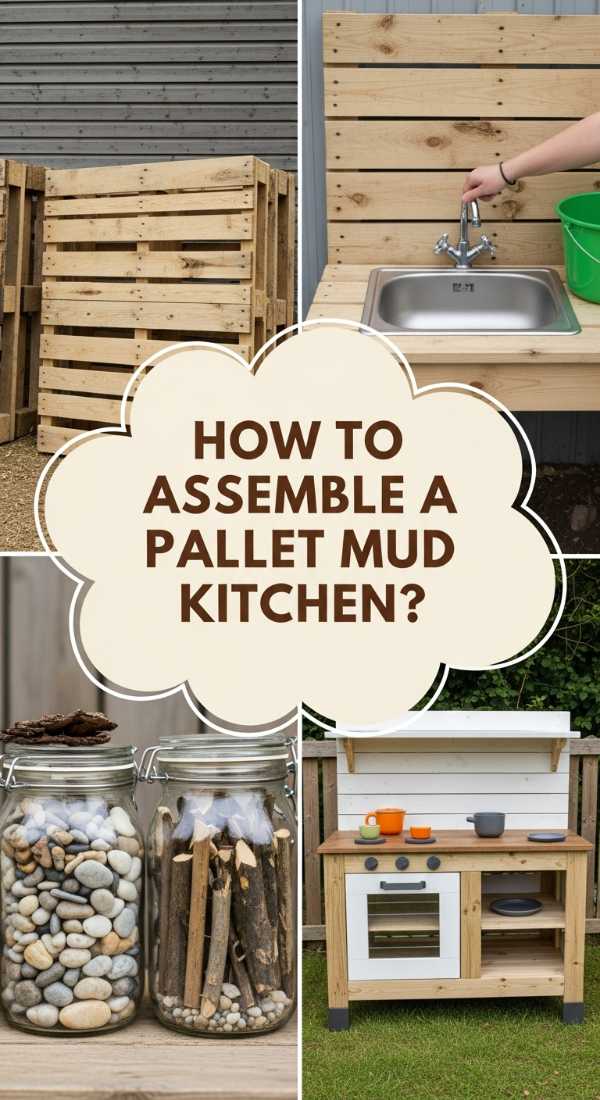
Why we love this
The pallet mud kitchen is a masterpiece of sustainable DIY, proving that beautiful play spaces can be created from reclaimed materials. We love the sturdy, industrial-meets-rustic aesthetic of the weathered wood and the way it provides a blank canvas for years of messy, glorious play. It smells of sun-warmed timber and fresh garden air, offering a substantial and grounded workspace where children can feel like true ‘chefs’ in their own outdoor domain.
Essential Elements:
- Two or three heat-treated (HT) wooden pallets
- A plastic or stainless steel drop-in sink basin
- Worktop wood (reclaimed boards or a third pallet)
- Screws and a power drill
- Outdoor wood stain or sealant
How to make it
- Source pallets marked with ‘HT’ (Heat Treated) to ensure they are safe for children; sand them thoroughly with a medium-grit sandpaper to remove any splinters and smooth out the rough grain.
- Stand two pallets vertically to act as the base legs and screw a third pallet horizontally across the top to create the main work surface, ensuring all joints are reinforced with heavy-duty exterior screws.
- Use a jigsaw to cut a hole in the work surface that is slightly smaller than the lip of your sink basin; drop the basin in and secure it with a bead of outdoor silicone if necessary.
- Add a vertical pallet to the back of the work surface to serve as a ‘backsplash,’ providing a place to mount shelves and hooks for kitchen tools.
- Apply two coats of a clear, non-toxic outdoor sealant to protect the wood from water and mud, allowing each coat to dry completely for a durable finish that will last through many rainy seasons.
How to Construct a Sensory Water Table for Cool Summer Days
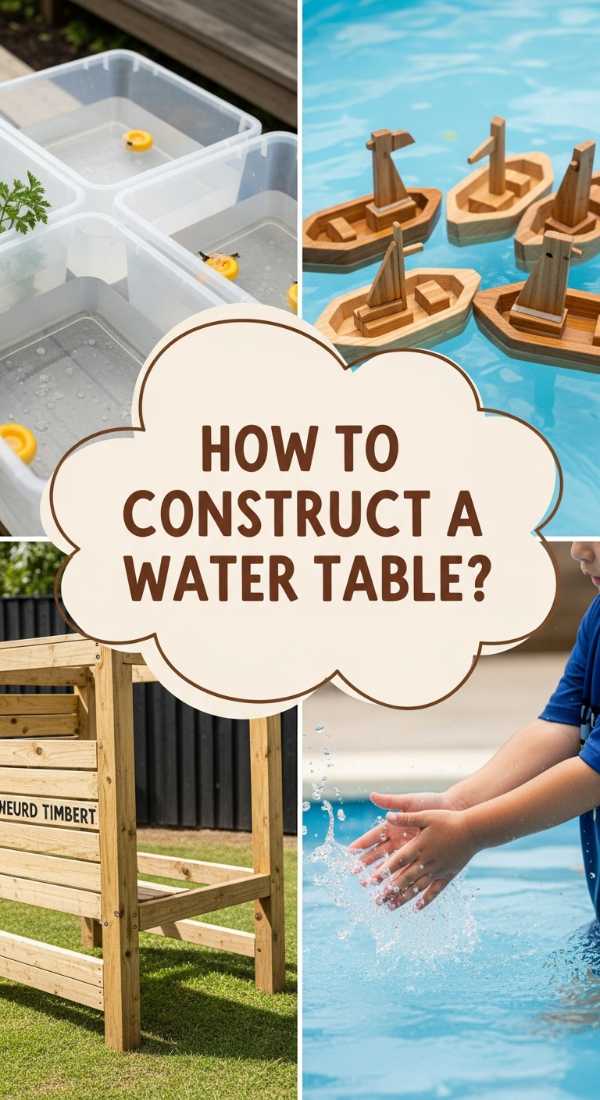
Why we love this
When the sun is high and the air is thick with summer heat, a sensory water table becomes the cool, refreshing heart of the garden. We love the rhythmic sound of water pouring through funnels and the tactile thrill of little hands dipping into chilled, blue-tinted water. It’s a clean, simple joy that combines physics with play, offering a sparkling, splashing focal point that keeps the kids cool while engaging their curiosity and fine motor skills.
Essential Elements:
- Large, shallow plastic storage bins
- PVC pipe or a wooden frame for a stand
- Water pumps, funnels, and tubing
- Floating toys and measuring cups
- Blue food coloring (optional for ‘ocean’ effects)
How to make it
- Build a stable frame using 1.5-inch PVC pipes or pressure-treated lumber, ensuring the height is tailored to your child’s waist level to prevent straining while they play.
- Place your plastic bins into the frame; if building with wood, ensure the bins are supported by a sturdy crossbeam to handle the weight of the water (which is roughly 8 lbs per gallon).
- Install a ‘waterfall’ feature by zip-tying funnels and clear plastic tubing to a vertical backboard, allowing water poured at the top to zigzag its way down into the main basin.
- Fill the bins with water and add a few drops of blue food coloring and some eco-friendly glitter to create an inviting, magical aesthetic that mimics a tropical lagoon.
- Provide a variety of ‘tools’—from turkey basters to slotted spoons—to encourage different types of water movement and sensory exploration.
How to Plant Lush Flower Beds for a Vibrant Home Entrance
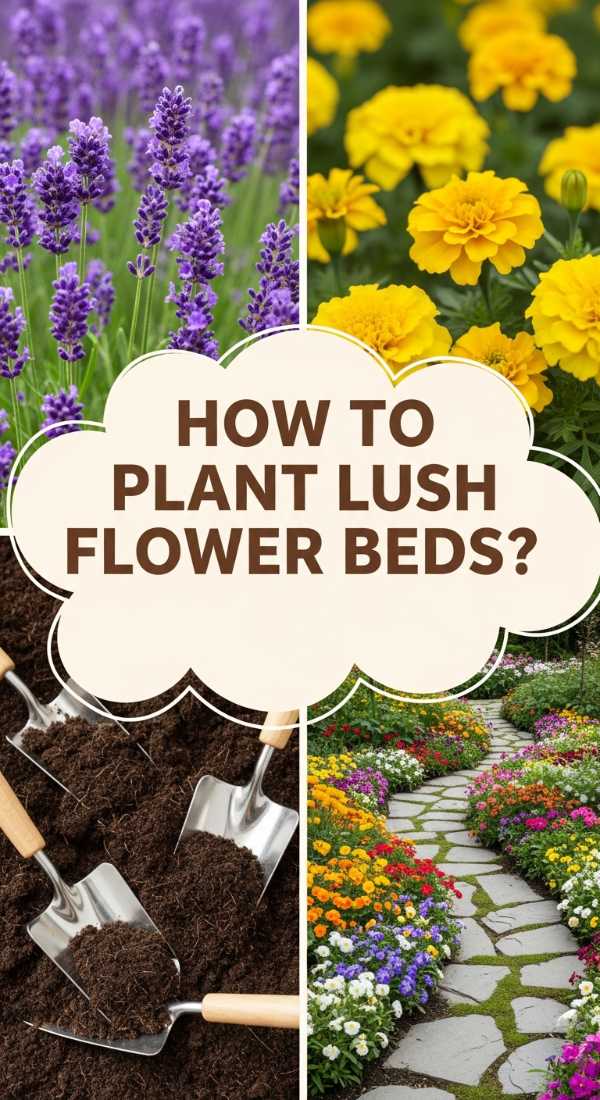
Why we love this
A lush flower bed at the entrance of a home is a living greeting card, bursting with the energy of a thousand blooming petals and the deep, refreshing green of healthy foliage. We love the way the colors shift from the bright yellows of spring daffodils to the rich purples of late-summer asters, providing a constant sense of renewal. The aroma is a complex bouquet of floral sweetness and damp, rich soil, making every arrival feel like a special occasion in a boutique botanical garden.
Essential Elements:
- Slow-release organic fertilizer
- A mix of annuals (Petunias, Marigolds) and perennials (Peonies, Iris)
- Soaker hose for consistent irrigation
- Garden trowel and gloves
- Decorative landscape edging
How to make it
- Prepare the soil by mixing in a generous amount of slow-release fertilizer and aged manure, creating a nutrient-rich foundation that will support ‘heavy feeders’ like peonies and roses.
- Install a soaker hose in a serpentine pattern across the bed, which delivers water directly to the roots and prevents the foliage from getting wet, reducing the risk of fungal diseases.
- Layer your plants according to their light requirements; place sun-loving vibrants like marigolds in the brightest spots and tuck shade-tolerant varieties like hostas under the eaves.
- Plant in ‘drifts’ or groups of 3 or 5 rather than single isolated plants; this creates a more impactful, lush look that mimics the way flowers grow in nature.
- Finish the bed with a decorative stone or brick edging, which not only looks professional but also holds the soil and mulch in place during heavy rain showers.
How to Create Minimalist Wood Planter Boxes for a Modern Patio
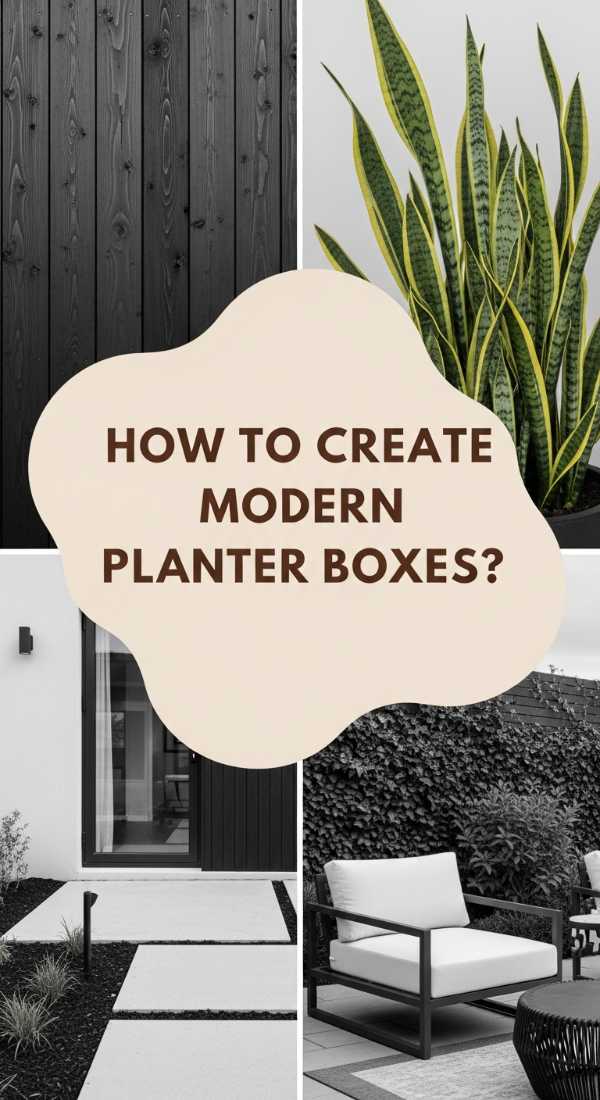
Why we love this
Minimalist wood planter boxes are the secret to achieving that high-end, architectural patio look that dominates luxury design magazines. We love the sharp, clean lines and the matte, dark finishes that make the vibrant greens of ornamental grasses or snake plants pop with dramatic intensity. These planters feel grounded and sophisticated, offering a structured contrast to the wildness of nature and turning a simple concrete patio into a sleek, boutique lounge area.
Essential Elements:
- Premium pine or plywood boards
- Black or charcoal exterior wood stain
- Wood glue and finishing nails
- Plastic interior liners
- Casters (optional for mobility)
How to make it
- Cut your wood to create a tall, slender rectangular box; for a modern look, use 45-degree miter cuts at the corners so no end-grain is visible on the sides.
- Apply wood glue to the joints and secure them with finishing nails, wiping away any excess glue immediately as it will block the stain from penetrating the wood.
- Sand the entire surface with fine-grit sandpaper (220 grit) to achieve a smooth, professional finish that feels like indoor furniture.
- Apply two coats of a deep charcoal or matte black exterior stain, allowing the first coat to dry for 4-6 hours before lightly sanding and applying the second for a rich, opaque color.
- Insert a plastic liner to hold the soil; this is crucial for minimalist designs as it prevents the wood from warping or staining over time, keeping those sharp lines perfectly intact.
Creating Your Outdoor Haven
Transforming your outdoor space from a mundane yard to a viral-worthy boutique retreat is a journey of small, intentional steps. Each project we’ve explored today offers a chance to infuse your home with personality and peace. Whether you start with the quiet ripple of a bird bath or the structured elegance of a minimalist planter, you are building more than just ‘features’—you are building the backdrop for your most cherished weekend memories. So grab your gloves, find a sunny spot, and start creating the outdoor life you’ve always dreamed of.