
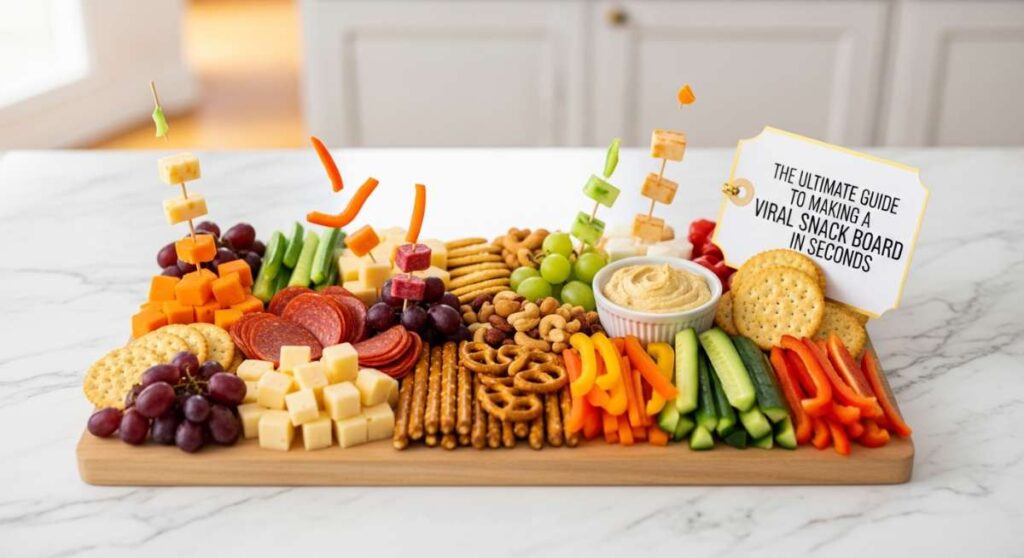
There is something absolutely magical about a sun-drenched afternoon spent on the back porch, surrounded by the laughter of friends and the irresistible aroma of a spread that looks as good as it tastes. We’ve all seen those gorgeous, viral food boards on social media that seem to come together effortlessly, but if you’re like me, you’ve wondered how to actually pull it off without spending your entire weekend in the kitchen. My philosophy has always been that the best memories are made when the host is actually present, not hidden away behind a stove.
Today, I’m pulling back the curtain on how to create the ultimate summer gathering board that feels curated, intentional, and vibrantly alive. Whether you are hosting a spontaneous neighborhood get-together or just want to elevate a Tuesday night dinner, these recipes are the building blocks of a lifestyle that celebrates the season. From the sizzle of the grill to the crisp snap of fresh garden vegetables, we are going to walk through every single element you need to make your next food board go viral in your own social circle.
How to make rotel dip?

Why we love this
This is the ultimate crowd-pleaser that brings a sense of nostalgic comfort to any gathering. The texture is incredibly silky and molten, with just the right amount of kick from the green chilies that cuts through the rich, creamy cheese. As it melts, the aroma of savory browned meat and zesty tomatoes fills the kitchen, instantly signaling to your guests that the party has started. It is the kind of dip that disappears in minutes because it hits every single savory note you crave in a snack.
Ingredients
- 1 lb ground beef or breakfast sausage
- 1 block (16 oz) Velveeta cheese, cubed
- 1 can (10 oz) Ro-Tel Diced Tomatoes and Green Chilies
- 1/2 cup whole milk (optional, for desired consistency)
- Fresh cilantro for garnish
- Sturdy tortilla chips for serving
How to make it
- Begin by browning your ground meat in a large skillet over medium-high heat. Use a wooden spoon to break the meat into small, uniform crumbles; this ensures a consistent texture in every bite of the dip. Cook until no pink remains and the meat has developed a deep, savory brown color.
- Crucial Step: Once the meat is cooked, tilt the pan and drain every drop of excess grease. This prevents your dip from becoming oily or separating later on.
- Reduce the heat to low and add the cubed Velveeta cheese. Adding it in cubes rather than one large block allows it to melt evenly and quickly without scorching the bottom.
- Pour in the can of Ro-Tel, including the juices. The acidity in the tomato juice helps to emulsify the cheese and adds that signature tang.
- Stir constantly with a heat-resistant spatula. If the dip feels too thick, splash in a little milk until it reaches a velvety, pourable consistency. The visual cue you are looking for is a smooth, glossy surface with no visible lumps of cheese.
- Transfer to a warm serving bowl or a small slow cooker on the ‘warm’ setting to keep it dip-able throughout the party.
How to make hummingbird nectar?

Why we love this
Creating your own nectar is such a simple way to bring vibrant life and movement to your backyard during the summer months. There is something deeply peaceful about watching those iridescent wings flutter near your window while you enjoy your morning coffee. This clear, clean syrup mimics the natural sucrose found in flowers, providing essential energy for these tiny visitors without the unnecessary dyes found in store-bought versions. It’s a small act of stewardship that rewards you with a front-row seat to nature’s most delicate aerobatics.
Ingredients
- 1 cup granulated white sugar
- 4 cups filtered water
How to make it
- In a medium saucepan, combine the water and the sugar. It is vital to use refined white sugar only; do not use honey, brown sugar, or artificial sweeteners, as these can be harmful or fatal to hummingbirds.
- Place the pan over medium heat and stir until the sugar is completely dissolved. Bring the mixture to a low boil for about 1 to 2 minutes. This boiling process helps slow down bacterial growth and ensures the sugar is fully integrated.
- Remove the pan from the heat immediately. You are not looking to create a thick caramel; you simply want a clear, thin syrup.
- Allow the nectar to cool to room temperature. This is a non-negotiable step—pouring hot nectar into a feeder can warp the plastic and harm the birds.
- Fill your clean hummingbird feeders. Visual cue: The liquid should be crystal clear. Store any extra nectar in a sealed glass jar in the refrigerator for up to two weeks.
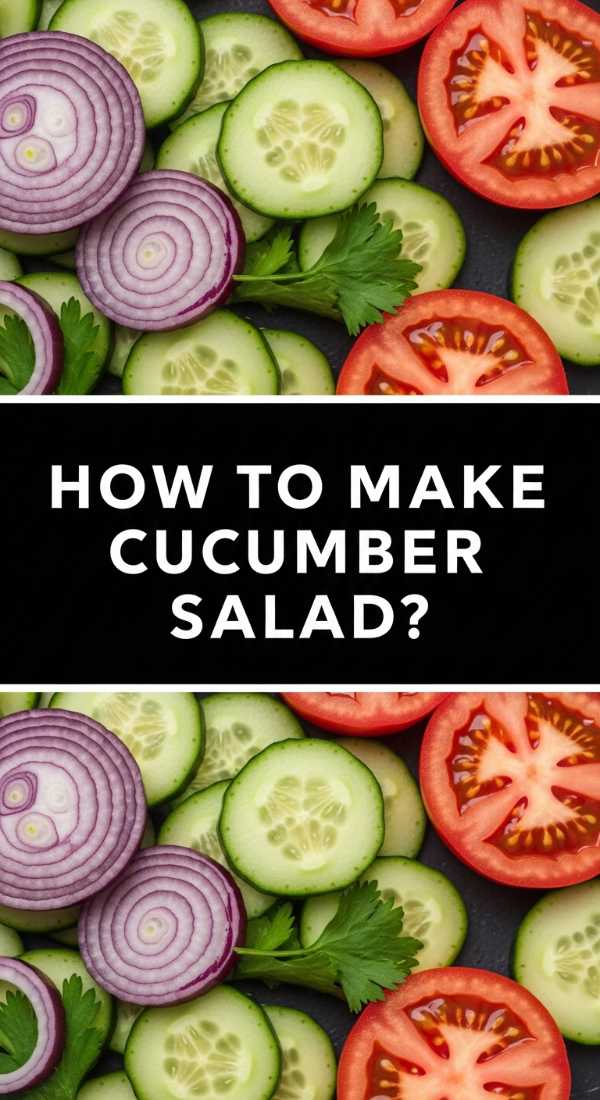
How to make cucumber salad?
Why we love this
This salad is the literal definition of refreshing, acting as the perfect cooling counterpart to any spicy or heavy grilled dish on your board. The paper-thin slices of cucumber provide a satisfying, watery crunch that is elevated by the sharp, bright tang of vinegar and the sweet bite of red onion. The aroma is clean and garden-fresh, reminiscent of a summer breeze. It’s a visually beautiful addition to a snack board, with its translucent green rounds and pops of purple onion that look like jewels under the sun.
Ingredients
- 2 large English cucumbers
- 1/2 small red onion, thinly sliced
- 1/2 cup white vinegar or apple cider vinegar
- 2 tablespoons sugar
- 1 teaspoon salt
- 1/2 teaspoon cracked black pepper
- Fresh dill, chopped
How to make it
- Using a mandoline or a very sharp chef’s knife, slice the English cucumbers into paper-thin rounds. Using English cucumbers is a pro tip because their skin is thin and their seeds are negligible, which results in a much better texture.
- Place the sliced cucumbers in a colander and sprinkle with a pinch of salt. Let them sit for 10 minutes to draw out excess moisture, then pat them dry with a paper towel. This ensures your salad stays crunchy rather than watery.
- In a large glass bowl, whisk together the vinegar, sugar, salt, and pepper until the sugar granules have completely vanished.
- Toss the cucumbers and the thinly sliced red onions into the dressing. Ensure every slice is submerged or coated.
- Let the salad marinate in the refrigerator for at least 30 minutes before serving. You’ll know it’s ready when the cucumbers have softened slightly but still maintain a crisp snap when bitten. Garnish heavily with fresh dill right before serving for maximum fragrance.
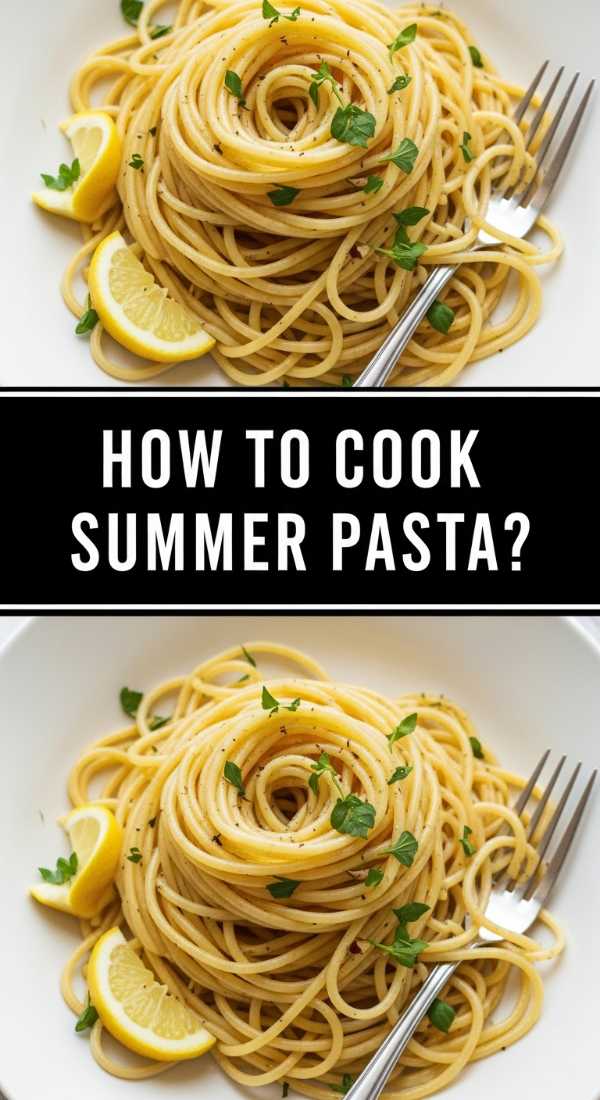
How to cook summer pasta?
Why we love this
Summer pasta is all about celebrating the harvest in its simplest, most elegant form. Instead of heavy, simmering sauces, we rely on the heat of the pasta to melt fresh ingredients into a light, silky coating. The scent of garlic hitting warm olive oil combined with the burst of sweet cherry tomatoes is intoxicating and deeply appetizing. It feels sophisticated yet effortless, providing a heartier element to your snack board that doesn’t leave anyone feeling weighed down in the summer heat.
Ingredients
- 1 lb pasta (gemelli, fusilli, or penne)
- 1 pint cherry tomatoes, halved
- 4 cloves garlic, minced
- 1/2 cup extra virgin olive oil
- 1/2 cup freshly grated Parmesan cheese
- 1 cup fresh basil leaves, torn
- Red pepper flakes (optional)
How to make it
- Bring a large pot of heavily salted water to a rolling boil. Cook your pasta until it is ‘al dente’—firm to the bite. Visual cue: The pasta should have a tiny white core when bitten into.
- Crucial Step: Before draining, reserve 1 cup of the starchy pasta water. This is the secret to a professional-grade summer sauce.
- While the pasta cooks, heat the olive oil in a wide skillet over medium-low heat. Add the minced garlic and red pepper flakes. Sauté for just 1-2 minutes until the garlic is fragrant and pale gold—do not let it brown or it will turn bitter.
- Add the halved cherry tomatoes to the oil and turn the heat up slightly. Cook until the skins just begin to wrinkle and pop.
- Toss the drained pasta into the skillet. Add half of the reserved pasta water and the Parmesan cheese. Toss vigorously over medium heat. The water and cheese will emulsify with the oil to create a light, glossy sauce that clings to every noodle.
- Remove from heat and fold in the fresh basil. The residual heat will wilt the basil just enough to release its oils without turning it black.
How to prep summer meals?

Why we love this
There is a profound sense of peace that comes with knowing your fridge is stocked with prepped, vibrant ingredients ready to be assembled at a moment’s notice. Summer meal prep isn’t about boring Tupperware containers of chicken and broccoli; it’s about creating a ‘library’ of flavors that you can pull from for your snack boards or quick dinners. The sight of organized, colorful glass jars filled with chopped herbs, washed berries, and marinated proteins makes healthy eating feel like a luxury rather than a chore.
Ingredients
- Variety of seasonal vegetables (bell peppers, zucchini, carrots)
- Leafy greens (arugula, kale)
- Proteins (chicken breast, chickpeas, hard-boiled eggs)
- Grains (quinoa or farro)
- Glass storage containers
How to make it
- Start by washing and thoroughly drying all produce. Use a salad spinner for greens; moisture is the enemy of shelf-life, and completely dry leaves stay crisp for up to a week.
- Chop your ‘hard’ vegetables like carrots and bell peppers into uniform sticks or slices. Store these in glass containers with a damp paper towel on top to maintain humidity.
- Cook a large batch of a neutral grain like quinoa. Spread it out on a baking sheet to cool completely before refrigerating; this prevents it from becoming gummy or clumping together.
- Marinate your proteins early. If using chicken, slice into strips and toss with olive oil, lemon, and herbs. This allows the flavors to penetrate the meat deeply over 24 hours.
- Batch-make a ‘house dressing’—a simple vinaigrette of 3 parts oil to 1 part acid. Store in a mason jar. The visual cue for a well-prepped fridge is clear containers where you can see the rainbow of ingredients, making assembly a 5-minute task.
How to make picnic sides?

Why we love this
Picnic sides are the unsung heroes of the outdoor dining experience, designed to be portable, durable, and packed with zingy flavors that hold up even after an hour in the sun. We love a good Mediterranean-style orzo salad because it combines the heartiness of pasta with the brightness of a salad. The combination of salty feta, briny olives, and lemon zest creates a flavor profile that is incredibly stimulating and palate-cleansing between bites of richer board items.
Ingredients
- 1 cup dried orzo pasta
- 1/2 cup crumbled feta cheese
- 1/2 cup English cucumber, diced
- 1/4 cup kalamata olives, halved
- 2 tablespoons fresh parsley, chopped
- Lemon-tahini dressing (lemon juice, tahini, garlic, olive oil)
How to make it
- Cook the orzo in boiling salted water until tender. Drain and immediately rinse under cold running water. This stops the cooking process and washes away excess starch so the grains don’t stick together.
- In a small jar, shake together your lemon juice, a tablespoon of tahini for creaminess, minced garlic, and olive oil. The tahini acts as a stabilizer, keeping the dressing from separating.
- In a large mixing bowl, combine the cooled orzo with the diced cucumber, olives, and feta.
- Pour the dressing over the mixture and toss gently. Visual cue: The orzo should look glistening and well-coated, not swimming in liquid.
- Professional Tip: If making this ahead of time, keep the feta and parsley separate and fold them in right before serving to maintain their color and texture. Serve in individual mason jars for the ultimate viral picnic aesthetic.
How to grill steak kabobs?

Why we love this
Steak kabobs bring a high-end, charred sophistication to your snack board that is hard to beat. The contrast between the smoky, caramelized exterior of the beef and the juicy, tender interior is a culinary delight. When you thread them with vibrant vegetables, the juices from the meat season the peppers and onions as they cook, creating a harmonious blend of savory and sweet flavors. The visual of those grill marks and the aromatic smoke rising from the coals is the quintessential soundtrack to a summer evening.
Ingredients
- 1.5 lbs top sirloin or ribeye, cut into 1-inch cubes
- 2 bell peppers, cut into chunks
- 1 large red onion, cut into wedges
- 1/4 cup soy sauce
- 2 tablespoons Worcestershire sauce
- 2 tablespoons honey
- 3 cloves garlic, smashed
- Wooden or metal skewers
How to make it
- Whisk together the soy sauce, Worcestershire, honey, and garlic in a bowl. Add the steak cubes and marinate for at least 1 hour (or up to 4). The honey is key here; it helps create those beautiful, dark charred bits on the grill.
- If using wooden skewers, soak them in water for at least 30 minutes. This prevents them from catching fire or splintering on the hot grates.
- Thread the skewers, alternating between meat, pepper, and onion. Don’t crowd the pieces too tightly; leaving a tiny bit of space allows the heat to circulate and brown all sides of the meat.
- Preheat your grill to medium-high heat (about 400°F). Clean the grates thoroughly and oil them lightly.
- Place the kabobs on the grill. Cook for 3-4 minutes per side. Visual cue: Look for the meat to easily release from the grates—if it’s sticking, it’s not ready to be flipped yet.
- Aim for an internal temperature of 135°F for medium-rare. Let the kabobs rest for 5 minutes before placing them on your board to allow the juices to redistribute.
How to make summer drinks?

Why we love this
A signature summer drink is the crowning jewel of a viral food board, offering a visual and sensory pop that ties everything together. We love drinks that utilize fresh fruit purees and herbal infusions because they feel incredibly upscale without needing complex mixology skills. The clinking of ice against a glass and the bright, citrusy aroma of a freshly muddled sprig of mint or basil provides an instant sense of relaxation and celebration.
Ingredients
- 1 cup fresh watermelon or strawberry puree
- 1/2 cup fresh lime juice
- 1/4 cup agave or simple syrup
- Sparkling water or club soda
- Fresh mint leaves and lime wheels for garnish
How to make it
- Start by creating your fruit base. Blend fresh watermelon or berries until completely smooth, then pass the liquid through a fine-mesh strainer to remove any pulp or seeds. This ensures a clean, professional mouthfeel.
- In a large pitcher, combine the fruit puree, lime juice, and sweetener. Stir well until the agave is fully integrated.
- Fill highball glasses to the brim with crushed ice. Crushed ice melts slower than small cubes and looks beautiful in photos.
- Pour the fruit mixture about halfway up each glass. Top with sparkling water.
- Pro Tip: ‘Slap’ your mint leaves between your palms before adding them as a garnish. This bruising technique releases the essential oils without making the drink bitter. Visual cue: The drink should have a beautiful gradient of color from the fruit base to the clear soda on top.
How to bake summer desserts?

Why we love this
Summer baking should be about letting the fruit shine, and nothing does that better than a rustic galette. We love the contrast of a buttery, flaky crust against the jammy, concentrated sweetness of roasted stone fruits or berries. The aroma of cinnamon and baking pastry wafting through the house is the perfect finale to a meal. Unlike a traditional pie, a galette is meant to look ‘imperfect,’ which gives it a charming, artisanal look that fits perfectly on a casual snack board.
Ingredients
- 1 store-bought or homemade pie crust disk
- 3 cups sliced peaches or plums
- 1/4 cup sugar (plus extra for sprinkling)
- 1 tablespoon cornstarch
- 1 teaspoon vanilla extract
- 1 egg (for egg wash)
How to make it
- Preheat your oven to 400°F and line a baking sheet with parchment paper.
- In a bowl, toss your sliced fruit with sugar, cornstarch, and vanilla. The cornstarch is essential as it thickens the fruit juices as they bake, preventing a soggy crust.
- Roll out your chilled pie dough into a rough 12-inch circle on the parchment paper. It doesn’t need to be perfect!
- Pile the fruit in the center of the dough, leaving a 2-inch border all the way around.
- Fold the edges of the dough over the fruit, pleating it as you go. The center of the fruit should still be exposed.
- Brush the crust with a beaten egg and sprinkle generously with coarse sugar. This creates a professional, golden-brown sheen and a crunchy texture.
- Bake for 30-35 minutes. Visual cue: The crust should be a deep golden brown and the fruit filling should be bubbling thick. Let it cool for at least 20 minutes so the filling sets before slicing.
How to cook summer soup?

Why we love this
Summer soup, particularly a chilled gazpacho, is like a concentrated shot of garden flavor. It is incredibly light, vibrant, and surprisingly filling. The texture should be a balance between a smooth puree and tiny, crunchy bits of fresh vegetables. We love how it can be served in small shot glasses on a snack board, making it easy for guests to sip while they mingle. It is cooling, healthy, and provides a sophisticated, bright acidity that cleanses the palate after enjoying savory meats and cheeses.
Ingredients
- 2 lbs ripe tomatoes, cored and chopped
- 1 small cucumber, peeled and chopped
- 1 red bell pepper, seeded and chopped
- 1/2 small red onion
- 1 clove garlic
- 2 tablespoons sherry vinegar
- 1/3 cup extra virgin olive oil
- Salt and pepper to taste
How to make it
- Place the tomatoes, cucumber, bell pepper, onion, and garlic into a high-powered blender.
- Blend on high until the mixture is completely liquefied. For an ultra-smooth, restaurant-quality soup, pass the liquid through a fine-mesh sieve to remove any remaining skins or seeds.
- With the blender running on low, slowly drizzle in the olive oil and sherry vinegar. This emulsifies the soup, giving it a creamy, orange-pink hue and a luxurious mouthfeel.
- Taste and season generously with salt and pepper. Chilled dishes often need more seasoning than hot ones.
- Crucial Step: Chill the soup in the refrigerator for at least 4 hours. The flavors need time to marry and the temperature needs to be icy cold.
- Visual cue: Serve in chilled glasses with a tiny drizzle of olive oil and a single basil leaf on top for a high-end look.
The Secret to the Perfect Spread
Creating a viral-worthy snack board is less about following a rigid set of rules and more about embracing the textures and colors of the season. By combining a mix of hot and cold, crunchy and soft, and savory and sweet, you create a sensory experience that keeps people coming back for more. Remember, the ‘viral’ part comes from the love and care you put into the presentation—use fresh herbs for garnishes, varying heights with bowls and platters, and most importantly, enjoy the process. Your guests will feel the warmth of your hospitality in every bite!