

From Basic to Viral: Simple Food Board Hacks for Your Next Party
There is something inherently magical about a perfectly curated food board. It’s more than just a meal; it’s a centerpiece that invites conversation, connection, and a bit of artistic flair into your home. Whenever I host a gathering, the moment the board hits the table, the energy shifts—suddenly, everyone is gathered around, grazing and laughing. It’s the ultimate low-stress, high-impact way to feed the people you love without being stuck in the kitchen all night.
Today, I’m sharing the viral hacks that will take your hosting game from ‘standard snack’ to ‘Pinterest-perfect’ in no time. We’re diving into everything from hearty meal preps to those refreshing summer salads and even the little details, like how to attract hummingbirds to your garden for that perfect backyard party backdrop. Let’s get into these simple, viral-worthy food board hacks!
12 Easy Healthy Summer Meal Preps (Step-by-Step Guide)

Why we love this
Summer meal prepping is all about capturing the vibrant essence of the season—the snap of a fresh bell pepper, the juicy burst of a cherry tomato, and the earthy aroma of fresh cilantro. We love these meal preps because they keep your kitchen cool while fueling your body with light, nutrient-dense ingredients that don’t weigh you down in the heat. There is a deep satisfaction in opening your fridge to see rows of colorful, crisp containers ready to go, smelling like lime zest and sunshine, making your busy weekdays feel like a breeze.
Ingredients
- 2 cups cooked quinoa or farro
- 1 lb grilled chicken breast or chickpeas
- 2 cups chopped cucumbers
- 1 pint cherry tomatoes, halved
- 1 red bell pepper, diced
- 1/2 cup feta cheese crumbles
- Dressing: 1/4 cup olive oil, 2 tbsp lemon juice, 1 tsp dried oregano, salt and pepper
How to make it
- Start by prepping your base grain; if using quinoa, rinse it thoroughly under cold water to remove the bitter saponin coating, then simmer in a 2:1 ratio of water to grain for 15 minutes until the germ separates and looks like a tiny curl.
- While the grain cools, grill your protein over medium-high heat—ensure the chicken reaches an internal temperature of 165°F (74°C) for safety, then let it rest for 10 minutes before slicing to keep the juices locked in.
- Wash and dry all vegetables meticulously; moisture is the enemy of a long-lasting meal prep, so use a salad spinner for the herbs and a clean kitchen towel for the cucumbers and tomatoes.
- Dice the cucumbers and peppers into uniform 1/2-inch pieces to ensure every bite has a balanced texture and flavor profile.
- In a small glass jar, whisk the olive oil, fresh lemon juice, oregano, salt, and pepper vigorously until the mixture emulsifies into a cloudy, golden dressing.
- Assemble by layering the grain at the bottom of your containers, followed by the protein, then the heavy vegetables, and finally the feta cheese on top. Store the dressing in a separate small container to keep the greens from wilting until you are ready to serve.
5 Best Rotel Dip Party Recipes You’ll Crave

Why we love this
Nothing screams ‘viral party food’ quite like a warm, gooey Rotel dip served in a rustic cast-iron skillet or a sleek ceramic bowl on your food board. We love the way the sharp, creamy cheese melts into the spicy, acidic kick of diced tomatoes and green chilies, creating a velvety texture that clings perfectly to a salty tortilla chip. The aroma of browning meat and melting cheese creates an instant ‘comfort food’ atmosphere that draws guests in from the moment they walk through the door.
Ingredients
- 1 lb Velveeta or high-quality processed melting cheese
- 1 can (10 oz) Rotel Original Diced Tomatoes & Green Chilies
- 1 lb ground beef or breakfast sausage
- 1 tbsp taco seasoning
- Optional: Fresh cilantro and diced jalapeños for garnish
How to make it
- Begin by browning your ground beef or sausage in a large skillet over medium-high heat, using a wooden spoon to break the meat into very small crumbles until no pink remains and it is slightly crispy at the edges.
- Drain the excess grease from the skillet thoroughly; this is a critical step to ensure your dip remains smooth and doesn’t develop an oily film on top as it cools.
- Reduce the heat to low and add the cubed cheese—cutting the cheese into 1-inch squares ensures it melts evenly without scorching or becoming stringy.
- Pour in the entire can of Rotel, including the liquid, which provides the necessary acidity and moisture to keep the dip at a pourable consistency.
- Stir constantly with a silicone spatula, scraping the bottom of the pan to prevent sticking, until the cheese is completely melted and the mixture is silky and homogenous.
- Transfer the dip to a pre-warmed slow cooker on the ‘warm’ setting for serving, or serve immediately in a heated bowl, garnishing with fresh cilantro for a pop of color and freshness.
How to Make Homemade Hummingbird Food at Home

Why we love this
While not a dish for humans, having hummingbirds fluttering around your patio adds a whimsical, nature-inspired vibe to any summer garden party. We love the simplicity of this two-ingredient recipe because it avoids the harmful red dyes found in store-bought versions, offering a pure, clean energy source for these tiny, iridescent visitors. The sight of a hummingbird hovering near your food board setup creates a magical, serene experience for your guests that feels straight out of a lifestyle magazine.
Ingredients
- 1 cup refined white granulated sugar
- 4 cups water
How to make it
- In a medium saucepan, combine the 4 cups of water and 1 cup of white sugar, ensuring you use only refined white sugar as honey or brown sugar can promote dangerous fungal growth for the birds.
- Place the pan over medium heat and stir until the sugar is completely dissolved; you don’t need a rolling boil, but heating the water helps the sugar integrate and kills any bacteria or impurities.
- Once the sugar is dissolved, let the mixture simmer for about 1-2 minutes to ensure the solution is stable and clear.
- Remove the pan from the heat and allow the nectar to cool completely to room temperature; never put hot nectar into a plastic feeder as it can warp the plastic or harm the birds.
- Clean your hummingbird feeder thoroughly with hot water (no soap) before filling it with the cooled nectar to prevent mold.
- Fill the feeder and hang it in a shaded spot near your party area, then store any leftover nectar in a clean glass jar in the refrigerator for up to one week.
10 Refreshing Summer Pasta Dishes for Busy Nights
Why we love this
Summer pasta is the ultimate chameleon of the food board world, offering a hearty base that still feels incredibly light and refreshing when tossed with seasonal produce. We love the contrast between the tender, al dente pasta and the crunch of raw vegetables, all tied together by a zesty lemon-herb vinaigrette that awakens the palate. It’s the kind of dish that tastes even better as it sits, making it the perfect make-ahead option for those hot nights when you’d rather be mingling than cooking.
Ingredients
- 1 lb short pasta (like fusilli or farfalle)
- 1/2 cup basil pesto
- 1 cup frozen peas, thawed
- 1 cup baby spinach
- 1/4 cup toasted pine nuts
- Zest and juice of one lemon
- Parmesan shavings
How to make it
- Bring a large pot of heavily salted water to a boil—it should taste like the ocean—and cook your pasta according to the package directions until it is just al dente.
- One minute before the pasta is finished, add the thawed peas to the boiling water to blanch them, ensuring they stay bright green and snappy.
- Reserve 1/2 cup of the starchy pasta water before draining; this liquid is liquid gold for creating a sauce that actually clings to the noodles.
- In a large mixing bowl, combine the hot pasta and peas with the fresh pesto and a splash of the reserved pasta water, tossing vigorously to create a creamy coating.
- Fold in the baby spinach while the pasta is still warm so the leaves just barely wilt from the residual heat without becoming soggy.
- Finish the dish with a generous squeeze of fresh lemon juice, the lemon zest, toasted pine nuts for crunch, and large shavings of Parmesan cheese before serving at room temperature or chilled.
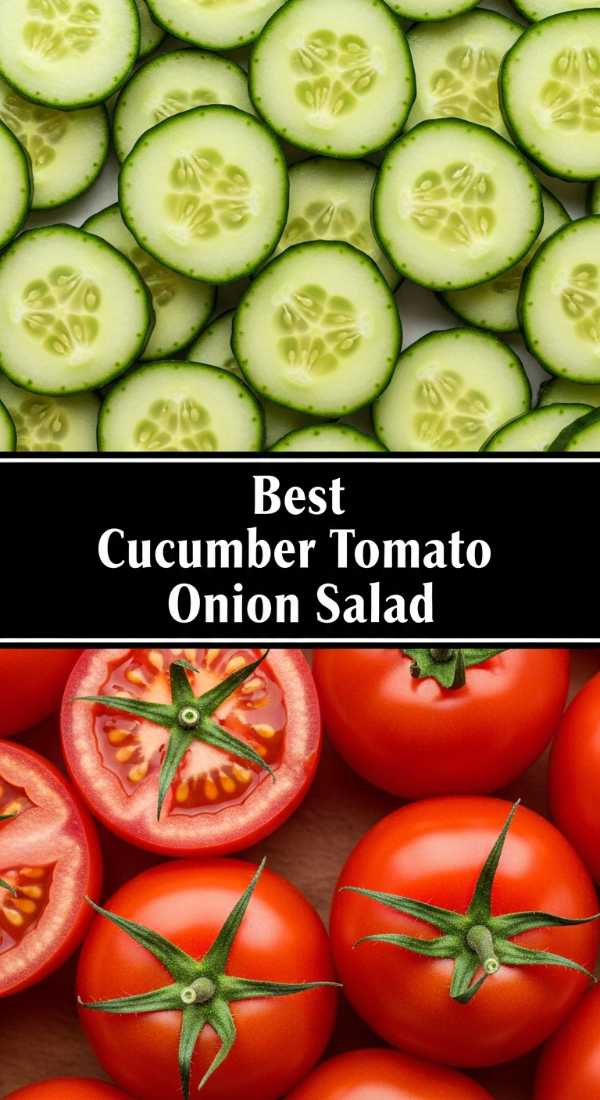
The Best Cucumber Tomato Onion Salad Recipe Ever

Why we love this
This salad is the quintessence of summer in a bowl, offering a cooling, crisp explosion of flavor that balances out heavier grilled items on a food board. We love the rhythmic sound of slicing the veggies and the way the red onion provides a sharp, peppery bite against the sweetness of garden-ripe tomatoes. The dressing is simple but effective, creating a pool of flavorful ‘salad juice’ at the bottom of the bowl that is absolutely essential for dipping crusty bread into.
Ingredients
- 2 large English cucumbers, sliced into half-moons
- 4 large Roma tomatoes, chopped
- 1 small red onion, thinly sliced into rings
- 1/4 cup apple cider vinegar
- 2 tbsp extra virgin olive oil
- 1 tsp dried dill or 1 tbsp fresh dill
- Salt and cracked black pepper to taste
How to make it
- Prepare your cucumbers by peeling them in alternating strips for a decorative look, then slice them into 1/4-inch half-moons to ensure they maintain their structural integrity in the dressing.
- Chop the Roma tomatoes into bite-sized chunks, removing excess seeds if you prefer a less watery salad, and place them in a large glass bowl with the cucumbers.
- Slice the red onion as thinly as possible; for a milder flavor, you can soak the onion slices in ice water for 10 minutes before adding them to the salad to remove the ‘harsh’ bite.
- In a small bowl, whisk together the apple cider vinegar, olive oil, and dill until the dressing is well-combined and fragrant.
- Pour the dressing over the vegetables and toss gently with large spoons to coat everything without bruising the tomatoes.
- Season generously with salt and pepper, then let the salad marinate in the refrigerator for at least 30 minutes to allow the flavors to meld together and the vegetables to slightly soften.
8 Sweet Summer Dessert Recipes for Your Next Party
Why we love this
A dessert board is the viral trend that refuses to go away, and for good reason—it’s a visual feast of colors and textures that satisfies every sweet tooth. We love the combination of macerated berries that bleed their deep red juices into fluffy clouds of whipped cream, creating a marbled effect that is as beautiful as it is delicious. There’s a playful, nostalgic joy in picking up a miniature tart or a chocolate-dipped strawberry that makes the end of a party feel like a special celebration.
Ingredients
- 1 pint strawberries, hulled and quartered
- 1 cup heavy whipping cream
- 2 tbsp powdered sugar
- 1 tsp vanilla extract
- Miniature pre-baked tart shells or shortbread cookies
- Dark chocolate for melting
How to make it
- Place your mixing bowl and whisk attachment in the freezer for 15 minutes; a cold bowl is the secret to achieving voluminous, stable whipped cream.
- Toss your quartered strawberries with a teaspoon of sugar and let them sit for 20 minutes (macerating) until they become glossy and release their natural syrups.
- In the chilled bowl, pour the heavy cream, powdered sugar, and vanilla, and beat on medium-high speed until stiff peaks form—be careful not to overbeat, or you will end up with butter.
- Melt the dark chocolate in a microwave-safe bowl in 30-second increments, stirring in between until the chocolate is smooth and glossy.
- Dip the shortbread cookies halfway into the chocolate and place them on parchment paper to set in the fridge for 10 minutes.
- Assemble your dessert board by placing the tart shells in the center, filling them with the whipped cream and topped with the macerated berries, then surrounding them with the chocolate-dipped cookies and extra fresh fruit.
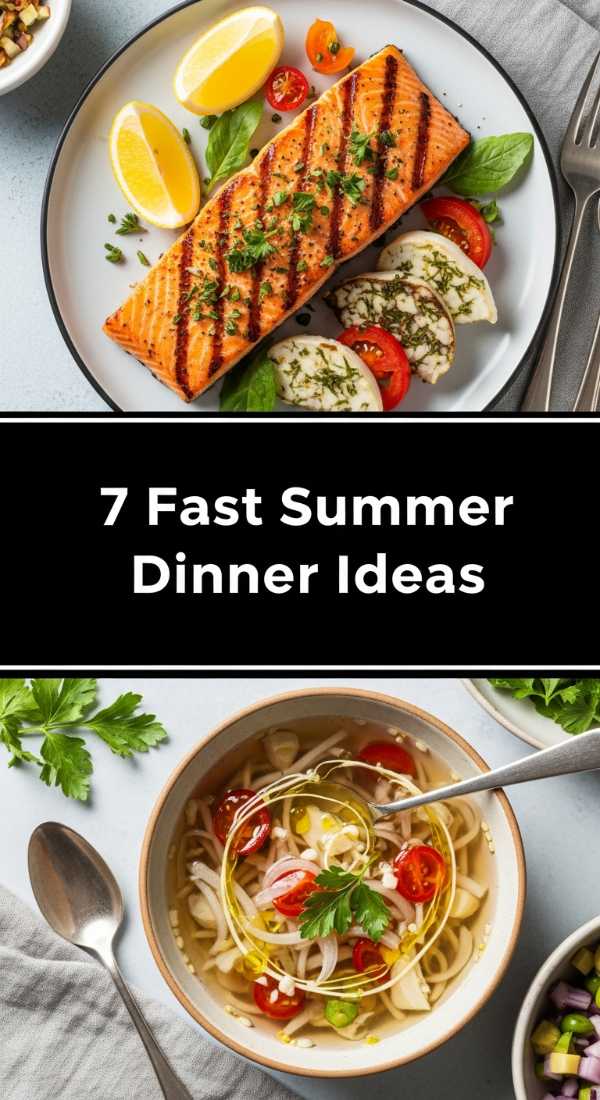
7 Quick Summer Dinner Ideas for Hot Nights

Why we love this
When the humidity hits, the last thing anyone wants is to turn on a hot oven, which is why we love these no-cook, assembly-focused dinner ideas. These recipes focus on assembly rather than chemistry, utilizing pre-cooked proteins and garden-fresh herbs to create a meal that feels sophisticated yet takes only minutes to prepare. The aroma of fresh lime and mint wafting through the kitchen provides an instant sensory cool-down, making even a Tuesday night dinner feel like a vacation.
Ingredients
- 1 rotisserie chicken, shredded
- Large flour tortillas or butter lettuce leaves
- 2 ripe avocados, sliced
- 1 jar of high-quality mango salsa
- Fresh cilantro and lime wedges
How to make it
- Carefully remove the skin from the rotisserie chicken while it is still warm, as it is easier to shred, and pull the meat into long, bite-sized strips using two forks.
- If using lettuce wraps, wash the butter lettuce thoroughly and pat dry with paper towels; crisp, dry leaves are essential for holding the weight of the fillings.
- Slice the avocados just before serving to prevent browning, and give them a quick squeeze of lime juice for both flavor and preservation.
- Lay out the tortillas or lettuce leaves on a large wooden board to create a ‘taco board’ style presentation.
- Place the shredded chicken in a bowl in the center, surrounded by smaller bowls of mango salsa, avocado slices, and extra cilantro.
- Encourage guests to build their own wraps, finishing each one with a generous squeeze of fresh lime to brighten the savory flavors of the chicken.
9 Crowd-Pleasing Picnic Side Dishes to Make Now

Why we love this
Picnic sides are the unsung heroes of the food board, providing the salty, tangy, and crunchy elements that make a meal complete. We love a good Mexican Street Corn (Elote) salad because it combines the charred, smoky sweetness of grilled corn with the creamy richness of cotija cheese and mayo. It’s a dish that travels well and looks stunning when garnished with bright red chili powder, making it a guaranteed conversation starter at any outdoor gathering.
Ingredients
- 4 cups grilled corn kernels (about 4 ears)
- 1/4 cup mayonnaise or Greek yogurt
- 1/2 cup crumbled cotija cheese
- 1/4 cup chopped fresh cilantro
- 1 tsp smoked paprika or chili powder
- 1 clove garlic, minced
How to make it
- Grill the corn on the cob over high heat, turning frequently until the kernels are charred and golden brown on all sides—this char is essential for that smoky, authentic flavor.
- Allow the corn to cool slightly, then stand the ear upright in a large bowl and use a sharp knife to slice the kernels off the cob in long strips.
- In a separate small bowl, mix the mayonnaise, minced garlic, and half of the lime juice to create a creamy dressing base.
- Pour the dressing over the warm corn kernels and toss well so the heat of the corn slightly thins the dressing, allowing it to coat every kernel perfectly.
- Fold in the crumbled cotija cheese and fresh cilantro, being careful not to over-mix so the cheese stays in visible chunks.
- Transfer to a serving bowl and dust the top with smoked paprika and an extra sprinkle of cilantro for a professional, viral-ready look.
Top 5 Starbucks Summer Drinks You Can Make at Home
Why we love this
There is a certain luxury in sipping an icy, caffeinated treat that looks like it cost seven dollars but was made in your own kitchen. We love these DIY Starbucks hacks because you can control the sweetness and the quality of the ingredients, ensuring your summer beverage is exactly to your liking. The visual of the dark coffee swirling into the white cream or the bright pink of a refresher is incredibly satisfying to create and even better to photograph for your social feed.
Ingredients
- 1 cup cold brew coffee concentrate
- 1/2 cup water or milk of choice
- 2 tbsp vanilla syrup
- 1/4 cup heavy cream (for cold foam)
- Ice cubes
How to make it
- Fill a tall glass to the brim with large, solid ice cubes; using large cubes prevents the drink from diluting too quickly in the summer heat.
- Pour the cold brew concentrate and water (or milk) into the glass, leaving about two inches of space at the top for the foam layer.
- Stir in one tablespoon of the vanilla syrup into the coffee mixture until well combined.
- In a separate small frothing pitcher or a jar, combine the heavy cream and the remaining tablespoon of vanilla syrup.
- Use a handheld milk frother to aerate the cream for about 30-45 seconds, or until it has doubled in volume and has the consistency of melted ice cream.
- Slowly pour the cold foam over the back of a spoon onto the top of the coffee; the spoon breaks the fall and allows the foam to sit elegantly on top of the dark liquid.
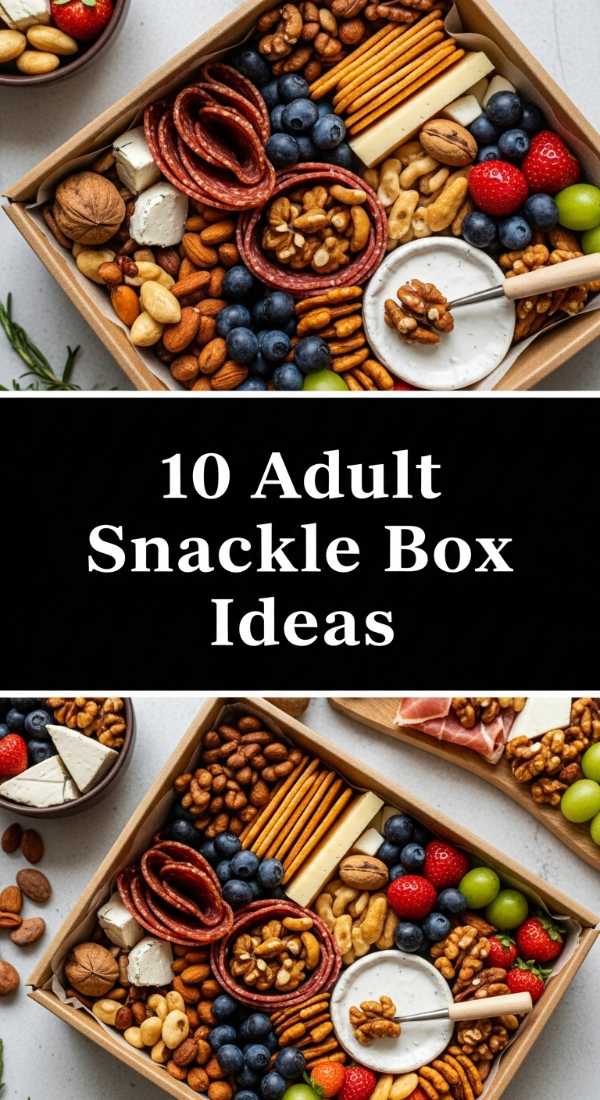
10 Creative Snackle Box Ideas for Adults (Beach Day)
[IMAGE_10]
Why we love this
The ‘Snackle Box’ is the ultimate viral food board hack for the girl-on-the-go, turning a tackle box into a portable charcuterie dream. We love the clever organization of it—the way a sharp cheddar nestles perfectly next to a handful of marcona almonds or a cluster of grapes. It’s functional, prevents snacks from getting crushed in your beach bag, and provides a delightful variety of textures and flavors that keep you grazing happily all day long under the sun.
Ingredients
- Assorted hard cheeses (Cheddar, Manchego)
- Cured meats (Prosciutto, Salami)
- Nuts (Almonds, Walnuts)
- Fresh fruit (Grapes, Blueberries)
- Dried fruit (Apricots, Cranberries)
- Dark chocolate squares
How to make it
- Thoroughly wash and dry a multi-compartment plastic organizer or ‘tackle box’ to ensure it is food-safe and free of any plastic scents.
- Line the bottom of each compartment with a small piece of parchment paper; this makes cleanup easier and prevents oily snacks from staining the plastic.
- Fill the smaller sections with ‘anchor’ items like nuts and dried fruits that won’t move around much during transport.
- Roll your deli meats into tight cylinders or fold them into quarters to fit snugly into the medium-sized compartments, which helps them stay fresh and easy to grab.
- Slice your hard cheeses into uniform cubes or triangles and place them in a section away from the moisture of the fresh fruit to prevent them from getting soggy.
- Place delicate items like berries or chocolate in the center compartments where they are most protected, then snap the lid shut and keep the box in a cooler bag until you hit the sand.
Wrapping Up Your Viral Hosting Journey
Creating a viral-worthy food board isn’t about being a professional chef; it’s about the joy of presentation and the love of sharing good food with great people. Whether you’re packing a Snackle Box for the beach or whipping up a batch of Rotel dip for a backyard bash, these hacks are designed to make your life easier and your parties more memorable. Remember, the best part of any food board is the memories made around it, so take a deep breath, put out the spread, and enjoy the moment!
Frequently Asked Questions
Everything you need to know about mastering the art of the board and summer hosting.