
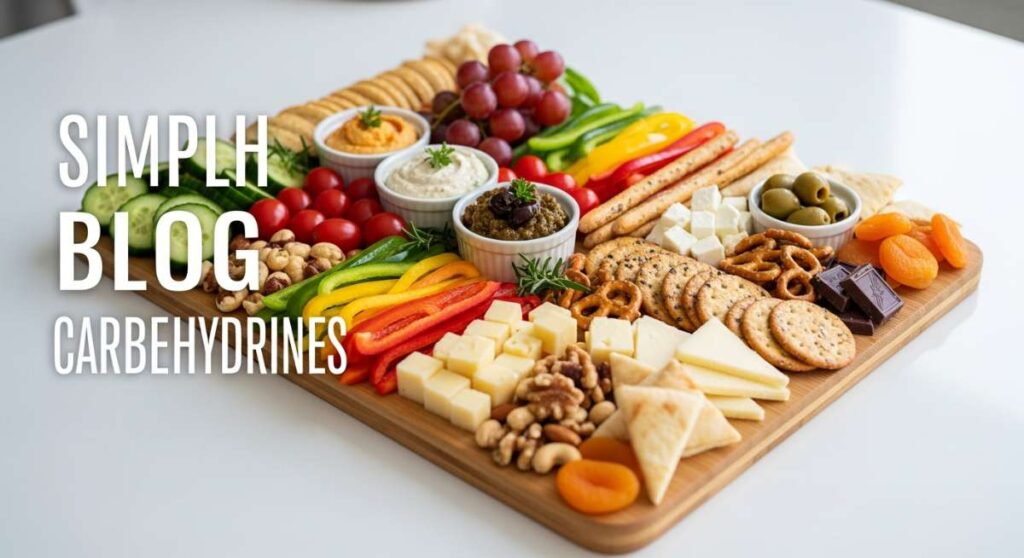
We have all been there—scrolling through our feeds and stopping dead in our tracks at those gorgeous, overflowing food boards that look like they belong in a high-end magazine. There is a certain kind of magic in the ‘Simple Food Board’ trend; it’s about more than just eating, it’s about the art of gathering and the joy of picking at a little bit of everything. It’s that effortless, ‘I just threw this together’ vibe that actually takes a little bit of intentionality to master.
As someone who lives for a good backyard hang, I’ve found that the secret to a viral-worthy board isn’t just expensive cheeses—it’s the variety and the seasonal freshness you bring to the table. Whether you are hosting a sprawling Fourth of July bash or just trying to survive a heatwave with a refreshing soup, these boards are the ultimate hack for stress-free hosting. They invite your guests to linger, to talk, and to experience flavors in a way that a plated meal just can’t replicate.
In this ultimate cheat sheet, I’m breaking down ten different ways to fill your boards this season. From healthy summer staples to those creamy, indulgent dips we all crave, we are covering every corner of the summer culinary landscape. So, grab your largest wooden platter, clear off the counter, and let’s dive into the recipes that will make your next gathering the talk of the neighborhood.
10 Easy Ways to Cook Healthy Summer Recipes (Step-by-Step Guide)
Why we love this
There is something truly restorative about a platter overflowing with the season’s best produce and light proteins. Imagine the crisp snap of fresh garden peas against the silkiness of a lemon-tahini drizzle, paired with the smoky aroma of lightly charred zucchini straight from the grill. It’s not just about the nutrients; it’s about that vibrant, sunshine-filled energy that makes every bite feel like a celebration of the outdoors. You can practically taste the garden in every forkful, balanced by a light, zesty acidity that wakes up your palate and leaves you feeling energized rather than sluggish.
Ingredients
- 2 large zucchinis, sliced into rounds
- 1 bunch of asparagus, woody ends trimmed
- 2 cups cherry tomatoes
- 1 lb lean chicken breast or firm tofu
- Extra virgin olive oil
- Lemon zest and juice
- Fresh mint and parsley
- Sea salt and cracked black pepper
- 1 cup quinoa, cooked and chilled
How to make it
- Begin by prepping your proteins; if using chicken, slice into thin cutlets to ensure fast, even cooking. Marinate them in a mixture of olive oil, lemon juice, and minced garlic for at least 30 minutes in the refrigerator.
- Preheat your grill or a heavy cast-iron skillet to medium-high heat. You want to see a slight wisp of smoke, which indicates the pan is ready to sear and lock in those juices.
- Lightly coat your zucchini and asparagus in olive oil and a pinch of salt. Place them on the heat source and grill for 3-4 minutes per side until you see distinct char marks but the vegetables still retain a slight crunch.
- Cook your chicken or tofu on the same high heat. For chicken, cook for about 5-6 minutes per side until the internal temperature reaches 165°F. For tofu, press out the moisture first and sear until the edges are golden brown and crispy.
- While the proteins rest, toss your chilled quinoa with the cherry tomatoes, fresh herbs, and a final squeeze of lemon.
- Assemble the board by layering the grilled vegetables over the quinoa base, slicing the protein thinly, and garnishing with extra mint for a cooling finish.
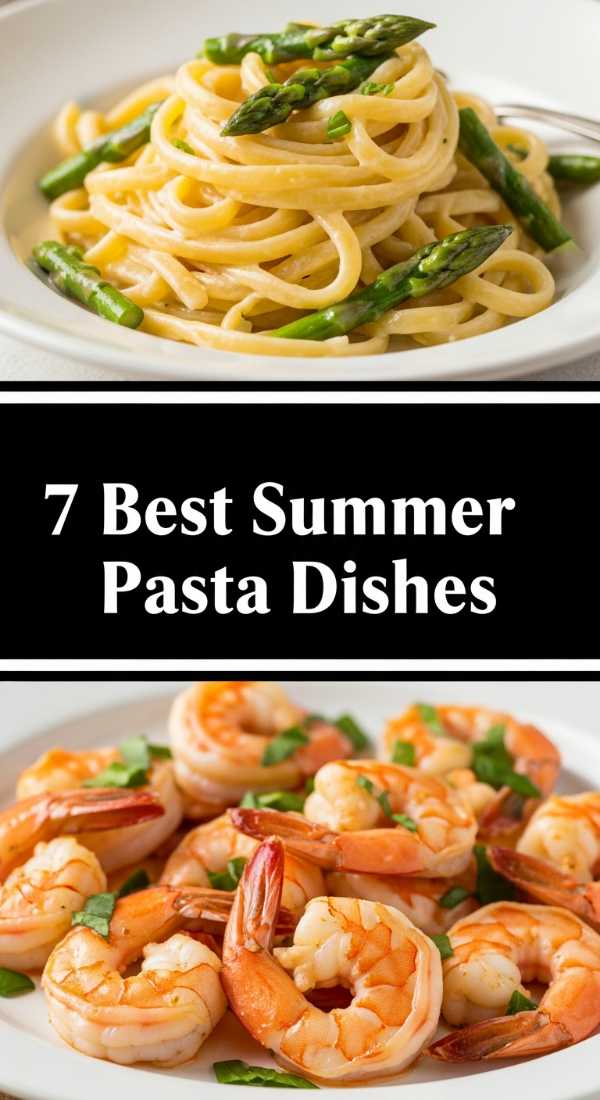
7 Best Ways to Serve Summer Pasta Dishes (Step-by-Step Guide)

Why we love this
Summer pasta isn’t about heavy, simmering sauces; it’s about the marriage of al dente noodles and the brightest ingredients your farmer’s market has to offer. Picture a bowl of golden linguine tossed with bursting tomatoes that release their sweet, jammy juices the moment they hit the heat. The aroma of toasted garlic and fresh basil fills the air, creating a scent profile that is instantly nostalgic and comforting. Each bite is a textural playground—the firmness of the pasta, the softness of melted mozzarella pearls, and the slight crunch of pine nuts come together for a meal that feels sophisticated yet incredibly easy to share on a large board.
Ingredients
- 1 lb Farfalle or Penne pasta
- 3 cups heirloom cherry tomatoes
- 4 cloves garlic, thinly sliced
- 1/2 cup high-quality olive oil
- 1 cup fresh basil leaves, torn
- 8 oz fresh mozzarella pearls
- 1/4 cup toasted pine nuts
- Red pepper flakes (optional)
How to make it
- Bring a large pot of heavily salted water to a rolling boil. The water should taste like the sea to properly season the pasta from the inside out. Cook the pasta for 1-2 minutes less than the package directions to achieve a true al dente texture.
- In a large wide skillet, heat the olive oil over medium-low heat. Add the sliced garlic and red pepper flakes, cooking slowly until the garlic is golden and fragrant, but be careful not to let it burn, as bitter garlic will ruin the delicate sauce.
- Turn the heat up to medium and add the cherry tomatoes. Cook them, stirring occasionally, until the skins begin to wrinkle and pop. Use the back of a wooden spoon to gently press some of them to release their juices into the oil.
- Before draining the pasta, reserve at least 1 cup of the starchy pasta water—this is the secret to a glossy, emulsified sauce.
- Add the cooked pasta directly into the skillet with the tomatoes and garlic. Pour in half of the pasta water and toss vigorously. The starch will bind with the oil to create a light sauce that coats every noodle.
- Remove from heat and fold in the mozzarella pearls and fresh basil. The residual heat will soften the cheese without fully melting it into a clump. Transfer to your serving board and scatter the pine nuts on top.
5 Quick Ways to Make Rotel Dip Recipes (Step-by-Step Guide)
Why we love this
Let’s be honest: no party board is truly complete without a center-piece of warm, gooey, spicy cheese dip. Rotel dip is the ultimate crowd-pleaser because it hits all those primal flavor notes—salt, fat, and just the right amount of heat from the green chilies. There is something deeply satisfying about the way a sturdy tortilla chip cuts through the thick, molten cheese, carrying a heavy load of savory sausage or beef. It’s the kind of dish that brings people together, standing around the board, dipping and chatting while the dip is still bubbling and emitting that irresistible cheesy, spicy aroma.
Ingredients
- 1 lb ground breakfast sausage or lean ground beef
- 1 block (16 oz) Velveeta or similar processed melting cheese
- 2 cans (10 oz each) Ro-Tel Diced Tomatoes and Green Chilies
- 1/2 cup pickled jalapeños (optional)
- 1/4 cup chopped cilantro for garnish
- Sturdy tortilla chips for serving
How to make it
- Place a large skillet or Dutch oven over medium heat. Add the ground sausage or beef and cook, breaking it up with a spatula into small, uniform crumbles. Cook until no pink remains and the meat has developed a nice brown crust.
- Very importantly, drain the excess fat from the skillet. Leaving too much grease will cause the cheese sauce to separate and look oily on your board.
- Cut the melting cheese into 1-inch cubes. This helps it melt evenly and quickly without scorching the bottom of the pan.
- Turn the heat down to low and add the undrained cans of Ro-Tel directly into the skillet with the meat. The liquid from the tomatoes is essential for the dip’s consistency.
- Add the cheese cubes and stir constantly with a silicone spatula. Keep the heat low and slow; if the cheese gets too hot too fast, it can become grainy.
- Once the mixture is smooth and velvety, stir in the pickled jalapeños if you want extra kick. Transfer to a bowl in the center of your food board and garnish with fresh cilantro immediately before serving to keep it looking bright.
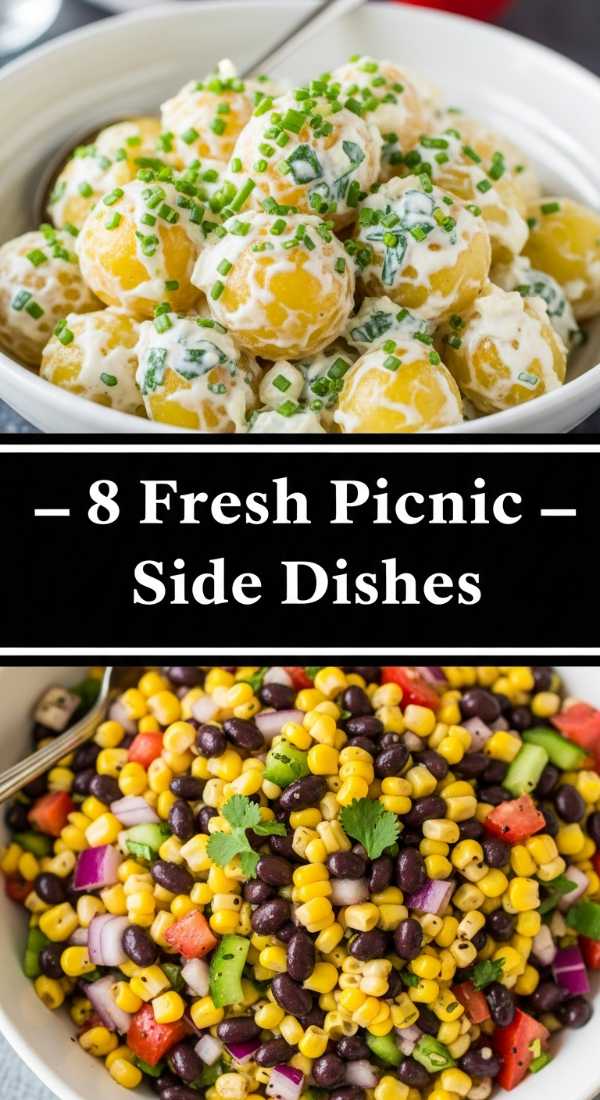
8 Easy Ways to Prepare Picnic Side Dishes (Step-by-Step Guide)

Why we love this
Picnic sides are the unsung heroes of the food board, providing the essential crunch and tang that balances out heavier grilled meats. Think about the refreshing snap of a vinegar-based coleslaw or the creamy, herbaceous delight of a classic potato salad speckled with fresh dill. These dishes are designed to be portable and durable, holding up beautifully under the summer sun. The smell of fresh cider vinegar and the sight of vibrant, shredded purple cabbage add a rustic, artisanal feel to your spread, making the entire board look like an intentional, curated feast rather than a collection of random bites.
Ingredients
- 1 lb small red potatoes
- 1 head of green cabbage, shredded
- 2 large carrots, grated
- 1/2 cup mayonnaise or Greek yogurt
- 2 tbsp Apple cider vinegar
- 1 tbsp Dijon mustard
- Fresh dill and chives, chopped
- Salt and black pepper to taste
How to make it
- Start with the potatoes: Place them in a pot of cold salted water and bring to a boil. Cooking from cold ensures the insides are fluffy while the outsides stay intact. Simmer until fork-tender, about 10-15 minutes.
- Drain the potatoes and let them cool until they are just warm to the touch. Slice them into halves or quarters. While still warm, drizzle with a tablespoon of vinegar—this allows the potatoes to absorb the tang deeply into their centers.
- In a small bowl, whisk together the mayo (or yogurt), mustard, chopped herbs, salt, and pepper to create your creamy dressing.
- Fold the dressing into the warm potatoes gently so they don’t turn into mash. Set aside in the fridge to chill; the flavors will meld and intensify as it sits.
- For the slaw, toss the shredded cabbage and carrots in a large bowl. In a separate jar, shake together apple cider vinegar, a touch of oil, a teaspoon of sugar, and celery salt.
- Pour the vinaigrette over the cabbage about 30 minutes before serving. This gives the vegetables time to soften slightly while maintaining a satisfying, audible crunch that is perfect for a food board.
12 Viral Ways to Create Summer Dessert Recipes (Step-by-Step Guide)
Why we love this
A dessert board is the ultimate visual ‘wow’ factor that signals the peak of summer indulgence. Imagine a landscape of macerated strawberries, pillows of whipped cream, and charred, caramelized peaches that smell like a campfire dream. It’s a sensory explosion where the sweetness of the fruit is heightened by the heat, and the coldness of the cream provides a luxurious, velvety contrast. This approach to dessert is interactive and fun, allowing everyone to build their own perfect bite—perhaps a bit of shortcake topped with a mountain of berries and a drizzle of honey. It’s light, bright, and the perfect end to a warm evening.
Ingredients
- 1 pint strawberries, hulled and sliced
- 1 pint blueberries
- 4 ripe peaches, halved and pitted
- 1 loaf of pound cake or shortcakes, sliced
- 2 cups heavy whipping cream
- 2 tbsp powdered sugar
- 1 tsp vanilla bean paste
- Fresh mint leaves and honey for drizzling
How to make it
- In a medium bowl, toss the sliced strawberries with a tablespoon of sugar and let them sit for 15 minutes. This ‘macerating’ process draws out the natural juices to create a built-in syrup.
- Prepare your peaches by brushing the cut sides with a tiny bit of neutral oil. Place them cut-side down on a hot grill or grill pan for 3-4 minutes until they have deep char marks and have softened slightly.
- Whip the heavy cream in a chilled bowl. Start on low speed and gradually increase. Once it begins to thicken, add the powdered sugar and vanilla bean paste. Continue whipping until stiff peaks form—it should be thick enough to hold its shape on the board.
- Lightly toast your pound cake slices on the grill or in a toaster until the edges are golden and slightly crisp, providing a sturdy base for the fruit.
- To assemble the board, place the bowl of whipped cream in the center. Arrange the toasted cake slices around it like spokes of a wheel.
- Fill the remaining gaps with the grilled peaches, the macerated berries, and handfuls of fresh blueberries. Drizzle the peaches with honey and scatter mint leaves over everything for a pop of color and a fresh, herbal scent.
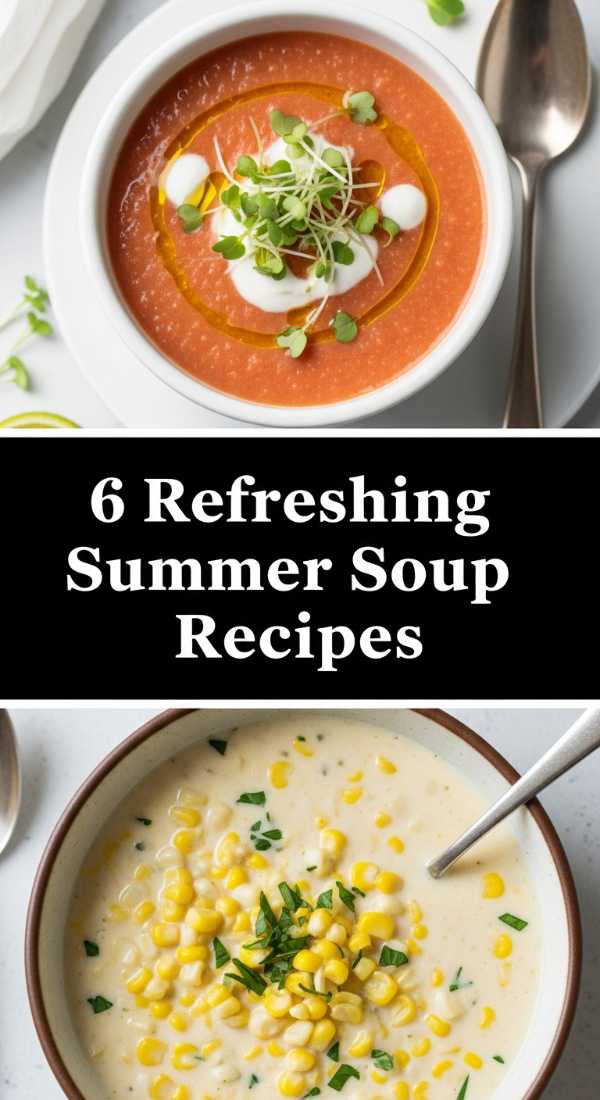
6 Refreshing Ways to Make Summer Soup Recipes (Step-by-Step Guide)

Why we love this
When the temperature climbs, a steaming bowl of soup is the last thing on anyone’s mind, but a chilled, vibrant summer soup is a total game-changer for a food board. Picture small glass shooters filled with a bright green pea and mint gazpacho or a deep red, traditional tomato gazpacho. The texture is incredibly smooth and refreshing, acting as a palate cleanser between other savory bites. The aroma is clean and garden-fresh, with notes of cucumber and bell pepper wafting up. It’s an elegant addition that feels sophisticated and unexpected, providing a cooling sensation that makes the heat of the day feel much more manageable.
Ingredients
- 6 large ripe tomatoes, cored
- 1 English cucumber, peeled and chopped
- 1 red bell pepper, seeded
- 2 cloves garlic
- 2 tbsp sherry vinegar
- 1/4 cup extra virgin olive oil
- Salt and cumin to taste
- Microgreens for garnish
How to make it
- Roughly chop your tomatoes, cucumber, and bell pepper. To get the best flavor, use the ripest produce you can find; the tomatoes should be soft and fragrant.
- Place all the vegetables into a high-powered blender. Add the garlic, sherry vinegar, and a pinch of cumin.
- Blend on high until the mixture is completely liquified. While the blender is running on a low setting, slowly stream in the olive oil. This creates a stable emulsion, giving the soup a creamy, luxurious mouthfeel without any dairy.
- Taste and adjust the seasoning with salt and more vinegar if needed. The acidity is what makes this soup ‘pop’ on the board.
- Pass the liquid through a fine-mesh strainer into a large pitcher if you want a perfectly silky texture, or leave it as-is for a more rustic, chunky style.
- Chill the soup in the refrigerator for at least 2 hours. Serving it ice-cold is non-negotiable. Pour into small glasses or bowls to place on your food board, garnishing each with a few drops of olive oil and a pinch of microgreens.
9 Simple Ways to Grill Kabobs on the Grill (Step-by-Step Guide)

Why we love this
Kabobs are the quintessential summer food—portable, charred, and infinitely customizable. There is a primal joy in the smell of wood smoke hitting marinated meat and peppers, creating a savory aroma that defines outdoor cooking. On a board, they provide wonderful height and structure, with the colorful alternating patterns of red onion, green pepper, and golden pineapple looking like edible jewelry. The texture is a beautiful mix of the tender, juicy interior of the meat and the crisp, blackened edges of the vegetables. It’s a complete meal on a stick, making it the perfect ‘grab and go’ item for guests mingling around your spread.
Ingredients
- 1.5 lbs top sirloin steak or chicken thighs, cut into 1-inch cubes
- 2 large bell peppers (multi-colored), cut into chunks
- 1 red onion, cut into wedges
- 1 cup pineapple chunks
- 1/2 cup soy sauce
- 1/4 cup brown sugar
- 2 tbsp ginger, minced
- Wooden or metal skewers
How to make it
- If using wooden skewers, soak them in water for at least 30 minutes. This prevents them from catching fire on the grill.
- Whisk together the soy sauce, brown sugar, and ginger to create a marinade. Reserve a small portion for basting later. Toss your meat cubes in the rest and let them marinate for at least 1 hour in the fridge.
- Thread the ingredients onto the skewers, alternating between meat, pepper, onion, and pineapple. Don’t pack them too tightly; leaving a tiny bit of space between items allows the heat to circulate and cook everything evenly.
- Preheat your grill to high heat. You want the grates to be hot enough that the meat sears instantly upon contact.
- Place the kabobs on the grill. Cook for about 3-4 minutes per side. Use tongs to turn them carefully, ensuring all four sides get those beautiful, dark grill marks.
- During the last 2 minutes of cooking, brush the reserved marinade over the kabobs to create a sticky, flavorful glaze. Remove from heat and let them rest for 5 minutes before laying them across your food board so the juices stay inside the meat.
15 Best Ways to Plan Fourth of July Party Ideas (Step-by-Step Guide)

Why we love this
Planning a Fourth of July board is all about embracing a theme with gusto and a bit of whimsical flair. The red, white, and blue color palette is naturally vibrant, using berries, cheeses, and dips to create a patriotic masterpiece. We love this because it turns food into decor; the board itself becomes the centerpiece of the party. The scent of salty pretzels, sweet blueberries, and tangy yogurt-covered almonds creates a profile that is both nostalgic and exciting. It’s a visual representation of summer celebration, making everyone feel immediately festive the moment they see the spread laid out on the table.
Ingredients
- Red: Strawberries, raspberries, cherry tomatoes, pepperoni
- White: Mozzarella balls, white cheddar cubes, cauliflower, yogurt pretzels
- Blue: Blueberries, blackberries, blue corn tortilla chips
- Star-shaped cookie cutter
- Large rectangular wooden board
How to make it
- Start by defining your ‘star’ area. Use a star-shaped cookie cutter to cut out pieces of white cheddar or jicama. Place a small bowl of blueberries in the top left corner of the board to represent the blue field of the flag.
- Create the ‘stripes’ by laying down rows of red and white ingredients. For example, a row of pepperoni followed by a row of mozzarella balls, then a row of sliced strawberries.
- Ensure you have a mix of textures in each stripe—combine soft fruits with crunchy crackers or cheeses to keep the eating experience interesting.
- Use the star-shaped cheese cutouts to top the blue section (the blueberries), giving it that iconic American flag look.
- Fill in any small gaps with smaller items like yogurt-covered almonds or blackberries to make the board look lush and professional.
- To keep it fresh, wait until just before guests arrive to add the crackers or chips, ensuring they stay crisp and don’t absorb moisture from the fruit.
10 Fun Ways to Mix Starbucks Summer Drinks (Step-by-Step Guide)
Why we love this
There is nothing quite like the icy, refreshing clink of a homemade version of those viral summer drinks. We love these because they bring that ‘coffee shop treat’ feeling right to your backyard board without the $7 price tag. Imagine a tray filled with glasses of bright pink refreshers and golden mango concoctions, all topped with swirls of sweet cold foam. The aroma is a tropical blend of hibiscus, coconut, and caffeine, instantly transporting you to a vacation state of mind. It’s the ultimate way to hydrate in style, offering a sweet, caffeinated kick that perfectly complements the savory snacks on your food board.
Ingredients
- 1 cup hibiscus tea, brewed and cooled
- 1/2 cup white grape juice
- 1/4 cup coconut milk (the creamy canned kind)
- 1 cup freeze-dried strawberries
- 1/2 cup heavy cream
- 1 tbsp vanilla syrup
- Ice cubes
How to make it
- For a ‘Pink Drink’ inspired refresher, combine the cooled hibiscus tea and white grape juice in a large pitcher. The grape juice provides the sweetness and body that mimics the Starbucks base.
- Add a handful of freeze-dried strawberries to the liquid and let them sit for 5 minutes. They will rehydrate slightly and turn the drink a vibrant, photo-ready pink.
- In a separate small jar, combine the heavy cream and vanilla syrup. Use a handheld milk frother to whip it for about 30 seconds until it doubles in volume and becomes a thick, pourable ‘cold foam.’
- Fill individual glasses with plenty of ice—the more ice, the more refreshing the drink feels.
- Pour the tea mixture over the ice until the glass is three-quarters full. Gently pour the coconut milk on top and watch it swirl beautifully through the pink liquid.
- Finish each drink with a generous dollop of the vanilla cold foam and a few more freeze-dried berries. Arrange the glasses on a section of your food board for a stunning, drinkable display.
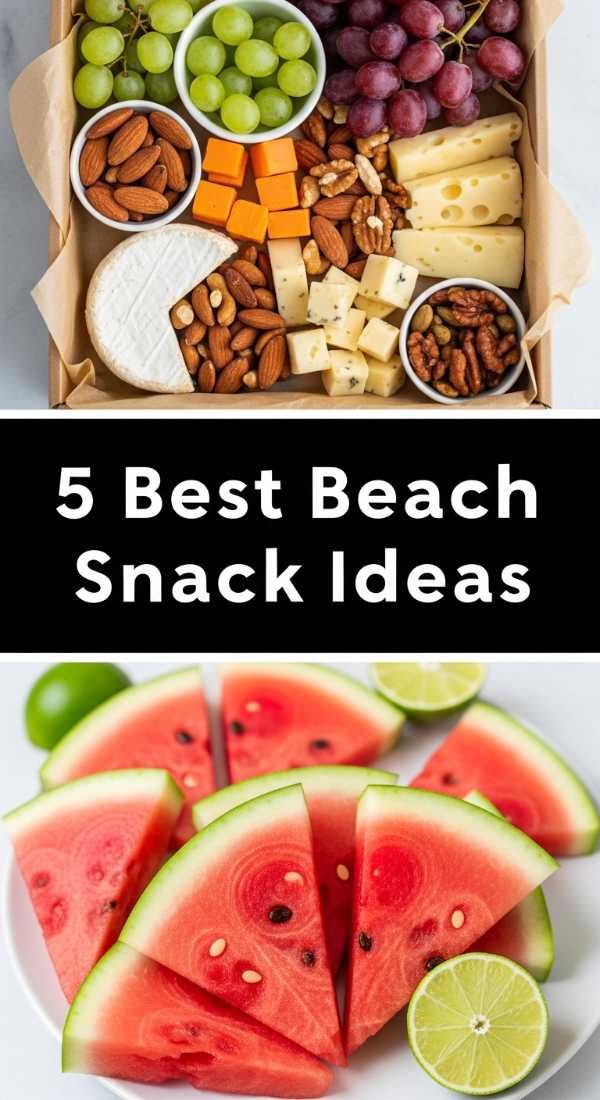
5 Best Ways to Pack Beach Snack Ideas (Step-by-Step Guide)
[IMAGE_10]
Why we love this
Beach snacks need to be two things: sand-proof and incredibly hydrating. We love this approach because it turns simple ingredients into a portable, mess-free version of a food board. Picture chilled watermelon spears that drip with sweetness and salty, roasted nuts that provide a much-needed energy boost after a swim. The smell of the salty air combined with the fresh, clean scent of cut fruit is the essence of summer. By using clever packaging, you ensure that the texture of your crackers stays crunchy and your fruit stays cold, making for a luxurious seaside experience that beats a squashed sandwich any day.
Ingredients
- 1/2 small watermelon, sliced into long spears
- 1 cup salted almonds or cashews
- 4-5 mini cucumbers, sliced into rounds
- 1 pack of sturdy pita chips
- Small individual hummus cups
- Grapes (frozen for extra coolness)
How to make it
- The key to a successful beach ‘board’ is the container. Use a large, partitioned bento box or a series of small, airtight glass jars to keep flavors from mixing and sand from entering.
- Slice your watermelon into spears rather than cubes; the rind acts as a natural ‘handle,’ keeping sandy fingers away from the fruit you actually eat.
- Freeze your grapes the night before. Not only are they a delicious frozen treat, but they also act as edible ice packs to keep the other items in your container cool.
- Place the hummus in the center of your container or use pre-sealed individual cups. This prevents the dip from leaking onto your crunchy pita chips.
- Keep the dry items, like nuts and chips, in their own dedicated, moisture-proof section. Nothing ruins a beach day faster than a soggy cracker.
- Pack the entire container at the very bottom of your cooler, directly against the ice packs. When you’re ready to eat, simply open the lid, and you have an instant, portable food board ready for the sand.
Wrapping Up the Viral Board Trend
Mastering the simple food board trend is all about balance—mixing the fresh with the indulgent, the crunchy with the creamy, and the bright colors of summer with the rustic tones of a wooden platter. Whether you’re following these recipes to the letter or using them as a jumping-off point for your own creations, remember that the best boards are the ones that reflect the joy of the season. So, go ahead, pile those peaches high, let the cheese dip bubble, and enjoy every single bite of your summer gatherings!