
Easy Viral Snack Boards: Minimal Effort, Maximum Wow
There is something almost magical about the way a beautifully arranged board brings people together. Whether it’s a golden hour gathering on the back porch or a lazy Sunday afternoon with the family, the ‘snack board’ mentality has completely transformed how I host. It’s no longer about spending hours over a hot stove while your guests laugh in the other room; it’s about creating a tapestry of flavors that invites everyone to dig in, linger, and enjoy the effortless beauty of simple, viral food trends.
I used to stress over three-course meals, but lately, I’ve found that the most ‘wow’ moments come from the simplest ingredients treated with a little love. These recipes are the ones that have been taking over my feed, and for good reason—they are vibrant, incredibly easy to pull together, and focus on the freshest seasonal flavors. Let’s dive into how you can create your own viral-worthy spreads that look like a million bucks but take minimal effort to master.
How to make rotel dip

Why we love this
This dip is the ultimate nostalgic comfort food, brought to life with a creamy, velvety texture and just the right amount of spicy kick. As it melts, the aroma of browned savory meat and tangy green chilies fills the kitchen, immediately drawing everyone toward the snack table. There is a satisfying, gooey richness that coats every single tortilla chip, making it impossible to stop at just one bite. It is the quintessential party starter that feels both indulgent and wonderfully familiar, perfect for those high-energy game days or casual backyard hangouts.
Ingredients
- 1 lb ground breakfast sausage or lean ground beef
- 1 block (32 oz) Velveeta cheese, cubed
- 2 cans (10 oz each) Ro-Tel Diced Tomatoes and Green Chilies
- 1/2 cup whole milk (optional, for creaminess)
- Fresh cilantro and sliced jalapeños for garnish
How to make it
- Begin by placing a large skillet over medium-high heat. Add your ground sausage or beef, breaking it apart with a wooden spoon or spatula into small, uniform crumbles. Cook for 7-9 minutes until the meat is deeply browned and no pink remains, which ensures a rich, savory base.
- Carefully drain the excess grease from the skillet to prevent the dip from becoming oily. If you are using a slow cooker, transfer the meat now; otherwise, lower the skillet heat to medium-low.
- Add the cubed Velveeta cheese to the meat. Cutting the cheese into 1-inch cubes is crucial as it allows for even melting without scorching the bottom of the pan. Stir constantly with a silicone spatula.
- Pour in both cans of Ro-Tel, including the liquid. The juices from the tomatoes provide the acidity needed to balance the richness of the cheese.
- Continue to stir over low heat for about 10-12 minutes. You are looking for a completely smooth, glossy consistency. If the dip feels too thick, whisk in the milk one tablespoon at a time until it reaches your desired silkiness.
- Once fully melted and steaming, transfer to a serving bowl or keep on the ‘warm’ setting in a slow cooker. Top with fresh cilantro and jalapeños for a pop of color and heat.
How to cook summer pasta
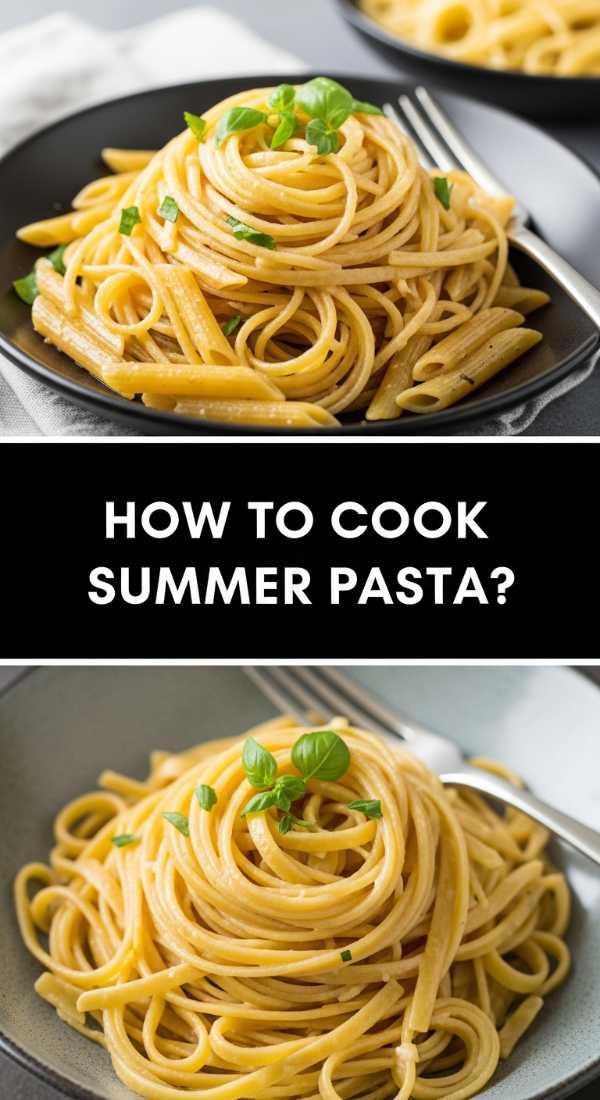
Why we love this
Summer pasta is all about celebrating the harvest, featuring a brightness that heavy winter sauces just can’t match. Imagine the scent of fresh basil leaves being torn by hand, mingling with the sweet, acidic aroma of bursting cherry tomatoes and high-quality olive oil. Each forkful offers a harmony of textures—from the al dente bite of the pasta to the creamy melt of fresh mozzarella pearls. It’s a dish that tastes like sunshine on a plate, feeling incredibly light yet deeply satisfying after a long day in the heat.
Ingredients
- 1 lb Farfalle or Penne pasta
- 2 cups cherry tomatoes, halved
- 3 cloves garlic, thinly sliced
- 1/2 cup extra virgin olive oil
- 1 cup fresh basil leaves, chiffonade
- 8 oz fresh mozzarella pearls
- Red pepper flakes and sea salt to taste
How to make it
- Bring a large pot of heavily salted water (it should taste like the sea) to a rolling boil. Add your pasta and cook for approximately 8-10 minutes. It is vital to pull the pasta when it is ‘al dente’—firm to the bite—as it will continue to cook slightly when tossed with the warm oil.
- While the pasta cooks, heat the olive oil in a wide skillet over medium-low heat. Add the sliced garlic and a pinch of red pepper flakes. Sauté for just 2-3 minutes until the garlic is fragrant and golden but not brown; burnt garlic will turn the entire dish bitter.
- Add the halved cherry tomatoes to the skillet. Increase the heat to medium and cook for 5 minutes, pressing down gently on a few tomatoes with your spoon so they release their juices to create a light, natural sauce.
- Before draining the pasta, reserve 1/2 cup of the starchy pasta water. This is the secret to a silky sauce that clings to the noodles.
- Drain the pasta and add it directly into the skillet with the tomatoes. Toss vigorously, adding the reserved pasta water a little at a time to emulsify the oil and juices.
- Remove from heat. Fold in the fresh mozzarella pearls and half of the basil. The cheese should just begin to soften but not completely melt. Serve topped with the remaining fresh basil and a sprinkle of sea salt.
How to make cucumber salad
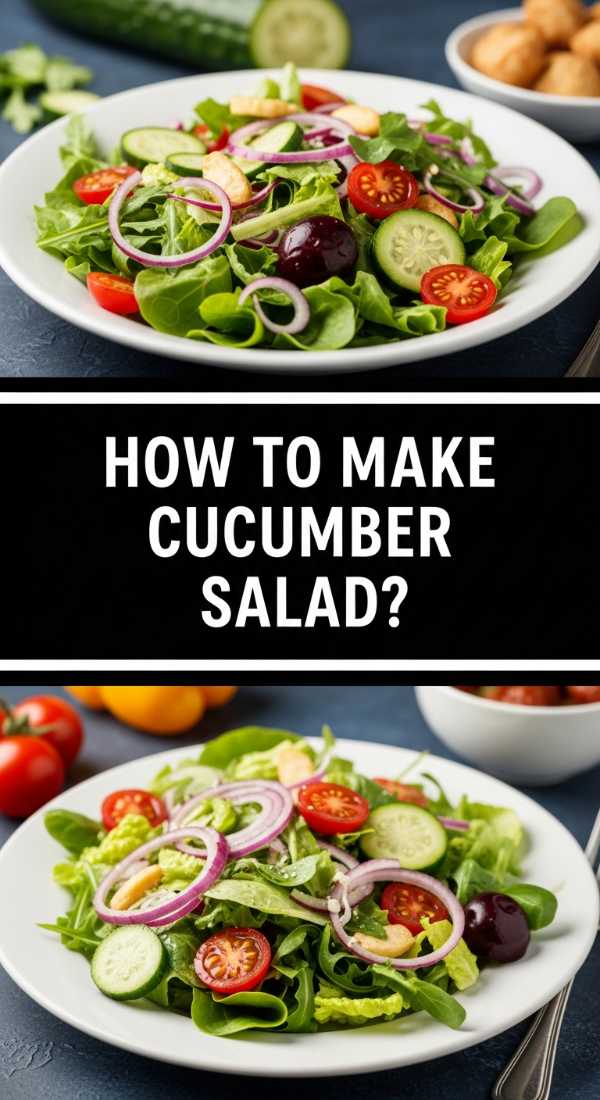
Why we love this
This salad is the ultimate palate cleanser, offering a crisp, cooling crunch that is incredibly refreshing on a humid afternoon. The sharp tang of rice vinegar and the subtle sweetness of white sugar create a brine that permeates the thinly sliced cucumbers, making them translucent and vibrant. Hints of toasted sesame oil and fresh dill add layers of earthy and herbal complexity, ensuring every bite is zesty and bright. It’s the kind of side dish that disappears in minutes because it provides such a clean, revitalizing contrast to grilled meats or spicy dips.
Ingredients
- 3 large English cucumbers
- 1/2 small red onion, paper-thinly sliced
- 1/2 cup rice vinegar
- 2 tablespoons white sugar
- 1 teaspoon salt
- 1 tablespoon fresh dill, chopped
- 1 teaspoon toasted sesame seeds
How to make it
- Start by washing your cucumbers and slicing them into very thin rounds. Using a mandoline slicer is highly recommended here to achieve paper-thin consistency, which allows the dressing to penetrate more effectively.
- Place the sliced cucumbers in a colander and sprinkle with the teaspoon of salt. Let them sit for about 15 minutes. This step draws out excess moisture, ensuring your salad stays crunchy rather than becoming watered down.
- While the cucumbers drain, whisk together the rice vinegar and sugar in a large glass bowl until the sugar is completely dissolved.
- Gently pat the cucumbers dry with a paper towel and add them to the bowl along with the thinly sliced red onions. The onions provide a sharp bite that balances the sweetness of the vinegar.
- Toss the vegetables thoroughly in the dressing, then fold in the fresh dill and sesame seeds.
- For the best flavor, cover and refrigerate for at least 30 minutes before serving. This chilling period allows the flavors to marinate and the cucumbers to become perfectly pickled and cold.
How to grill summer kabobs

Why we love this
Grilling kabobs is a sensory experience that defines the summer season, from the rhythmic sound of the skewers hitting the grates to the smoky, charred aroma that wafts through the backyard. There is something so visually appealing about the rainbow of colors—vibrant bell peppers, purple onions, and succulent pieces of marinated protein all lined up in perfect rows. The high heat of the grill caramelizes the natural sugars in the vegetables, creating sweet, charred edges that contrast beautifully with the tender, juicy interior of the meat. It is interactive, fun to eat, and always a crowd favorite.
Ingredients
- 1.5 lbs chicken breast or top sirloin steak, cut into 1.5-inch cubes
- 2 large bell peppers (different colors), cut into chunks
- 1 red onion, cut into wedges
- 1 cup zucchini rounds
- 1/2 cup olive oil
- 3 tablespoons soy sauce
- 2 tablespoons honey
- Wooden or metal skewers
How to make it
- If using wooden skewers, soak them in water for at least 30 minutes. This prevents them from catching fire on the grill.
- In a medium bowl, whisk together the olive oil, soy sauce, and honey to create a marinade. Place your cubed meat into a zip-top bag, pour in half the marinade, and let it sit in the fridge for at least 1 hour (or up to 4 hours for maximum tenderness).
- Preheat your grill to medium-high heat (about 400°F). Clean the grates thoroughly and lightly oil them to prevent sticking.
- Thread the meat and vegetables onto the skewers, alternating between protein and produce. Do not pack them too tightly; leaving a tiny bit of space between items allows the heat to circulate and cook everything evenly.
- Place the kabobs on the grill. Cook for about 10-12 minutes total. Turn the skewers a quarter-turn every 3 minutes. Look for clear grill marks and an internal temperature of 165°F for chicken or 145°F for steak.
- During the last 2 minutes of grilling, brush the remaining fresh marinade over the kabobs to create a glossy, flavorful glaze. Remove from heat and let rest for 5 minutes before serving.
How to make hummingbird food

Why we love this
While not a snack for humans, making hummingbird food is a delightful summer ritual that brings the vibrant energy of nature right to your window. The simple process of creating a clear, sweet nectar is incredibly rewarding when you see those tiny, iridescent wings fluttering near your garden. It’s a pure, clean alternative to store-bought dyes, ensuring these delicate creatures stay healthy and hydrated. Watching the hummingbirds dart in for a sip adds a peaceful, meditative element to a summer afternoon spent on the patio.
Ingredients
- 1 cup white granulated sugar
- 4 cups filtered water
- Note: Never use honey, brown sugar, or red dye as they can be harmful to birds.
How to make it
- In a medium saucepan, combine the 1 cup of white sugar and 4 cups of water. The 4:1 ratio is crucial as it most closely mimics the natural sucrose levels found in flowers.
- Place the pan over medium heat and stir constantly until the sugar is completely dissolved. You do not need to bring it to a rolling boil, but heating it helps the sugar bond and kills any bacteria or mold spores in the water.
- Once the liquid is clear and the sugar is gone, remove the pan from the heat.
- Allow the nectar to cool completely to room temperature. This is vital; pouring hot liquid into a plastic feeder can warp the plastic or harm the birds.
- Fill your hummingbird feeder with the cooled nectar. Store any extra in a clean, airtight jar in the refrigerator for up to one week.
- Clean your feeder every 3-5 days with hot water (no soap) to ensure the nectar stays fresh and free from fermentation.
How to make summer soup

Why we love this
Summer soup, like a chilled Gazpacho or a light corn chowder, is a revelation for those who think soup is only for the winter. It’s a celebration of raw or lightly simmered produce, offering a bright, acidic, and cooling sensation that rehydrates the body. The texture can range from silky smooth to a chunky, garden-fresh salsa-like consistency, bursting with the flavors of vine-ripened tomatoes, cucumbers, and bell peppers. Serving a chilled soup in small glasses or bowls adds an elegant, sophisticated touch to any snack board spread.
Ingredients
- 6 large ripe tomatoes, cored and chopped
- 1 cucumber, peeled and seeded
- 1 red bell pepper, seeded
- 2 cloves garlic
- 2 tablespoons sherry vinegar
- 1/4 cup extra virgin olive oil
- Salt and pepper to taste
How to make it
- Place the chopped tomatoes, cucumber, bell pepper, and garlic into a high-speed blender. For a traditional Gazpacho, you want the freshest, most fragrant vegetables you can find.
- Pulse the blender until the mixture reaches your desired consistency. Some prefer it completely liquified and silky, while others like a little bit of ‘pulp’ for texture.
- While the blender is running on a low speed, slowly stream in the sherry vinegar and the olive oil. This emulsifies the soup, giving it a creamy mouthfeel without the need for dairy.
- Season generously with salt and pepper. Taste as you go—the acidity of the tomatoes will vary, so you might need a touch more vinegar or a pinch of sugar to balance it.
- Pour the soup into a glass pitcher and refrigerate for at least 4 hours. Chilling is the most important step; the flavors need time to marry, and the soup must be ice-cold to be truly refreshing.
- Serve in chilled bowls or even shot glasses, garnished with a tiny drizzle of olive oil and a sprig of micro-greens.
How to pack beach snacks
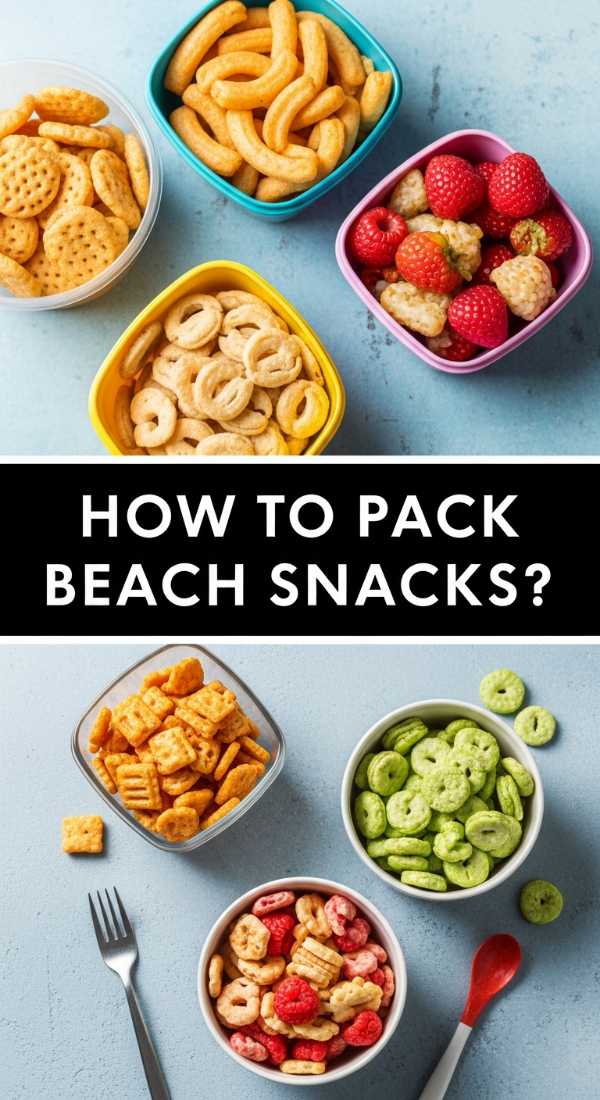
Why we love this
Packing the perfect beach snack board is an art form that balances portability with absolute cravings. There’s something so satisfying about opening a cooler to find neatly organized, chilled treats while the salt air and sun surround you. The focus is on hydration and ease of eating—think finger foods that won’t melt in the heat or get ruined by a stray grain of sand. It turns a simple day at the shore into a gourmet picnic, keeping everyone energized and happy between dips in the ocean.
Ingredients
- Hard cheeses (Cheddar or Manchego), pre-sliced
- Firm fruits (Grapes, apple slices, cherries)
- Dry crackers or pretzels
- Individual hummus or guacamole cups
- Salami or jerky
- Insulated cooler and ice packs
How to make it
- Start by choosing the right container. A bento-style box or a container with dividers is best to keep different textures separate and prevent crackers from getting soggy.
- Slice your hard cheeses and meats ahead of time. Hard cheeses are better for the beach than soft ones like Brie, which can become oily and unappealing in the heat.
- Place the heavier, denser items like fruit and meat at the bottom of your container.
- Layer your crackers or pretzels in a separate reusable silicone bag. Keeping them outside the main chilled container prevents them from absorbing moisture and losing their crunch.
- Prepare ‘buffer’ snacks like grapes or cherries. These can actually be frozen the night before; they act as edible ice packs and are incredibly refreshing as they slowly thaw in the sun.
- When packing the cooler, place your snacks on the very top of the ice. Ensure everything is in airtight containers to prevent melted ice water from leaking into your food.
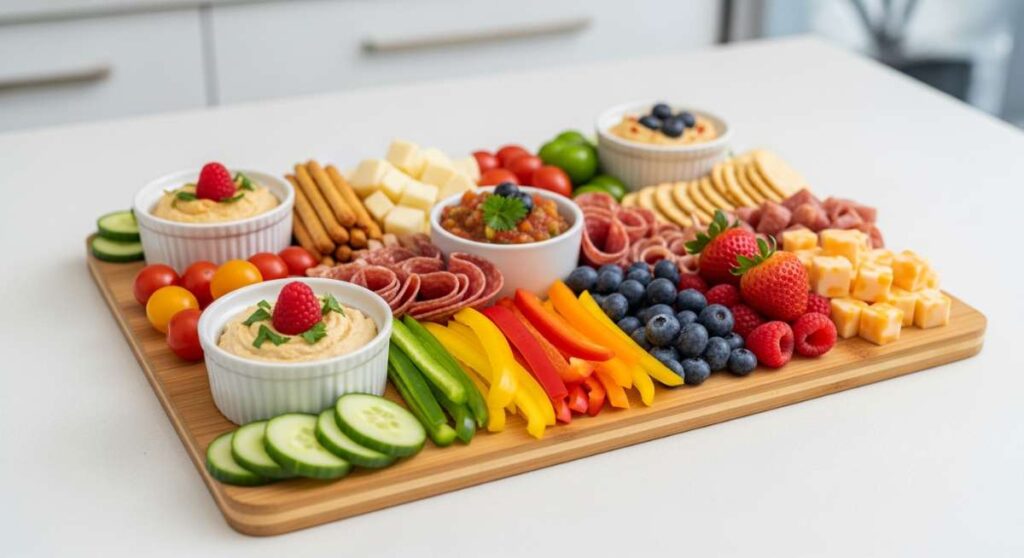
How to prepare summer dips

Why we love this
Summer dips are the quintessential centerpiece of any viral snack board, offering a variety of flavors and textures in one beautiful display. From a whipped feta that feels like a cloud to a zesty bean dip, they provide a communal eating experience that encourages sharing. The beauty lies in the garnishes—bright herbs, swirls of golden oil, and sprinkles of spice make them look as good as they taste. They are versatile, allowing you to use whatever produce is currently in your fridge as a vessel for dipping.
Ingredients
- 8 oz feta cheese, crumbled
- 1/2 cup Greek yogurt
- 1 clove garlic, minced
- Zest of one lemon
- Fresh mint and honey for topping
- Assorted veggies (carrots, radishes, snap peas)
How to make it
- To make a viral whipped feta dip, place the crumbled feta, Greek yogurt, minced garlic, and lemon zest into a food processor.
- Process on high for 2-3 minutes. Stop halfway through to scrape down the sides with a spatula. You are looking for a perfectly smooth, whipped consistency that holds a soft peak.
- If the dip is too thick, add one teaspoon of cold water or olive oil at a time until it is light and spreadable.
- Transfer the dip to a shallow bowl. Use the back of a spoon to create ‘swirls’ and ‘wells’ in the top of the dip.
- Drizzle honey into the wells and sprinkle with chopped fresh mint. This combination of salty feta and sweet honey is addictive.
- Arrange the bowl in the center of your board and surround it with a vibrant array of raw summer vegetables, ensuring they are cut into easy-to-scoop spears.
How to make summer desserts

Why we love this
Summer desserts should feel effortless and light, focusing on the natural sweetness of peak-season fruit rather than heavy, baked doughs. There’s a rustic elegance to a dessert board featuring macerated berries, clouds of whipped cream, and crunchy meringues. The aroma of fresh strawberries and a hint of vanilla bean creates an inviting, sweet finish to a meal without leaving anyone feeling weighed down. It’s a ‘build-your-own’ experience that allows everyone to customize their perfect bite of sweetness.
Ingredients
- 1 pint strawberries, sliced
- 1 pint blueberries
- 2 cups heavy whipping cream
- 2 tablespoons powdered sugar
- 1 teaspoon vanilla bean paste
- Shortbread cookies or pound cake cubes
How to make it
- Begin by preparing your fruit. Toss the sliced strawberries with a teaspoon of sugar and let them sit for 15 minutes. This ‘macerating’ process draws out the juices, creating a natural strawberry syrup.
- In a cold metal bowl, combine the heavy whipping cream, powdered sugar, and vanilla bean paste. Using a cold bowl helps the cream whip faster and creates more volume.
- Whisk with a hand mixer on medium-high speed until stiff peaks form. Stiff peaks mean the cream stands straight up when the whisk is lifted; this ensures it won’t deflate on your dessert board.
- Cut your pound cake or shortbread cookies into bite-sized cubes. This makes them perfect for dipping into the cream and berries.
- To assemble, place the bowl of whipped cream in the center of a board. Arrange the macerated strawberries and blueberries in clusters around it.
- Fill the gaps with the cake cubes and cookies. Garnish with a few sprigs of fresh mint for a professional, viral-ready look.
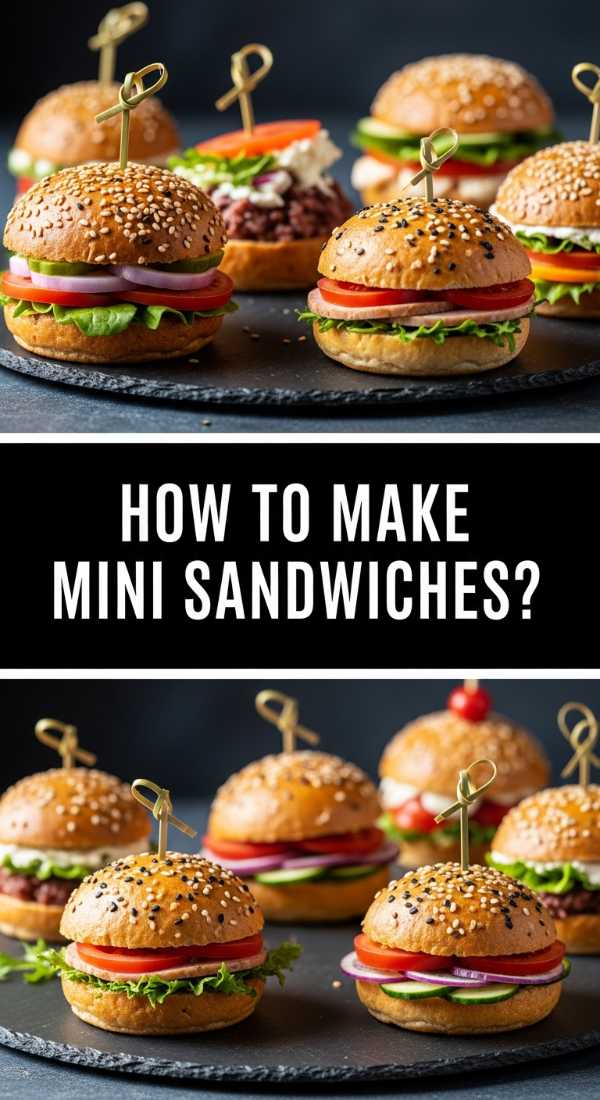
How to make mini sandwiches
Why we love this
Mini sandwiches, or sliders, are the ultimate functional food for a snack board—they are hearty enough to satisfy hunger but small enough to leave room for everything else. The soft, buttery texture of a brioche roll paired with savory fillings like pesto chicken or cucumber and herbed cream cheese is a match made in heaven. They are easy to grab, mess-free, and look incredibly charming when stacked in neat rows. It’s a classic tea-party vibe reimagined for a modern, casual lifestyle.
Ingredients
- 1 pack of mini brioche buns or dinner rolls
- 1/2 lb deli turkey or chicken
- 1/4 cup basil pesto
- Slices of provolone cheese
- Handful of arugula
- 2 tablespoons melted butter and garlic salt
How to make it
- Keep the rolls connected if possible and slice the entire slab in half horizontally. This is a time-saving hack that ensures even layers.
- Spread a generous layer of basil pesto on the bottom half of the bread. The pesto provides moisture and a punch of herbal flavor.
- Layer the deli meat evenly across the pesto, followed by a layer of provolone cheese. Make sure the cheese overlaps slightly so every bite is cheesy.
- Top with a handful of fresh arugula for a peppery crunch, then place the top half of the rolls back on.
- Brush the tops of the rolls with melted butter and a sprinkle of garlic salt. This adds a beautiful golden sheen and extra flavor when they toast.
- Place the slab of sandwiches in a 350°F oven for 10 minutes, just until the cheese is melted and the bread is warm. Slice into individual sandwiches and serve immediately on your board.
Conclusion
Creating a viral snack board is less about following a rigid recipe and more about embracing a relaxed, flavorful way of eating. By focusing on these simple, high-impact dishes, you can spend less time in the kitchen and more time making memories with your favorite people. Whether you start with a cheesy Rotel dip or end with a fresh berry board, the key is to keep it fresh, colorful, and fun. Happy hosting!