
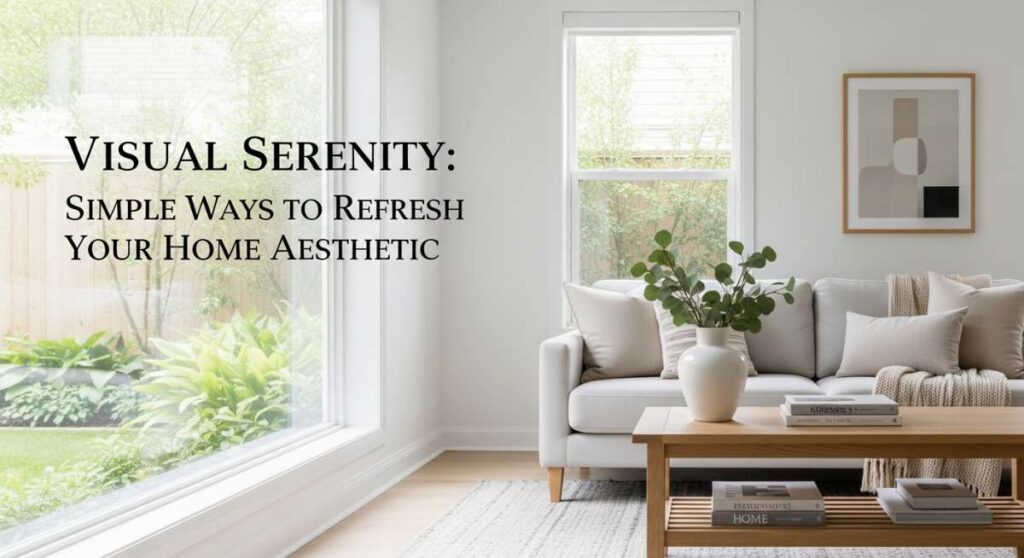
Visual Serenity: Simple Ways to Refresh Your Home Aesthetic
There is a specific kind of magic that happens when you walk into a room that feels intentionally curated. It’s not just about the furniture or the color on the walls; it’s about the way the light hits a specific texture, the subtle fragrance lingering in the air, and the sense of calm that washes over you. Home is our sanctuary, a physical manifestation of our inner state, and when we take the time to refresh our surroundings, we aren’t just decorating—we are practicing self-care in its most visual form.
I remember the first time I truly understood the power of aesthetic intention. I had spent months living out of boxes, and the day I finally styled my first shelf with a few vintage finds and a trailing plant, the entire energy of my apartment shifted. Suddenly, I wasn’t just existing in a space; I was thriving in it. This guide is a collection of my favorite ways to bring that same sense of visual serenity and whimsical charm into your own home, from the front porch to the secret corners of your garden.
How to Arrange a Bloom Bar for the Ultimate Garden Party

Why we love this
A Bloom Bar is more than just a decoration; it is an interactive sensory experience that invites guests to engage with the natural beauty of the season. Imagine the sweet, intoxicating scent of jasmine and eucalyptus wafting through the air as friends gather around a rustic wooden table laden with vibrant petals. The tactile sensation of soft petals and the crisp snap of fresh stems provide a grounding moment of creativity. It turns a standard gathering into a blooming celebration, leaving everyone with a hand-picked souvenir that carries the fragrance of the day back to their own homes.
Essential Elements:
- Assorted seasonal blooms (roses, peonies, ranunculus, and snapdragons).
- Fresh greenery (eucalyptus, ruscus, or ferns).
- Individual glass bud vases or kraft paper sleeves.
- Professional floral shears and garden twine.
- A variety of ribbons in silk or velvet textures.
- Customized ‘Build Your Own Bouquet’ signage.
How to make it
- Begin by hydrating your flowers for at least 4 hours in cool water with floral food before the event starts. This ensures the petals look turgid and vibrant throughout the party.
- Select a long table or a vintage bar cart and cover it with a linen runner to provide a soft, organic texture as your base.
- Organize your flowers by variety into clean buckets or large glass jars. Grouping by color or type creates a visually satisfying gradient and makes it easier for guests to select their focal flowers.
- Set up a ‘Prep Station’ at one end of the bar. This should include sharp shears and a waste bin for discarded leaves. Teach your guests the ’45-degree angle cut’ technique, explaining that a slanted cut increases the surface area for water absorption, keeping their bouquet fresh longer.
- Place focal flowers (the largest blooms) on the left, filler flowers in the middle, and greenery on the right. This logical flow guides the guest through the process of building a balanced arrangement.
- Provide silk ribbons and pre-cut twine. Demonstrate how to tie a ‘French Knot’ or a simple bow to secure the stems without crushing them, finishing the aesthetic with a touch of elegance.
How to Style an Easter Front Porch for a Welcoming Home Vibe

Why we love this
The front porch is the handshake of your home, and styling it for Easter brings a sense of renewal and playful elegance to your neighborhood. We love the contrast of weathered wood against the soft, buttery yellows of daffodils and the pale blues of robin’s eggs. There is something deeply comforting about the smell of damp soil and fresh moss as you step over the threshold. It creates a transition space that feels like a warm embrace, signaling to every visitor that spring has officially arrived and beauty resides within these walls.
Essential Elements:
- A large, grapevine or moss-covered wreath.
- Pastel-colored ceramic planters or galvanized buckets.
- A mixture of spring bulbs (tulips, hyacinths, and daffodils).
- Faux or real moss runners and decorative eggs.
- A high-quality coir doormat with a layered decorative rug underneath.
- Vintage-style lanterns with LED candles.
How to make it
- Start by deep-cleaning your porch area. Sweep away winter debris and wipe down the front door to provide a pristine canvas for your pastel palette.
- Layer your rugs. Place a larger, patterned outdoor rug (think ticking stripes or subtle checks) underneath your functional coir mat. This adds instant depth and a ‘designer’ feel to the entryway.
- Create a ‘Rule of Three’ grouping with your planters. Use three different heights of ceramic pots in coordinating pastel shades. Place the tallest in the back, filling it with structure (like pussy willow branches), and the shorter ones in front with ‘spiller’ plants like ivy or creeping jenny.
- Assemble your wreath by nesting small decorative eggs into the grapevine using a hot glue gun or floral wire. Ensure the weight is balanced so the wreath sits straight on the door hook.
- Add a whimsical touch by tucking moss into the gaps of your planters. This hides the soil and gives the arrangement a ‘just-sprouted’ woodland aesthetic.
- Position your lanterns near the door. Use LED candles with a timer set to turn on at dusk, providing a warm, flickering glow that highlights your decor even after the sun sets.
How to Style a Dreamy Pink Bed for the Perfect Aesthetic
Why we love this
A dreamy pink bed is the ultimate sanctuary for those who crave a soft, romantic escape from the digital noise of the world. We love the interplay of light and shadow on ruffled linen and the way a dusty rose palette can feel both sophisticated and cozy. The feeling of sinking into layers of cotton and velvet after a long day is pure bliss, especially when the colors evoke the warmth of a sunset. It transforms the bedroom into a soft-focus dreamscape where the aroma of a nearby lavender candle feels perfectly at home.
Essential Elements:
- Linen or high-thread-count cotton sheets in blush or cream.
- A heavy-knit throw blanket in a deep mauve or rosewood.
- Euro sham pillows in velvet textures.
- A ruffled or quilted duvet cover.
- Accent pillows with subtle floral embroidery or lace trim.
- Dimmable warm lighting or fairy lights nearby.
How to make it
- Layer your base. Start with crisp, well-ironed cream sheets, pulling the top sheet back over the duvet by about 12 inches to create a layered ‘hotel fold.’
- Apply the ‘Chop Technique’ to your Euro shams. Stand two large velvet pillows against the headboard and give them a gentle karate chop in the center top to create a lived-in, luxurious indentation.
- Layer your duvet. If you want that extra-puffy look, insert two down comforters into a single duvet cover. This creates the ‘cloud’ effect seen in high-end lifestyle photography.
- Fold your heavy-knit throw blanket in thirds and drape it unevenly across the foot of the bed. This intentional ‘messiness’ adds a touch of human warmth and prevents the bed from looking too sterile.
- Add depth with accent pillows. Place a smaller, circular or rectangular pillow in the very front that features a different texture, such as silk or a chunky weave, to break up the pink tones.
- Finish the aesthetic by ensuring your bedside table has a stack of books with spines that complement the pink palette, tying the whole room’s color story together.
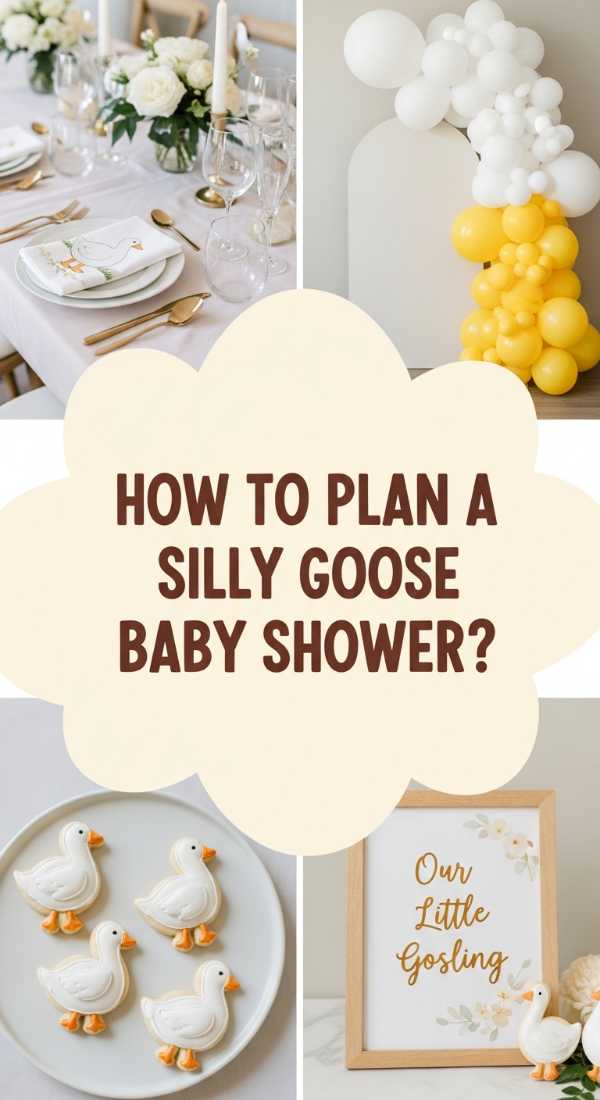
How to Decorate a Silly Goose Baby Shower for a Whimsical Atmosphere

Why we love this
The ‘Silly Goose’ theme is a refreshing, gender-neutral take on classic nursery motifs, blending nostalgia with a modern, clean aesthetic. We love the soft yellows, muted oranges, and crisp whites that define this look, creating a space that feels airy and lighthearted. The scent of vanilla cupcakes and fresh lemon zest fills the room, while the sight of cute, long-necked geese illustrations brings a smile to every guest’s face. It’s a theme that celebrates the joy of new beginnings without being overly traditional, making it perfect for a modern mama-to-be.
Essential Elements:
- Wooden or ceramic goose figurines.
- Yellow and white gingham tablecloths.
- Custom ‘A Little Goose is on the Loose’ bunting.
- Dried baby’s breath and yellow billy buttons (craspedia).
- Goose-shaped sugar cookies with royal icing.
- A soft blue or sage green backdrop to make the whites pop.
How to make it
- Establish your focal point, usually the dessert table. Cover it with a floor-length gingham cloth to set the whimsical, country-chic tone.
- Create ‘height zones’ on the table using wooden crates or white cake stands. Place the main cake in the center and arrange smaller treats like goose-shaped macarons at varying levels to create visual interest.
- Use dried florals like billy buttons in simple amber glass bottles. The round, yellow pops of color mimic the ‘silly’ nature of the theme while remaining sophisticated.
- Drape your bunting across the front of the table or a nearby wall. Ensure the swag has a natural curve—don’t pull it too tight, as a gentle dip looks more relaxed and inviting.
- Scatter small wooden goose figurines throughout the floral arrangements as ‘Easter eggs’ for guests to discover, adding to the playful atmosphere.
- For the photo backdrop, use a mix of white and pale yellow balloons in varying sizes to create a ‘bubble’ effect that looks like clouds, providing a perfect frame for the ‘Mama Goose’ to sit in.
How to Use Vintage Garden Decor for a Timeless Backyard Aesthetic

Why we love this
Vintage garden decor tells a story of time passing gracefully, evoking the feeling of an English cottage hidden away from the world. We love the patina of weathered zinc, the chipped paint on an old wrought-iron chair, and the way moss naturally creeps over stone ornaments. There is a soulful quality to these items; they carry the aroma of rain-soaked earth and the history of seasons past. It transforms a simple backyard into a sanctuary of timelessness where you can truly disconnect and enjoy the rhythmic sounds of nature.
Essential Elements:
- Antique zinc wash tubs for planters.
- Wrought iron bistro sets with a natural patina.
- Concrete garden statues or birdbaths.
- Weathered wooden ladders for vertical plant displays.
- Old terracotta pots in various states of aging.
- Strands of Edison bulbs for soft evening lighting.
How to make it
- Curate your ‘found’ objects. Look for items that have genuine age, such as rusted iron or mossy stone. Avoid ‘faux-vintage’ when possible to maintain an authentic, soulful vibe.
- Create a seating ‘vignette.’ Place your bistro set on a patch of pea gravel or tucked into a corner surrounded by tall perennials like foxgloves or delphiniums to create a sense of enclosure.
- Repurpose old wash tubs as container gardens. Drill drainage holes in the bottom and fill them with a mix of herbs and flowers. The silver-grey of the zinc makes the green foliage pop beautifully.
- Stage a weathered ladder against a wall or fence. Use the rungs to hold smaller terracotta pots, varying the plants between trailers (like ivy) and uprights (like geraniums) for a balanced vertical look.
- Apply a ‘yogurt wash’ to new terracotta pots if you want to speed up the aging process. Brushing plain yogurt on the exterior encourages moss and lichen growth when placed in a damp, shady spot.
- Position a stone birdbath as a focal point in the center of a flower bed. This not only adds a classic architectural element but also attracts wildlife, adding movement and sound to the garden.
How to Curate Earth Tone Palettes for a Sophisticated Living Space

Why we love this
Earth tones bring the grounding stability of the outdoors into our most-lived-in spaces. We love the sophisticated hum of ochre, sage, terracotta, and sand working in harmony to create a room that feels both high-end and incredibly approachable. These colors don’t shout; they whisper comfort. Walking into an earth-toned living room feels like a deep exhale. The textures of raw wood and woven jute complement the palette, while the subtle scent of sandalwood or cedarwood incense completes the grounding atmosphere of a sophisticated home base.
Essential Elements:
- A neutral linen sofa as the anchor piece.
- Textiles in varying shades of clay, olive, and mustard.
- Natural wood coffee table and shelving.
- Stone or ceramic vases with matte finishes.
- Jute or sisal area rugs for tactile grounding.
- Abstract art featuring organic, flowing shapes in tonal browns.
How to make it
- Identify your ‘base earth tone.’ Start with a large neutral surface like a sand-colored rug or a cream sofa. This acts as the ‘soil’ from which the rest of your palette grows.
- Layer your ‘mid-tones.’ Introduce sage green or terracotta through throw pillows and blankets. Use the 60-30-10 rule: 60% neutral base, 30% primary earth tone (like olive), and 10% accent (like burnt orange).
- Incorporate natural wood. Ensure you mix wood grains—pair a light oak coffee table with darker walnut frames to prevent the room from feeling one-dimensional or ‘flat.’
- Texture is vital. Because the color palette is restrained, use different fabrics to provide visual interest. Combine a smooth leather chair with a chunky wool knit throw and linen curtains.
- Select matte ceramic accessories. Shiny surfaces can break the organic feel of an earth-toned room. Look for ‘bisque’ finishes that have a slightly rough, tactile quality.
- Use ‘warm’ light bulbs (2700K to 3000K). Earth tones can look muddy under cool, blue-toned office lighting. Warm light brings out the golden undertones in the browns and greens, making the space feel glowy.
How to Create Book Centerpieces for a Literary Dinner Aesthetic

Why we love this
There is something profoundly intellectual and cozy about dining among books. A literary-themed centerpiece invites conversation and adds a layer of vintage charm that feels both personal and curated. We love the scent of old paper and the sight of gold-leafed spines glimmering under candlelight. It suggests a life well-read and a night of deep, meaningful storytelling. It’s the perfect aesthetic for those who find beauty in the written word and want their dinner table to reflect their love for history and narrative.
Essential Elements:
- Hardcover books with aesthetically pleasing spines (vintage or linen-bound).
- Taper candles in brass holders.
- Dried flower bookmarks or pressed leaves.
- Silk ribbon or vintage twine.
- Small magnifying glasses or spectacles as props.
- Loose pages from damaged books (for use as place mats).
How to make it
- Select your books based on a color theme or a specific genre. Dark leathers and golds work for a ‘Dark Academia’ look, while pastels and linens suit a ‘Poetry and Prose’ brunch.
- Stack the books in the center of the table in uneven groups. Place 3 books in one stack and 2 in another, laying some flat and leaning others against the stacks to create an organic, library-esque flow.
- Use a damaged book’s pages as a runner or individual place mats. Carefully tear out pages and scatter them slightly overlapping down the center of the table to create a textured foundation.
- Integrate lighting. Place brass taper holders between the stacks. Ensure the candles are unscented so they don’t compete with the smell of the food or the nostalgic scent of the paper.
- Tuck dried lavender or pressed ferns between the pages of the top books, letting them peek out like organic bookmarks. This adds a delicate, natural element to the structured stacks.
- Place a small magnifying glass or a vintage fountain pen on top of the tallest stack. This ‘still life’ approach makes the centerpiece feel like a snapshot from a writer’s desk.
How to Organize a Sewing Room for Maximum Creative Inspiration
Why we love this
A well-organized sewing room is a catalyst for creativity, turning a functional space into a vibrant studio that inspires every stitch. We love the rainbow of thread spools neatly aligned, the tactile satisfaction of organized fabric bolts, and the clarity that comes with a clutter-free cutting table. The faint hum of a sewing machine and the crisp scent of freshly ironed cotton create a focused, rhythmic atmosphere. When everything has a place, your mind is free to wander through patterns and possibilities rather than getting lost in a sea of scraps.
Essential Elements:
- Pegboards for hanging scissors, rulers, and bobbins.
- Clear acrylic bins for fabric scraps sorted by color.
- Thread racks for wall-mounted spool storage.
- A sturdy, counter-height cutting table with a self-healing mat.
- Magnetic strips for pins and needles.
- Inspiration board (cork or wire) for swatches and sketches.
How to make it
- Verticalize your storage. Install a large pegboard above your sewing machine. Use hooks to hang your ‘essential three’: fabric shears, embroidery snips, and a rotary cutter. This keeps your desktop clear for fabric movement.
- Sort your fabric by weight and then by color. Use ‘comic book boards’ to wrap your fabric yardage into uniform bolts, then stack them on open shelving. This turns your stash into a visual display that mimics a boutique fabric shop.
- Organize your thread visually. Arrange spools on a wall rack following the ROYGBIV color spectrum. Not only does this make finding the right shade easy, but it also creates a stunning piece of ‘functional art’ for the room.
- Set up a dedicated ‘Ironing Station.’ Use a wall-mounted fold-down ironing board to save space, and keep a pressurized steam iron ready. A crisp seam is the difference between homemade and professional-looking garments.
- Use a magnetic strip near your machine. This prevents lost pins and allows you to ‘toss’ pins toward the magnet while sewing without looking away from your seam allowance.
- Dedicate one wall to an ‘Inspiration Board.’ Pin up fashion illustrations, color palettes, and fabric swatches for your next three projects. Seeing your goals visualized keeps your creative momentum high.
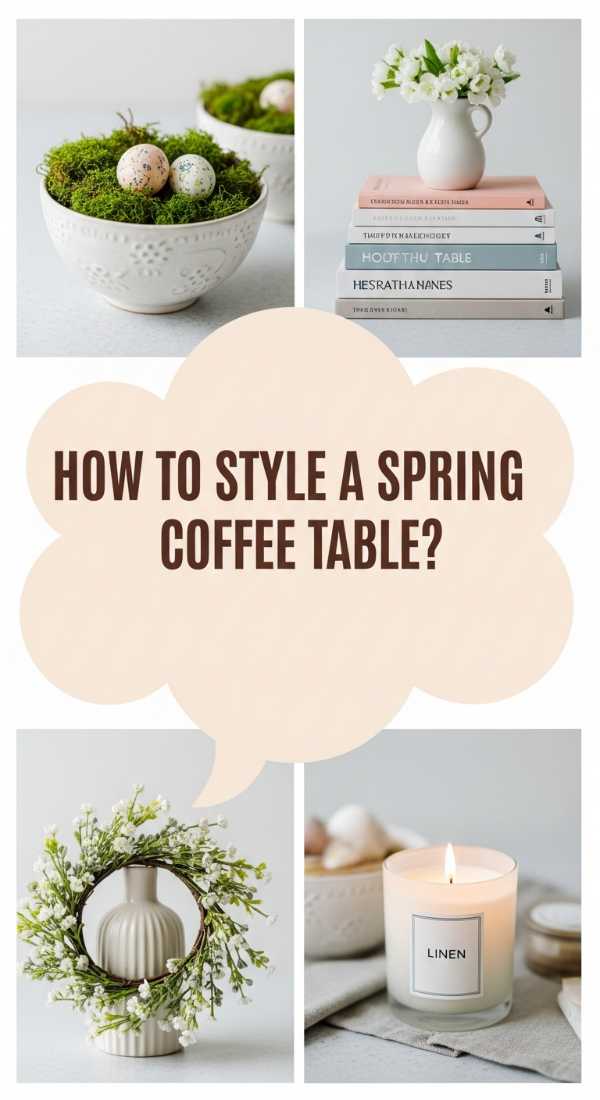
How to Refresh Your Coffee Table for a Bright Spring Mood

Why we love this
The coffee table is the heart of the living room, and a spring refresh is the perfect way to welcome the longer days and brighter light. We love the combination of translucent glass, fresh green stems, and a stack of new, inspiring art books. The aroma of citrus-infused water and the sight of a single, vibrant tulip drooping elegantly over a vase can change the entire mood of the afternoon. It’s a small, manageable change that yields huge results in how you perceive your space during the transitional season.
Essential Elements:
- A decorative tray (woven for texture or brass for shine).
- Fresh spring flowers (tulips, sweet peas, or viburnum).
- A large, high-quality coffee table book with a green or floral cover.
- A textured ceramic bowl for seasonal snacks or decorative beads.
- A candle with a fresh, herbal scent (basil, mint, or tomato vine).
- Small coasters in a natural material like marble or wood.
How to make it
- Clear everything off and start with a blank slate. Wipe the surface with a gentle cleaner to let the natural material of the table shine.
- Anchor the look with a tray. A tray corrals smaller items and prevents the table from looking cluttered. Place it on one side of the table rather than dead center for a more modern, asymmetrical look.
- Stack your books by size. Place the largest on the bottom and a smaller, more colorful book on top. This creates a pedestal for a small object like a ceramic bowl or a brass magnifying glass.
- Add height with a floral arrangement. Use a clear glass vase to keep the look ‘light.’ For tulips, remember they continue to grow in the vase and will bend toward the light, so leave room for their natural movement.
- Incorporate a ‘sensory element.’ Place your herbal-scented candle on the tray. For spring, avoid heavy ambers or vanillas; stick to ‘green’ scents that mimic the outdoor world waking up.
- Balance the ‘weight.’ If your books are on the left, place your taller vase on the right. This visual diagonal keeps the eye moving across the table and feels harmonious.
How to Design a Rainforest Falls Theme for a Magical Learning Space
[IMAGE_10]
Why we love this
A Rainforest Falls theme turns a standard learning environment into an immersive, magical world that sparks curiosity and wonder. We love the deep, lush emerald tones, the sound of trickling water, and the way draped fabrics can mimic the movement of a cascading waterfall. It’s a space that feels cool, shaded, and alive. For a child or a lifelong learner, this aesthetic provides a calming yet stimulating backdrop that makes the act of discovery feel like a grand adventure into the heart of the jungle.
Essential Elements:
- Sheer blue and white fabric for the ‘waterfall’ effect.
- Artificial silk vines and oversized monstera leaves.
- A small, tabletop water fountain.
- Plush tropical birds or animals tucked into greenery.
- Forest green floor cushions or a grass-textured rug.
- A sound machine playing rainforest birds and rain sounds.
How to make it
- Create the ‘Waterfall.’ Secure sheer blue fabric to the ceiling or the top of a bookshelf, letting it drape down to the floor in ripples. Use a staple gun or command hooks, and layer varying shades of blue to give the ‘water’ depth.
- Layer the greenery. Wrap artificial vines around the edges of the ‘waterfall’ and hang oversized silk leaves from the ceiling. Use different textures of foliage—some waxy like monstera, some feathery like ferns—to mimic a real rainforest canopy.
- Incorporate the ‘Riverbed.’ Use a green shag rug or a collection of mossy-green floor cushions at the base of the waterfall to create a soft, inviting reading or learning nook.
- Set the ‘Soundscape.’ Hide a small water fountain or a Bluetooth speaker behind some large leaves. The auditory cue of water and distant tropical birds is essential for the ‘immersive’ feeling of the theme.
- Lighting is key. Use green-tinted LED bulbs or smart lights set to a ‘jungle’ preset. Avoid harsh overhead lights; instead, use small spotlights directed upward through the leaves to create dappled shadows on the ceiling.
- Add ‘Hidden Wonders.’ Tuck small toy monkeys, parrots, or frogs among the vines. This encourages children to interact with the environment, turning the decor into a game of ‘I Spy’ that keeps the space engaging.
Conclusion: Embracing Your Visual Sanctuary
Refreshing your home aesthetic isn’t about following every fleeting trend; it’s about identifying the elements that bring you peace, joy, and a sense of wonder. Whether you are arranging a bloom bar for friends or curating a quiet corner of your living room with earth tones, the goal is always the same: to create a space that reflects the most serene version of yourself. Take these ideas as a starting point, mix them with your own memories and treasures, and watch as your home transforms into a visual sanctuary that nourishes your soul every single day.