

Effortless Entertaining: The Best Viral Food Boards for Every Occasion
There is something truly magical about the way food brings us together, especially when it is presented as a vibrant, grazing-style board. In my home, the kitchen has always been the heart of every gathering, and I have found that nothing sparks conversation quite like a beautifully curated spread that invites everyone to dig in. The ‘viral food board’ trend isn’t just about the aesthetic; it’s about creating a relaxed environment where the host isn’t stuck in the kitchen, but rather part of the laughter and the memories being made.
Whether you are planning a sun-drenched picnic in the park or a cozy date night by the fireplace, these boards are designed to be as visually stunning as they are delicious. We are moving away from traditional plated meals and embracing the tactile, sensory joy of building the perfect bite. I am so excited to share these ten viral concepts with you, each one crafted to elevate your next get-together into something truly extraordinary and effortless.
How to make aesthetic sandwiches?
Why we love this
There is an undeniable charm to mini-sandwiches that are as beautiful to look at as they are to eat. We love this approach because it transforms humble bread and fillings into a sophisticated mosaic of colors and textures. Imagine the scent of freshly cut dill mingling with the sharp, cool aroma of sliced cucumbers, all resting on a bed of velvety, whipped herb cream cheese. Every bite offers a satisfying crunch followed by a soft, pillowy finish that feels like a decadent tea party in the middle of a modern afternoon.
Ingredients
- Artisan white sourdough or brioche loaf
- Whipped cream cheese with chives
- English cucumbers, thinly mandoline-sliced
- Watermelon radishes for a pop of pink
- Fresh dill and microgreens
- Smoked salmon or thinly sliced heirloom tomatoes
- Flaky sea salt and cracked black pepper
How to make it
- Begin by preparing your bread; use a serrated knife to remove all crusts carefully, ensuring you have perfectly uniform squares or rectangles. For an extra touch of luxury, lightly toast one side of the bread in a pan with a touch of butter until it is just barely golden, providing a hidden structural crunch.
- Spread a generous, even layer of the whipped cream cheese from edge to edge, acting as the ‘glue’ for your aesthetic toppings. Ensure the layer is thick enough to hold the vegetables but not so thick that it spills over the sides when pressed.
- Layer your vegetables in a shingle pattern, overlapping the cucumber and radish slices slightly to create a scale-like effect that covers the entire surface. If using salmon, fold the ribbons delicately to create height and movement.
- Using a very sharp chef’s knife, trim the edges one final time for a sharp, professional finish, then slice into your desired shapes—rectangles, triangles, or squares.
- Garnish with a single sprig of dill and a pinch of flaky salt. The visual cue for success is a sandwich that looks like a miniature piece of art where no bread is visible beneath the vibrant toppings.
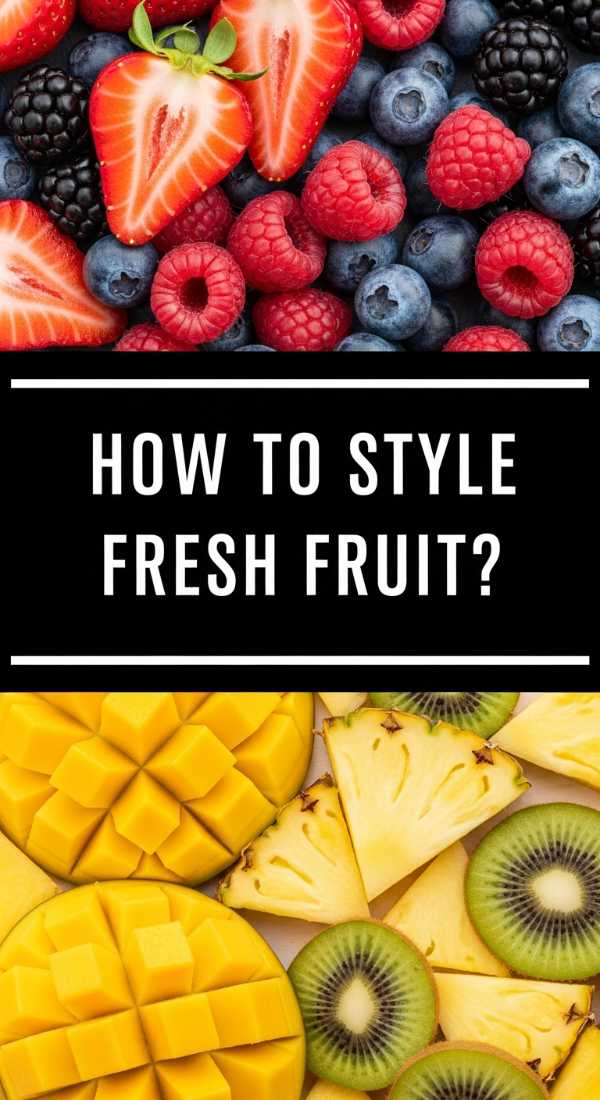
How to style fresh fruit?

Why we love this
Fresh fruit is nature’s candy, and when styled correctly, it becomes the crowning jewel of any food board. This method is all about celebrating the vibrant, saturated hues of the season—the deep purples of blackberries, the electric orange of cantaloupe, and the ruby red of pomegranate seeds. The scent is intoxicatingly sweet and floral, reminiscent of a summer orchard at peak harvest. The texture contrast between juicy citrus, crisp apples, and buttery mango creates a refreshing palate cleanser that feels incredibly indulgent yet light.
Ingredients
- Seasonal melons (Cantaloupe, Honeydew, Watermelon)
- Stone fruits (Peaches, Plums, Nectarines)
- Berries (Strawberries, Raspberries, Blueberries)
- Kiwi and Dragonfruit for exotic texture
- Fresh mint leaves and lime zest
- Honey or agave for a glossy finish
How to make it
- Start by prepping your larger fruits; use a melon baller or a small star-shaped cookie cutter to create uniform shapes from the melons, which adds a playful, viral-worthy element to the board.
- Slice stone fruits into thin, even wedges. To prevent browning on apples or pears, toss them gently in a bowl with a splash of lemon juice and cold water for 60 seconds before draining.
- Arrange the fruit in a color gradient (ombre style), starting with deep reds and purples on one side and transitioning through oranges and yellows to greens. This visual flow is what makes the board ‘viral’ and appetizing.
- Nestle clusters of berries into any gaps to create a sense of abundance and ‘overflow.’ Use the dragonfruit and kiwi as accent pieces, placing them on top to showcase their unique internal patterns.
- Finely zest a lime over the entire board and scatter fresh mint leaves. For a professional shine, lightly drizzle a thin stream of honey over the more matte fruits like melons and peaches.
How to make picnic pasta?
Why we love this
Picnic pasta is the ultimate comfort food reimagined for the outdoors, moving away from heavy, mayo-based salads toward something bright, zesty, and herb-forward. We love the way the al dente pasta shells catch pockets of tangy vinaigrette, releasing a burst of Mediterranean flavors with every forkful. The aroma of toasted pine nuts and fresh basil creates an instant sense of alfresco dining, while the creamy crumbles of feta add a salty richness that balances the acidity of sun-dried tomatoes. It is a hearty, satisfying dish that stays fresh even in the warm sun.
Ingredients
- Farfalle (bowtie) or Orzo pasta
- Sun-dried tomatoes in oil
- Kalamata olives, pitted and halved
- Fresh baby spinach or arugula
- Feta cheese, high-quality block
- Toasted pine nuts
- Lemon-oregano vinaigrette (olive oil, lemon juice, dried oregano, garlic)
How to make it
- Boil a large pot of heavily salted water—it should taste like the sea—and cook the pasta until it is strictly al dente. This is crucial because the pasta will continue to absorb the dressing as it sits, and you want to avoid a mushy texture.
- Drain the pasta and immediately toss it with a tablespoon of olive oil to prevent sticking. Spread it out on a large baking sheet for 10 minutes to cool to room temperature; never dress steaming hot pasta or the herbs will wilt and the cheese will melt.
- In a large wooden bowl, combine the cooled pasta with the sun-dried tomatoes, olives, and greens. Pour the vinaigrette over the top and toss gently using large spoons to ensure every crevice of the bowtie pasta is coated.
- Crumbled the feta by hand into large, rustic chunks rather than small bits to maintain textural contrast. Fold them in at the very end along with the toasted pine nuts.
- Taste for seasoning; pasta often needs more salt than you think once cooled. The final look should be glossy and vibrant, with the greens looking crisp and the pasta holding its shape perfectly.
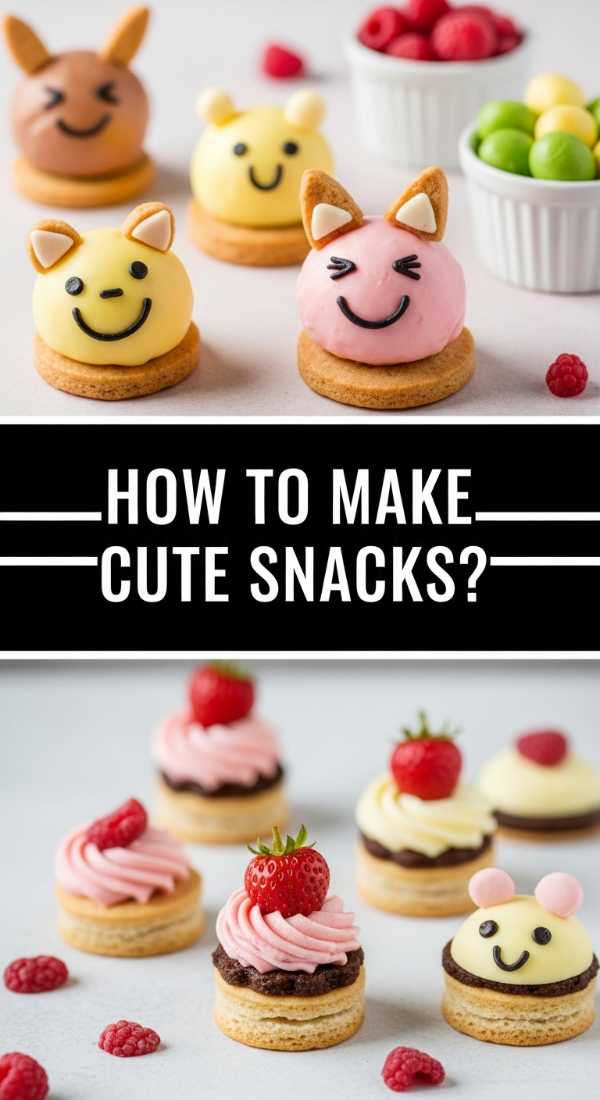
How to make cute snacks?

Why we love this
Cute snacks are all about the ‘joy factor’—taking everyday ingredients and giving them a whimsical, thoughtful makeover. We love this because it appeals to the inner child in everyone, turning a simple snack break into a curated experience. The combination of salty pretzels, creamy cheeses cut into stars, and crisp, heart-shaped cucumbers creates a playground of textures. It’s the kind of board that makes people stop and take a photo before they eat, celebrating the effort put into the smallest, most delightful details.
Ingredients
- White cheddar and Gouda slices
- English cucumbers
- Mini pretzel twists
- Cherry tomatoes
- Small grapes
- Miniature rice cakes or crackers
- Star and heart-shaped small metal cutters
How to make it
- Lay your cheese slices flat on a clean cutting board and use your metal cutters to punch out shapes. Keep the ‘scraps’ to melt into a dip later so there is zero waste.
- For the cucumbers, use a vegetable peeler to remove strips of skin lengthwise to create a striped pattern before slicing them into rounds. Then, use a small heart cutter to remove the center of each round.
- Assemble ‘mini stacks’ by placing a shaped cheese on top of a cracker, followed by a cucumber heart. Secure them with a decorative toothpick if needed.
- Create ‘grape caterpillars’ by skewering 3-4 green grapes and using two tiny dots of cream cheese and black sesame seeds for eyes on the lead grape.
- Arrange these items on a small board in clusters. The trick to the ‘cute’ aesthetic is keeping everything bite-sized and repetitive, creating a patterned look that feels organized and intentional.
How to prepare picnic dates?

Why we love this
A picnic date board is the height of romantic effortlessness, focusing on ‘grazing for two’ with a mix of aphrodisiacs and indulgent pairings. We love how this board encourages slow eating and deep conversation, with finger foods that are easy to handle while lounging on a blanket. The scent of aged prosciutto and sweet figs, paired with a soft brie that has begun to weep slightly at room temperature, creates an atmosphere of pure luxury. It’s about the intimacy of sharing flavors and the tactile experience of assembling the perfect cracker for your partner.
Ingredients
- Double cream Brie or Camembert
- Prosciutto di Parma
- Fresh figs or halved grapes
- Honeycomb or fig jam
- Marcona almonds
- Artisan baguette slices
- Dark chocolate squares
How to make it
- Remove your cheese from the refrigerator at least one hour before the date. A soft cheese must be served at room temperature to achieve that viral ‘ooze’ and full flavor profile.
- Ribbon the prosciutto by bunching it loosely rather than laying it flat; this adds volume and makes it easier to pick up with fingers.
- Place the cheese wheel in the center of a small wooden board and cut a small wedge out to invite the first bite. Drizzle the honeycomb directly over the exposed center of the cheese.
- Place the baguette slices in a small basket or tucked into the side of the board. Ensure they are sliced on a sharp bias for a more elegant look.
- Fill the remaining spaces with the Marcona almonds and dark chocolate. The visual goal is ‘rustic elegance’—it shouldn’t look too perfect, but rather like a bountiful, spontaneous harvest meant for two.
How to pack simple lunches?
Why we love this
Packing a ‘board-style’ lunch transforms the mundane midday break into a highlight of the day. We love this approach because it prevents the ‘soggy sandwich’ syndrome by keeping components separate until the moment you’re ready to eat. The crispness of snap peas, the creaminess of a small pot of hummus, and the savory bite of turkey roll-ups provide a balanced nutritional profile that keeps energy levels high. Opening a lunch container to find a colorful, organized array of food is a simple act of self-care that feels much more rewarding than a standard brown-bag lunch.
Ingredients
- Sliced deli turkey or roast beef
- Hummus or tzatziki
- Sugar snap peas and baby carrots
- Hard-boiled eggs
- Whole grain crackers
- Apple slices with a squeeze of lemon
- A few olives or cornichons
How to make it
- Use a bento-style container with dividers to keep textures distinct. If you don’t have one, use silicone cupcake liners to create sections within a standard container.
- Roll the deli meat tightly and secure each roll with a toothpick or place them seam-side down to keep them compact. This prevents them from drying out.
- Place the hummus in a small, leak-proof container in the center. Surround it with the vertical ‘dippers’ like carrots and snap peas to save space.
- Boil your eggs for exactly 8 minutes for a ‘jammy’ yolk or 10 minutes for a traditional hard yolk. Peel them and slice them in half just before packing, dusting with ‘everything bagel’ seasoning for flavor and visual appeal.
- Add the crackers last, placing them in a spot where they won’t touch any moisture-rich vegetables. The visual cue is a ‘rainbow in a box’—aim for at least four different colors to ensure a variety of nutrients and textures.
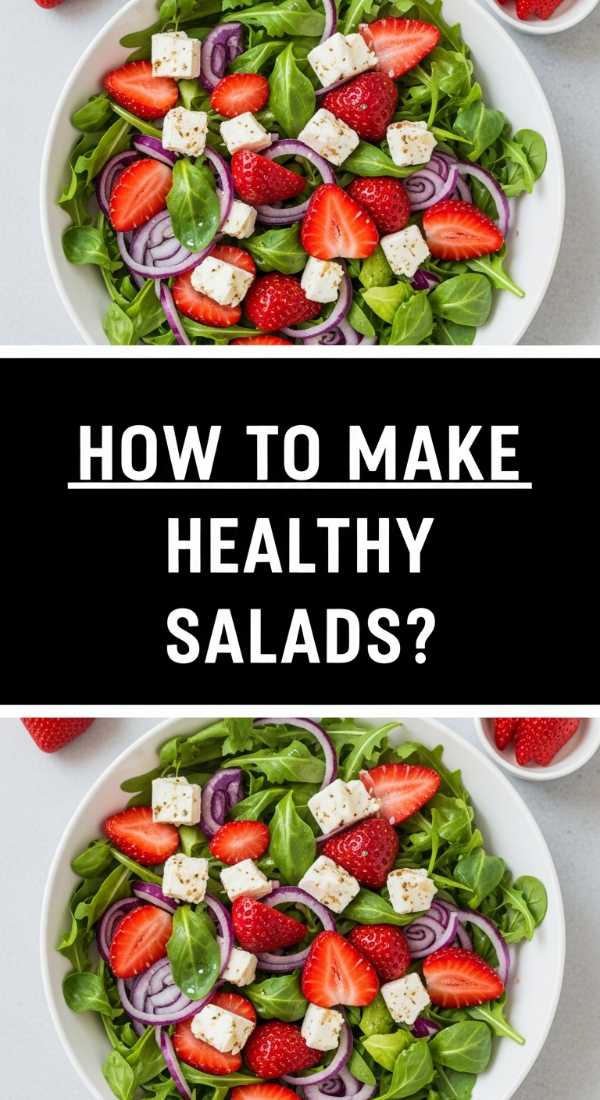
How to make healthy salads?

Why we love this
Healthy salads on a board change the way we perceive ‘diet’ food, making greens feel like a feast rather than a chore. We love this method because it allows for a deconstructed presentation where every ingredient shines—the velvety avocado, the charred corn, and the bright pop of pomegranate seeds. The aroma is fresh and earthy, like a garden after rain. By laying the salad out on a flat board or platter, you ensure that every bite is perfectly balanced with toppings, avoiding the ‘bottom of the bowl’ syndrome where all the good stuff disappears.
Ingredients
- Massaged kale or wild arugula
- Roasted sweet potato cubes
- Avocado, sliced or cubed
- Pickled red onions
- Toasted pumpkin seeds (pepitas)
- Chickpeas, roasted until crispy
- Tahini-lemon dressing
How to make it
- Start with the greens. If using kale, strip the leaves from the stem, chop finely, and ‘massage’ them with a teaspoon of olive oil and a pinch of salt for 2 minutes until they turn dark green and tender.
- Roast your sweet potatoes and chickpeas at 400°F (200°C) until the potatoes are caramelized and the chickpeas are crunchy. Let them cool completely before adding to the board to keep the greens from wilting.
- Lay the greens as a base layer on a large platter. Instead of tossing, ‘stripe’ the other ingredients across the top in neat rows or organized piles.
- Nestle the avocado slices in the center, fanning them out like a rose. Top with the pickled onions for a hit of acidity and bright pink color.
- Drizzle the dressing in a zig-zag motion across the entire board just before serving, or provide it in a small bowl on the side. The goal is a lush, textured landscape of ingredients that looks incredibly nutrient-dense.
How to bake picnic bites?

Why we love this
Picnic bites, like mini quiches or savory tarts, bring a warm, buttery element to an outdoor spread that is simply irresistible. We love the flaky, golden layers of puff pastry that shatter delightfully upon the first bite, revealing a savory, herb-filled center. The scent of melting Gruyère and sautéed leeks wafting through the air is enough to make anyone’s mouth water. These bites are designed to be sturdy enough for transport but delicate enough to feel like gourmet finger food, making them the ultimate ‘viral’ picnic addition.
Ingredients
- Store-bought puff pastry, thawed but cold
- Large eggs and heavy cream
- Leeks, finely sliced and sautéed
- Gruyère or Swiss cheese, shredded
- Fresh thyme and nutmeg
- Salt and white pepper
How to make it
- Preheat your oven to 375°F (190°C). Roll out the puff pastry on a lightly floured surface and use a round cutter to create circles that fit into a mini-muffin tin.
- Press the pastry into the greased tins, ensuring there are no air bubbles underneath. Prick the bottoms with a fork (docking) to prevent the pastry from rising too much in the center.
- Whisk the eggs and cream together in a ratio of 1 egg to 1/4 cup of cream. Season with salt, pepper, and a tiny pinch of nutmeg—this is the secret to a professional-tasting quiche.
- Place a few sautéed leeks and a pinch of cheese into each pastry shell, then carefully pour the egg mixture over the top until 3/4 full. Do not overfill, or they will stick to the pan.
- Bake for 15-18 minutes. The visual cue for doneness is a pastry that is deeply golden and puffed, with a center that is set but still has a slight, custard-like wobble when shaken gently.
How to bake sweet treats?
Why we love this
A dedicated sweet treat board is the ultimate finale to any gathering, offering a curated selection of ‘petite fours’ style desserts. We love the contrast between rich, dark chocolate, tart fruit preserves, and the buttery crumble of a shortbread cookie. The scent is a heavenly mix of vanilla bean and toasted sugar, creating an immediate sense of celebration. It’s a way to provide variety without the commitment of a whole cake, allowing guests to sample a little bit of everything in a beautiful, accessible format.
Ingredients
- Miniature brownies or blondies
- Shortbread cookies
- Chocolate-dipped strawberries
- Macarons in pastel colors
- Raspberry jam for dipping
- Clotted cream or whipped mascarpone
- Edible flowers (optional)
How to make it
- Bake your brownies in a square pan and slice them into tiny, 1-inch cubes. This ‘bite-sized’ approach is key for board aesthetics. For a professional finish, dust them with cocoa powder or powdered sugar.
- Dip half of each strawberry into melted dark chocolate and place on parchment paper to set. If you want a viral look, drizzle white chocolate in thin lines over the dark chocolate once it has hardened.
- Arrange the treats on a marble or wooden board. Group them by type, but create ‘rivers’ of cookies that wind between the piles of brownies.
- Place a small bowl of jam and a bowl of clotted cream in opposite corners. These act as anchors for the board.
- Fill small gaps with fresh raspberries or edible flowers like pansies. The finished board should look like a decadent candy shop window, bursting with different shapes and textures of sweetness.
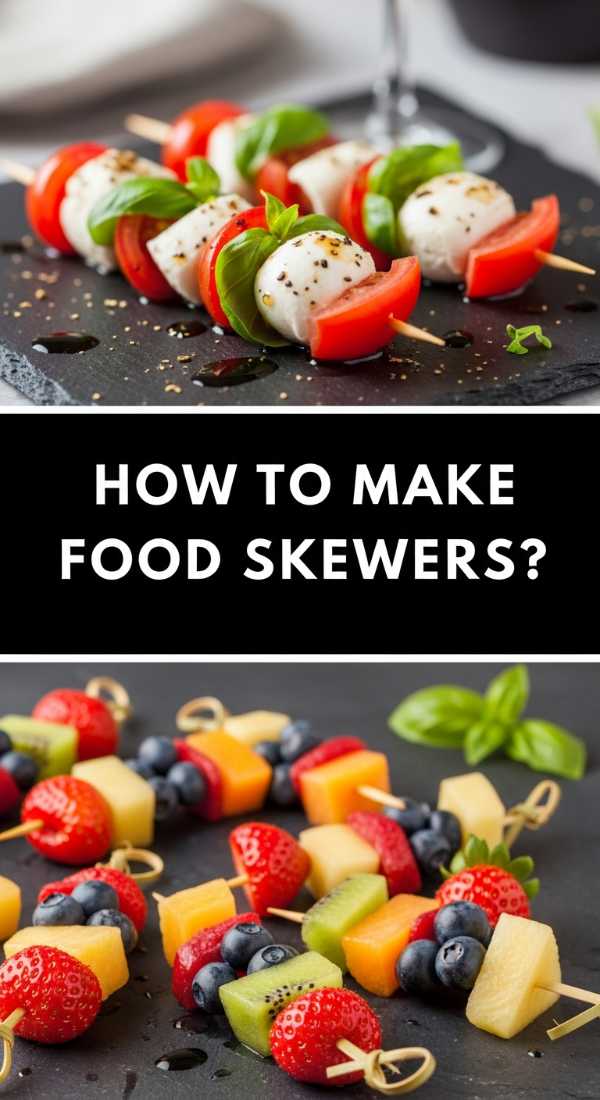
How to make food skewers?
[IMAGE_10]
Why we love this
Food skewers are the unsung heroes of effortless entertaining, providing a clean, ‘no-mess’ way to enjoy complex flavor pairings. We love how a simple wooden pick can turn a salad into a portable snack, like the classic Caprese pairing of mozzarella, tomato, and basil. The smooth, milky texture of the cheese combined with the snap of a cherry tomato and the aromatic punch of fresh basil is a timeless trio. They are visually striking when lined up in rows, offering a sense of order and abundance that is perfect for large crowds.
Ingredients
- Mini mozzarella pearls (Ciliegine)
- Cherry tomatoes, uniform in size
- Fresh basil leaves
- Balsamic glaze (thick and syrupy)
- Extra virgin olive oil
- Bamboo skewers or decorative picks
How to make it
- Prep your ingredients by washing the tomatoes and basil. Pat the mozzarella pearls dry with a paper towel; if they are too wet, the balsamic glaze will slide right off.
- Thread the skewer in a specific order for the best visual: first a tomato, then a folded basil leaf, then the mozzarella pearl. Folding the basil leaf into a little ‘bundle’ ensures it stays put and releases more aroma.
- For a more substantial skewer, add a folded piece of salami or a cheese-filled tortellini that has been cooked and cooled.
- Line the finished skewers up on a long, narrow platter. This linear presentation is very ‘viral’ and looks much cleaner than a pile.
- Just before guests arrive, drizzle a high-quality balsamic glaze in a steady, thin stream across the entire row of skewers. Finish with a quick spray of olive oil and a crack of black pepper. The visual cue is a glossy, vibrant appetizer that looks curated and high-end.
Conclusion
Effortless entertaining is truly an art form, but with these viral food board ideas, it becomes an accessible joy for any host. By focusing on high-quality ingredients, thoughtful styling, and sensory details, you can create a spread that not only feeds your guests but also serves as a beautiful centerpiece for your gathering. Remember, the best boards are the ones that reflect your personal taste and the season’s best offerings. So, grab a board, start styling, and enjoy the laughter and connection that follows!