

There is something almost magical about the way a simple wooden board can transform a standard weeknight dinner into a core memory. I remember the first time I ditched the individual plates and laid everything out family-style; the air in the room immediately shifted from a rushed meal to a lingering conversation. It’s not just about the food; it’s about the tactile joy of reaching across the table, the shared laughter over a perfectly crispy potato, and the effortless beauty of a spread that looks like it took hours but actually came together with ease.
Today, I’m sharing the ultimate hosting hack that has gone viral for a reason: the Simple Food Board. By mastering a few foundational elements—from the juiciest proteins to the fluffiest grains—you can assemble a gorgeous, interactive feast that caters to everyone’s cravings. Whether you’re hosting a boisterous girl’s night or just trying to make a Tuesday feel special, these techniques will ensure your board is the star of the show.
How to make juicy chicken

Why we love this
There is nothing quite as satisfying as slicing into a chicken breast and seeing those clear juices run across the board. The aroma of searing poultry mingled with garlic and thyme creates an instant sense of home and comfort. When done right, the exterior develops a beautiful, golden-amber crust that crackles slightly under the knife, while the interior remains incredibly tender and velvety. It is the versatile anchor of any board, providing a lean, savory protein that pairs beautifully with every dip and side dish imaginable.
Ingredients
- 2 large boneless, skinless chicken breasts
- 2 tablespoons olive oil
- 1 tablespoon unsalted butter
- Salt and cracked black pepper
- 1 teaspoon garlic powder
- Fresh thyme sprigs
How to make it
- Start by patting the chicken dry with paper towels; moisture is the enemy of a good sear, and this ensures a golden crust.
- Season generously on both sides with salt, pepper, and garlic powder, pressing the spices into the meat.
- Heat a heavy-bottomed skillet or cast iron pan over medium-high heat. Add the olive oil and wait until it shimmers.
- Place the chicken in the pan and sear undisturbed for 5-7 minutes. You are looking for a deep golden-brown color before flipping.
- Flip the chicken and add the butter and thyme sprigs to the pan. Use a spoon to baste the melting butter over the chicken continuously.
- Reduce heat to medium and cook for another 5-8 minutes until the internal temperature reaches 165°F (74°C).
- Crucially, move the chicken to a cutting board and let it rest for a full 10 minutes before slicing to allow the juices to redistribute.
How to roast crispy potatoes

Why we love this
The perfect roasted potato is a study in contrasts: an impossibly glass-like, crunchy shell that gives way to a center as light and fluffy as a cloud. As they roast, the kitchen fills with a deep, earthy fragrance that promises total satisfaction. These little golden nuggets catch the light on your board and act as the ultimate vessel for sea salt and herbs. They are the ultimate crowd-pleaser, providing that salty, savory crunch that keeps guests reaching back for “just one more” until the board is bare.
Ingredients
- 1.5 lbs Yukon Gold or Russet potatoes
- 3 tablespoons avocado oil or duck fat
- 1 teaspoon sea salt
- 1/2 teaspoon smoked paprika
- 2 cloves smashed garlic
- Fresh rosemary
How to make it
- Peel and cut the potatoes into uniform 1-inch chunks to ensure they cook at the same rate.
- Place potatoes in a pot of cold salted water, bring to a boil, and parboil for exactly 8 minutes until the edges are just softening.
- Drain the potatoes and give them a vigorous shake in the colander to roughen up the edges; this starchy “fuzz” is what creates the crunch.
- Preheat your oven to 425°F (220°C) and place a baking sheet inside to get screaming hot.
- Toss the roughed-up potatoes with oil, salt, and paprika. Carefully spread them onto the hot baking sheet in a single layer.
- Roast for 20 minutes, then flip. Add the smashed garlic and rosemary to the tray and roast for another 15-20 minutes until dark golden and audible when tapped.
How to prep fresh salad
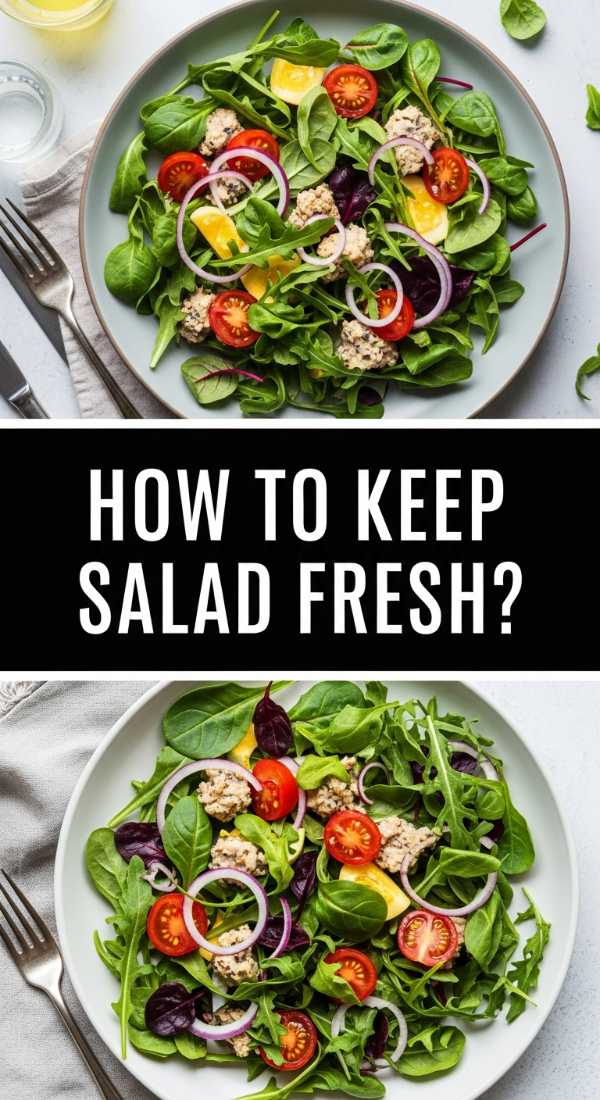
Why we love this
A fresh salad brings much-needed vibrancy and a refreshing snap to a board dominated by warm, savory elements. The bright green hues of the leaves against a zesty dressing act as a palate cleanser, cutting through richness with every crisp bite. The scent of torn mint or parsley combined with the acidic zing of lemon juice awakens the senses and makes the entire meal feel balanced and light. It’s the breath of fresh air your food board needs to look as good as it tastes.
Ingredients
- 4 cups mixed baby greens or arugula
- 1/2 English cucumber, thinly sliced
- 1/4 red onion, shaved
- 3 tablespoons extra virgin olive oil
- 1 tablespoon fresh lemon juice
- Flaky sea salt
How to make it
- Wash your greens in ice-cold water to ensure maximum crispness, then spin them completely dry in a salad spinner.
- In a small jar, emulsify the olive oil and lemon juice by shaking vigorously with a pinch of salt until the dressing is thick and cloudy.
- Place the dried greens in a large chilled bowl. Do not dress them until the very last second to avoid wilting.
- Add the cucumber and shaved onions, then drizzle only enough dressing to lightly coat the leaves—do not drench them.
- Use your hands to gently toss the salad, ensuring every leaf has a slight sheen without being weighed down.
- Transfer to the board immediately, finishing with a final sprinkle of flaky sea salt for texture.
How to sear perfect steak

Why we love this
There is a primitive, mouthwatering appeal to a perfectly seared steak with its deep, mahogany crust and tender, rosy center. The sound of the steak hitting a hot pan is the ultimate dinner bell, signaling a meal of substance and luxury. As it rests, the aroma of rendered fat and peppercorns becomes irresistible. When sliced thinly across the grain, it provides a buttery, melt-in-your-mouth experience that anchors the board with a sense of celebration and indulgence.
Ingredients
- 1 lb Ribeye or New York Strip (1.5 inches thick)
- Kosher salt and coarse black pepper
- 1 tablespoon high-smoke point oil (like grapeseed)
- 2 tablespoons butter
- 3 cloves garlic, crushed
How to make it
- Remove the steak from the fridge at least 45 minutes before cooking to bring it to room temperature; this ensures even cooking.
- Pat the meat exceptionally dry and season heavily with salt and pepper on all sides, including the edges.
- Heat a cast-iron skillet over high heat until it just begins to smoke. Add the oil.
- Lay the steak away from you in the pan. Sear for 3-4 minutes without moving it to build a thick, caramelized crust.
- Flip the steak and immediately add the butter and garlic. Tilt the pan and spoon the foaming butter over the steak for the final 3 minutes of cooking.
- Use a meat thermometer to pull the steak at 130°F (54°C) for medium-rare.
- Let the steak rest on a warm plate for 10 minutes before slicing into thin strips to serve on your board.
How to steam fluffy rice

Why we love this
Fluffy rice is the quiet hero of the board, providing a soft, neutral canvas that soaks up sauces and balances bold flavors. Each grain should be distinct and tender, exhaling a gentle, sweet steam when fluffed with a fork. It offers a comforting, starchy foundation that makes the meal feel complete. When served in a neat pile or a small bowl on your board, its snowy white texture provides a beautiful visual contrast to the colorful vegetables and seared meats surrounding it.
Ingredients
- 1 cup Basmati or Long-grain white rice
- 1.5 cups filtered water
- 1/2 teaspoon salt
- 1 teaspoon butter or oil (optional)
How to make it
- Rinse the rice in a fine-mesh sieve under cold running water for 1-2 minutes until the water runs clear; this removes excess starch and prevents stickiness.
- Combine the rinsed rice, water, salt, and butter in a heavy-bottomed saucepan.
- Bring the water to a vigorous boil over medium-high heat. Once boiling, stir once to ensure no grains are sticking to the bottom.
- Cover the pot with a tight-fitting lid and immediately turn the heat down to the lowest possible setting.
- Cook for 15 minutes without lifting the lid—the steam is doing all the work!
- Remove the pot from the heat and let it sit, still covered, for 10 minutes to allow the moisture to finish absorbing.
- Fluff gently with a fork and serve immediately.
How to roast honey carrots

Why we love this
Roasted honey carrots bring a stunning pop of orange to your board and a concentrated, earthy sweetness that is simply addictive. The high heat of the oven caramelizes the natural sugars in the vegetable, while the honey creates a glossy, sticky glaze that clings to every curve. They offer a tender-crisp texture that feels elegant yet rustic. The faint scent of charred honey and warm carrots adds a sophisticated, autumnal note to your spread that guests will find completely irresistible.
Ingredients
- 1 bunch heirloom carrots (tops trimmed)
- 2 tablespoons olive oil
- 2 tablespoons honey or hot honey
- 1/2 teaspoon cumin
- Salt and pepper
How to make it
- Preheat your oven to 400°F (200°C). If the carrots are very thick, slice them in half lengthwise so they cook evenly.
- In a large bowl, whisk together the olive oil, honey, cumin, salt, and pepper until well combined.
- Toss the carrots in the honey mixture until they are thoroughly and evenly coated.
- Spread the carrots on a parchment-lined baking sheet, making sure they aren’t crowded; they need space to roast rather than steam.
- Roast for 20-25 minutes, tossing halfway through, until the edges are charred and the carrots are tender when pierced with a fork.
- Drizzle any remaining glaze from the pan back over the carrots before placing them on the board.
How to make creamy oats
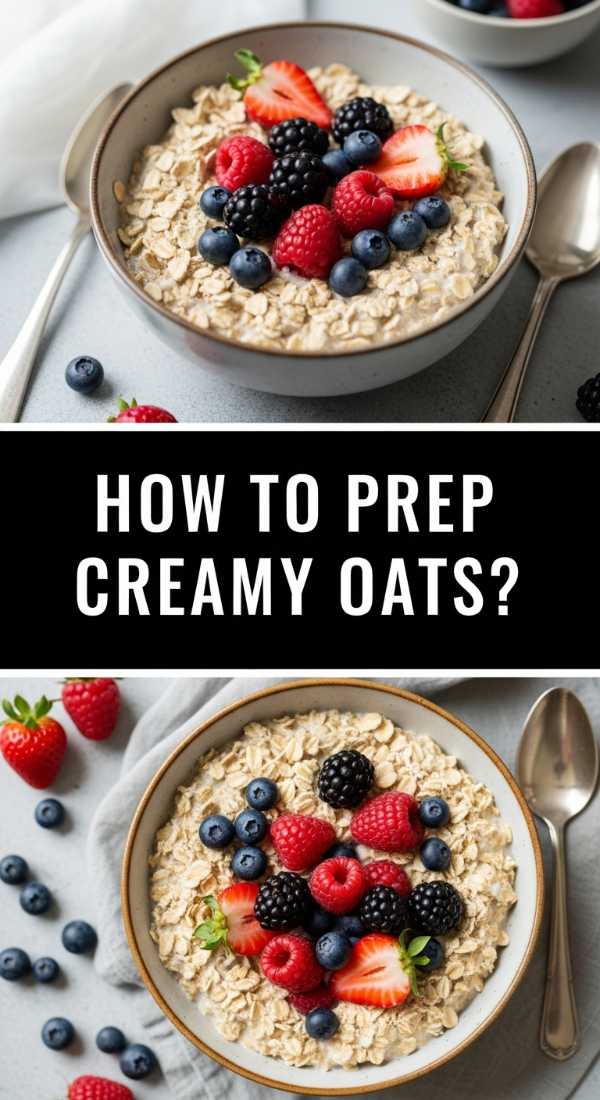
Why we love this
While often reserved for breakfast, creamy oats can be a surprising and comforting addition to a brunch-style board. They have a soothing, velvety texture that coats the spoon and carries the scents of cinnamon and vanilla throughout the room. The warmth they provide is like a culinary hug, making your board feel approachable and cozy. Whether topped with berries or a swirl of nut butter, they offer a soft, wholesome element that rounds out the more textural components of your feast.
Ingredients
- 1 cup old-fashioned rolled oats
- 2 cups milk (dairy or almond)
- Pinch of salt
- 1 tablespoon maple syrup
- 1/2 teaspoon vanilla extract
How to make it
- In a small saucepan, bring the milk and salt to a gentle simmer over medium heat; do not let it reach a rolling boil.
- Stir in the oats and reduce the heat to low.
- Cook for 5-7 minutes, stirring frequently to release the starches, which creates that signature creamy consistency.
- Once the oats have absorbed most of the liquid and reached your desired thickness, stir in the maple syrup and vanilla.
- Remove from heat and let sit for 2 minutes to thicken further.
- Transfer to a small decorative bowl to nestle into your food board.
How to bake salmon fillets
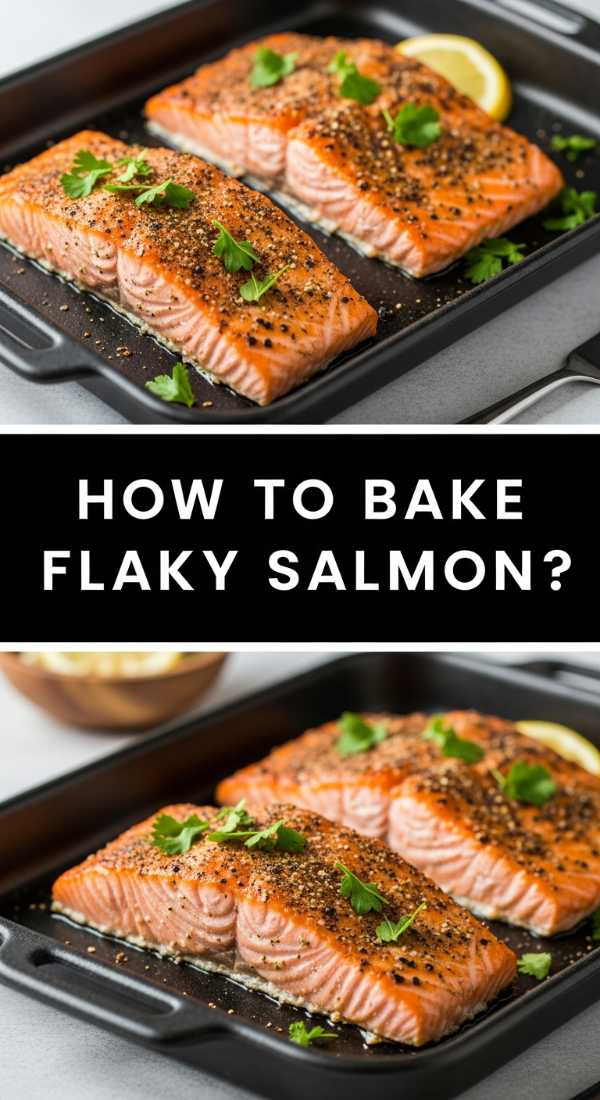
Why we love this
Baked salmon is a showstopper, offering a vibrant pink hue and a rich, flaky texture that feels inherently healthy yet decadent. The gentle heat of the oven coaxes out the healthy fats, making the fish practically melt on the tongue. The mild, oceanic flavor is elevated by citrus and herbs, filling the air with a light, fresh aroma. It’s a sophisticated protein choice that adds a touch of elegance to any board, looking beautiful alongside bright greens and roasted root vegetables.
Ingredients
- 2 salmon fillets (6oz each)
- 1 tablespoon olive oil
- 1/2 lemon, thinly sliced
- Salt and cracked pepper
- Fresh dill
How to make it
- Preheat your oven to 375°F (190°C). Line a small baking dish with parchment paper for easy cleanup.
- Place the salmon fillets in the dish and rub them with olive oil, then season generously with salt and pepper.
- Top each fillet with 2-3 thin lemon slices and a sprig of fresh dill.
- Bake for 12-15 minutes. The key visual cue is that the salmon should be opaque and just starting to flake when pressed with a fork.
- For a slightly firmer texture, you can broil the salmon for the last 60 seconds to lightly brown the top.
- Remove from the oven and let rest for 3 minutes before placing on the board.
How to meal prep pasta
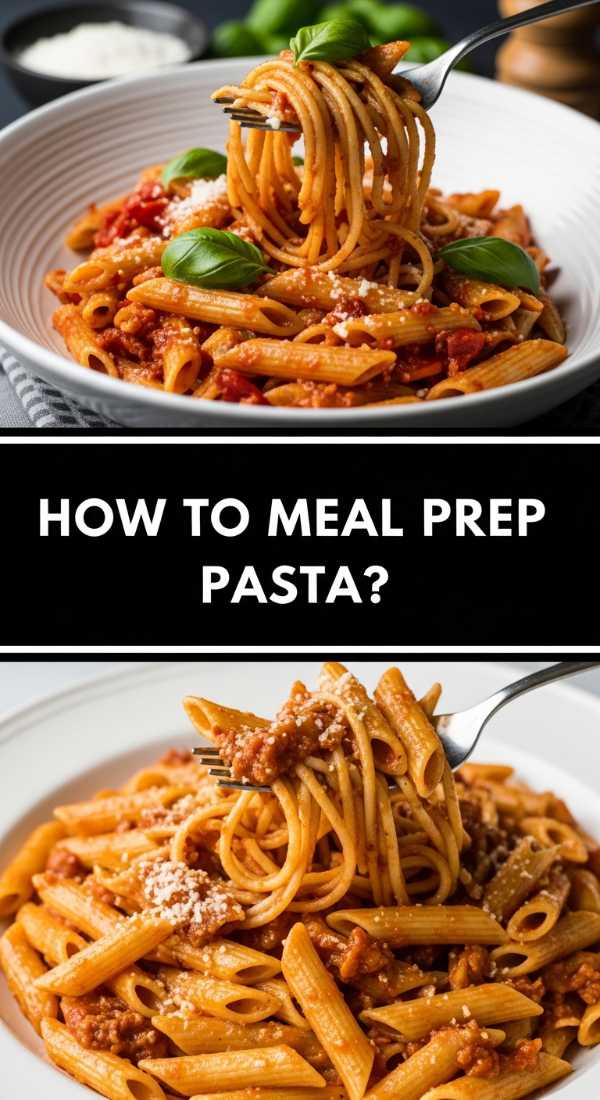
Why we love this
Pasta is the ultimate comfort food, providing a chewy, satisfying bite that everyone loves. When prepared correctly, it holds its shape and carries sauces with ease, making it a reliable and filling addition to a large board. The scent of simmering wheat and olive oil is a classic kitchen staple that signals a hearty meal is ahead. Whether served plain with a side of pesto or tossed in a light garlic butter, it provides a versatile base that guests can customize with other board elements.
Ingredients
- 8 oz dried pasta (Penne or Fusilli work best for boards)
- 4 quarts water
- 2 tablespoons salt
- 1 tablespoon olive oil (to prevent sticking)
How to make it
- Bring a large pot of water to a rolling boil—don’t be afraid of the heat!
- Add the salt to the water once it’s boiling; it should taste like the sea to properly season the pasta from within.
- Add the pasta and stir immediately to prevent the pieces from clumping together.
- Cook according to the package directions, but start tasting 2 minutes before the suggested time. You want “al dente”—firm to the bite.
- Drain the pasta, but reserve half a cup of the starchy cooking water.
- Toss the pasta with olive oil and a splash of the reserved water to keep it moist and prevent it from becoming a single block on your board.
How to boil perfect eggs
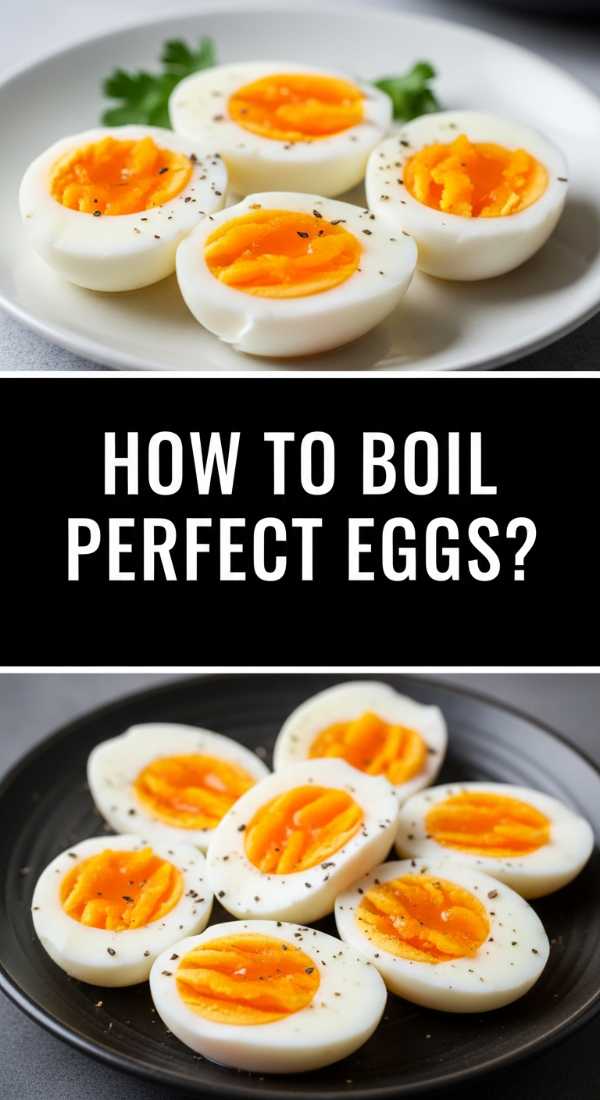
Why we love this
A perfectly boiled egg is a marvel of simple cooking—a firm, pearly white exterior protecting a center that can range from a liquid gold to a creamy, jammy yolk. They are the perfect bite-sized protein for a board, offering a rich, savory flavor that complements everything from steak to salad. There is something deeply satisfying about peeling a smooth egg and slicing it open to reveal that vibrant yellow center, adding a pop of color and a boost of nutrition to your display.
Ingredients
- 4-6 large cold eggs
- Large pot of water
- Bowl of ice water
How to make it
- Bring a pot of water to a boil, ensuring there is enough water to cover the eggs by at least an inch.
- Using a slotted spoon, gently lower the cold eggs into the boiling water to prevent cracking.
- For a jammy, soft-boiled yolk, set a timer for exactly 6 and a half minutes. For a creamy hard-boiled yolk, go for 9 minutes.
- While the eggs cook, prepare an “ice bath” by filling a bowl with cold water and plenty of ice.
- When the timer goes off, immediately transfer the eggs to the ice bath for at least 5 minutes. This stops the cooking and makes them easy to peel.
- Gently crack the shells all over and peel under the water for the smoothest results.
Elevating Your Hosting Game
Building a viral food board isn’t about being a professional chef; it’s about mastering the basics and presenting them with love. By focusing on these simple, high-quality techniques, you take the stress out of hosting and put the focus back where it belongs: on the people gathered around your table. So grab your largest board, pick a few of these favorites, and get ready to wow your guests with a spread that tastes even better than it looks.