
The Aesthetic Garden: Secrets to an Instagram-Worthy Outdoor Oasis
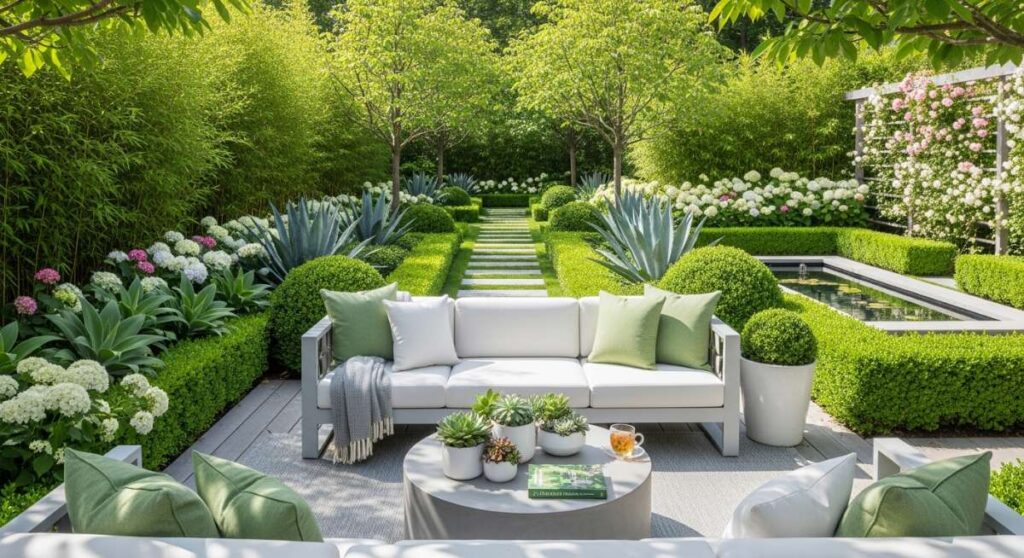
There is something truly magical about stepping into a garden that feels like a living, breathing extension of your home. It’s that first sip of coffee on a sun-drenched porch, the gentle hum of bees among the blooms, and the quiet pride of seeing a landscape you’ve nurtured with your own two hands. We all crave that ‘Pinterest-perfect’ outdoor space, but creating it is about more than just buying plants—it’s about crafting an experience that reflects your personal style and warmth.
In today’s fast-paced world, our outdoor spaces have become our most important sanctuaries. Whether you have a sprawling backyard or a cozy urban balcony, the way you curate your greenery can transform your mood and your home’s entire aesthetic. In this guide, I’m sharing my favorite viral secrets for creating an outdoor oasis that isn’t just beautiful to look at, but functional, protected, and full of life.
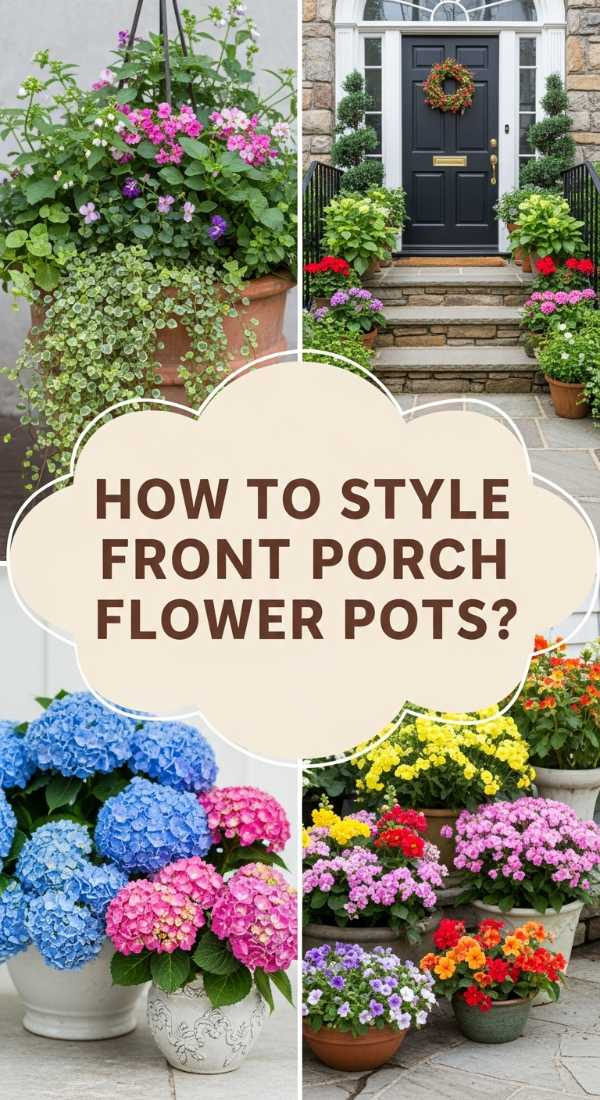
How to Style Front Porch Flower Pots for Instant Curb Appeal
Why we love this
Styling your front porch with flower pots is like putting the perfect accessory on an outfit; it instantly elevates the entire vibe of your home’s entrance. There’s a tactile joy in selecting the velvety petals of a deep purple petunia and pairing it with the architectural sharpness of a spike plant. The fragrance of damp soil and blooming jasmine greets you every time you walk through the door, creating a sensory bridge between the busy world outside and your peaceful sanctuary within.
Essential Elements:
- Weather-resistant ceramic or terracotta pots in varying heights
- A ‘Thriller’ plant (e.g., Dracaena or Fountain Grass)
- ‘Filler’ plants (e.g., Geraniums or Marigolds)
- ‘Spiller’ plants (e.g., Sweet Potato Vine or Creeping Jenny)
- High-quality potting mix and slow-release fertilizer
How to make it
- Select three pots of different sizes but cohesive colors to create a ‘rule of three’ cluster. Ensure all pots have drainage holes at the bottom.
- Fill the pots two-thirds full with a lightweight potting mix specifically designed for containers, avoiding garden soil which is too heavy.
- Place your ‘Thriller’ (the tallest plant) in the center of the pot. Ensure the top of its root ball is about an inch below the rim.
- Surround the Thriller with your ‘Fillers’—medium-height plants that add volume and color. Space them evenly to avoid crowding the roots.
- Tuck your ‘Spillers’ along the edges of the pot so they can naturally cascade over the sides as they grow.
- Fill in the gaps with extra potting mix, tamping down lightly to remove air pockets without compacting the soil.
- Water thoroughly until water runs out of the drainage holes and place in a spot that receives the appropriate amount of sunlight for your chosen plants.
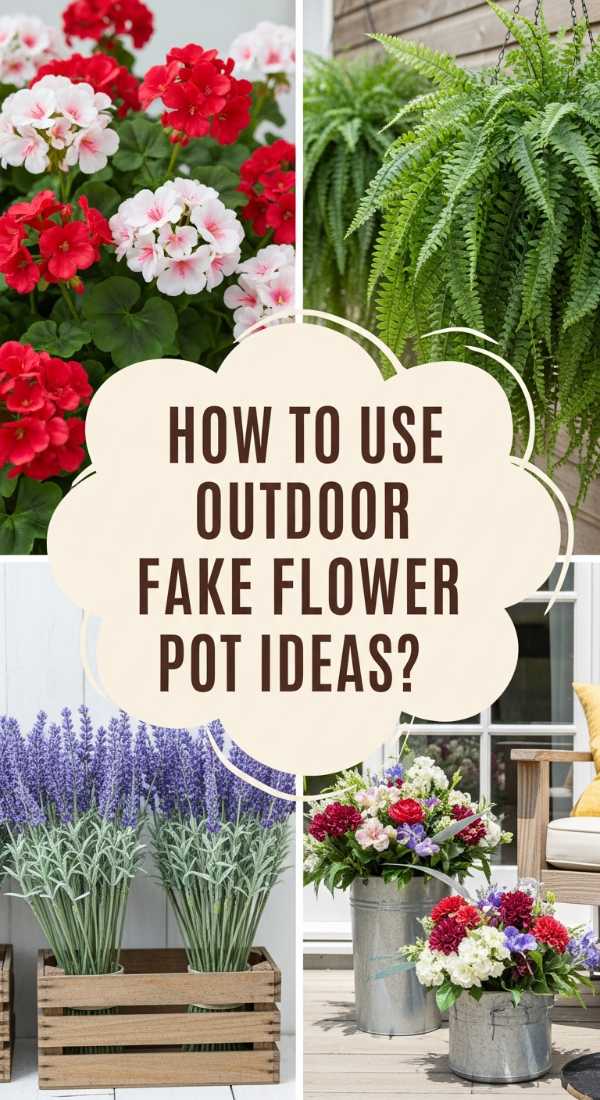
How to Use Outdoor Fake Flower Pot Ideas for Everlasting Summer Color
Why we love this
Let’s be honest: sometimes life gets in the way of a watering schedule, or you have that one scorched corner of the deck where nothing survives. High-quality faux florals offer a vibrant, zero-maintenance solution that keeps your home looking lush and intentional all season long. Modern faux blooms possess such realistic textures and UV-resistant coatings that they can fool even the most seasoned gardener, providing a pop of everlasting color that never wilts under the summer heat.
Essential Elements:
- UV-rated artificial flowers (Silk or high-density plastic)
- Sturdy planters or urns
- Floral foam or expanding spray foam
- Decorative moss or river stones
- Clear UV-protection spray
How to make it
- Select UV-resistant faux plants; if they aren’t pre-treated, apply a clear UV-protection spray to prevent fading from direct sunlight.
- Place a block of floral foam inside your planter, securing it with hot glue or by wedging it tightly so it doesn’t move in the wind.
- Begin by inserting your tallest stems into the center of the foam, pushing them down at least 3 inches for stability.
- Layer in smaller floral clusters around the base, bending the wires of the stems to create a natural, organic shape rather than a stiff arrangement.
- Add faux trailing greens like ivy or eucalyptus around the rim to soften the edges of the container.
- Cover the exposed floral foam with a layer of dried Spanish moss or polished river stones for a realistic ‘grounded’ look.
- Weight the bottom of the pot with a few heavy bricks before adding the foam if you live in a high-wind area to prevent the arrangement from tipping.
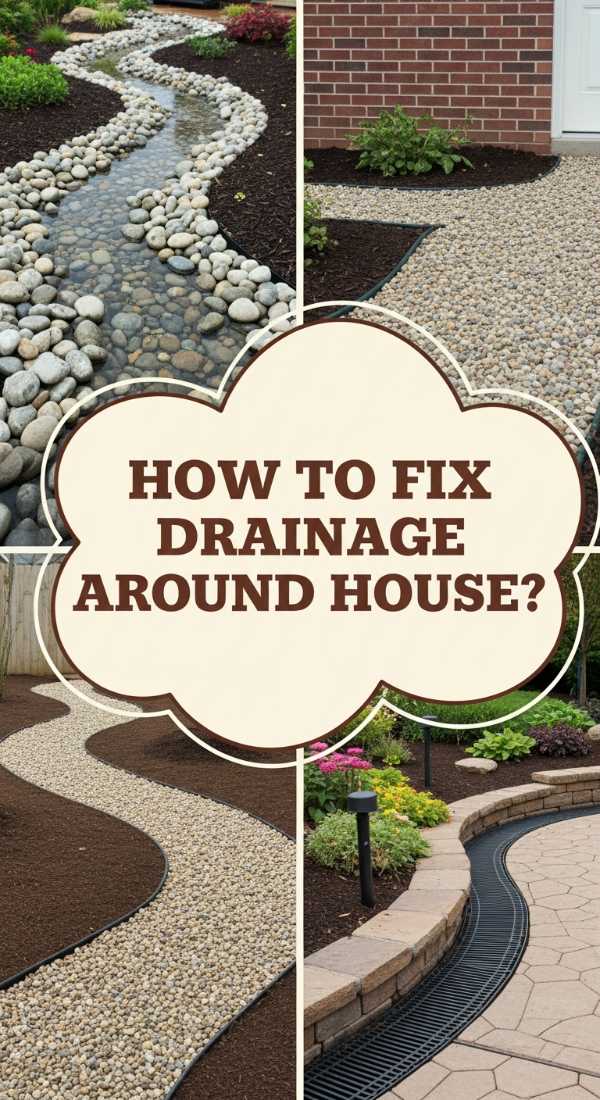
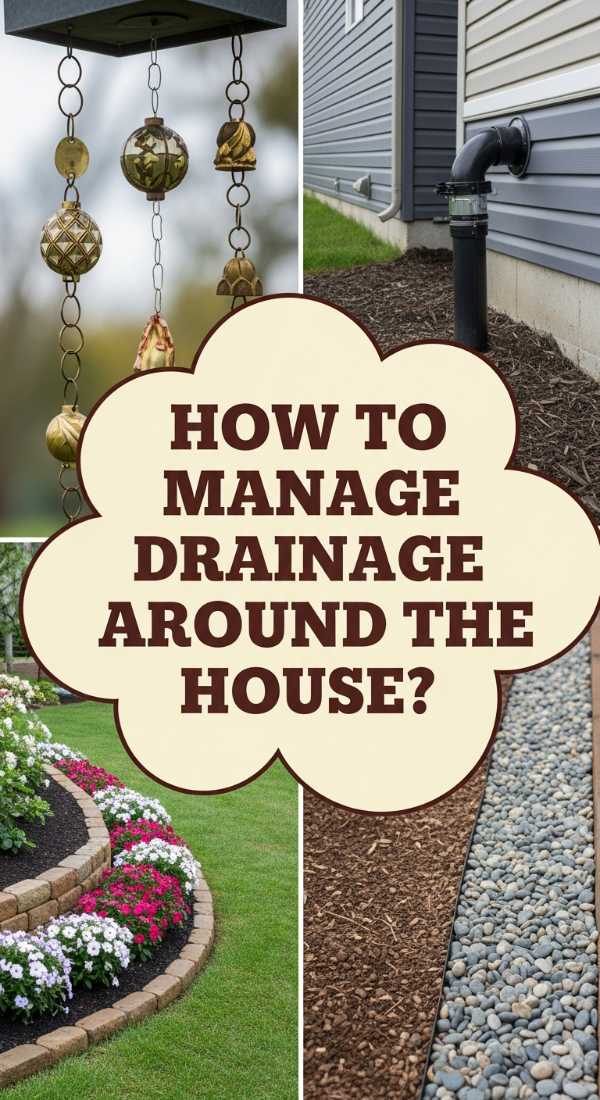
How to Fix Drainage Around House for a Protected Foundation
Why we love this
While it might not be the most ‘glamorous’ part of gardening, ensuring proper drainage is the ultimate act of self-care for your home. There is a deep sense of security that comes with knowing your foundation is dry and your plants aren’t drowning in stagnant pools after a summer thunderstorm. A well-drained yard smells fresher, prevents the muddy footprints of pets and kids, and creates a crisp, clean landscape that looks as professional as it is functional.
Essential Elements:
- Perforated PVC drainage pipe
- Non-woven geotextile landscape fabric
- Washed river gravel or 3/4-inch crushed stone
- Catch basins or downspout adapters
- Shovel and trenching tool
How to make it
- Identify the low spots where water pools and plan a path for a French drain that leads water away from the foundation toward a safe discharge area.
- Dig a trench approximately 12 inches deep and 6 inches wide, ensuring a downward slope of at least 1 inch for every 8 feet of length.
- Line the entire trench with geotextile fabric, leaving enough excess on the sides to wrap over the top later.
- Pour a 2-inch base layer of washed gravel into the bottom of the fabric-lined trench.
- Lay the perforated pipe on top of the gravel with the holes facing downward to allow water to enter the pipe from the bottom.
- Cover the pipe with more gravel until it is about 2 inches from the surface, then wrap the excess fabric over the gravel to prevent soil from clogging the system.
- Top with decorative stones or replace the sod to hide the drain while allowing water to permeate through.
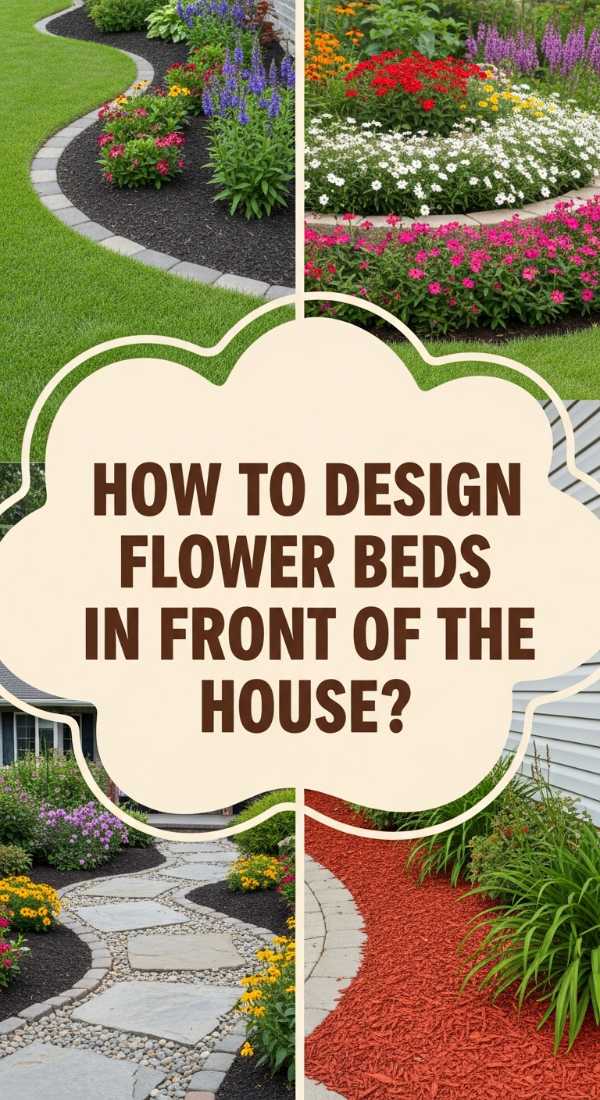
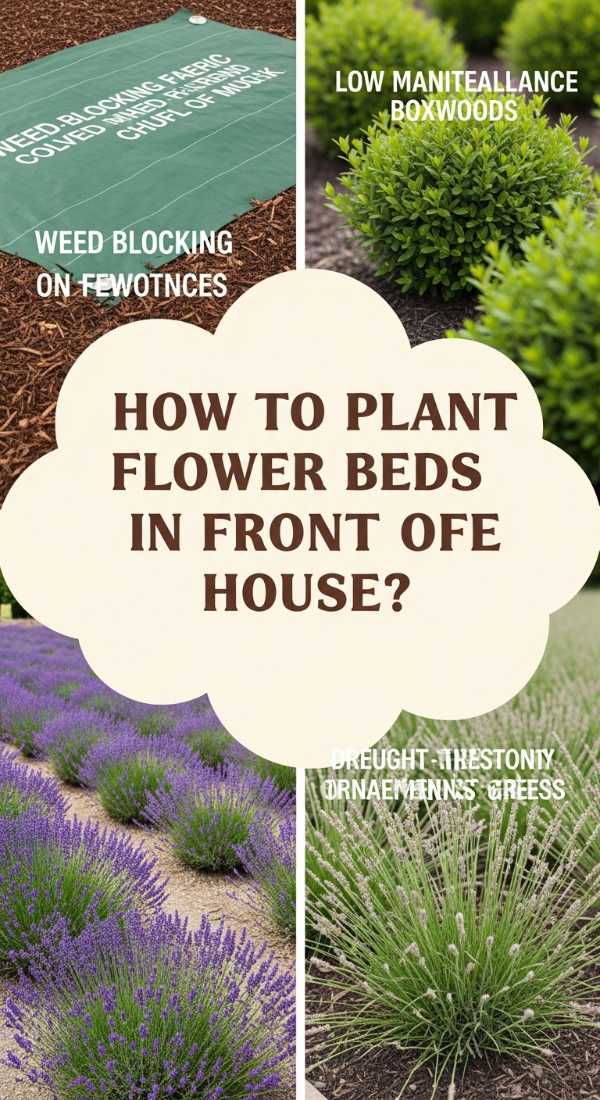
How to Design Flower Beds in Front of House for a Magical Garden Entrance
Why we love this
The front of your home is the first chapter of your story, and a beautifully designed flower bed sets a tone of magic and welcome. We love the way layered heights and contrasting textures—like the softness of lamb’s ear against the bold structure of a boxwood—create a visual rhythm that draws the eye toward the front door. It’s an invitation to slow down, breathe in the scent of mulch and blossoms, and appreciate the artistry of a well-planned garden entrance.
Essential Elements:
- Hardscape edging (stone, brick, or metal)
- Premium dark hardwood mulch
- A mix of evergreen shrubs, perennials, and annuals
- Landscape fabric (optional for weed control)
- Garden hose for outlining curves
How to make it
- Use a garden hose or spray paint to layout a curved, organic shape for your flower bed; curves look more professional and ‘designer’ than straight lines.
- Remove the grass within the outline using a flat-edged shovel, ensuring you dig deep enough to remove all root systems.
- Install your edging material—be it stacked stone or metal strips—to create a clean barrier between the lawn and the bed.
- Amend the soil with organic compost to ensure your plants have the nutrients they need for a strong start.
- Arrange your plants while they are still in their nursery pots: place ‘anchors’ (shrubs) in the back, ‘accent’ perennials in the middle, and ‘border’ plants in the front.
- Dig holes twice as wide as the nursery pots, place the plants, and backfill with soil, pressing firmly to remove air.
- Apply a 3-inch layer of mulch across the entire bed, keeping it an inch away from the stems of the plants to prevent rot.
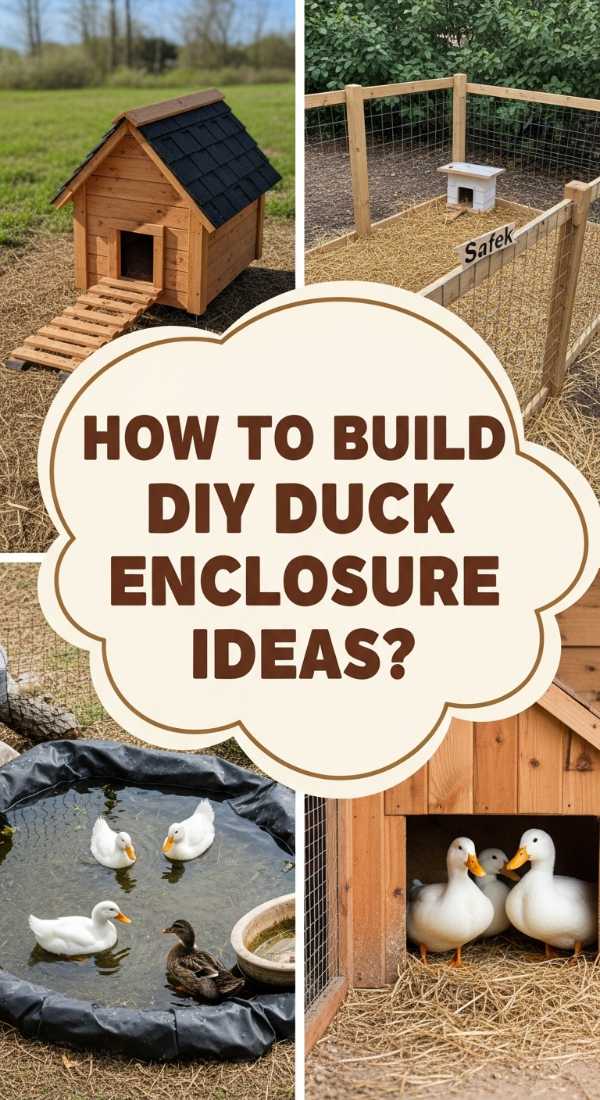
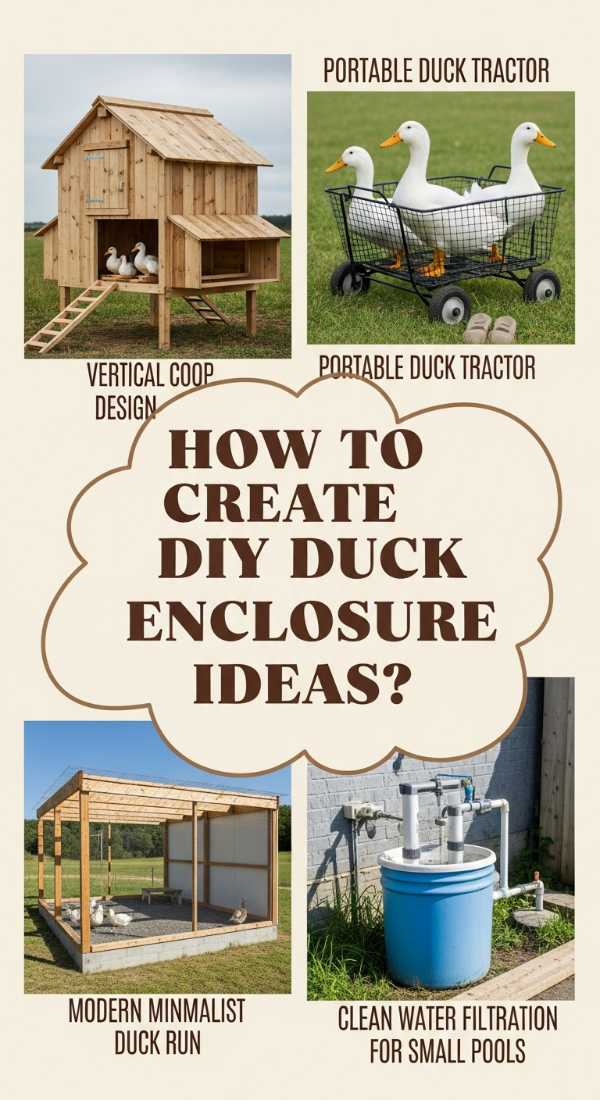
How to Build DIY Duck Enclosure Ideas for a Happy Feathered Family
Why we love this
Adding ducks to your backyard oasis brings a whimsical, lively energy that is purely infectious. Watching them waddle through the grass and splash in their water is the ultimate ‘slow living’ experience. A well-built enclosure doesn’t just keep them safe; it becomes a charming rustic feature of your garden. The soft quacks and the rhythmic sound of splashing water add a layer of natural ambiance that makes your outdoor space feel like a true mini-homestead.
Essential Elements:
- Hardware cloth (not chicken wire) for predator protection
- Pressure-treated lumber for the frame
- Corrugated roofing panels
- Nesting boxes and clean straw
- A secure latching system
How to make it
- Construct a sturdy wooden frame using 2×4 pressure-treated lumber, creating a footprint of at least 4 square feet per duck.
- Wrap the frame in 1/2-inch hardware cloth, burying the mesh 12 inches underground around the perimeter to prevent burrowing predators like foxes or raccoons.
- Install a slanted roof using corrugated metal or polycarbonate panels to provide shade and protection from rain.
- Build an elevated nesting house inside the enclosure with a ramp for easy access, ensuring it is well-ventilated but draft-free.
- Create a ‘wet zone’ using a heavy-duty plastic tub or a small pre-formed pond that can be easily drained and cleaned daily.
- Line the dry areas of the enclosure with pine shavings or straw to keep their feet comfortable and the area clean.
- Add a heavy-duty sliding bolt latch to the door to ensure the enclosure is completely secure during the night.
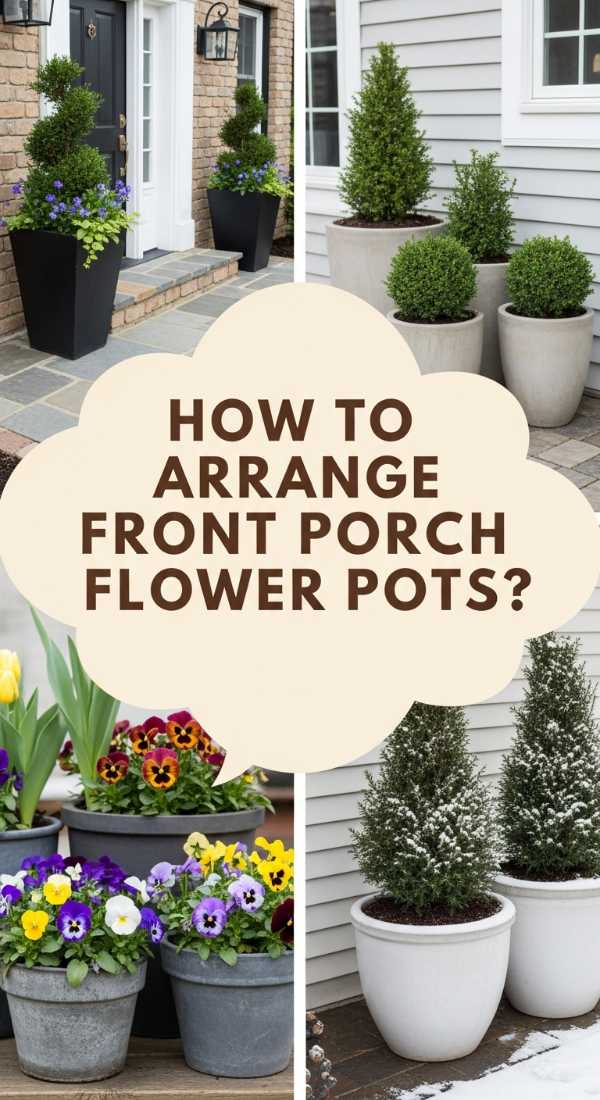
How to Arrange Front Porch Flower Pots for a Welcoming Entryway
Why we love this
Arranging your pots is an art form that balances symmetry with personality. We love how a thoughtfully placed collection of containers can guide a visitor’s eye and create a sense of balance before they even step inside. The interplay of different textures, from the cool touch of glazed ceramic to the warmth of woven baskets, adds depth to your porch. It’s about creating a ‘vignette’ that feels curated and cozy, making every arrival home feel like a special occasion.
Essential Elements:
- An odd number of pots (3 or 5) for visual interest
- Pot feet or risers
- Coordinating color palette of plants
- Decorative lanterns or outdoor rugs
- Small side table for staging
How to make it
- Start by identifying the focal point of your porch—usually the door—and decide if you want a formal symmetrical look or a casual asymmetrical cluster.
- Place your largest, most impressive pot first to act as the anchor of the arrangement.
- Use pot feet or wooden risers to vary the heights of your containers; this prevents the ‘flat’ look and allows for better air circulation.
- Group pots in a triangle formation, placing the tallest in the back and smaller ones tucked slightly forward to the sides.
- Coordinate your plant colors across the pots; for example, use a touch of white alyssum in every pot to tie the look together visually.
- Add non-plant elements like a tall lantern or a small stack of books on a side table to give the arrangement a ‘lived-in’ lifestyle feel.
- Regularly rotate the pots every week so all sides of the plants receive equal sunlight, keeping the arrangement lush and full.
How to Select Outdoor Fake Flower Pot Ideas for Shady Verandas

Why we love this
Shady verandas can be notoriously difficult to keep bright, as many flowering plants crave the sun. Faux flowers are a game-changer here, allowing you to have ‘blooms’ in deep shade where only ferns would usually survive. We love the ability to mix high-quality faux white hydrangeas with real shade-loving foliage like Hostas. It creates a lush, English garden feel in areas that would otherwise look dark or empty, bringing light and life to the shadows.
Essential Elements:
- High-quality silk hydrangeas or gardenias
- Faux ferns or ivy for texture
- Real-touch technology florals
- Weighted bases for the stems
- Matte-finish pots to enhance the realistic look
How to make it
- Choose ‘real-touch’ faux flowers which have a latex coating that mimics the cool, moist feel of real petals.
- Pick a pot that complements the ‘shade garden’ vibe, such as a mossy terracotta or a dark slate container.
- Fill the pot with real potting soil or bark mulch; even though the flowers are fake, the presence of real soil significantly increases the illusion of reality.
- Arrange the faux flowers in a dense cluster, ensuring no gaps are visible between the stems.
- Intermix a few real, low-light plants like ‘Mother-in-Law’s Tongue’ with your faux blooms to confuse the eye and add organic movement.
- Dust the leaves of your faux plants with a damp cloth once a month to keep them looking fresh and vibrant.
- Position the pot in a corner that receives indirect light to further enhance the realistic appearance of the blooms.
How to Manage Drainage Around House for a Lush Healthy Lawn
Why we love this
A healthy lawn is the foundation of a great garden, but it’s impossible to achieve if water is drowning the roots. We love the transformation that happens when you fix drainage issues; the grass becomes a deeper, more vibrant emerald, and the soil feels springy rather than soggy. Managing water flow is the key to a ‘golf-course’ finish, allowing your lawn to thrive even during the wettest seasons, and providing a perfect, dry stage for all your outdoor gatherings.
Essential Elements:
- Aerate tool or machine
- Top-dressing sand and compost mix
- Pop-up emitters for downspouts
- Leveling rake
- High-quality grass seed
How to make it
- Core aerate your lawn in the spring or fall to break up soil compaction and allow water to reach the root zone more effectively.
- Install pop-up emitters at the end of your downspout extensions; these stay flush with the ground when dry but pop up to distribute water away from the foundation when it rains.
- Identify low spots in the lawn and fill them with a 50/50 mix of sand and organic compost to level the surface.
- Use a leveling rake to spread the mixture evenly, ensuring the grass blades are still peeking through the top.
- Overseed the leveled areas with a grass variety suited for your climate to prevent weeds from taking over the newly drained soil.
- Check your gutters and downspouts for clogs regularly; a single blocked gutter can cause a massive drainage issue on the lawn below.
- Water deeply but infrequently to encourage roots to grow downward, making the lawn more resilient to both drought and heavy rain.
How to Plant Flower Beds in Front of House for Low Maintenance Beauty
Why we love this
The best gardens are the ones that allow you to spend more time relaxing in them than working in them. We love the low-maintenance approach because it relies on the natural resilience of native plants and perennials that return year after year. There is a quiet beauty in a garden that knows how to take care of itself—where the plants fill in so densely that weeds don’t have a chance, and the landscape evolves beautifully through the seasons with minimal intervention.
Essential Elements:
- Native perennial plants (e.g., Coneflowers, Black-eyed Susans)
- Groundcover plants (e.g., Sedum or Pachysandra)
- High-quality landscape fabric or cardboard for sheet mulching
- Drip irrigation kit (optional)
- Slow-release organic fertilizer
How to make it
- Choose ‘Right Plant, Right Place’ by selecting species that are native to your region and thrive in your specific sun/shade conditions.
- Space plants according to their mature width, not their current size; this prevents overcrowding and the need for frequent pruning.
- Use the ‘Sheet Mulching’ technique: lay down plain brown cardboard over the soil before mulching to suffocate weeds naturally.
- Plant groundcovers between larger perennials to create a ‘living mulch’ that shades the soil and retains moisture.
- Install a simple battery-operated drip irrigation system to deliver water directly to the roots, reducing water waste and leaf diseases.
- Apply a pre-emergent weed preventer in early spring to stop weed seeds from germinating before they start.
- Prune only once a year in late winter or early spring to clear away dead growth and make room for new, vibrant stems.
How to Create DIY Duck Enclosure Ideas for Small Backyard Spaces
Why we love this
You don’t need a farm to enjoy the company of ducks; a small backyard can be a perfect habitat with a bit of clever design. We love the challenge of creating a ‘vertical’ or ‘modular’ enclosure that maximizes every square inch. A compact duck run can be integrated into your existing garden beds, where the ducks can help with pest control while being part of a beautiful, cohesive backyard design. It proves that sustainability and style can go hand-in-hand, no matter the size of your lot.
Essential Elements:
- Modular wire panels or fencing
- Compact, multi-level duck house
- Collapsible or easy-drain pool
- Vertical herb planters for the enclosure exterior
- Hanging feeders to save floor space
How to make it
- Utilize a corner of your yard to use existing fences as two sides of your enclosure, saving on materials and space.
- Build a multi-level house where the ducks sleep on an upper platform and their feeding/shaded area is underneath.
- Choose a narrow, deep pool rather than a wide shallow one to provide swimming space while taking up less horizontal area.
- Attach vertical planters to the outside of the enclosure to grow duck-safe treats like kale or lettuce, which also helps beautify the structure.
- Use ‘Deep Litter Method’ (layering straw) to manage waste in a small area without it becoming smelly or messy.
- Ensure the enclosure is at least 3 feet tall to allow for easy cleaning access for you while keeping the footprint small.
- Incorporate a small ‘porch’ area for the ducks using flat stones to help keep their feet clean and dry in a high-traffic small space.
Conclusion: Your Garden, Your Sanctuary
Creating an aesthetic garden is a journey of patience, creativity, and a little bit of dirt under your fingernails. Whether you’re arranging the perfect porch pots or ensuring your home’s foundation is safe with better drainage, every step you take brings you closer to an outdoor space that feels like home. Remember, the ‘perfect’ garden isn’t just the one that looks good on camera—it’s the one where you feel most at peace. Happy gardening!