
Rooted in Style: Decorating Your Home and Garden Like a Pro
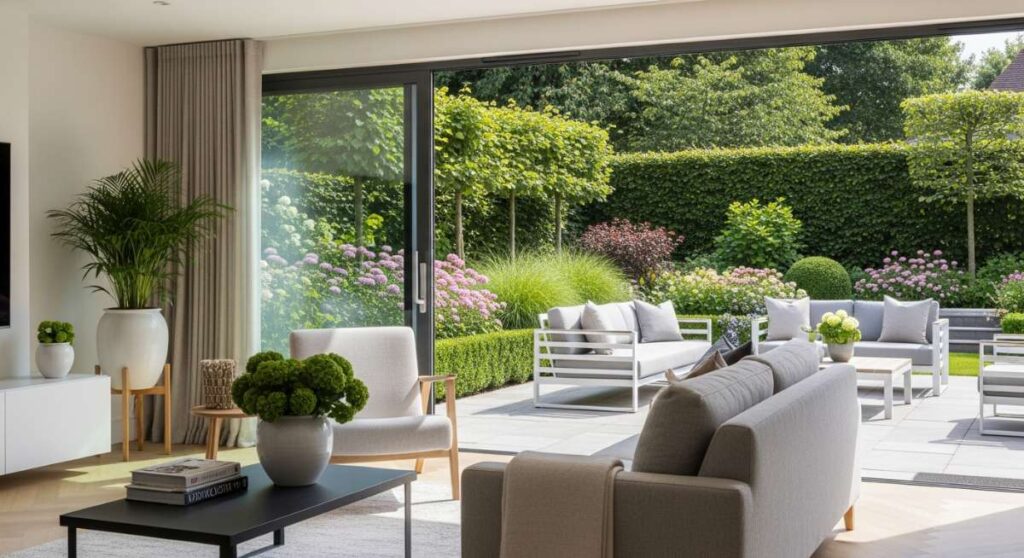
There is a specific kind of magic that happens when your home finally starts to feel like an extension of your soul. We’ve all scrolled through those perfectly curated feeds, feeling that little spark of inspiration, but also wondering, ‘How on earth do they make it look so effortless?’ Whether it’s the way the golden hour light hits a perfectly placed porch planter or the organized hum of a kitchen that actually works for a busy family, these details are what transform a house into a sanctuary. I’ve spent years experimenting with dirt under my fingernails and paint in my hair to find that sweet spot between ‘magazine-worthy’ and ‘actually livable.’
In this guide, we are diving deep into the projects that have gone viral for a reason: they combine aesthetic beauty with real-world functionality. We aren’t just talking about surface-level decor; we’re talking about creating spaces that invite you to slow down, breathe, and enjoy the life you’ve built. From the first greeting at your front door to the hidden corners of your backyard where you escape the world, let’s roll up our sleeves and get rooted in style together. It’s time to stop dreaming about that ‘Influencer’ home and start building it, one intentional project at a time.
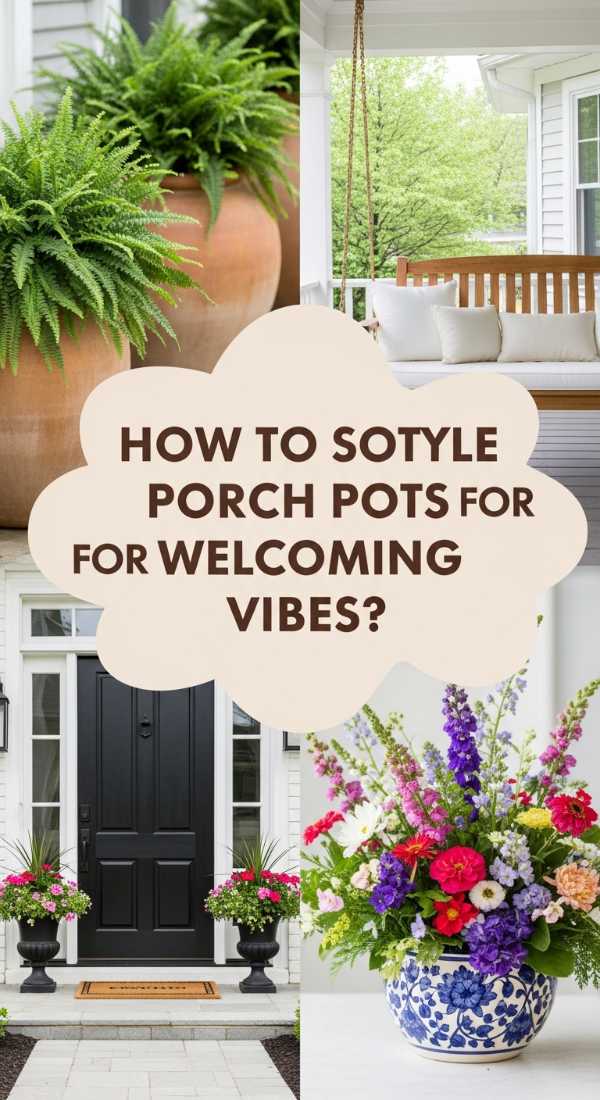
How to Style Front Porch Flower Pots for a Welcoming Home Entry
Why we love this
There is nothing quite like the welcoming embrace of a lush, vibrant front porch that greets you after a long day. Styling these pots is about more than just plants; it’s about creating a sensory experience of velvety petals, the earthy scent of damp potting soil, and the rhythmic sway of ornamental grasses in the breeze. When done right, these containers offer a burst of color that makes your entryway feel intentional and high-end, providing a living frame for your home that changes beautifully with the seasons. It’s the ultimate first impression that whispers, ‘Someone who cares lives here.’
Essential Elements:
- Large, weather-resistant planters in varied heights
- High-quality potting mix with perlite
- A ‘Thriller’ plant (e.g., Dracaena, Grasses, or Canna Lily)
- ‘Filler’ plants (e.g., Geraniums, Lantana, or Coleus)
- ‘Spiller’ plants (e.g., Sweet Potato Vine, Creeping Jenny, or Lobelia)
- Slow-release fertilizer granules
How to make it
- Select your vessels by choosing three pots of varying heights but in a cohesive color palette; this creates a professional ‘staggered’ look that draws the eye upward.
- Fill each container about two-thirds full with a lightweight, premium potting soil, ensuring you leave enough room for the root balls of your plants. Mix in a handful of slow-release fertilizer at this stage to provide a steady supply of nutrients.
- Place your ‘Thriller’ plant directly in the center or slightly toward the back of the pot. This should be your tallest, most dramatic element—think architectural leaves or bold height.
- Surround the thriller with your ‘Fillers.’ These are mounding plants that hide the ‘legs’ of your tall plant and add volume and color. Space them evenly to ensure the pot looks full from every angle.
- Tuck your ‘Spillers’ along the very edge of the pot, leaning them slightly outward. As they grow, they will cascade over the rim, softening the edges of the container for that lush, overflowing effect.
- Water deeply until liquid runs out of the drainage holes, then top off with a bit more soil if any settling occurs. Pro tip: Deadhead spent blooms weekly to encourage continuous flowering all season long.
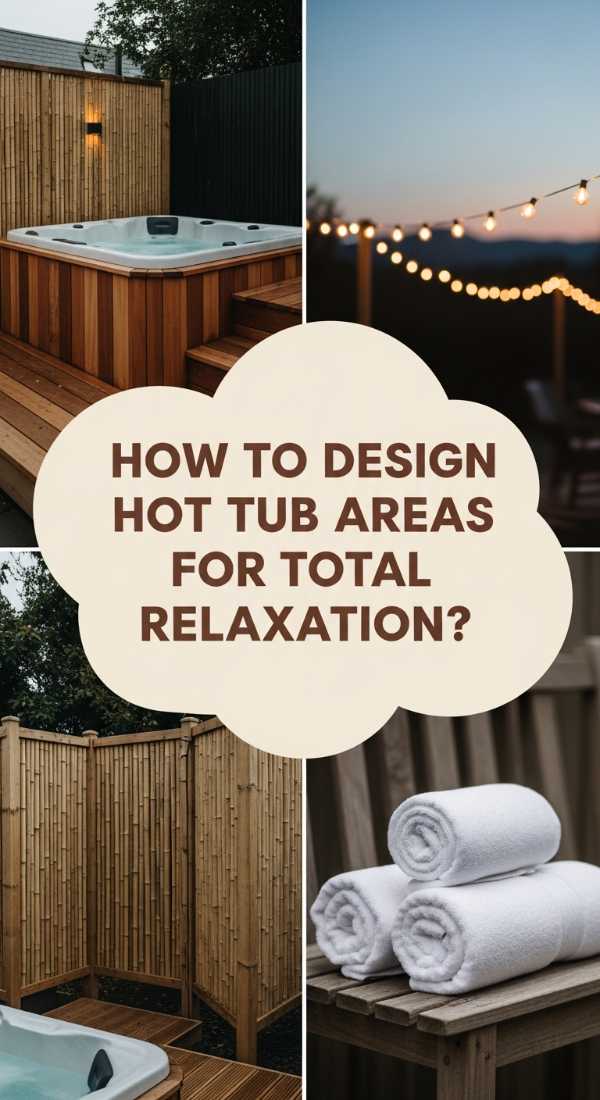
How to Design a Private Hot Tub Area for Ultimate Backyard Relaxation
Why we love this
Imagine the steam rising into the cool evening air, the gentle hum of bubbling water, and the absolute stillness of a space carved out just for you. A private hot tub area is the crown jewel of a backyard sanctuary, offering a tactile escape where the aroma of cedar or lavender-infused water melts away the day’s stress. It’s about the contrast between the hot, therapeutic water and the soft texture of outdoor rugs underfoot, all tucked away behind lush greenery or architectural screens that make the rest of the world disappear in a cloud of bubbles and peace.
Essential Elements:
- Privacy screens (wood slats, bamboo, or tall hedges)
- Weatherproof outdoor rug and lighting (string lights or solar lanterns)
- A sturdy, level foundation (concrete pad or reinforced deck)
- Convenient towel rack or weather-resistant storage bench
- Potted aromatic plants like Lavender or Jasmine
- Submersible LED mood lighting
How to make it
- Determine the placement by choosing a spot that is close enough to the house for easy access but far enough away to feel like a getaway. Ensure the ground is perfectly level; even a slight slope can put uneven pressure on the hot tub frame.
- Install your privacy boundary first. If using wood slats, space them about half an inch apart to allow airflow while still blocking the line of sight from neighbors. For a more organic feel, plant a row of ‘Green Giant’ Arborvitae which grow quickly and remain green year-round.
- Lay down a high-quality outdoor rug to define the ‘zone’ and provide a soft, non-slip surface for wet feet. Choose a material like polypropylene that dries quickly and resists mold.
- Set up your lighting by draping Edison-style string lights overhead or along the fence line. The goal is a soft, amber glow rather than harsh overhead light. Professional tip: Use a dimmer switch to adjust the ambiance based on your mood.
- Add a ‘dry zone’ within arm’s reach. This includes a sturdy bench for setting down robes and a waterproof basket for fresh towels. This prevents you from having to drip across the yard once you’re done soaking.
- Incorporate greenery around the perimeter to soften the hard lines of the tub. Use large pots filled with fragrant herbs that release their scent when brushed against, enhancing the spa-like atmosphere.
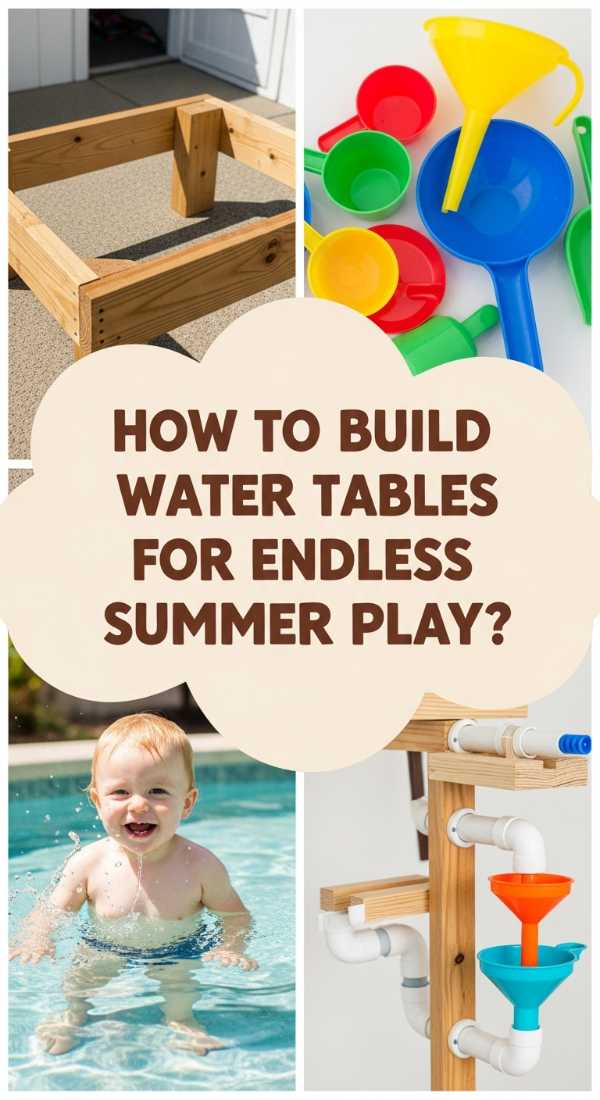
How to Build a Fun Water Table for Kids for Endless Summer Play
Why we love this
There is a pure, unbridled joy in the sound of children splashing in cool water on a sun-drenched afternoon. A DIY water table isn’t just a toy; it’s a sensory laboratory where little hands explore the physics of pouring, the coolness of the stream, and the satisfying clink of plastic toys against a sturdy frame. We love this project because it keeps kids engaged for hours in the fresh air, offering a tactile experience that blends the refreshing chill of water with the warmth of the summer sun, all while looking stylish enough to sit on any modern patio.
Essential Elements:
- Pressure-treated 2×4 lumber for the frame
- Large, shallow plastic storage bins (tubs)
- Exterior grade wood screws
- Waterproof wood stain or outdoor paint
- Assorted PVC pipes, funnels, and water pumps
- Drainage plugs (optional but recommended)
How to make it
- Measure your plastic bins first, as the entire frame will be built to accommodate their specific dimensions. You want the bins to hang by their lips, so the internal frame opening should be slightly smaller than the bin’s rim.
- Construct the rectangular top frame using your 2x4s and wood screws. Double-check that your bins fit snugly within the openings before proceeding to the legs.
- Cut four legs to a height that is comfortable for your children (usually between 18 and 24 inches). Attach the legs to the inside of the frame corners using heavy-duty lag bolts for maximum stability—this table will be heavy once filled with water!
- Sand all wood surfaces thoroughly to prevent splinters. Apply two coats of an outdoor-rated stain or paint to protect the wood from constant splashing and UV rays.
- If you want easy cleanup, drill a hole in the bottom of each bin and install a standard marine drain plug. This allows you to empty the table without having to lift heavy, water-filled tubs.
- Add the ‘fun factor’ by attaching PVC pipe sections to the side of the frame using U-brackets. This creates a gravity-fed water run. Fill with water, add some floating toys, and let the sensory play begin!
How to Create Lush Front Yard Flower Beds for Instant Curb Appeal

Why we love this
A well-designed flower bed is like a beautifully composed painting that changes every day. It’s the visual handshake of your home, offering a rich tapestry of textures—from the feathery fronds of ferns to the bold, waxy leaves of hostas. We love the way a layered flower bed adds depth and dimension to a flat lawn, filling the air with the sweet perfume of blossoms and the busy hum of pollinators. It creates a sense of arrival and pride, making even a simple house look like a curated estate through the power of thoughtful planting and rich, dark mulch.
Essential Elements:
- Edging material (metal, stone, or a clean ‘v-trench’ edge)
- Quality topsoil and compost mix
- A mix of Perennials (foundation) and Annuals (seasonal color)
- Hardscaping elements like boulders or birdbaths
- Landscaping fabric (optional for weed control)
- Premium wood mulch (dark brown or black for contrast)
- Mark out your bed’s shape using a garden hose or spray paint. Aim for soft, flowing curves rather than rigid straight lines; curves feel more organic and high-end.
- Remove the grass within the marked area using a flat-head spade. Dig down at least 4 inches to ensure you’ve removed all root systems. This is the hardest part, but a clean slate is vital for long-term success.
- Amend the soil by mixing in several bags of organic compost. This improves drainage and provides the nutrients your new plants need to establish strong root systems. Level the area with a garden rake.
- Arrange your plants while they are still in their nursery pots. Place the tallest shrubs in the back (near the house), medium-height perennials in the middle, and low-growing groundcovers or annuals at the very front. Step back and look from the street to ensure the balance is right.
- Dig holes twice as wide as the root balls and plant your selections, ensuring the top of the root ball is level with the soil surface. Pack the soil firmly but gently around each plant.
- Apply a 3-inch layer of mulch over the entire bed, keeping it an inch away from the stems of the plants to prevent rot. Mulch is the ‘secret sauce’ that suppresses weeds and gives the bed a professional, finished look.
- Airtight glass or BPA-free plastic canisters
- Uniform labels (chalkboard, vinyl, or printed)
- Tiered shelving for canned goods
- Deep baskets for ‘backstock’ or bulky items
- Lazy Susans for oils and vinegars
- Over-the-door rack for small snacks or spices
- Start by completely emptying your pantry. This ‘blank slate’ approach allows you to see the space clearly and, more importantly, check expiration dates on everything you own. Wipe down the shelves with a warm, soapy cloth.
- Categorize your items into groups: Baking, Breakfast, Grains/Pasta, Snacks, and Dinner Prep. This ‘zoning’ is the foundation of a functional pantry.
- Decant your most-used dry goods (flour, sugar, pasta, cereal) into uniform airtight containers. Not only does this look beautiful, but it also keeps food fresh longer and prevents pests. Pro tip: Clip the ‘cooking instructions’ or ‘expiration date’ from the original packaging and tape it to the bottom of the jar.
- Utilize vertical space with tiered ‘stadium seating’ shelves for cans. This ensures you can see the labels of the back row without having to move everything in the front.
- Place heavy or bulky items like bags of potatoes or extra paper towels in large woven baskets on the floor or bottom shelf. This keeps the visual clutter at bay while keeping heavy items easy to access.
- Label everything! Even if you think you’ll remember which is bread flour and which is all-purpose, labels create a system that the whole family can follow, ensuring the pantry stays organized long after the initial setup.
- Durable, easy-wipe work tables
- Washable rug or linoleum flooring
- Clear, accessible storage bins for supplies
- A dedicated ‘Gallery Wall’ for displaying work
- Drying rack for wet paintings
- Art cart on wheels for mobile projects
- Choose a room or corner with the best natural light. If natural light is limited, install ‘daylight’ LED bulbs to ensure colors are seen accurately. The floor should be protected with a splat mat or a low-pile, washable rug.
- Set up ‘The Maker Station’ with a sturdy table at a height where kids can either sit or stand comfortably. A table with a laminate top is ideal for easy cleanup of glue and paint spills.
- Organize supplies by type in clear, open-topped bins. Grouping markers, colored pencils, and crayons separately makes it easy for little hands to find what they need—and more importantly, where to put them back.
- Create a ‘Wet Zone’ featuring a drying rack and a small wash station (even just a basin and paper towels) so that messy projects have a safe place to land without ruining other surfaces.
- Design an ‘Inspiration Board’ or gallery wire with clips. Rotating the art frequently keeps the room feeling fresh and gives children a sense of accomplishment as they see their work ‘published’ on the wall.
- Implement a ‘Clean-up Routine’ by labeling bins with both words and pictures. This teaches responsibility and ensures that the creative space remains inviting rather than overwhelming.
- Assorted landscaping rocks (River rock, pea gravel, or crushed granite)
- Heavy-duty landscape fabric
- Galvanized steel or heavy plastic edging
- Drought-tolerant plants (Succulents, Lavender, Blue Fescue)
- Landscape staples
- Large ‘statement’ boulders
- Excavate the area to a depth of about 3 inches. Like a traditional flower bed, removing the grass and top layer of soil is crucial for preventing weeds from pushing through your rocks later.
- Install a sturdy edging material. This is vital for rock beds, as it keeps the stones from migrating into your lawn. Steel edging provides a slim, modern profile that lasts a lifetime.
- Lay down a professional-grade, woven landscape fabric. Overlap the seams by at least 6 inches and secure it tightly with landscape staples every 12 inches. This fabric allows water to drain but prevents soil from mixing with your clean rocks.
- Cut ‘X’ shapes into the fabric where you want your plants to go. Dig your holes, amend the soil specifically for the plant’s needs (succulents need gritty, well-draining soil), and plant them securely.
- Place your large ‘statement’ boulders first. These should be partially buried (about 1/3 of the way) so they look like they are naturally emerging from the earth rather than just sitting on top.
- Pour your decorative rocks around the plants and boulders. Spread them evenly to a depth of 2-3 inches. Pro tip: Use a leaf blower on a low setting to easily clear away any fallen leaves or debris from the rocks without moving the stones.
- Heat-treated (HT) wood pallets
- Old stainless steel sink or plastic washing basins
- Outdoor-rated wood screws and hooks
- Second-hand kitchen utensils (spoons, whisks, pots)
- Water source (hose or a large drink dispenser)
- Sandpaper and outdoor wood sealant
- Source two or three pallets, ensuring they are marked with ‘HT’ (Heat Treated) rather than ‘MB’ (Methyl Bromide), which is a toxic pesticide. Safety first when children are involved!
- Dismantle one pallet to use the boards for the countertop and shelving. Use the other two pallets as the base and the backboard. Sand every single inch thoroughly; pallet wood is notorious for splinters.
- Cut a hole in your ‘countertop’ pallet boards that is slightly smaller than the lip of your sink or basin. Drop the sink in to ensure a snug fit.
- Assemble the frame by attaching the backboard pallet vertically to the base pallet. Secure the countertop boards at a height that matches your child’s waist. Use heavy-duty screws and corner brackets for stability.
- Attach hooks to the backboard for hanging spoons and pans. Add a small shelf for ‘spice jars’ filled with pebbles, acorns, and dried petals.
- Apply a generous coat of clear, non-toxic outdoor sealant. This protects the wood from the inevitable water and mud it will be drenched in. Set up near a garden hose and let the ‘cooking’ begin!
- Pressure-treated 2×6 or 2×8 joists
- Decking boards (Cedar, Redwood, or Composite)
- Deck blocks (like TuffBlocks) or concrete footers
- Level and chalk line
- Hidden deck fasteners or specialized deck screws
- End-cut solution to seal cut wood
- Clear and level the area where the deck will sit. Lay down landscape fabric and a layer of gravel to prevent weeds and ensure good drainage under the structure.
- Layout your deck blocks. These sit on the ground and hold your frame. Space them according to your local building codes (usually every 4-5 feet). Use a long straight board and a level to ensure every block is perfectly even with the others.
- Build the outer box frame using pressure-treated lumber. Check for square by measuring the diagonals; they must be identical. Once square, install the inner joists 16 inches apart (on center).
- Apply joist tape to the top of the frame. This is a pro secret that prevents water from sitting on the joists, doubling the life of your deck.
- Install your decking boards. Start from the outside and work your way in. Use spacers to ensure consistent gaps for drainage and expansion. For a high-end look, use hidden fasteners so no screw heads are visible on the surface.
- Trim the edges of the boards with a circular saw for a perfectly straight finish. Sand any rough edges and apply a high-quality UV-protectant stain to keep the wood from graying over time.
- 4×4 lumber for legs and 2x4s for the tabletop
- Kreg Jig (pocket hole system) and pocket hole screws
- Waterproof wood glue (Titebond III)
- Power sander and various grits of sandpaper
- Exterior wood stain and spar urethane sealer
- Clamps (the more, the better!)
- Cut your 4×4 legs and 2×4 apron pieces to your desired size. A standard dining table is usually 30 inches high. Use a Kreg Jig to drill pocket holes into the apron pieces.
- Assemble the base by attaching the aprons to the legs using wood glue and pocket hole screws. Ensure everything is square; a wobbly table is a DIYer’s nightmare!
- Prepare the tabletop by cutting 2×4 or 2×6 boards to length. For a ‘farmhouse’ look, use a breadboard end design. Drill pocket holes along the length of the boards to join them together.
- Apply a bead of waterproof wood glue between each board before screwing them together. Use large pipe clamps to hold the tabletop tight while the glue dries (at least 24 hours). This creates a solid, gap-free surface.
- Sand the entire table, starting with 80-grit and working your way up to 220-grit. The goal is a surface that feels like glass to the touch. Wipe away all dust with a tack cloth.
- Apply a high-quality outdoor stain followed by at least three coats of spar urethane. Spar urethane contains UV blockers and expands/contracts with the temperature, which is essential for preventing cracks in outdoor furniture.
How to make it
How to Achieve Realistic Pantry Organization for a Stress Free Kitchen

Why we love this
There is a profound sense of calm that comes from opening a pantry door and seeing exactly what you have. It’s the satisfying ‘clink’ of a glass lid, the uniform rows of labeled jars, and the elimination of that frantic ‘where is the flour?’ search mid-recipe. We love realistic organization because it’s not just about the ‘aesthetic’—it’s about systems that work for real life. It’s the smell of dried spices, the orderly texture of woven baskets, and the visual peace of a kitchen that supports your creativity rather than hindering it with clutter.
Essential Elements:
How to make it
How to Set Up Inspiring Elementary Art Rooms for Young Creative Minds

Why we love this
An art room should feel like a playground for the imagination, a place where the scent of tempera paint and the sight of a rainbow-ordered crayon bin spark instant excitement. We love this setup because it honors the beautiful mess of childhood. It’s a space filled with the tactile crunch of construction paper, the smooth glide of markers, and the pride of a drying rack filled with new masterpieces. By creating an intentional space for art, you’re telling a child that their ideas have value and that creativity is a vital part of every day.
Essential Elements:
How to make it
How to Install Rock Flower Beds for a Beautiful Low Maintenance Yard
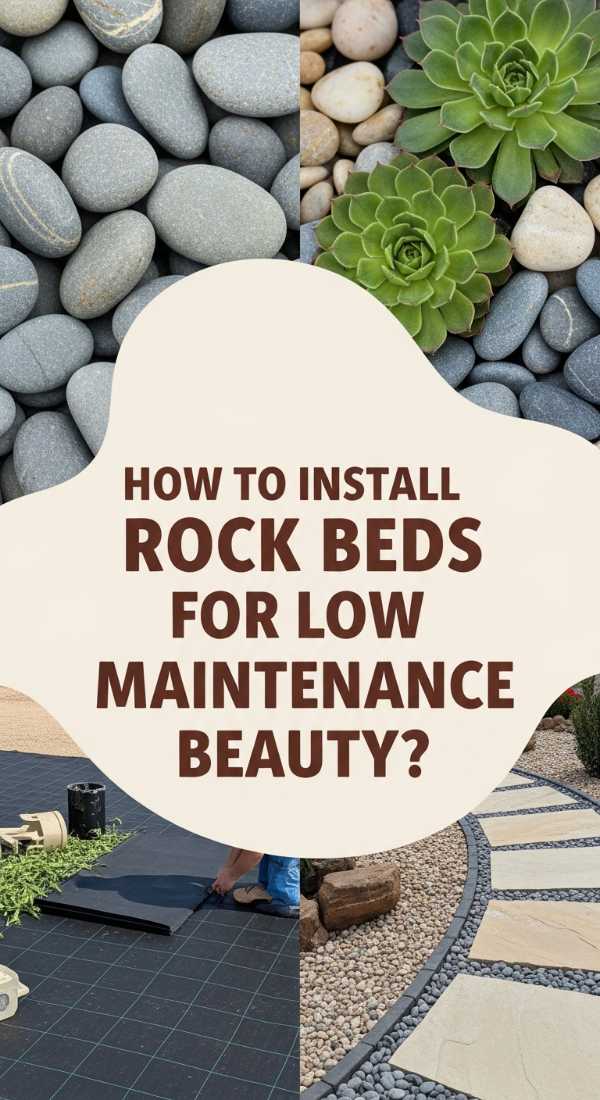
Why we love this
Rock flower beds offer a sophisticated, desert-modern aesthetic that is as practical as it is beautiful. We love the crunch of river rock under a garden spade and the way a variety of stone textures—from smooth pebbles to jagged lava rocks—can highlight the sculptural beauty of succulents and ornamental grasses. It’s a permanent solution for those ‘trouble spots’ where grass won’t grow, providing a clean, architectural look that requires almost zero upkeep. It’s the perfect marriage of rugged durability and refined style.
Essential Elements:
How to make it
How to Make a Pallet Mud Kitchen for Natural Sensory Play
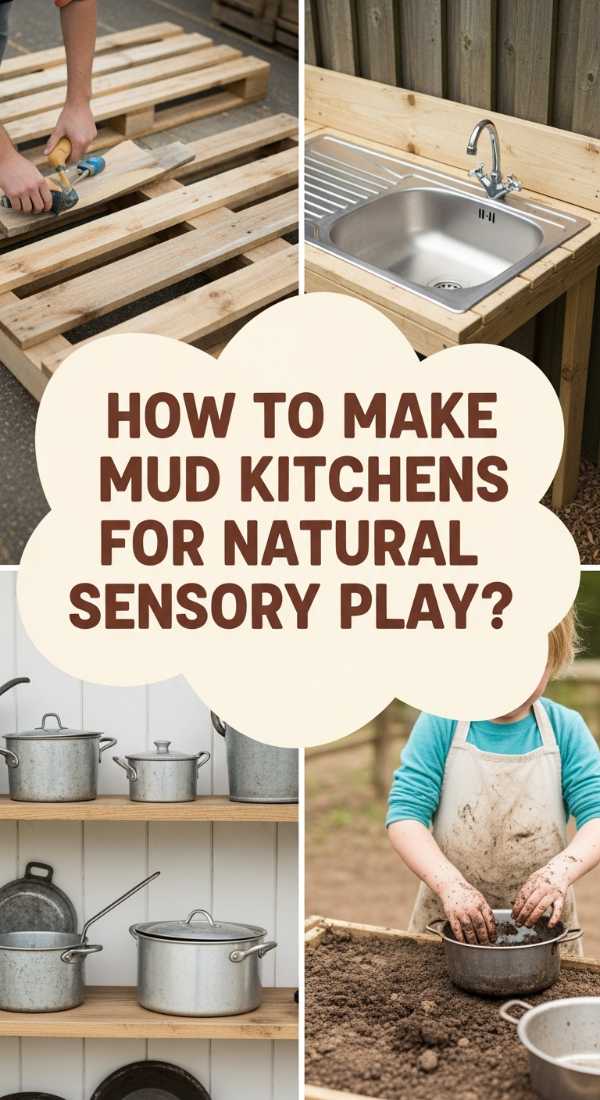
Why we love this
The mud kitchen is the ultimate tribute to the ‘slow childhood.’ It’s about the squish of cool mud between fingers, the floral scent of ‘flower soup,’ and the focused concentration of a child ‘baking’ a dirt pie. We love the rustic, reclaimed charm of using pallets to build something so magical. It’s a tactile, outdoor space that encourages messy play, where the only limit is imagination. It’s a beautiful way to upcycle wood into a centerpiece for backyard exploration that smells like rain and earth.
Essential Elements:
How to make it
How to Build a Floating Deck for a Sophisticated Entertaining Space
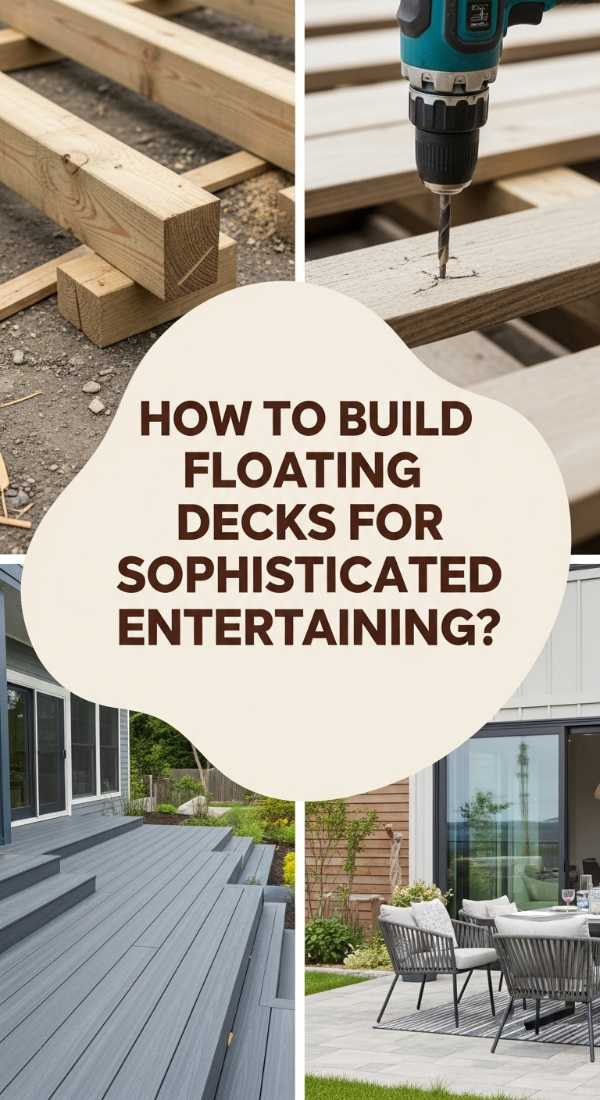
Why we love this
A floating deck is the ultimate ‘level up’ for a backyard, creating a defined stage for summer dinner parties and quiet morning coffees. Unlike traditional decks, a floating deck sits just above the ground, giving it a sleek, modern look that feels integrated with the landscape. We love the warmth of the wood against the cool grass, the solid feel of a well-built platform, and the way it instantly transforms a patch of yard into a sophisticated ‘outdoor room.’ It’s an inviting, textured space that begs for bare feet and good conversation.
Essential Elements:
How to make it
How to Craft a Custom DIY Patio Table for Elegant Outdoor Dining

Why we love this
There is a special pride in sitting down to a meal at a table you built with your own two hands. A custom patio table is more than just furniture; it’s the heartbeat of your outdoor entertaining. We love the substantial, heavy feel of solid wood, the smooth, stained finish that highlights the grain, and the way it provides a canvas for linen runners and flickering candles. It’s an investment in future memories—of long summer evenings, clinking glasses, and the lingering scent of grilled food shared with the people you love most.
Essential Elements:
How to make it
Conclusion
Creating a home and garden that reflects your personal style is a journey, not a destination. Whether you’re starting small with a few porch pots or tackling a weekend deck build, the key is to lean into the process. Each project we’ve explored today is designed to add not just value to your home, but joy to your daily life. So, take these tips, make them your own, and remember that the most beautiful homes are the ones that are lived in, loved in, and constantly evolving. Happy styling!