
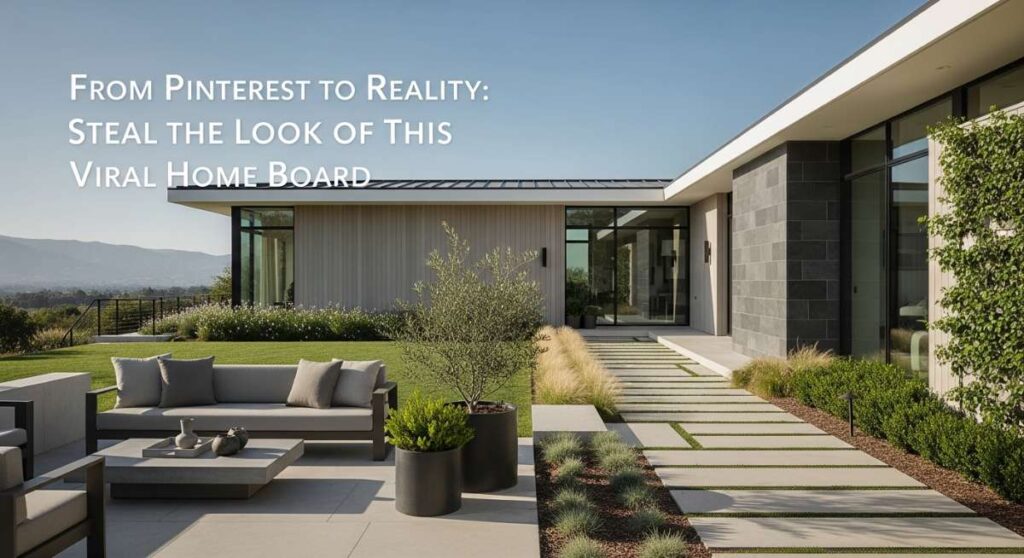
We’ve all been there—it’s 11:00 PM, the house is finally quiet, and you find yourself spiraling down a Pinterest rabbit hole of perfectly manicured lawns and sleek, modern facades. There is a specific magic to those viral ‘Simple Home & Exterior’ boards that makes us feel like we can breathe deeper just by looking at them. It’s that perfect blend of clean lines, intentional greenery, and those little architectural details that whisper ‘luxury’ without screaming for attention. I spent last week obsessively deconstructing one of the most saved boards on the platform to figure out how to bring that ethereal vibe into our actual daily lives.
The truth is, these homes aren’t just beautiful because of a massive budget; they are beautiful because of a cohesive vision. They play with light, texture, and geometry in a way that feels both grounded and aspirational. Whether you are living in a fixer-upper ranch or looking to spruce up a modern new build, the elements that make these images go viral are actually within your reach. Let’s stop pinning and start building our own sanctuary by stealing the exact design language used by the pros.
In this guide, I’m breaking down the ten essential projects and design moves that will take your home from ‘before’ to ‘Pinterest-after.’ We’re talking everything from the structural bones of a ranch renovation to the delicate shimmer of garden glass. Grab your coffee (and maybe a tape measure), because we are about to turn your home into the neighborhood inspiration board.
How to Modernize Retro Exteriors for Total Curb Appeal Transformation

Why we love this
There is something incredibly satisfying about watching a dated, tired exterior shed its old skin and emerge as a contemporary masterpiece. This transformation isn’t just about a coat of paint; it’s about the tactile contrast between smooth matte surfaces and the rough, organic texture of natural wood accents. You can almost feel the cool breeze hitting the updated siding and see the way the shadows play across the new, sharp architectural lines in the late afternoon sun. It creates a sense of pride every time you pull into the driveway, offering a visual ‘sigh of relief’ that welcomes you home.
Essential Elements:
- Matte black or charcoal exterior paint
- Natural cedar or white oak slat accents
- Modern, low-profile address numbers
- Updated LED sconce lighting
- Sleek, minimalist rain gutters
How to make it
- Begin by thoroughly pressure washing the entire exterior to remove decades of grime, oxidation, and loose paint, ensuring a pristine surface for adhesion.
- Apply a high-quality masonry or wood primer specifically formulated for the substrate, using a professional-grade airless sprayer for an even, streak-free coat that fills in small cracks.
- Paint the main body of the house in a deep, neutral matte finish; use long, overlapping strokes and maintain a wet edge to prevent visible lap marks.
- Install vertical or horizontal wood slats over specific focal points, such as the entryway or between windows, using stainless steel trim nails to prevent rust weeping.
- Finish by swapping out outdated hardware for matte black alternatives, ensuring everything is level and centered to create that sharp, high-end architectural look.
How to Style Glass Sculptures for a Luminous Garden Vibe
Why we love this
Integrating glass into a garden is like catching lightning in a bottle; it transforms the way your outdoor space interacts with the sun. As the light shifts throughout the day, these sculptures create dancing prisms of color that skip across the grass and highlight the delicate veins of nearby leaves. There is a cooling, liquid quality to the glass that contrasts beautifully with the dry textures of mulch and stone, making the garden feel like a living art gallery. The sound of a soft breeze passing through glass arrangements adds a subtle, rhythmic clarity to the air that feels both peaceful and sophisticated.
Essential Elements:
- Hand-blown glass orbs or shards
- Sturdy, hidden metal ground stakes
- Directional spotlights for nighttime illumination
- Low-growing ground cover for contrast
- Polished river stones for a base
How to make it
- Observe your garden’s light patterns for a full day to identify ‘hot spots’ where the sun hits directly, as these are the ideal locations for maximum refraction.
- Clear a small circular area of mulch or grass, and lay down a bed of smooth river stones to create a clean, intentional foundation for the glass art.
- Secure the glass sculpture using heavy-duty landscape adhesive or the provided metal stakes, ensuring it is buried deep enough to withstand high winds.
- Angle the glass slightly toward the southwest to catch the ‘golden hour’ light, which creates the most dramatic long-range color reflections across your lawn.
- Install a low-voltage LED uplight at the base, directed upward into the heart of the glass, to ensure the sculpture glows with an ethereal light long after the sun goes down.
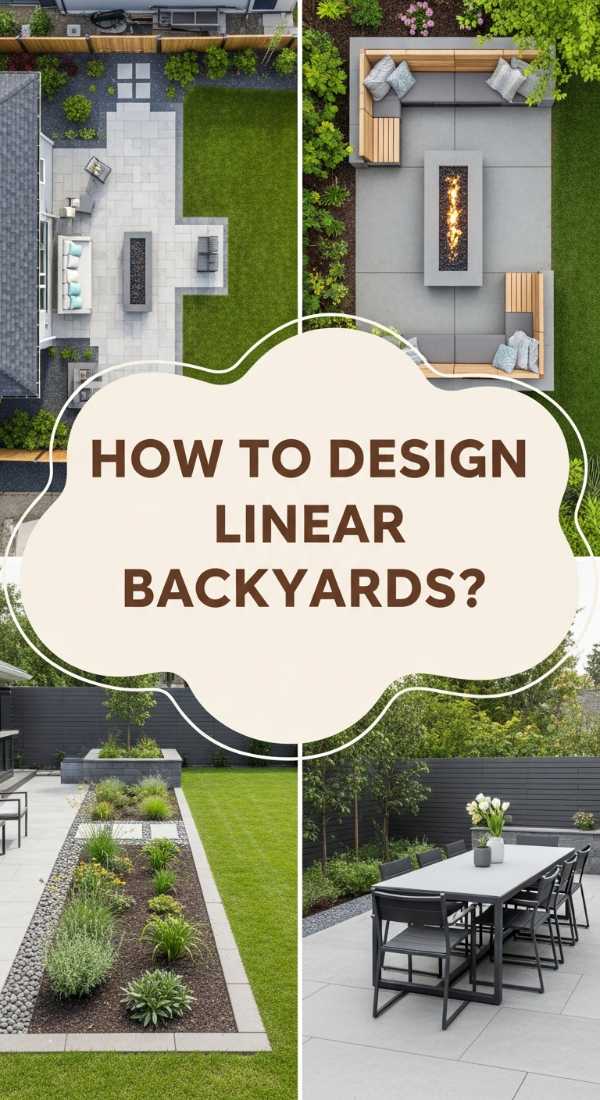
How to Design Linear Backyards for Optimal Flow
Why we love this
Linear backyards bring a sense of mathematical peace to an outdoor space, replacing chaos with intentionality and clear purpose. The crisp, straight edges of pavers and garden beds draw the eye toward the horizon, making even a small yard feel infinitely larger and more organized. You can feel the intentionality in every step as you move from a hardscaped dining area to a soft, manicured lawn, with no awkward corners or wasted space. It’s a design style that celebrates the beauty of perspective, creating a rhythmic flow that feels as curated as a high-end boutique hotel courtyard.
Essential Elements:
- Large-format rectangular concrete pavers
- Artificial or high-maintenance fescue turf
- Metal edging for razor-sharp borders
- Linear fire feature or water trough
- Symmetrical planting rows
How to make it
- Start by sketching a gridded plan of your yard, using a 90-degree layout to ensure every path and bed runs perfectly parallel or perpendicular to the house.
- Excavate the site to a depth of six inches, then lay a four-inch base of compacted crushed stone followed by a one-inch layer of leveling sand.
- Install your pavers with a 1/4 inch gap for polymeric sand, using a string line and a long level to ensure the surface is perfectly flat with a slight pitch for drainage.
- Define the garden beds using black steel landscape edging, hammering it deep into the ground so only a thin, crisp line remains visible at the surface.
- Plant rows of architectural grasses, like Karl Foerster, in perfectly spaced intervals to reinforce the linear geometry and provide vertical height without bulk.
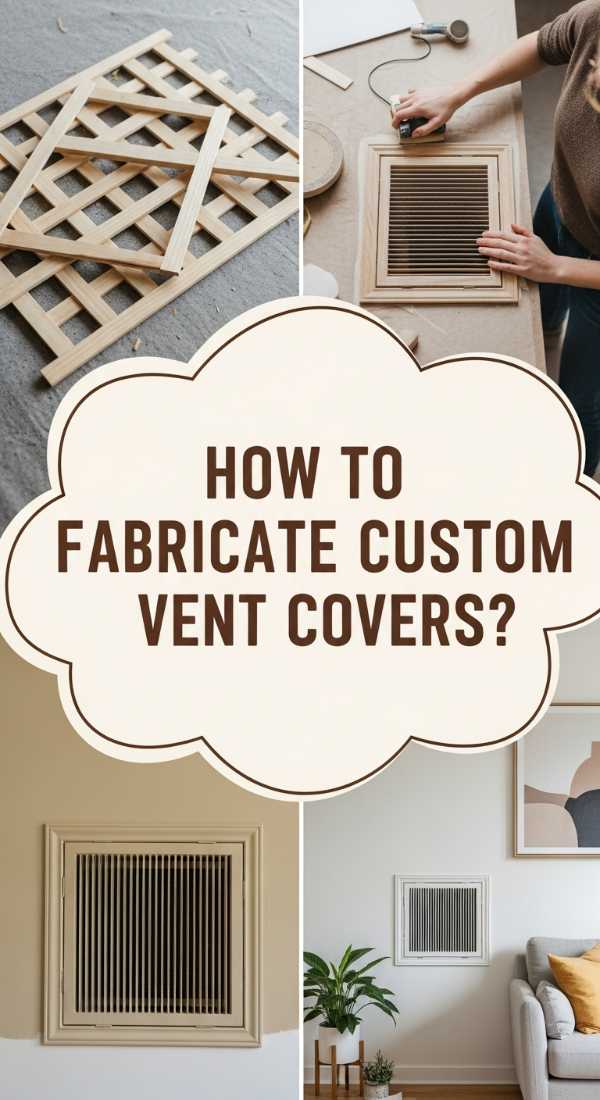
How to Fabricate Custom Vent Covers for a Polished Finish

Why we love this
It is the small, often overlooked details like vent covers that separate a DIY project from a professional-grade renovation. Replacing standard, plastic or rusted metal vents with custom-fabricated covers adds a layer of industrial chic that feels incredibly expensive and thoughtful. There’s a tactile satisfaction in the weight of a custom steel or wood grate, and the way it sits flush with the exterior siding creates a seamless, uninterrupted visual plane. These covers turn a utilitarian necessity into a design feature, proving that every square inch of a home is worthy of aesthetic consideration.
Essential Elements:
- Sheet metal or cedar slats
- Laser-cutting service or a steady jigsaw
- High-heat resistant spray paint
- Stainless steel flush-mount screws
- Magnetic catch or hidden brackets
How to make it
- Measure the interior and exterior dimensions of your existing vent openings, allowing for a half-inch overlap on all sides to hide the rough edges of the cutout.
- Design a pattern—geometric slats or a honeycomb grid work best—and cut your material to size using a jigsaw with a metal-cutting blade for precision.
- Sand all edges of the new cover until they are rounded and smooth to the touch, preventing any future snags or cuts during maintenance.
- Apply three coats of weather-resistant enamel paint in a color that matches your trim, allowing each coat to dry for four hours to prevent bubbling or runs.
- Drill pilot holes into the corners and mount the cover using color-matched screws, ensuring the vent is perfectly plumb to maintain the clean lines of the exterior.
How to Construct Budget Fencing for Ultimate Backyard Privacy
Why we love this
Privacy is the ultimate luxury, and there is a specific feeling of safety and seclusion that comes from being wrapped in a beautiful, horizontal slat fence. The warm, honey-toned wood smells of cedar and sunshine, creating a cozy perimeter that blocks out the noise of the world while letting soft slivers of light through. Unlike traditional vertical fencing, horizontal lines feel modern and expansive, stretching the visual width of your property. It’s the kind of project that instantly turns a backyard into a private sanctuary where you can truly relax without the prying eyes of neighbors.
Essential Elements:
- 4×4 pressure-treated pine posts
- 1×6 cedar or treated pine pickets
- Galvanized deck screws
- Quick-set concrete mix
- Semi-transparent exterior stain
How to make it
- Dig post holes 24 inches deep and 6 feet apart, then set your 4×4 posts in concrete, using a plumb bob to ensure they are perfectly vertical as the mix cures.
- Install a bottom runner board two inches off the ground to prevent rot, using a laser level to ensure it is perfectly horizontal across the entire span.
- Stack your 1×6 boards horizontally, using 1/2 inch spacers between each board to allow for wood expansion and to create a modern, airy aesthetic.
- Drive two screws into each post per board, countersinking them slightly for a professional finish that hides the hardware under the wood’s surface.
- Apply a high-quality UV-rated stain using a wide brush, working the liquid into the gaps to ensure the wood is fully protected from moisture and sun bleaching.
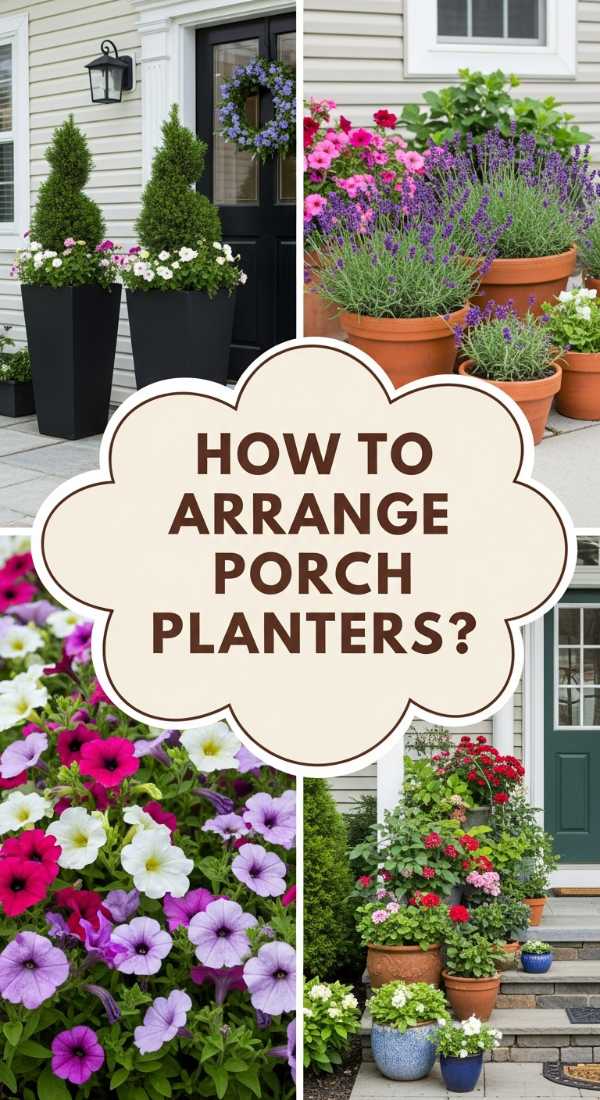
How to Arrange Porch Planters for Instant Home Warmth
Why we love this
The entryway is the handshake of the home, and a well-arranged set of porch planters offers a greeting that is both lush and sophisticated. There is a sensory delight in the scent of damp earth and the vibrant green of overflowing vines spilling over the edge of a heavy, stone-textured pot. These planters add a necessary softness to the hard angles of an entrance, providing a burst of life that changes with the seasons. It makes the act of coming home feel like an event, wrapping the front door in a layer of organic texture and welcoming color.
Essential Elements:
- Graduated set of three planters (Small, Medium, Large)
- High-quality potting soil with perlite
- A ‘Thriller’ (tall plant), ‘Filler’ (mounded plant), and ‘Spiller’ (trailing plant)
- Slow-release fertilizer granules
- Decorative moss or mulch topper
How to make it
- Select a trio of pots in varying heights but with a consistent color or material to create a cohesive, tiered look that draws the eye upward toward the door.
- Fill the bottom third of the pots with empty plastic water bottles or packing peanuts to reduce weight and improve drainage before adding premium potting soil.
- Place your ‘Thriller’ (like a Sansevieria or Grass) in the back-center, then surround it with ‘Fillers’ (like Petunias) to create a sense of lush density.
- Tuck ‘Spillers’ (like Creeping Jenny or Ivy) near the front edge so they can gracefully cascade down the sides of the pot, softening the transition to the floor.
- Water thoroughly until liquid runs out of the drainage holes, then top with a layer of dark wood mulch to retain moisture and provide a clean, finished appearance.
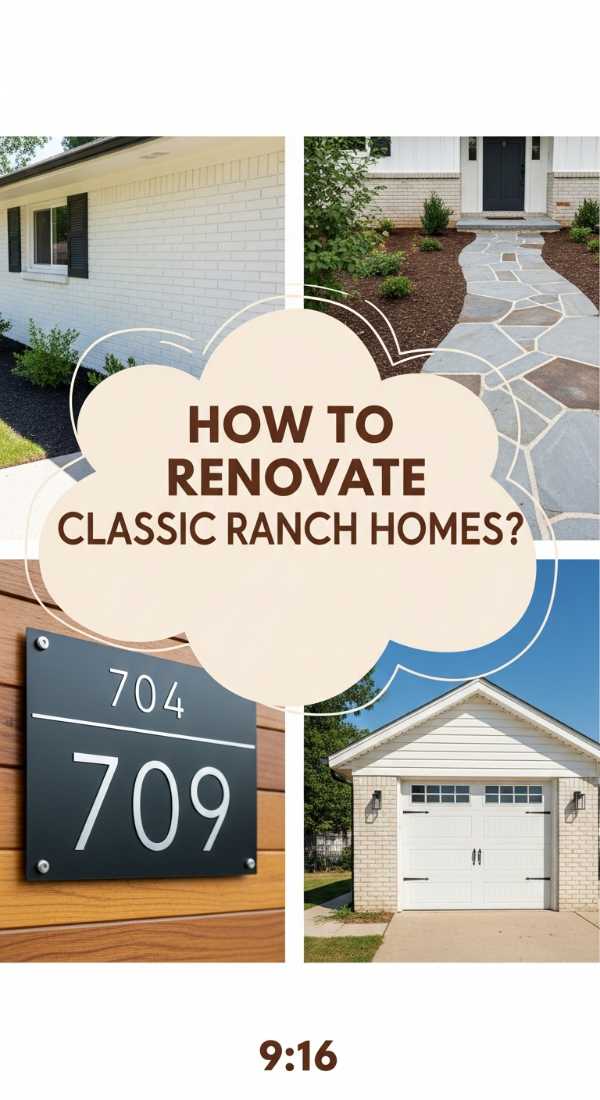
How to Renovate Classic Ranch Homes for Contemporary Living

Why we love this
Classic ranch homes are the unsung heroes of suburban architecture, offering a long, low profile that is ripe for a modern, open-concept transformation. Renovating a ranch is about honoring its mid-century roots while injecting it with the light and flow of contemporary design. Imagine walking into a space where walls have been replaced by light, and the barrier between the indoors and the backyard has been blurred by massive glass sliders. It’s a renovation style that feels grounded, easy to navigate, and incredibly spacious, proving that single-story living can be the height of sophistication.
Essential Elements:
- Open-concept floor plan (removing non-load-bearing walls)
- Large black-frame casement windows
- Vaulted ceilings or exposed beams
- Natural oak flooring throughout
- Minimalist, handle-less cabinetry
How to make it
- Consult with a structural engineer to identify load-bearing walls; replace them with recessed steel beams to create a wide-open living, dining, and kitchen area.
- Update the window schedule by enlarging the openings to accommodate floor-to-ceiling black aluminum frames, maximizing the intake of natural light.
- Refinish the existing hardwood or install wide-plank European Oak, using a matte clear coat to keep the wood looking raw, natural, and modern.
- Replace the low-pitched roof shingles with a standing-seam metal roof in a dark bronze or charcoal to emphasize the home’s long, sleek horizontal lines.
- Strip away ornate trim and molding, opting for a ‘square-set’ plaster finish and simple 4-inch flat-stock baseboards to maintain a clean, minimalist interior.
How to Position Artistic Garden Glass for Radiant Outdoor Spaces

Why we love this
There is a specific kind of magic that happens when art meets the elements, and garden glass is the perfect medium for this intersection. The way a glass shard catches the morning dew, turning a simple garden bed into a field of diamonds, is nothing short of breathtaking. It adds a layer of curated elegance that feels more permanent and intentional than plants alone. When positioned correctly, these pieces act as light-catchers that draw the eye to the furthest corners of your property, making the entire outdoor space feel used, loved, and thoughtfully designed.
Essential Elements:
- Cobalt, amber, or clear glass spikes
- Strategic placement near water features
- Low-voltage landscape lighting
- Minimalist metal supports
- Neutral-colored gravel beds
How to make it
- Identify the focal points of your yard from the main interior windows, as the goal is to create ‘visual destinations’ that look beautiful from the inside out.
- Group glass pieces in odd numbers (3, 5, or 7) and vary their heights to mimic the organic growth patterns of natural flora, preventing a ‘static’ look.
- Angle the glass faces toward the setting sun to capture the intense oranges and reds of dusk, which will illuminate the glass from within like a glowing ember.
- Clear away any overhanging branches that might cast heavy shadows, ensuring the glass has a clear ‘view’ of the sky for maximum light absorption.
- Incorporate a small recirculating water pump nearby; the reflection of moving water on the glass surface creates a shimmering, dynamic effect that is mesmerizing.
How to Organize Geometric Yards for Seamless Entertaining

Why we love this
A geometric yard is the ultimate backdrop for hosting, as it defines ‘rooms’ outdoors without the need for walls. The crisp squares and rectangles create a sense of order that makes guests feel immediately at ease, knowing exactly where to lounge, where to eat, and where to gather around the fire. There is a beautiful rhythm in the repetition of shapes—the square of the fire pit mirroring the rectangle of the pool or the grid of the patio stones. It’s a layout that feels incredibly high-end, like a private resort designed for the flow of conversation and the enjoyment of the open air.
Essential Elements:
- Zoned areas for lounging, dining, and fire
- Sunken fire pits or raised planters
- Uniform paving materials (e.g., travertine or slate)
- Boxwood hedges for structural definition
- Built-in seating benches
How to make it
- Divide your backyard into distinct functional zones using ‘rugs’ made of different materials, such as a concrete pad for dining and a gravel area for the fire pit.
- Construct raised garden beds using smooth-finish concrete or stone, ensuring they are exactly 18 inches high so they can double as extra seating for large parties.
- Plant tightly clipped boxwood or privet hedges along the perimeter of each zone to create ‘living walls’ that reinforce the geometric structure of the design.
- Install a central ‘spine’ path made of oversized pavers separated by two inches of decorative moss or pea gravel to connect all zones with a clear walking route.
- Use a consistent color palette for all furniture and textiles—think blacks, whites, and greys—to allow the green of the landscape to be the primary ‘pop’ of color.
How to Select Entrance Greenery for a Grand First Impression
[IMAGE_10]
Why we love this
Choosing the right greenery for your entrance is like selecting the perfect jewelry for an outfit; it’s the finishing touch that brings everything together. There is a dignity in a pair of perfectly symmetrical tall cypress trees or the architectural drama of a large-leafed agave flanking a modern door. The sight of vibrant, healthy leaves against a crisp house color creates an immediate sense of vitality and care. It tells everyone who passes by that the people inside value beauty and nature, creating a first impression that is both grand and deeply welcoming.
Essential Elements:
- Symmetrical ‘sentinel’ plants (trees or tall shrubs)
- Texture-heavy base plants (ferns or grasses)
- Scale-appropriate planters (larger is usually better)
- Automated drip irrigation for consistency
- Subtle ‘moonlighting’ from tree canopies
How to make it
- Measure the width of your entryway and select plants that, at full maturity, will take up no more than one-third of the total horizontal space to avoid crowding.
- Choose ‘sentinel’ plants like Sky Pencil Hollies or Italian Cypresses to add vertical height and frame the door, drawing the eye upward toward the architecture.
- Mix different leaf textures—pair the glossy, broad leaves of a Magnolia with the fine, feathery fronds of a Fern—to create a rich, multi-dimensional look.
- Ensure your planters are at least 20 inches in diameter to provide enough soil volume for the roots to stay cool and hydrated during the peak of summer.
- Tuck a 1/4-inch drip irrigation line into the back of each pot, connected to a smart timer, to ensure your ‘first impression’ stays lush and green without daily manual watering.
Turning Inspiration into Your Everyday Reality
Building a home that looks like it belongs on a viral Pinterest board isn’t about doing everything at once; it’s about the slow, intentional accumulation of these details. Start with one project—maybe it’s the porch planters or the custom vent covers—and watch how that one change ripples out to improve the entire feel of your home. These design principles of geometry, light, and texture are universal, and once you start seeing them, you can apply them to every corner of your life. Your home is your sanctuary, and it deserves to be just as beautiful as the images you save at midnight. Happy building!