
The Ultimate DIY Playbook: Viral Secrets for a Stunning Home Lifestyle
There is a profound, almost rhythmic magic in the act of creating something with your own two hands. It starts with a spark—a vision of a more colorful garden path or a more organized kitchen—and blossoms into the tangible reality of a home that truly reflects your soul. I remember the first time I picked up a paintbrush to transform a stack of old bricks; the nervous excitement of ‘what if’ quickly turned into the pure joy of seeing my garden come alive with personality and charm.
In a world of mass-produced furniture and cookie-cutter interiors, the DIY lifestyle is your secret weapon for crafting a sanctuary that feels curated, not just decorated. It’s about the earthy scent of cedar as you build a birdhouse, the satisfying click of a glass jar lid in a perfectly organized pantry, and the laughter of children playing at a mud kitchen you built from scratch. These projects aren’t just about the end result; they are about the memories woven into the wood, paint, and soil of your daily life.
How to Create Painted Bricks Crafts for a Charming Garden Walkway
Why we love this
There is something inherently whimsical about a secret garden path, and these hand-painted bricks add a layer of storybook enchantment to any outdoor space. Imagine walking through your garden at sunset, the golden light catching the vibrant patterns underfoot as the scent of damp earth and blooming jasmine fills the air. The tactile texture of the cool masonry beneath your fingertips combined with the pop of custom colors creates a sensory experience that makes every stroll through your yard feel like a curated journey through an art gallery.
Essential Elements:
- Old or new clay bricks (cleaned and dried)
- Exterior-grade masonry primer
- Acrylic outdoor patio paints or masonry paint
- Small detail brushes and foam rollers
- UV-resistant outdoor clear sealant
- Painter’s tape for geometric designs
How to make it
- Begin by thoroughly scrubbing your bricks with a stiff wire brush to remove all loose debris, moss, and dirt. Rinse them with a garden hose and allow them to dry completely in the sun for 24 hours to ensure the paint adheres properly.
- Apply a thin, even coat of exterior-grade masonry primer using a foam roller. This step is crucial because bricks are porous and will soak up paint; the primer creates a smooth, non-absorbent canvas for your colors.
- Once the primer is dry (usually 2-4 hours), use your painter’s tape to mark off stripes, chevrons, or borders. If you prefer a more organic look, freehand paint floral motifs, ladybugs, or abstract swirls using high-quality outdoor acrylics.
- Apply your colors in thin layers. It is better to do two light coats than one thick coat, as thick paint is more likely to peel over time. Let each color dry to the touch before adding overlapping details.
- After your designs have cured for at least 48 hours, apply two coats of UV-resistant clear sealant. Use a brush to get into the crevices of the brick. This protects your artwork from rain, foot traffic, and fading from the sun.
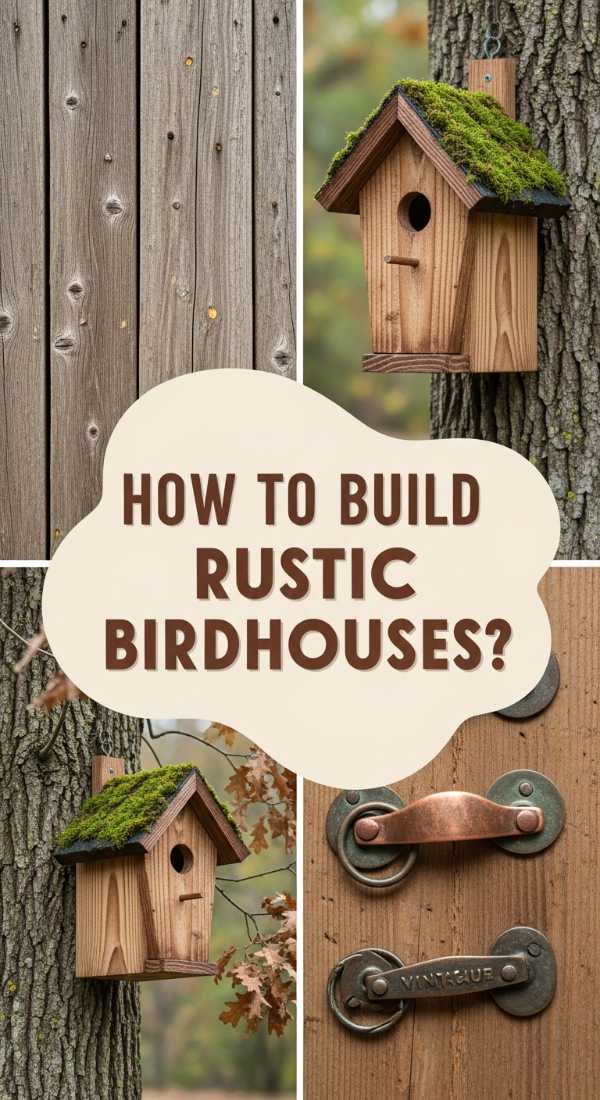
How to Build Rustic Birdhouses for a Whimsical Backyard Sanctuary

Why we love this
Building a birdhouse is an act of hospitality for the natural world, turning your backyard into a bustling sanctuary filled with the cheerful trills of bluebirds and wrens. There is a deep sense of peace that comes from watching a family of birds take up residence in a home you built, smelling the sweet, resinous aroma of cedar wood as it warms in the sun. It bridges the gap between our structured lives and the wild beauty of nature, providing a focal point that is both architecturally charming and ecologically beneficial.
Essential Elements:
- 1×6 Untreated cedar or pine boards
- Galvanized nails or outdoor wood screws
- Wood glue (exterior grade)
- Drill with a 1.5-inch hole saw bit
- Sandpaper (medium and fine grit)
- Hammer or power drill
How to make it
- Measure and cut your cedar boards into six pieces: a base (5×5″), two sides (8″ tall), a back (10″ tall to allow for mounting), a front (8″ tall), and two roof pieces (one slightly longer to overlap the other). Cedar is preferred because it naturally resists rot and insects.
- On the front panel, measure 6 inches up from the bottom and use your 1.5-inch hole saw bit to drill the entrance. This specific size is perfect for small songbirds while keeping larger predators out. Sand the edges of the hole until they are perfectly smooth.
- Apply a bead of exterior wood glue to the edges of the base and front panel. Nail them together using galvanized nails, which won’t rust. Repeat this process for the sides and the back, ensuring everything is square and flush.
- Attach the roof pieces at a 45-degree angle. Make sure one side overlaps the peak of the other to prevent water from leaking into the birdhouse. Leave a small gap under the eaves for ventilation.
- Drill four small 1/4-inch holes in the floor of the birdhouse for drainage. Finally, sand the entire exterior to remove any splinters, but leave the interior rough so fledglings have something to grip when they are ready to fly.
How to Design Above Ground Pool Bar Ideas for Ultimate Summer Entertaining
Why we love this
Transforming an above-ground pool area into a social hub creates the ultimate resort-at-home vibe, where the splashing water meets the clinking of ice cubes in a cold glass. There is a specific joy in leaning against a cool, sturdy bar top while your feet are still submerged, feeling the contrast of the hot summer sun on your shoulders and the refreshing water below. It turns a simple backyard pool into a sophisticated entertainment zone that smells like coconut sunscreen and fresh lime garnishes, making every weekend feel like a vacation.
Essential Elements:
- Pressure-treated 2x4s for the frame
- Exterior-grade plywood or deck boards for the siding
- Waterproof countertop material (sealed wood or stone)
- L-brackets and heavy-duty deck screws
- Weatherproof bar stools
- Outdoor-rated LED strip lighting
How to make it
- Measure the height of your pool’s top rail. You want the bar to sit just slightly above it. Build a rectangular frame using pressure-treated 2x4s, reinforcing the corners with L-brackets to ensure the structure can withstand the weight of the countertop and guests leaning on it.
- Anchor the frame into the ground using concrete footings or secure it directly to your existing pool deck. Stability is key here, as the bar will be a high-traffic area.
- Wrap the frame with your chosen siding. Using horizontal deck boards gives a modern, clean look, while corrugated metal panels can provide an industrial or rustic feel. Use a level at every step to ensure the bar is perfectly flat.
- Install the countertop. If using wood, sand it down to a high polish and apply at least three coats of marine-grade spar urethane to protect it from constant water splashes and UV rays. Ensure there is a 6-10 inch overhang on the pool side for comfortable seating.
- Finish the look by mounting a bottle opener to the side and installing outdoor LED strips under the bar lip. This creates a stunning glow for evening swims and makes the space functional long after the sun goes down.
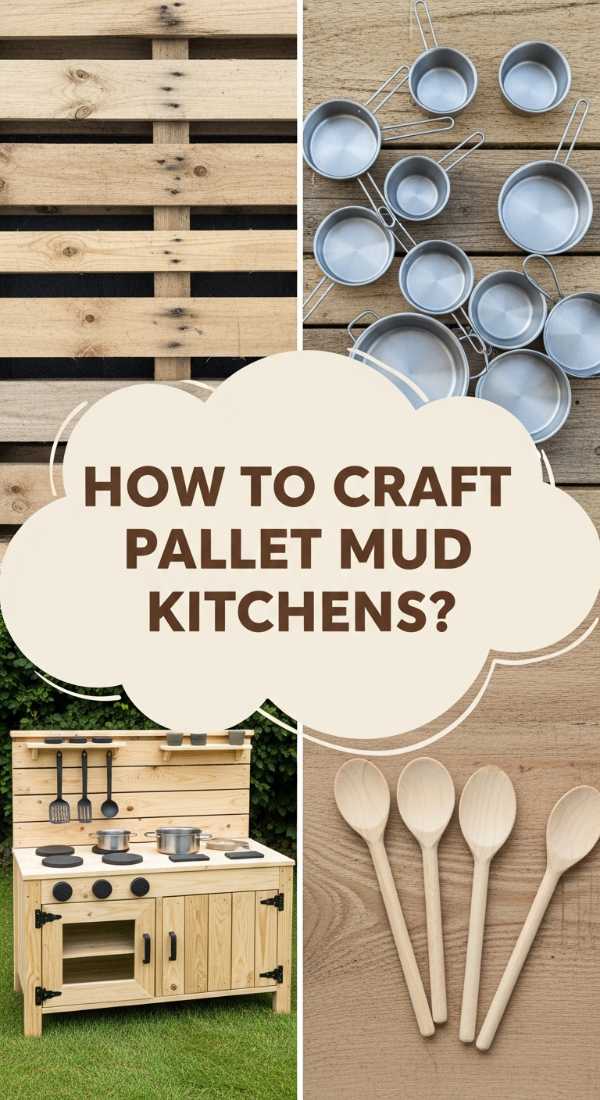
How to Craft a Pallet Mud Kitchen for Endless Outdoor Playtime
Why we love this
A mud kitchen is a portal to a world of imaginative play, where ‘mud pies’ are gourmet delicacies and the scent of damp soil and crushed mint leaves fills the air. It’s a space that celebrates the beautiful messiness of childhood, offering a tactile, sensory-rich environment where kids can explore textures, volumes, and nature. Seeing a child deeply concentrated on stirring a pot of ‘leaf soup’ on a kitchen you built from repurposed wood is a heartwarming reminder of the simple joys of outdoor living.
Essential Elements:
- 2-3 Heat-treated (HT) wooden pallets
- Stainless steel mixing bowls (for sinks)
- Old kitchen faucets or knobs
- Outdoor-rated wood screws
- Jigsaw and power drill
- Handheld sander and 80-grit sandpaper
How to make it
- Select pallets marked with ‘HT’ (Heat Treated), which are safe for children as they haven’t been treated with harsh chemicals. Disassemble one pallet to use the boards for shelving and supports, while keeping the other two intact for the main structure.
- Sand every single surface of the pallets thoroughly. Children will be running their hands over this constantly, so you must eliminate every possible splinter and rough edge using 80-grit then 120-grit sandpaper.
- Construct the base by standing two pallets upright and connecting them with cross-beams at the desired height (usually 20-24 inches for toddlers). Create a flat work surface on top using the extra boards you salvaged.
- Use a jigsaw to cut circular holes in the top surface that are slightly smaller than the lip of your stainless steel bowls. Drop the bowls into the holes to create ‘sinks’ that can be filled with water or mud.
- Attach old faucets, hooks for wooden spoons, and a small shelf for ‘spices’ (jars of pebbles or dried petals). Ensure all accessories are rounded and have no sharp edges, and finish the wood with a food-safe outdoor oil or wax.
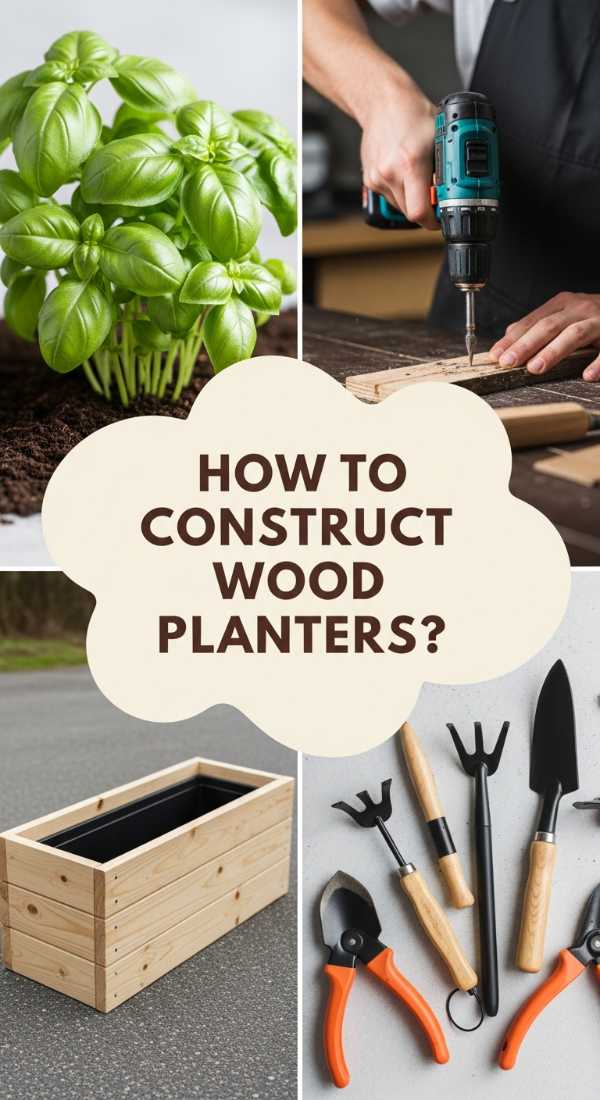
How to Construct a DIY Wood Planter Box for Your Fresh Kitchen Herbs
Why we love this
There is nothing quite like the sensory delight of reaching out your kitchen door to snip fresh basil or rosemary for a home-cooked meal. A DIY wood planter box brings the garden to your fingertips, filling your cooking space with the aromatic, herbaceous scents of Mediterranean summers. The sight of lush green leaves against the warm grain of handcrafted wood creates a grounding, organic aesthetic that reminds us of the connection between the earth and our table, making even a simple pasta dish feel like a gourmet event.
Essential Elements:
- Cedar or Redwood boards (naturally rot-resistant)
- Pocket hole screws or exterior wood screws
- Landscape fabric (liner)
- Wood glue (exterior)
- Drill and miter saw
- Potting mix and herb seedlings
How to make it
- Cut four side pieces and one bottom piece from your cedar boards. For a standard windowsill planter, 24 inches long by 6 inches wide is ideal. Cedar is the best choice here because it won’t rot when exposed to moist soil and contains no toxic chemicals that could leach into your herbs.
- Use a pocket hole jig to create hidden joints for a professional look, or simply pre-drill holes and use exterior screws to assemble the four sides into a rectangle. Glue the joints first for extra durability.
- Fit the bottom piece inside the rectangle. Before securing it, drill five to six 1/2-inch drainage holes through the bottom board. Proper drainage is the most important factor in keeping herbs like thyme and oregano from getting ‘wet feet’ and rotting.
- Line the interior of the box with landscape fabric, stapling it to the sides. This prevents soil from washing out of the drainage holes while still allowing water to pass through freely.
- Fill the box with a high-quality organic potting mix designed for containers. Plant your herbs—placing the taller ones like rosemary in the back and trailing ones like mint or thyme near the front edges—and water them thoroughly until water runs out the bottom.
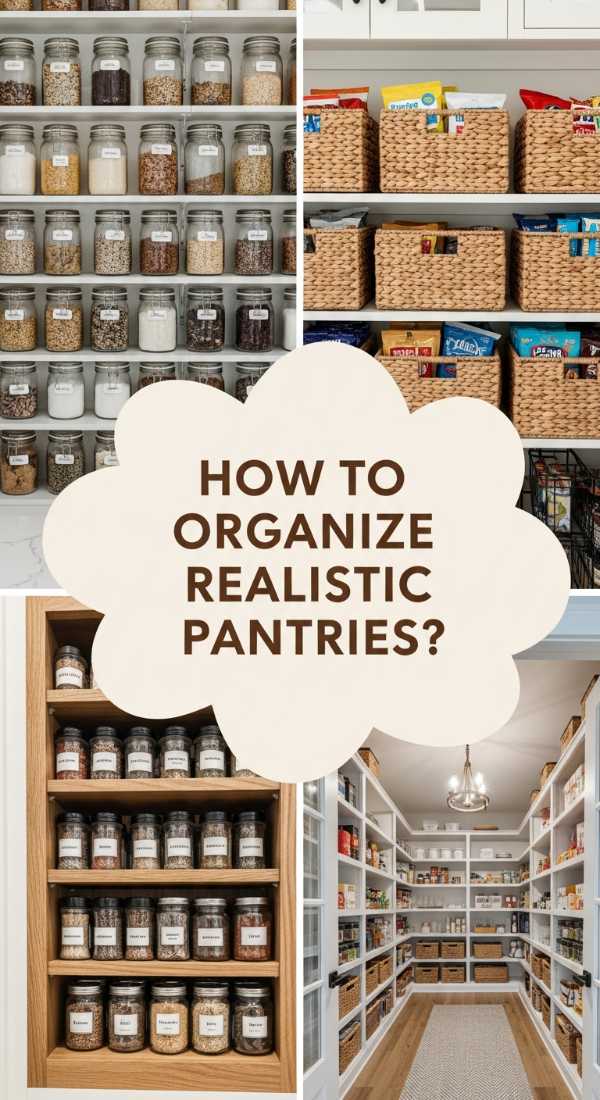
How to Achieve Realistic Pantry Organization for a Stress Free Cooking Space
Why we love this
Walking into a perfectly organized pantry is like taking a deep breath for your brain; it replaces the visual noise of mismatched boxes with a serene, orderly aesthetic. The satisfying clink of glass jars and the uniform look of hand-written labels create a high-end boutique feeling in the heart of your home. Beyond the beauty, it transforms cooking from a chore into a seamless flow, where every ingredient is visible, accessible, and fresh, making you feel like the professional chef of your own kitchen sanctuary.
Essential Elements:
- Glass or BPA-free plastic airtight canisters
- Uniform baskets (wicker, wire, or canvas)
- A label maker or vinyl stickers
- Tiered shelf risers for canned goods
- Lazy Susans for oils and vinegars
- Over-the-door rack for small items
How to make it
- Completely empty your pantry. This ‘blank slate’ approach is essential. Check expiration dates and discard anything past its prime. Wipe down every shelf with a mild cleaner to remove dust and spilled grains.
- Group your items into categories: Baking, Grains, Snacks, Canned Goods, and Breakfast. This logical grouping is the foundation of a system that stays organized over time.
- Decant dry goods like flour, sugar, pasta, and cereal into airtight glass canisters. This not only looks beautiful but keeps food fresh longer and allows you to see exactly when you’re running low on essentials. Leave a small space behind the jars for backstock.
- Use tiered risers for canned goods so you can see the labels of the back row. Place oils, vinegars, and sauces on a Lazy Susan (turntable) in a corner; this eliminates the need to dig through rows of bottles to find the balsamic.
- Apply clear, legible labels to every bin and jar. Use a consistent font or handwriting style to maintain the visual ‘viral’ aesthetic. Finally, place the items you use most frequently at eye level, and seasonal or rarely used items on the very top or bottom shelves.
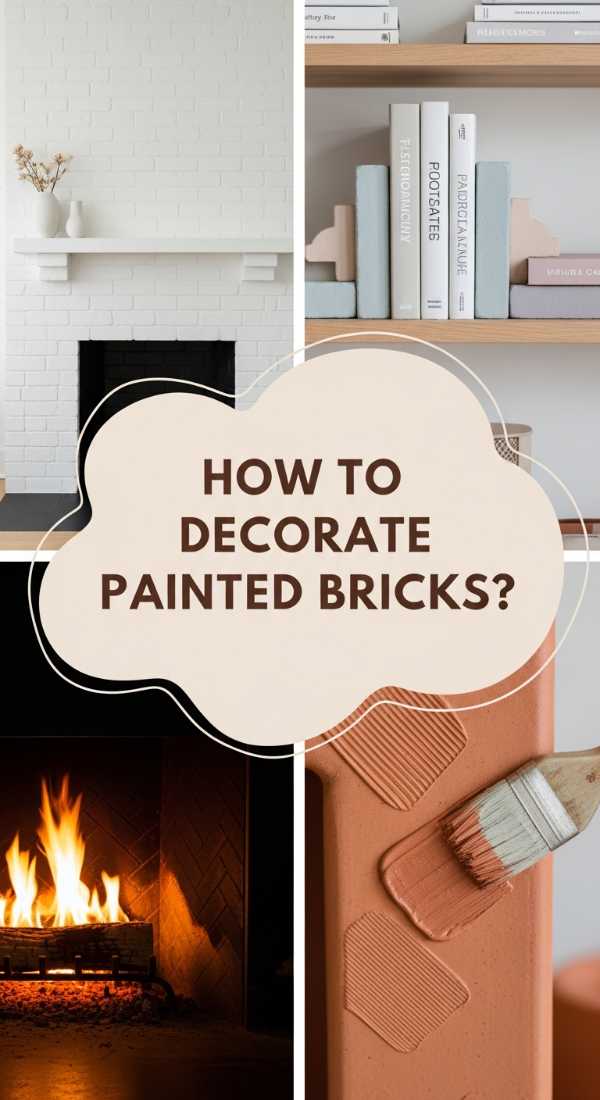
How to Style Painted Bricks Crafts for Cozy Indoor Fireplace Accents
Why we love this
Indoor painted bricks bring a touch of artisanal texture to the hearth, making the fireplace feel like an intentional piece of art rather than just a utility. When the fire is crackling, the light dances off the subtle patterns and soft finishes of the bricks, creating a cozy, hygge-inspired atmosphere. The smell of woodsmoke and the visual warmth of customized masonry work together to turn your living room into the ultimate gathering spot, where every brick tells a story of craftsmanship and homey comfort.
Essential Elements:
- Clean, dust-free bricks
- Chalk paint or matte interior acrylics
- Stencils (mandala, Moroccan, or geometric)
- Stippling brushes or sponge applicators
- Matte interior sealant
- Fine-grit sandpaper for distressing
How to make it
- Ensure your bricks are free of soot and ash by wiping them with a damp cloth and a bit of degreasing soap. If the bricks are already part of the fireplace surround, mask off the floor and walls with painter’s tape and plastic sheeting.
- Apply a base coat of chalk paint. Chalk paint is ideal for indoor bricks because it has a beautiful matte finish and adheres well to the uneven texture without needing a primer. Let it dry for 2 hours.
- Secure your stencil over the brick using low-tack tape. Use a dry-brush technique: dip your stippling brush in paint, then dab most of it off onto a paper towel before hitting the stencil. This prevents paint from bleeding under the edges and ensures a crisp design.
- For a vintage, ‘shabby chic’ look, wait for the paint to dry completely and then lightly sand the edges of the bricks with fine-grit sandpaper. This allows the original brick color to peek through slightly, giving it an aged, soulful appearance.
- Finish with a light coat of matte interior sealant. This makes the bricks easy to dust and protects the paint from the heat of the fireplace, ensuring your accents stay looking fresh for years of cozy nights.
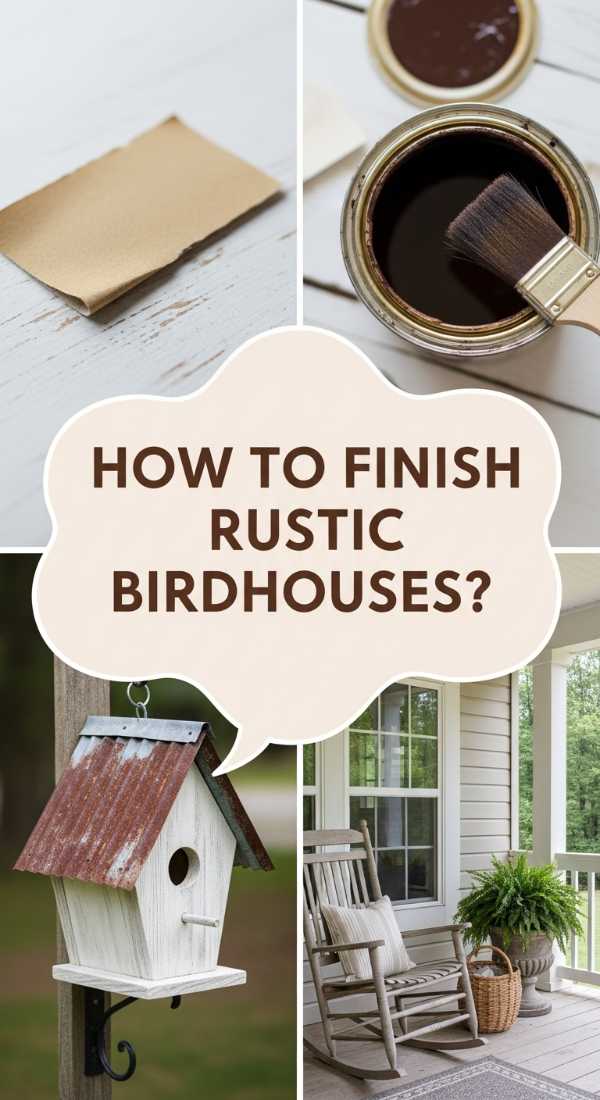
How to Finish Rustic Birdhouses for a Weathered Vintage Farmhouse Look

Why we love this
The weathered look on a birdhouse suggests a history of seasons passed and stories told, adding a layer of vintage soul to your backyard sanctuary. It mimics the silver-grey patina of old barns and salt-sprayed fences, making the structure feel like a found treasure rather than a new project. This finish is soft to the eye and blends harmoniously with the organic textures of trees and gardens, providing a timeless charm that smells like sun-dried wood and nostalgia.
Essential Elements:
- Steel wool and white vinegar solution
- Strong black tea (brewed)
- Paintbrush
- Fine-grit sandpaper
- Wire brush
- Clear wax or matte outdoor sealer
How to make it
- Create your aging solution 24 hours in advance by placing a pad of steel wool in a jar of white vinegar. The chemical reaction creates an iron acetate solution that reacts with wood tannins to create a weathered grey color.
- Prepare the wood by scrubbing it with a wire brush in the direction of the grain. This ‘opens up’ the wood fibers and creates small grooves that will catch the stain, mimicking the texture of naturally aged timber.
- Apply a coat of very strong black tea to the birdhouse. The tannins in the tea provide the ‘fuel’ for the vinegar solution to react with, especially if you are using a low-tannin wood like pine. Let the tea dry completely.
- Brush on the vinegar and steel wool solution. You will see the wood change color almost instantly, turning from a light tan to a beautiful, silvery barn-grey. The more coats you apply, the darker and more ‘weathered’ it will become.
- Once dry, lightly sand the corners and high points to mimic natural wear. Seal the finish with a clear, breathable outdoor wax. This protects the wood while maintaining that soft, non-shiny vintage farmhouse aesthetic.
How to Upgrade Above Ground Pool Bar Ideas for a Tropical Resort Vibe
Why we love this
Upgrading your pool bar with tropical elements transforms your backyard into an exotic getaway where the air feels warmer and the mood feels lighter. The rustle of synthetic thatch in the breeze and the golden glow of bamboo accents create a sensory escape from the everyday. It’s about more than just a drink; it’s about the feeling of sand between your toes (even if you’re on a deck) and the vibrant, carefree energy of a Caribbean island right in your own zip code.
Essential Elements:
- Synthetic thatch roofing rolls
- Bamboo fencing or half-round bamboo poles
- Manila or sisal rope for trim
- Tropical-colored outdoor paint (teal, coral, or yellow)
- Solar-powered tiki torches
- Heavy-duty staple gun
How to make it
- Start by installing a simple sloped roof frame over your existing bar using lightweight 2×2 wood. This frame will hold your thatch and provide much-needed shade for your bartenders and guests.
- Unroll the synthetic thatch and attach it to the roof frame using a staple gun. Start from the bottom and layer the rolls upward, overlapping them so the water sheds off the ends. Synthetic thatch is better than natural as it doesn’t rot or attract pests.
- Cover the front and sides of the bar with bamboo fencing. You can buy these in rolls; simply cut them to height and screw them directly into the bar frame. For a more polished look, use split bamboo poles to frame the corners and edges.
- Use heavy-duty manila rope to wrap any exposed joints or to create a decorative border around the bar top. Use a hot glue gun or small finish nails to secure the rope in tight, neat coils.
- Incorporate ‘pop’ colors by painting the bar stools or the interior shelves in vibrant tropical hues. Add solar-powered tiki torches to the corners of the bar area to provide flickering, amber light that completes the resort atmosphere at night.
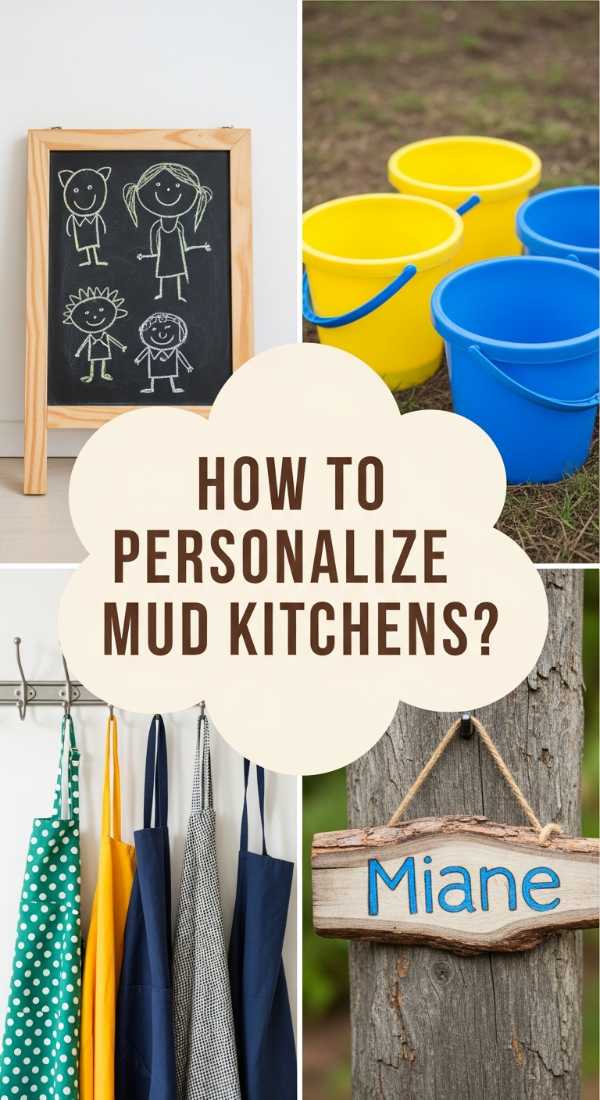
How to Personalize a Pallet Mud Kitchen for the Most Creative Tiny Chefs
[IMAGE_10]
Why we love this
Personalizing a mud kitchen turns a functional toy into a cherished childhood landmark, a place where a child feels a true sense of ownership and pride. The addition of custom nameplates, chalkboard menus, and specific sensory zones encourages deep, focused play that smells like imagination and fresh pine. It’s a joyful sight to see a ‘Today’s Menu’ scribbled in chalk, featuring ‘Dandelion Stew’ and ‘Acorn Cupcakes,’ proving that the best play happens when children are given a space that feels uniquely theirs.
Essential Elements:
- Chalkboard paint
- Wooden alphabet letters or custom nameplate
- Multi-colored outdoor-safe knobs and hooks
- Small plastic bins for sensory ‘ingredients’
- Stencils for ‘stove burners’
- Child-safe exterior paint in bright colors
How to make it
- Identify a flat section of the mud kitchen (the backboard is perfect) and apply two coats of high-quality chalkboard paint. This allows your tiny chef to write out daily specials, prices, or draw their culinary creations, enhancing the role-play experience.
- Paint a set of wooden letters to spell out the child’s name (e.g., ‘Leo’s Lakeside Cafe’) and wood-glue them to the top of the kitchen. This makes the space feel official and special.
- Use a circular stencil and black outdoor paint to create ‘burners’ on the countertop. Add old stove knobs (or painted wooden discs) that actually turn; you can achieve this by using a bolt and a nylon nut that allows for rotation without falling off.
- Mount hooks along the sides to hang small pots, pans, and whisks. Having a designated ‘home’ for every tool teaches organizational skills through play and keeps the kitchen from becoming a cluttered mess.
- Install a few small, removable plastic bins on the side. Fill these with different ‘sensory ingredients’ like dried beans, pinecones, or colorful pebbles. This gives the children a starting point for their concoctions and keeps the play area organized and inviting.
Conclusion
Embarking on these DIY projects is about so much more than home improvement; it is about lifestyle improvement. Whether you are painting bricks for a whimsical path or organizing your pantry for ultimate peace of mind, you are infusing your home with intention and love. These viral-worthy secrets aren’t just for the ‘gram—they are for the quiet mornings, the rowdy family gatherings, and the everyday moments that make a house a home. Grab your tools, find your inspiration, and start creating the stunning home lifestyle you’ve always dreamed of today.