
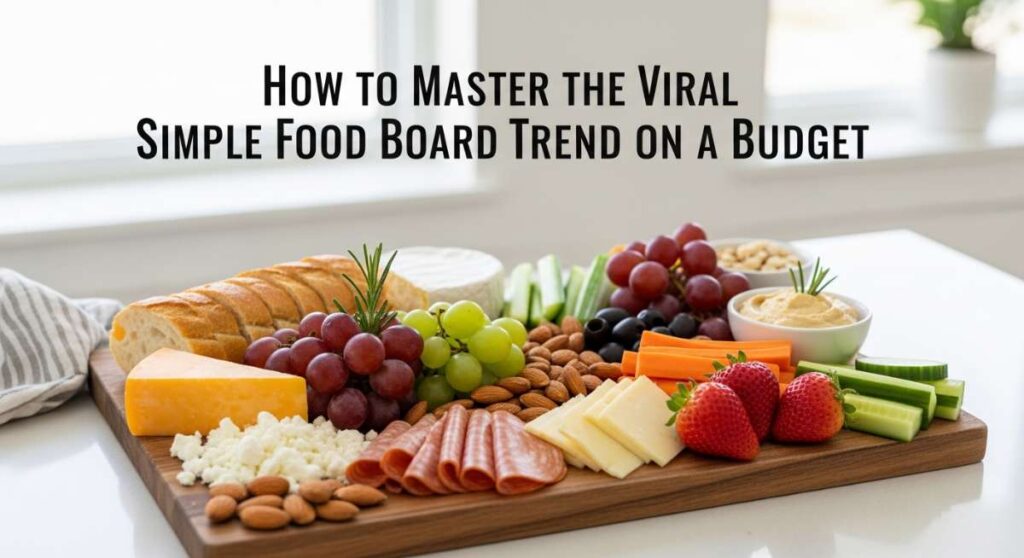
We’ve all seen them scrolling through our feeds: those stunning, overflowing food boards that look like they belong in a high-end editorial spread. There is something so deeply communal and comforting about a ‘Simple Food Board’—it invites everyone to lean in, linger over conversation, and pick at their favorite bites. It turns a standard Tuesday night into a tactile, sensory experience that feels like a warm hug for your soul.
But let’s be real for a second—building one of these masterpieces can feel intimidating and expensive if you’re looking at gourmet cheese shops. The secret to mastering this viral trend without breaking the bank is focusing on high-quality prep of simple, affordable ingredients. By mastering a few basic techniques, you can transform humble potatoes, carrots, and chicken into a spread that looks like a million bucks. Let’s dive into how you can create your own budget-friendly feast that will have your friends reaching for their cameras before their forks.
How to make crispy potatoes

Why we love this
There is nothing quite like the sound of a perfectly roasted potato crunching beneath your fork, revealing a center so fluffy it practically melts on your tongue. The aroma of rosemary and hot olive oil wafting through the kitchen creates an immediate sense of home and comfort that no fancy restaurant can replicate. Each golden nugget is a masterclass in texture, offering a salty, savory bite that feels indulgent yet remains incredibly humble and budget-friendly. It’s the ultimate anchor for your food board, providing a satisfying weight that pairs beautifully with almost any dip or protein you choose to include.
Ingredients
- 2 lbs Yukon Gold potatoes
- 3 tbsp extra virgin olive oil
- 2 sprigs fresh rosemary, chopped
- 1 tsp sea salt
- 1/2 tsp black pepper
- 1/2 tsp garlic powder
How to make it
- Start by peeling your potatoes and cutting them into uniform 1-inch cubes; uniformity is key to ensuring they all cook at the same rate.
- Place the cubes in a large pot of cold salted water and bring to a boil. Boil them for exactly 8 minutes—you want them tender on the outside but still firm in the middle.
- Drain the potatoes and let them steam dry in the colander for 2 minutes, then give them a vigorous shake to roughen up the edges; these fuzzy bits turn into the ultimate crispy crust.
- Preheat your oven to 425°F (220°C) and place a baking sheet inside to get hot.
- Carefully toss the potatoes with olive oil, salt, pepper, garlic powder, and rosemary in a bowl until coated.
- Spread the potatoes onto the hot baking sheet in a single layer, ensuring they aren’t crowded, and roast for 25-30 minutes, flipping halfway through, until they are deep golden brown and audibly crunchy.
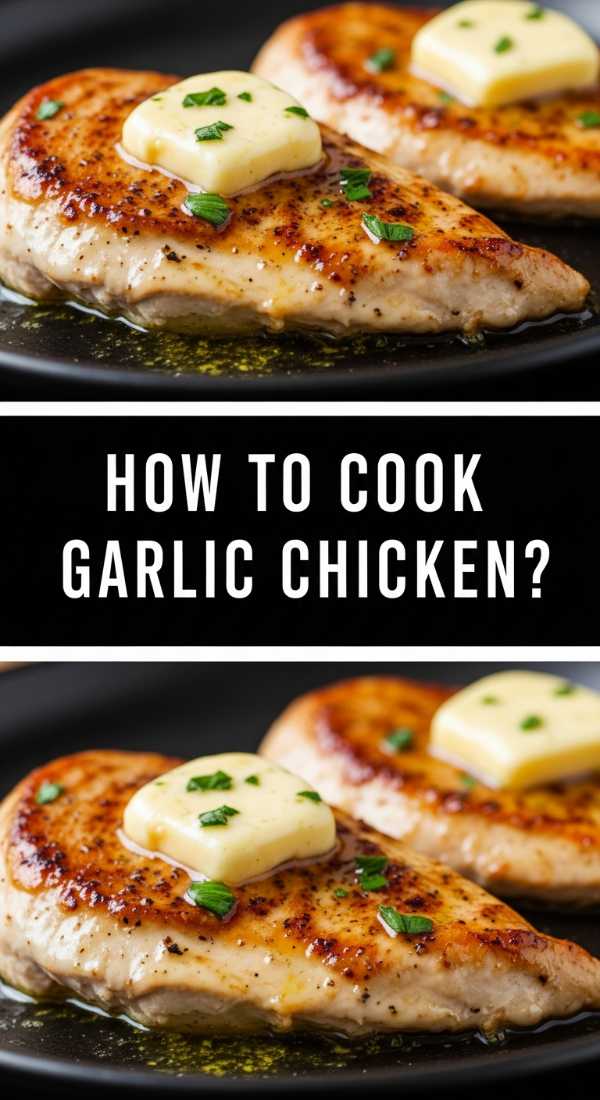
How to cook garlic chicken
Why we love this
Garlic chicken is the aromatic heartbeat of a great food board, filling the room with a scent that is both sharp and sweet as the cloves caramelize. When done right, the chicken stays incredibly succulent, with a golden-brown exterior that locks in all the juices. It’s a versatile protein that feels sophisticated because of the infusion of fresh herbs, yet it relies on one of the most affordable pantry staples: garlic. The way the butter melts into the pan juices creates a natural sauce that you’ll want to drizzle over everything else on the board.
Ingredients
- 1.5 lbs chicken breast or thighs, bite-sized
- 6 cloves of garlic, minced
- 2 tbsp unsalted butter
- 1 tbsp olive oil
- 1 tsp dried oregano
- Salt and pepper to taste
- Fresh parsley for garnish
How to make it
- Pat your chicken pieces completely dry with paper towels; moisture is the enemy of a good sear, and dry meat will brown much more effectively.
- Season the chicken generously with salt, pepper, and oregano, ensuring every piece is coated.
- Heat the olive oil and 1 tablespoon of butter in a large skillet over medium-high heat. Wait until the butter stops foaming and starts to shimmer.
- Add the chicken in a single layer (work in batches if needed) and let it sit undisturbed for 3-4 minutes to develop a deep, golden crust.
- Flip the chicken and add the remaining butter and all the minced garlic to the center of the pan.
- Lower the heat to medium and use a spoon to baste the garlic butter over the chicken for another 3-5 minutes until the internal temperature reaches 165°F (74°C). The garlic should be golden and fragrant, not burnt.
How to sear juicy salmon

Why we love this
A perfectly seared piece of salmon is the crown jewel of any board, offering a vibrant pop of pink and a sophisticated, flaky texture. The contrast between the crackling, salty skin and the buttery, tender flesh creates a dining experience that feels truly luxurious. As the salmon sears, it releases a light, clean aroma that signals freshness and health, balancing out the heavier elements of the meal. It’s the kind of dish that looks impressive and high-effort but actually relies on temperature control and patience more than anything else.
Ingredients
- 2 salmon fillets (6 oz each)
- 1 tbsp avocado oil (high smoke point)
- 1/2 lemon
- Coarse sea salt
- 1 tsp smoked paprika
How to make it
- Remove the salmon from the fridge 15 minutes before cooking to take the chill off; this ensures the middle cooks through without the outside overcooking.
- Use a sharp knife to score the skin slightly and season both sides heavily with salt and smoked paprika.
- Heat a non-stick or cast-iron skillet over medium-high heat until it is very hot—you should see a faint wisp of smoke from the oil.
- Place the salmon fillets skin-side down in the pan, pressing down firmly with a spatula for 10 seconds to prevent the skin from curling.
- Lower the heat to medium and leave it alone for about 5-6 minutes; you will see the color change creeping up the side of the fish.
- Flip the fillets once the skin is crispy and the fish is 70% cooked through, then sear the flesh side for just 1-2 minutes for a medium finish. Finish with a squeeze of fresh lemon juice while still in the pan.
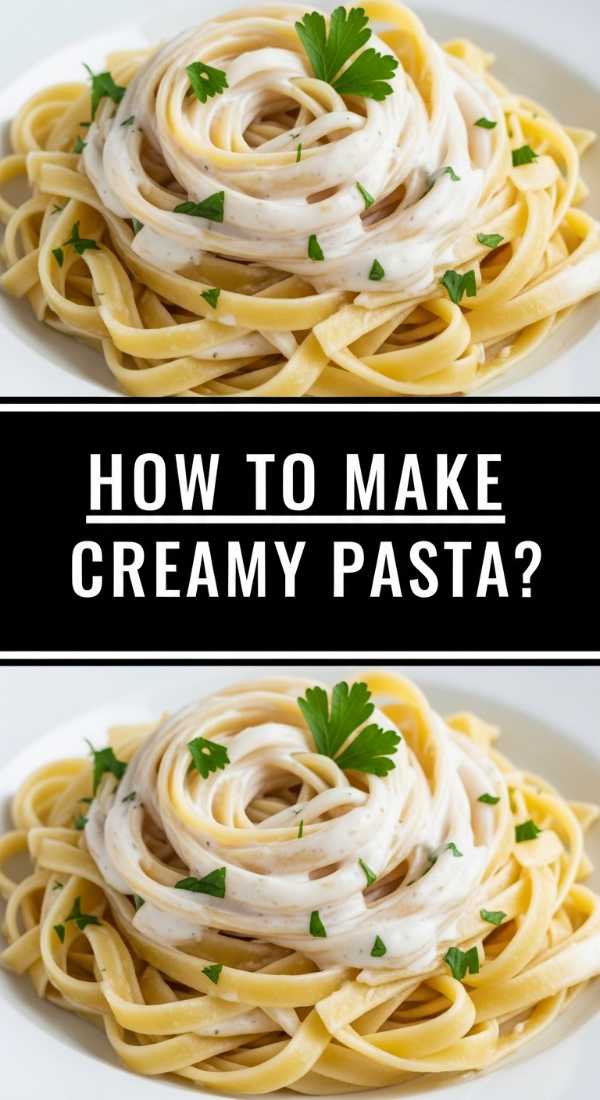
How to make creamy pasta
Why we love this
Creamy pasta acts as the ultimate comfort vessel on a board, providing a silky, smooth texture that contrasts beautifully with crispy proteins. The way the sauce clings to every ridge of the pasta ensures that each bite is a decadent explosion of cheese and cream. The scent of simmering garlic and parmesan cheese is intoxicating, creating an atmosphere of warmth and indulgence. It’s a filling addition that allows you to stretch your budget, turning simple grains into a centerpiece that feels like a celebration of Italian soul food.
Ingredients
- 8 oz fettuccine or penne
- 1 cup heavy cream
- 1/2 cup grated Parmesan cheese
- 2 cloves garlic, minced
- 2 tbsp butter
- 1/2 tsp nutmeg
- Pasta water (reserved)
How to make it
- Boil a large pot of heavily salted water—it should taste like the sea—and cook your pasta until it is ‘al dente,’ about 2 minutes less than the package directions.
- Before draining, reserve at least one full cup of the starchy pasta water; this is the secret to a smooth, non-clumping sauce.
- In a separate wide pan, melt the butter over medium heat and sauté the garlic for 60 seconds until it smells wonderful but hasn’t browned.
- Pour in the heavy cream and bring to a gentle simmer, letting it reduce slightly for 3 minutes until it coats the back of a spoon.
- Whisk in the Parmesan cheese and nutmeg quickly, then add the drained pasta directly into the sauce.
- Toss the pasta vigorously, adding splashes of the reserved pasta water as needed to create a glossy, emulsified sauce that coats every strand perfectly.
How to grill perfect steak

Why we love this
Steak brings a primal, smoky intensity to the board that is hard to beat, offering a rich umami flavor that feels deeply satisfying. The sight of those charred grill marks against a perfectly pink center is enough to make anyone’s mouth water instantly. The aroma of searing fat and black pepper fills the air, promising a hearty and robust bite that anchors the lighter veggies. It’s a high-impact protein that, when sliced thin across the grain, can be shared easily among a group, making a single expensive cut go a very long way.
Ingredients
- 1 lb Flank or Sirloin steak
- 2 tbsp neutral oil
- 1 tbsp coarse salt
- 1 tbsp cracked black pepper
- 2 sprigs thyme
How to make it
- Take your steak out of the refrigerator 30 minutes prior to cooking and pat it extremely dry with paper towels to ensure a proper crust.
- Rub the meat with oil and season it aggressively with salt and pepper; much of the seasoning falls off during the cooking process, so don’t be shy.
- Heat your grill or a heavy cast-iron pan until it is screaming hot—about 450°F (230°C).
- Place the steak down and do not move it for 4 minutes to allow a dark, crusty sear (the Maillard reaction) to form.
- Flip the steak and add the thyme to the pan, cooking for another 3-4 minutes for a medium-rare finish (internal temp of 130°F/54°C).
- Transfer the steak to a cutting board and let it rest for a full 10 minutes; this allows the juices to redistribute so they don’t run out when you slice it. Slice against the grain for maximum tenderness.
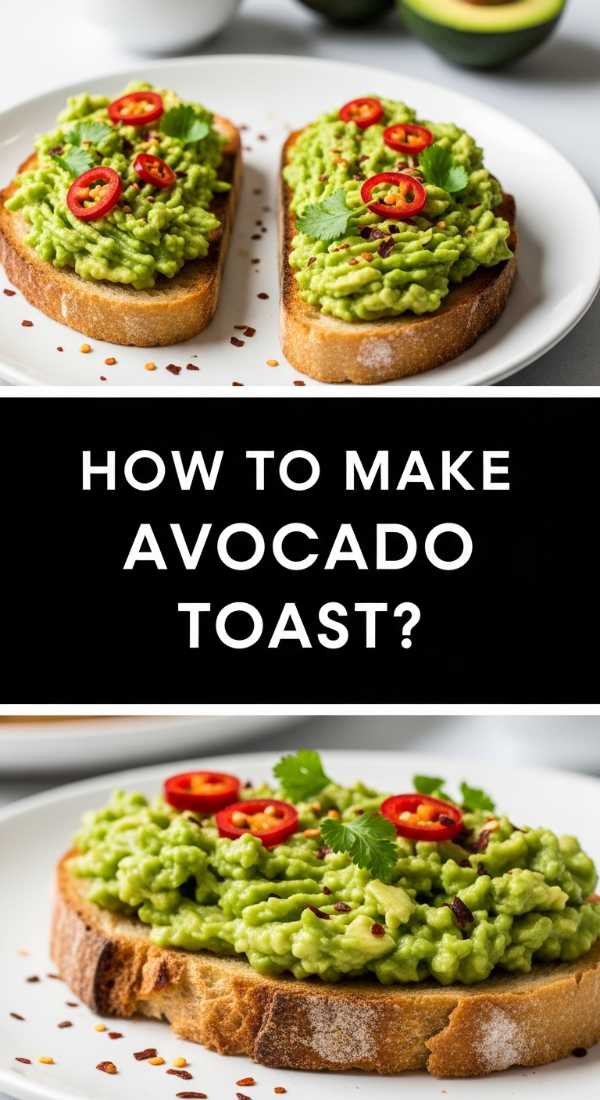
How to make avocado toast
Why we love this
Avocado toast provides that essential creamy, cool component that cuts through the richness of grilled meats and fried potatoes. The texture of ripe, mashed avocado spread over thick, crunchy sourdough is a match made in culinary heaven. The bright green hue adds a visual freshness to your board, while the sprinkle of red pepper flakes or seeds adds a subtle, exciting kick. It feels modern and light, yet the healthy fats make it incredibly satiating, providing a canvas for endless flavor variations.
Ingredients
- 4 thick slices of sourdough bread
- 2 ripe avocados
- 1 tbsp lemon juice
- 1/2 tsp red pepper flakes
- Salt and pepper
- Everything Bagel seasoning (optional)
How to make it
- Toast your bread slices until they are deeply golden and very firm; you need a sturdy base to hold the weight of the avocado without getting soggy.
- In a small bowl, scoop out the avocado flesh and add lemon juice, salt, and pepper.
- Use a fork to mash the avocado until it reaches your desired consistency—some prefer it chunky for texture, while others like it whipped and smooth.
- Spread a thick, even layer of the mixture onto each piece of toast, going all the way to the edges.
- Sprinkle the red pepper flakes and seasoning over the top immediately while the avocado is fresh.
- Cut each slice into thirds or quarters diagonally; this makes them ‘grab-and-go’ friendly for the food board.
How to prepare fresh tacos

Why we love this
Tacos bring a festive, vibrant energy to the table, encouraging guests to build their own perfect bites with a mix of colors and textures. The scent of toasted corn tortillas and fresh lime juice is inherently cheerful and inviting, promising a meal that is as fun to eat as it is delicious. Between the crunch of fresh radish, the creaminess of avocado, and the zing of cilantro, every taco is a miniature explosion of flavor. They are the ultimate budget-friendly crowd-pleaser, using simple tortillas and fresh produce to create a high-impact presentation.
Ingredients
- Small corn or flour tortillas
- 1 cup shredded cabbage
- 1/2 cup chopped cilantro
- 2 limes, wedged
- 1/2 red onion, diced
- Optional: Pickled jalapeños
How to make it
- Warm your tortillas directly over a low gas flame for 10-15 seconds per side using tongs until they are charred at the edges and pliable. If you don’t have gas, use a dry stainless steel pan on high heat.
- Immediately place the warm tortillas inside a clean kitchen towel to steam; this keeps them soft and prevents them from cracking.
- Prepare your ‘slaw’ by tossing the shredded cabbage with a squeeze of lime and a pinch of salt to soften it slightly.
- Finely dice the red onion and chop the cilantro to create a fresh garnish mix.
- On your food board, create a ‘taco zone’ where the tortillas are stacked next to small bowls containing the cabbage, onions, and lime wedges.
- This allows people to tuck their choice of steak, chicken, or salmon from the other sections of the board into the tortillas for a customized taco experience.
How to cook veggie stirfry
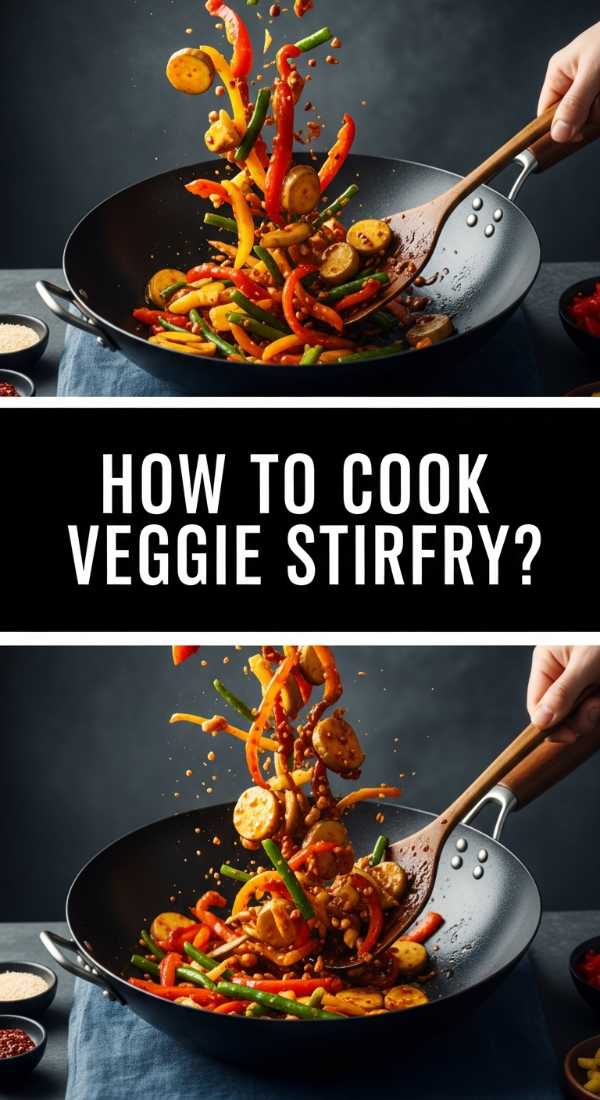
Why we love this
A veggie stirfry is the best way to add a mountain of color and nutrition to your board without spending a fortune on specialty items. The high-heat cooking method preserves the ‘snap’ and brightness of the vegetables, ensuring they don’t become a mushy mess. The aroma of toasted sesame oil and ginger is sharp and enticing, cutting through the other savory scents on the table. It’s a great way to use up whatever is in your crisper drawer, turning everyday peppers and broccoli into a glossy, flavorful side dish that pops against the board.
Ingredients
- 1 head of broccoli, cut into florets
- 2 bell peppers, sliced thin
- 1 carrot, julienned
- 2 tbsp soy sauce
- 1 tbsp sesame oil
- 1 tsp grated fresh ginger
- 1 tbsp honey
How to make it
- Prep all your vegetables before you even turn on the stove; stir-frying happens so fast (3-5 minutes total) that you won’t have time to chop once you start.
- Whisk the soy sauce, ginger, and honey in a small bowl to create your signature stir-fry glaze.
- Heat a wok or large skillet over high heat until a drop of water flicked onto the surface dances and evaporates instantly.
- Add the sesame oil, followed immediately by the broccoli and carrots; stir constantly for 2 minutes to get a light char while keeping the crunch.
- Add the bell peppers and cook for 1 more minute. You want the colors to remain vibrant and the texture to be ‘crisp-tender.’
- Pour the sauce over the veggies and toss for 30 seconds until the liquid bubbles and thickens into a glossy coating, then remove from heat immediately to prevent overcooking.
How to bake fluffy pancakes

Why we love this
Including pancakes on a food board brings a touch of breakfast-for-dinner whimsy that everyone secretly craves. The smell of sweet vanilla and sizzling butter is purely nostalgic, evoking memories of slow weekend mornings and cozy kitchens. A stack of fluffy, golden-brown pancakes provides a soft, cloud-like texture that serves as the perfect vehicle for syrups or fresh fruit. They add a necessary hint of sweetness to an otherwise savory board, making the whole meal feel like a well-rounded culinary journey from start to finish.
Ingredients
- 1.5 cups all-purpose flour
- 3.5 tsp baking powder
- 1 tbsp sugar
- 1.25 cups milk
- 1 egg
- 3 tbsp melted butter
- 1 tsp vanilla extract
How to make it
- Whisk your dry ingredients together in a large bowl, making sure the baking powder is evenly distributed—this is the secret to a uniform rise.
- In a separate bowl, beat the egg, milk, melted butter, and vanilla until combined.
- Pour the wet ingredients into the dry and stir with a spoon until *just* combined; it is vital that you leave some lumps in the batter. Over-mixing leads to tough, rubbery pancakes.
- Let the batter rest for 5-10 minutes while you heat a griddle to medium-low. This rest period allows the flour to hydrate and the baking powder to activate.
- Lightly grease the griddle and pour 1/4 cup of batter for each pancake. Wait for bubbles to form on the surface and the edges to look dry (about 2-3 minutes).
- Flip gently and cook for another 1-2 minutes until the other side is golden. Keep them warm in a low oven until you’re ready to assemble the board.
How to roast sweet carrots
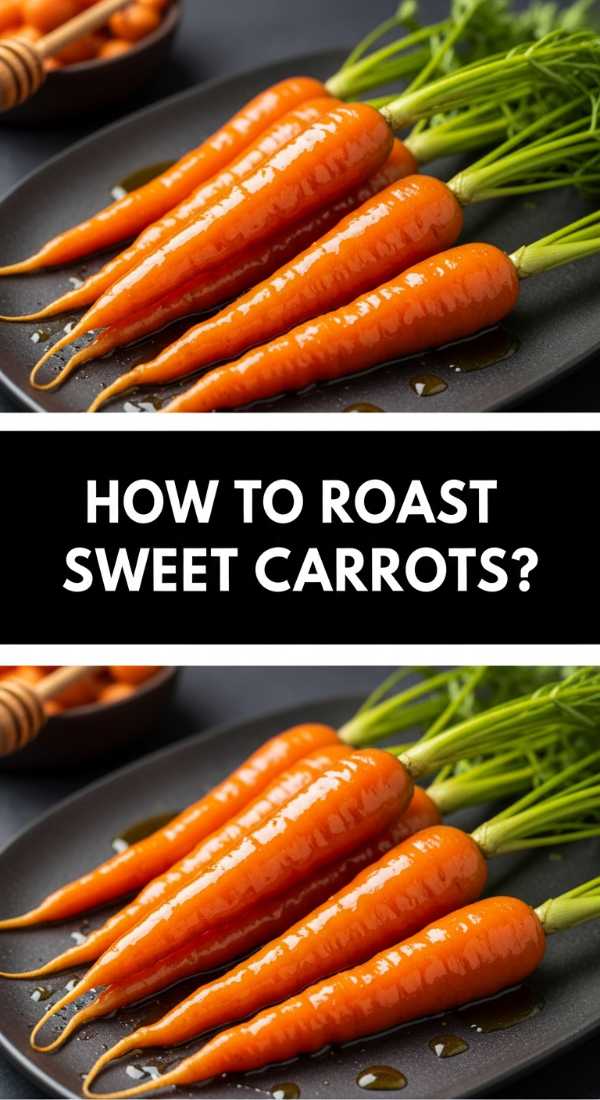
Why we love this
Roasting carrots transforms a basic, crunchy root vegetable into a tender, candy-like treat that adds an elegant touch to your display. The natural sugars in the carrots caramelize in the high heat of the oven, creating deep brown spots that are packed with concentrated flavor. The scent of warm honey and earthy carrots is comforting and sophisticated all at once. They offer a beautiful, slender shape that helps fill the gaps on your board, providing a bright orange contrast that makes the entire spread look professionally styled.
Ingredients
- 1 bunch of whole carrots (with tops if possible)
- 2 tbsp olive oil
- 1 tbsp honey or maple syrup
- 1/2 tsp cumin
- Salt and pepper
How to make it
- Preheat your oven to 400°F (200°C). Scrub the carrots clean, but don’t peel them if they are thin; the skin adds texture and flavor. If they are very thick, slice them in half lengthwise.
- Trim the green tops to about 1 inch for a beautiful, rustic presentation.
- On a large baking sheet, toss the carrots with olive oil, honey, cumin, salt, and pepper until every inch is slick and seasoned.
- Arrange the carrots in a single layer so they aren’t touching; crowding them will cause them to steam rather than roast and caramelize.
- Roast for 20-25 minutes, giving the pan a shake halfway through.
- The carrots are done when they are tender enough to be pierced easily with a knife and show dark, caramelized edges. Serve them warm or at room temperature.
Wrapping It All Up
Mastering the viral food board trend isn’t about how much you spend; it’s about the love and technique you put into every single element. By combining these crispy, juicy, and creamy components onto one large surface, you create more than just a meal—you create an event. Don’t be afraid to let the juices run together or the colors overlap; that’s part of the rustic charm! Now grab your biggest wooden board, start cooking, and watch your friends and family gather round to enjoy the feast of the season.