

5 Effortless Food Boards That Are Going Viral Right Now
There is something inherently magical about gathering friends around a beautifully curated board, isn’t there? It’s not just about the food; it’s about the shared laughter, the reaching hands, and the cozy atmosphere that a well-placed platter creates in the heart of your home. Recently, I’ve found myself leaning into these ‘effortless’ food boards because they allow me to be present with my guests instead of being tucked away in the kitchen for hours on end.
As we dive into these viral trends, remember that the best boards are those infused with your own personality. Whether you are serving a crowd or just treating yourself to a fancy Tuesday night, these concepts—ranging from the sweet comfort of cobblers to the professional edge of a sourdough starter—will transform your hosting game. Let’s get into the textures, the aromas, and the pure joy of creating something beautiful from scratch.
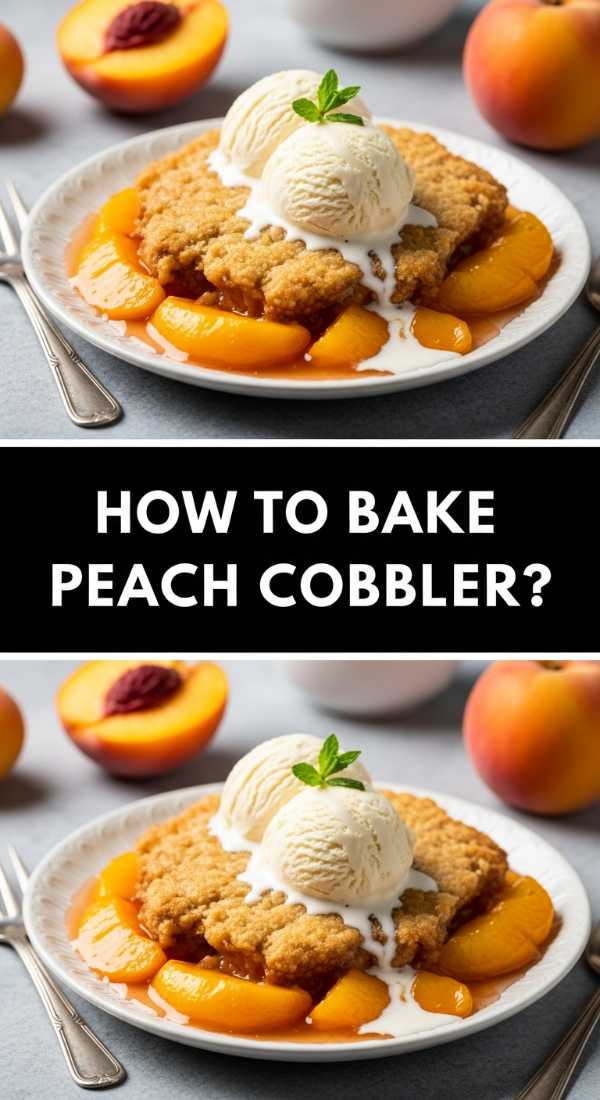
How to bake peach cobbler?
Why we love this
There is nothing quite as nostalgic as the scent of cinnamon-spiced peaches bubbling away under a golden, buttery crust. When you pull a fresh peach cobbler out of the oven, the kitchen fills with a heavy, sweet aroma that feels like a warm hug on a summer evening. The contrast between the jammy, tender fruit and the crisp, biscuit-like topping creates a sensory experience that is both comforting and sophisticated, especially when served with a melting scoop of vanilla bean ice cream that mingles with the warm juices.
Ingredients
- 6-8 large fresh peaches, peeled and sliced
- 1 cup granulated sugar
- 1/2 cup brown sugar
- 1 teaspoon ground cinnamon
- 1/4 teaspoon ground nutmeg
- 1 tablespoon lemon juice
- 2 teaspoons cornstarch
- 1 cup all-purpose flour
- 1 cup milk
- 1/2 cup unsalted butter, melted
- 1 tablespoon baking powder
- Pinch of salt
How to make it
- Begin by preheating your oven to 375°F (190°C). While the oven warms, place your 1/2 cup of unsalted butter in a 9×13 inch baking dish and set it in the oven to melt completely, being careful not to let it brown or burn.
- In a large mixing bowl, combine your sliced peaches, brown sugar, cinnamon, nutmeg, lemon juice, and cornstarch. Toss them gently so the peaches are evenly coated; the cornstarch is vital here as it will thicken the natural juices into a luscious syrup as it bakes.
- In a separate medium bowl, whisk together the flour, granulated sugar, baking powder, and a pinch of salt. Gradually pour in the milk, whisking until the batter is smooth and free of lumps.
- Remove the hot baking dish from the oven. Carefully pour the batter directly over the melted butter. Do not stir! This is the secret to a perfect cobbler texture.
- Spoon the peach mixture evenly over the batter. Again, do not stir. As it bakes, the batter will rise up and around the fruit, creating those signature golden peaks.
- Bake for 40-45 minutes until the top is deeply golden brown and the peach juices are bubbling thick around the edges. Let it cool for at least 15 minutes before serving to allow the internal structure to set.
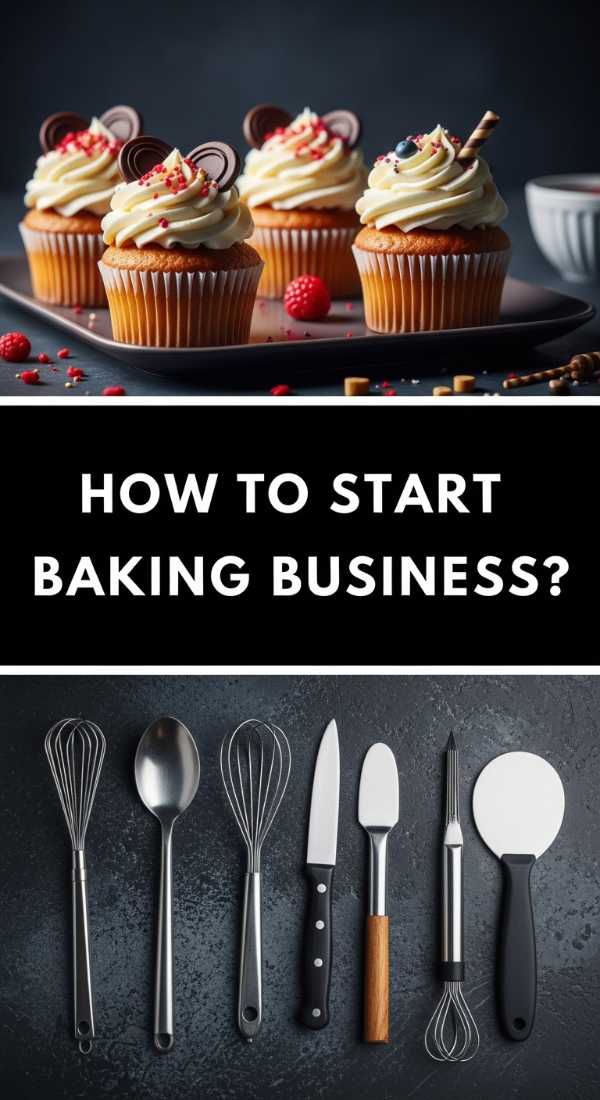
How to start baking business?
Why we love this
Turning a passion for flour and sugar into a thriving business is a dream that many of us hold close to our hearts. It is the ultimate expression of creative freedom, allowing you to share your unique flavors and artistic vision with your community every single day. The thrill of seeing a customer’s face light up when they taste your signature recipe is unmatched, providing a sense of fulfillment that goes far beyond a traditional career path, blending the art of chemistry with the warmth of hospitality.
Ingredients
- A solid, tested business plan
- Legal business registration and permits
- Food handler’s license and insurance
- A niche or ‘signature’ product line
- Basic kitchen equipment (commercial grade preferred)
- A dedicated marketing strategy
- Startup capital for ingredients and packaging
How to make it
- The first step is deep research into your local cottage food laws or commercial kitchen requirements. Every region has specific health and safety regulations that dictate whether you can bake from home or need a professional space.
- Develop your niche. Don’t try to bake everything; instead, master 3 to 5 ‘hero’ products that people can’t get anywhere else. Perfect these recipes until they are consistent every single time.
- Register your business name and obtain the necessary tax IDs and insurance. This protects you and gives your brand immediate professional credibility.
- Create a visual identity. This includes a logo, a color palette, and a clear voice for your social media presence. Visuals are everything in the food industry, so invest in high-quality photography early on.
- Set up your ordering system. Whether it is a simple DM-to-order system or a full e-commerce website, make it as easy as possible for customers to give you their money.
- Start small by selling at local farmers’ markets or pop-ups. This provides invaluable face-to-face feedback and helps you gauge demand before scaling up your production.
How to design baking tattoos?

Why we love this
Baking tattoos are a beautiful way to wear your heart—and your craft—on your sleeve, literally. They serve as a permanent tribute to the precision, patience, and love that goes into every loaf of bread or delicate pastry you create. From minimalist rolling pin silhouettes to intricate, colorful stand mixers adorned with flowers, these designs are a visual language that connects you to a global community of makers, celebrating the tools of the trade that bring so much joy to others.
Ingredients
- Reference images of baking tools (whisks, mixers, wheat)
- A clear vision of the tattoo style (fine line, traditional, watercolor)
- A reputable tattoo artist specializing in your chosen style
- Placement ideas (forearm, wrist, ankle)
- Sketches or mood boards
How to make it
- Start by gathering visual inspiration from your own kitchen. Take photos of your favorite heirloom whisk or the specific way you score your sourdough. These personal touches make the design unique.
- Research tattoo styles. Do you want something ‘Traditional’ with bold black outlines and vibrant colors, or something ‘Fine Line’ and delicate? Knowing this will help you find the right artist.
- Look for a tattoo artist whose portfolio matches your vision. A great artist will take your basic idea and add professional flair, ensuring the design flows well with the anatomy of your body.
- Schedule a consultation. During this meeting, discuss the ‘meaning’ behind the elements—perhaps a sprig of lavender for your favorite cake flavor or a specific temperature on a candy thermometer.
- Review the stencil carefully before the ink hits the skin. Check for symmetry and scale. Remember, small details can blur over time, so listen to the artist’s advice on size and placement for longevity.
How to make lemon tarts?

Why we love this
The lemon tart is the crown jewel of the pastry world, offering a sharp, citrusy brightness that cuts through the richness of a buttery shortcrust shell. There is a specific satisfaction in the silky-smooth texture of a perfectly set lemon curd as it hits your tongue, followed by the crunch of a crust that tastes like high-quality butter and vanilla. It is a dessert that feels incredibly light and refreshing, making it the perfect palate cleanser for a summer dinner party or a sunny afternoon tea.
Ingredients
- 1 1/2 cups all-purpose flour
- 1/2 cup powdered sugar
- 3/4 cup cold unsalted butter, cubed
- 1 large egg yolk
- 4 large eggs (for filling)
- 1 cup granulated sugar (for filling)
- 3/4 cup fresh lemon juice
- 2 tablespoons lemon zest
- 1/2 cup heavy cream
How to make it
- Create the crust (Pâte Sucrée) by pulsing flour, powdered sugar, and cold butter in a food processor until it looks like coarse sand. Add the egg yolk and pulse until the dough just starts to come together.
- Press the dough into a tart pan with a removable bottom. Freeze the shell for 30 minutes. This prevents shrinkage during baking. Preheat your oven to 350°F (175°C).
- Line the frozen shell with parchment paper and pie weights. Blind bake for 15 minutes, remove the weights, and bake for another 10 minutes until the bottom is dry and golden. Let it cool completely.
- Prepare the filling by whisking eggs, granulated sugar, lemon juice, lemon zest, and heavy cream in a bowl until perfectly smooth. Strain the mixture through a fine-mesh sieve to remove any bits of cooked egg or excess zest for a silky finish.
- Place the tart shell on a baking sheet inside the oven (to prevent spilling) and carefully pour the lemon mixture into the shell.
- Bake at 325°F (160°C) for 20-25 minutes. The edges should be set, but the center should still have a slight jiggle. Cool to room temperature, then refrigerate for at least 2 hours before slicing.
How to grow baking business?

Why we love this
Watching your small baking operation bloom into a full-scale success is one of the most rewarding journeys a creative entrepreneur can take. Growth represents more than just higher sales; it’s about refining your systems, expanding your team, and reaching a wider audience who appreciates your craft. The process of scaling allows you to transition from ‘the baker’ to ‘the visionary,’ giving you the space to innovate new products while your business reaches new heights and solidifies its place in the local culinary landscape.
Ingredients
- Consistent financial tracking software
- Customer relationship management (CRM) tools
- Scaling plan (hiring or larger space)
- Wholesale partnership agreements
- Advanced marketing (SEO and paid ads)
- Diversified revenue streams (classes, merch)
How to make it
- Analyze your current data to identify your most profitable items. Growth doesn’t mean doing more of everything; it means doing more of what works. Cut low-margin items that take too much time.
- Invest in efficiency. Upgrade to a 20-quart mixer or a double deck oven. Reducing the time it takes to produce a single loaf or cake is the fastest way to increase your capacity without adding labor.
- Expand your reach through wholesale. Contact local coffee shops or boutique grocery stores to carry your products. This provides a steady, predictable income stream compared to individual retail orders.
- Build a team. Start by hiring someone to handle cleaning and packaging, freeing you up for high-level baking and business strategy. Create standard operating procedures (SOPs) so they can replicate your quality.
- Leverage digital marketing. Start an email list to alert customers of ‘drops’ or seasonal specials. Use SEO strategies on your website to ensure local customers find you when they search for specialty cakes or bread.
- Monitor your cash flow religiously. Growth often requires upfront investment, so ensure you have a line of credit or savings to cover the ‘growing pains’ phase without sacrificing ingredient quality.
How to bake strawberry shortcake?

Why we love this
Strawberry shortcake is the essence of pure, unadulterated joy served on a plate. There is a rustic charm to the slightly crumbly, salted biscuit that perfectly soaks up the sweet, macerated juices of ruby-red strawberries. Topped with a cloud of freshly whipped cream that has just a hint of vanilla, every bite is a perfect balance of textures: the crunch of sugar on the biscuit top, the softness of the fruit, and the airy lightness of the cream. It is a dessert that tastes like a sunny afternoon in a berry patch.
Ingredients
- 2 lbs fresh strawberries, hulled and sliced
- 1/4 cup plus 2 tablespoons granulated sugar
- 3 cups all-purpose flour
- 1 tablespoon baking powder
- 1/2 teaspoon baking soda
- 3/4 cup cold unsalted butter, cubed
- 1 cup buttermilk
- 1 cup heavy whipping cream
- 1 teaspoon vanilla extract
How to make it
- Macerate the strawberries: Toss the sliced berries with 2 tablespoons of sugar and let them sit at room temperature for at least 30 minutes. This draws out the juices to create a natural syrup.
- Preheat your oven to 425°F (220°C). In a large bowl, whisk together the flour, 1/4 cup sugar, baking powder, baking soda, and a pinch of salt.
- Using a pastry cutter or your fingers, work the cold butter into the flour mixture until it resembles small peas. Be quick so the butter doesn’t melt; cold butter is key for a flaky biscuit.
- Stir in the buttermilk until a shaggy dough forms. Turn it onto a floured surface, gently pat it into a 1-inch thick rectangle, and cut into rounds using a biscuit cutter. Do not twist the cutter, as this seals the edges and prevents rising.
- Brush the tops with a little heavy cream and sprinkle with coarse sugar. Bake for 12-15 minutes until tall and golden brown.
- Whip the heavy cream with vanilla and a tablespoon of sugar until soft peaks form. Split the warm biscuits in half, layer with strawberries and a generous dollop of cream, and serve immediately.
How to choose baking tattoos?

Why we love this
Choosing the right baking tattoo is a deeply personal process of curation, much like selecting the finest ingredients for a signature recipe. It’s an opportunity to reflect on your journey as a baker—perhaps acknowledging a grandmother who taught you how to knead dough or a specific milestone in your professional career. The right design becomes a badge of honor, a conversation starter, and a source of daily inspiration that reminds you why you fell in love with the art of baking in the first place.
Ingredients
- Personal story or motivation
- Visual style preferences
- Desired body placement
- Color vs. Black and Grey choice
- A list of ‘meaningful’ symbols (wheat, whisk, scale)
How to make it
- Identify the ‘why.’ Are you getting this tattoo to celebrate your career, a loved one, or simply your love for sweets? This will dictate whether the design should be whimsical or technical.
- Think about placement in relation to your work. If you work in a professional kitchen, consider how heat or frequent hand-washing might affect the healing process of a tattoo on the hands or forearms.
- Choose your icons. A stand mixer represents modern baking, while a bundle of wheat or a wooden spoon lean towards traditional, rustic roots. Combining these with botanical elements like vanilla orchids or cocoa beans adds depth.
- Consider the scale. A tiny whisk on a finger might look cute now, but fine details in small areas can fade. Larger pieces on the outer arm or calf allow for more intricate shading and better longevity.
- Consult with your artist about ‘readability.’ You want someone to be able to tell what your tattoo is from a few feet away. High contrast and clear outlines are essential for food-themed art.
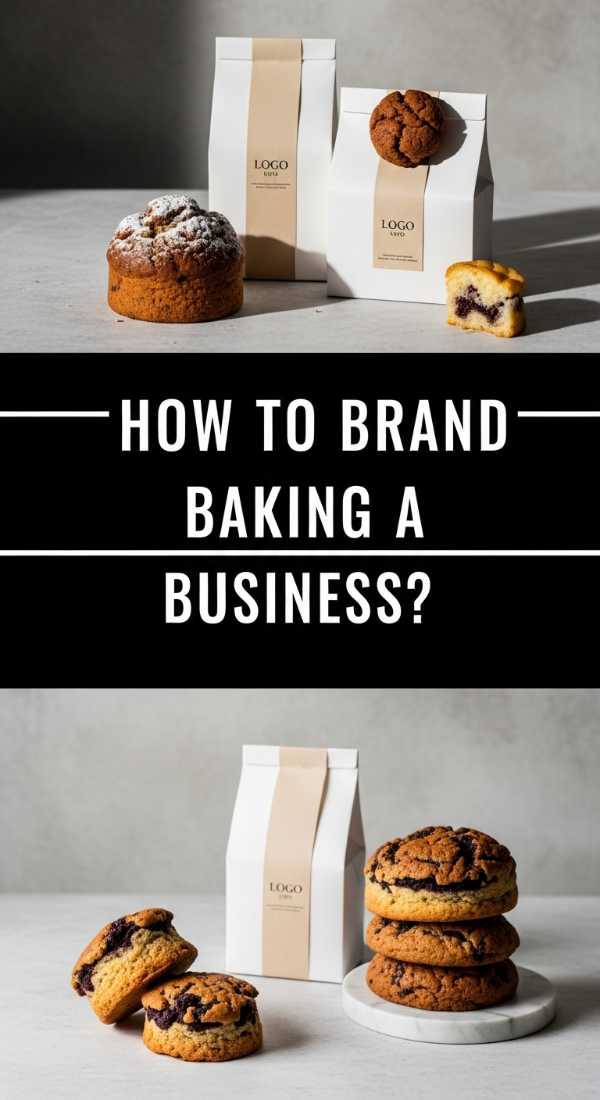
How to brand baking business?
Why we love this
Branding is the secret ingredient that transforms a ‘person who bakes’ into a ‘recognized bakery.’ It is the emotional connection you build with your customers before they even take their first bite. A cohesive brand tells a story of quality, care, and specific style, whether you are a rustic sourdough specialist or a high-end luxury cake designer. When your packaging, logo, and social media all sing the same tune, it builds a level of trust and professionalism that allows you to charge premium prices for your hard work.
Ingredients
- Brand name and tagline
- Logo suite (primary, secondary, and submark)
- Defined color palette and typography
- Consistent brand ‘voice’
- High-quality brand photography
- Cohesive packaging design
How to make it
- Define your ‘Brand Personality.’ Write down five adjectives that describe your baking (e.g., Rustic, Elegant, Whimsical, Modern, Comforting). Every design choice must align with these words.
- Select a color palette that evokes the right feeling. Warm tones like terracotta and cream suggest rustic bread, while pastels and gold might suggest high-end patisserie.
- Invest in professional photography. In the food world, people eat with their eyes first. You need a mix of product shots, ‘behind the scenes’ process shots, and a professional headshot of yourself.
- Develop your packaging. The unboxing experience is a viral marketing opportunity. Custom stamps for your boxes, branded tissue paper, or a specific ribbon color make your product instantly recognizable.
- Create a ‘Style Guide.’ This is a document that lists your fonts, colors, and logo usage rules. Refer to this every time you create a social media post or an invoice to ensure 100% consistency.
- Infuse your ‘voice’ into your copy. Whether you are writing a caption on Instagram or a description on your menu, make sure it sounds like you—the person behind the flour.
How to make fruit tarts?

Why we love this
Fruit tarts are a stunning display of nature’s candy, arranged in geometric patterns that look almost too good to eat. We love the interplay between the crisp, cookie-like crust and the velvet-smooth pastry cream (crème pâtissière) that lies beneath the fruit. Each bite offers a burst of freshness from the berries, followed by the rich, vanilla-flecked cream and the sweet crunch of the tart shell. It is a sophisticated, colorful centerpiece that never fails to impress at a brunch or dinner gathering.
Ingredients
- 1 pre-baked 9-inch sweet tart shell
- 2 cups whole milk
- 1/2 cup granulated sugar
- 1/4 cup cornstarch
- 4 large egg yolks
- 2 tablespoons unsalted butter
- 1 tablespoon vanilla bean paste
- Assorted fresh fruit (kiwi, berries, mango, grapes)
- 1/4 cup apricot preserves (for glaze)
How to make it
- Make the pastry cream: Heat the milk and vanilla paste in a saucepan until it just begins to simmer. In a separate bowl, whisk together the sugar, cornstarch, and egg yolks until pale and thick.
- Temper the eggs: Slowly pour about half of the hot milk into the egg mixture while whisking constantly. This prevents the eggs from scrambling. Pour everything back into the saucepan.
- Cook over medium heat, whisking vigorously, until the mixture thickens into a pudding-like consistency. Remove from heat and stir in the butter until melted and glossy.
- Transfer the cream to a bowl, press plastic wrap directly onto the surface to prevent a skin from forming, and chill for at least 4 hours.
- Assemble: Spread the chilled pastry cream evenly into your pre-baked tart shell. Arrange the sliced fruit in concentric circles, starting from the outside and working your way in for a professional look.
- Heat the apricot preserves with a teaspoon of water, strain it, and lightly brush the warm glaze over the fruit. This gives the tart a professional shine and keeps the fruit from drying out.
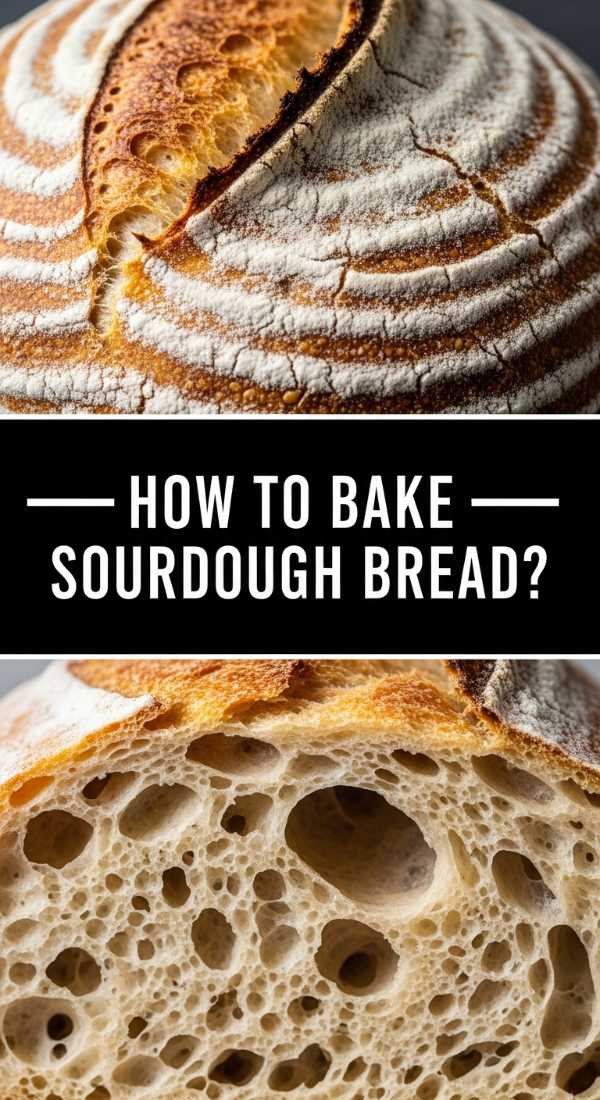
How to bake sourdough bread?
Why we love this
Sourdough is the ultimate labor of love, a slow-fermented masterpiece that requires nothing but flour, water, salt, and time. There is a primal satisfaction in hearing the ‘crackled song’ of a loaf as it cools, the crust singing as it contracts. The interior, or crumb, is airy and chewy with a distinct tang that only wild yeast can provide. Baking sourdough connects you to an ancient tradition, requiring you to tune into the rhythms of your environment and the life of your starter, resulting in a loaf that is as nutritious as it is delicious.
Ingredients
- 100g active, bubbly sourdough starter
- 350g warm water (filtered)
- 500g bread flour
- 10g fine sea salt
How to make it
- In a large glass bowl, whisk your active starter and warm water together until the starter is dissolved. Add the flour and salt, then mix by hand until a shaggy dough forms and no dry flour remains. Cover and rest for 30 minutes (autolyse).
- Perform a series of ‘stretch and folds.’ Every 30 minutes for 2 hours, grab one side of the dough, stretch it upwards, and fold it over the center. Rotate the bowl and repeat four times. This builds strength without heavy kneading.
- Bulk Fermentation: Cover the bowl and let the dough rise in a warm spot until it has grown by about 50% and looks bubbly and jiggly. This can take anywhere from 4 to 10 hours depending on your kitchen temperature.
- Shape the loaf: Gently turn the dough onto a floured surface. Fold the edges into the center to create tension, then flip it over and use your hands to tension the surface into a smooth ball. Place it upside down in a floured proofing basket (banneton).
- Cold Proof: Place the basket in the fridge overnight (12-15 hours). This develops the flavor and makes the dough easier to score.
- Bake: Preheat a Dutch oven at 500°F (260°C). Turn the dough onto parchment paper, score a deep line with a razor blade, and carefully drop it into the hot pot. Bake covered for 20 minutes at 450°F, then uncovered for 20-25 minutes until the crust is a deep mahogany brown.
Conclusion
Creating viral-worthy food boards and baked goods isn’t just about the final photo—it’s about the process of slowing down and enjoying the craft. Whether you’re starting a new business venture, marking your passion with ink, or simply mastering the art of the perfect sourdough crust, I hope these guides inspire you to bring a little more beauty into your kitchen this week. Happy baking!