
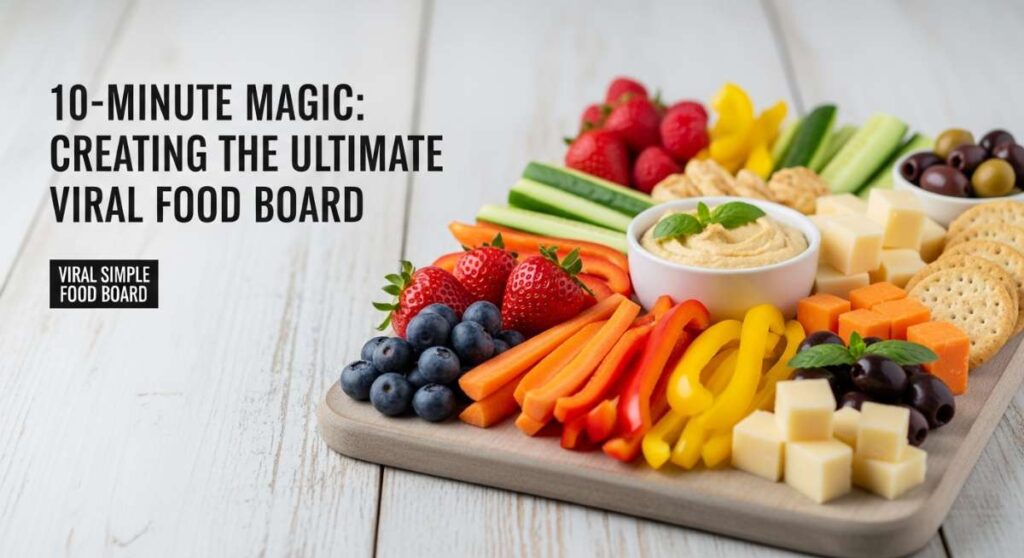
10-Minute Magic: Creating the Ultimate Viral Food Board
We’ve all been there: the sun is setting, your favorite playlist is humming in the background, and friends are about to knock on the door, yet the thought of a traditional three-course meal feels overwhelming. There is a specific kind of magic that happens when we stop worrying about formal plating and start embracing the abundance of a shared board. It’s about more than just food; it’s about the laughter that erupts while someone reaches for the last crispy potato and the way a beautifully arranged spread invites everyone to linger just a little longer. This is the heart of the ‘viral’ food board trend—it’s approachable, stunning, and deeply soulful.
The secret to a show-stopping food board isn’t hours of labor; it’s about choosing high-impact, flavorful elements that look as good as they taste. Whether you’re craving the comfort of a slow-cooked stew or the vibrant crunch of garden greens, the goal is to create a tapestry of textures and aromas that tell a story. In this guide, I’m sharing my favorite elements to mix and match so you can build a board that isn’t just a meal, but an experience. Let’s dive into the kitchen and create something truly memorable together.
How to cook quick chicken dinner
Why we love this
There is nothing quite like the sizzle of a well-seasoned chicken breast hitting a hot pan, filling the kitchen with the scent of toasted herbs and savory drippings. We love this because it yields a perfectly golden-brown crust that yields to an incredibly juicy, tender interior, making it the versatile star of any board. The aroma of garlic and thyme infusing into the meat creates an immediate sense of home and comfort, while the vibrant color adds a rustic, professional touch to your spread. It is the ultimate reliable protein that pairs beautifully with everything from creamy dips to sharp cheeses.
Ingredients
- 2 boneless, skinless chicken breasts
- 2 tablespoons olive oil
- 1 tablespoon unsalted butter
- 3 cloves garlic, smashed
- Fresh thyme and rosemary sprigs
- Sea salt and cracked black pepper to taste
- 1/2 teaspoon smoked paprika
How to make it
- Start by patting your chicken breasts completely dry with paper towels; removing surface moisture is the absolute key to achieving that signature golden-brown crust rather than steaming the meat.
- Season both sides generously with sea salt, cracked black pepper, and a dusting of smoked paprika for a hint of earthiness and color.
- Place a heavy-bottomed skillet over medium-high heat and add the olive oil; wait until the oil is shimmering and just starting to show a faint wisp of smoke before adding the chicken.
- Lay the chicken in the pan (away from you to avoid splashes) and let it sear undisturbed for about 5-6 minutes; you are looking for the edges to turn opaque and the bottom to release easily from the pan with a deep amber color.
- Flip the chicken and immediately add the butter, smashed garlic, and herb sprigs to the pan; as the butter foams, tilt the pan slightly and use a large spoon to continuously baste the chicken with the flavored fat for the remaining 4-5 minutes of cooking.
- Check for doneness using an instant-read thermometer—it should register 165°F (74°C)—then remove from the pan and let it rest for at least 5 minutes before slicing against the grain to ensure the juices remain locked inside.
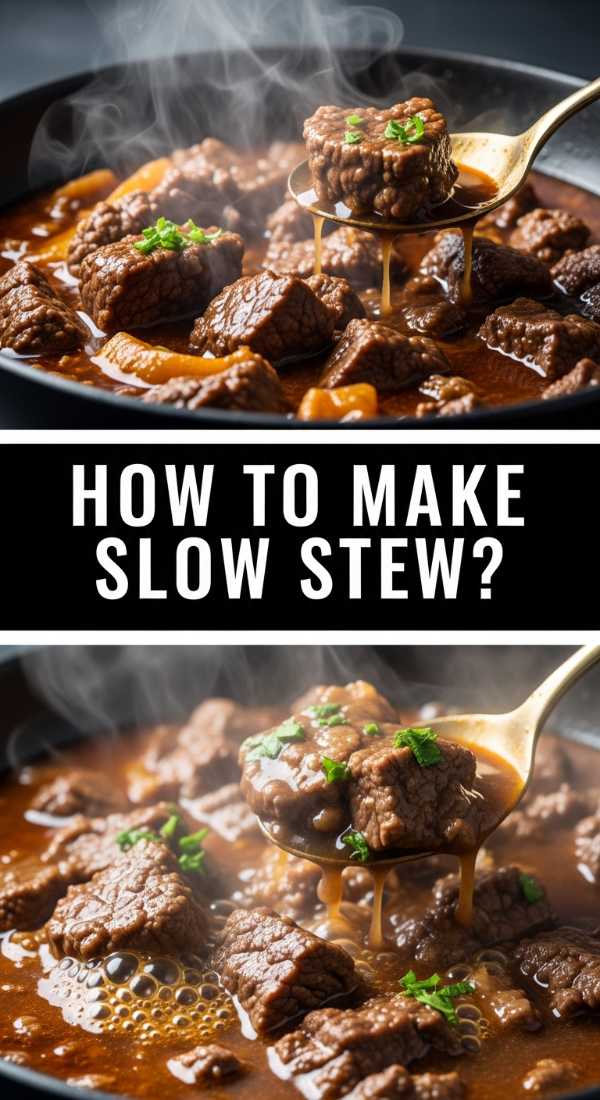
How to make slow beef stew
Why we love this
Slow beef stew is the culinary equivalent of a warm, weighted blanket on a rainy afternoon, offering a richness that only time can create. We adore the way the tough fibers of the beef transform into melt-in-your-mouth morsels, swimming in a velvet-thick gravy that carries notes of red wine and earthy root vegetables. The aroma is intoxicating, filling every corner of the house with a savory promise of a hearty meal that feels both humble and luxurious. It provides a stunning, dark contrast on a food board, especially when served in a small communal crock or bowl for dipping.
Ingredients
- 2 lbs beef chuck, cut into 1.5-inch cubes
- 1/4 cup all-purpose flour
- 3 cups beef bone broth
- 1 cup dry red wine (Cabernet or Merlot)
- 2 tablespoons tomato paste
- 3 large carrots, thick-sliced
- 2 stalks celery, chopped
- 1 large onion, diced
- 4 sprigs fresh thyme
How to make it
- Begin by tossing your beef cubes in a bowl with flour, salt, and pepper until each piece is lightly and evenly coated; this flour will eventually act as the thickening agent for your luscious gravy.
- In a large Dutch oven, heat a splash of oil over high heat and sear the beef in small batches; do not crowd the pan, as you want a hard brown crust on all sides to develop deep umami flavors.
- Remove the beef and add the onions, carrots, and celery to the same pot, sautéing for about 5 minutes until the onions are translucent and have picked up the browned bits (fond) from the bottom.
- Stir in the tomato paste and cook for 2 minutes until it turns a deep brick red, then deglaze the pan by pouring in the red wine, scraping the bottom vigorously with a wooden spoon to incorporate all that flavor.
- Return the beef to the pot, add the beef broth and thyme sprigs, and bring the mixture to a very gentle simmer.
- Cover with a tight-fitting lid and reduce the heat to the lowest setting; let it braise for 2.5 to 3 hours until the meat is tender enough to be broken apart with a spoon, ensuring the liquid never reaches a rolling boil which would toughen the protein.
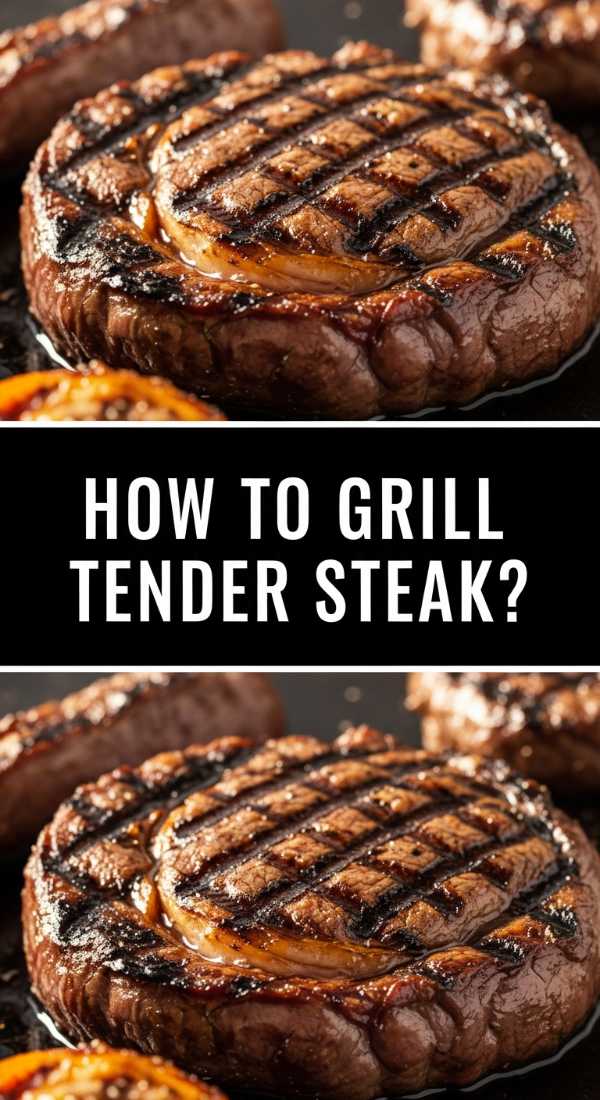
How to grill tender steak outdoors

Why we love this
There is a primal joy in the ritual of outdoor grilling, where the scent of charcoal and seared fats creates an irresistible invitation to eat. A perfectly grilled steak offers a complex profile of charred, smoky exterior and a cool, buttery pink center that provides a sophisticated anchor for your viral food board. The contrast between the rough texture of the crust and the silky tenderness of the meat is a sensory delight that never fails to impress. Sliced thin and fanned out, it looks incredibly appetizing and encourages guests to pick and choose their favorite pieces.
Ingredients
- 2 Ribeye or New York Strip steaks (1.5 inches thick)
- 2 tablespoons high-smoke point oil (like avocado oil)
- Flaky sea salt
- Coarsely ground black pepper
- 2 tablespoons unsalted butter
- 1 sprig rosemary
How to make it
- Take your steaks out of the refrigerator at least 45 minutes before grilling; bringing the meat to room temperature is essential for an even cook from the edge to the center.
- Preheat your grill to high heat (around 450-500°F); if using charcoal, wait until the coals are covered in a thin layer of grey ash and the heat is intense.
- Pat the steaks bone-dry and rub them with a thin layer of oil, then season very aggressively with flaky salt and pepper, as much of the seasoning will fall off during the grilling process.
- Place the steaks on the hottest part of the grill and sear for 3-4 minutes without moving them to create those beautiful, professional-looking grill marks.
- Flip the steaks and move them to a slightly cooler zone of the grill (indirect heat) if they are browning too quickly; cook for another 3-5 minutes depending on your desired level of doneness (130°F for medium-rare).
- In the final minute, place a pat of butter and a rosemary sprig directly onto each steak, allowing it to melt and perfume the meat before removing it from the grill to rest for 10 minutes, which allows the muscle fibers to relax and reabsorb the flavorful juices.
How to bake buttery garlic bread

Why we love this
Nothing brings a group together faster than the smell of garlic and butter wafting from the oven, promising a crunch that echoes through the room. We love garlic bread for its dual texture: the shattering crispiness of the crust and the soft, pillowy interior that is saturated with herb-flecked fat. It serves as the perfect edible utensil, ready to swipe up stray sauces or hold a slice of tender steak. Its golden hue and the vibrant green of fresh parsley make it a visual highlight that fills the gaps of any food board with pure, carb-loaded comfort.
Ingredients
- 1 large French baguette or Italian loaf
- 1/2 cup unsalted butter, softened
- 4 cloves garlic, finely minced
- 1/4 cup fresh parsley, chopped
- 1/4 cup grated Parmesan cheese
- A pinch of red pepper flakes
How to make it
- Preheat your oven to 375°F (190°C) and line a large baking sheet with parchment paper for easy cleanup.
- In a small bowl, combine the softened butter, minced garlic, chopped parsley, and red pepper flakes; use a fork to cream them together until the mixture is completely uniform and bright green.
- Slice the bread into 1-inch thick rounds, but stop just before cutting through the bottom crust if you want a ‘pull-apart’ loaf, or cut them completely for individual toasts.
- Spread a generous amount of the garlic butter between each slice and across the top of the loaf, ensuring the butter gets deep into the nooks and crannies.
- Sprinkle the grated Parmesan cheese over the top to create a salty, umami-rich crust as it bakes.
- Wrap the loaf loosely in foil to keep the center soft and bake for 10 minutes, then open the foil and bake for another 5 minutes until the edges are toasted to a perfect golden brown and the cheese is bubbling.
How to make savory pot roast

Why we love this
Savory pot roast is the king of nostalgic comfort foods, offering a deep, concentrated beef flavor that feels like a Sunday afternoon at grandma’s house. We love it for its incredible tenderness—the way it effortlessly shreds into succulent ribbons with just the touch of a fork. The vegetables that cook alongside it become infused with the meat’s essence, turning into sweet, soft jewels that melt on the tongue. It’s a rustic addition to a board that brings a sense of warmth and abundance, especially when drizzled with its own dark, shimmering reduction.
Ingredients
- 3-4 lb Chuck roast
- 2 tablespoons vegetable oil
- 1 lb small Yukon Gold potatoes, halved
- 3 large carrots, cut into chunks
- 2 onions, quartered
- 2 cups beef stock
- 1 tablespoon Worcestershire sauce
- 2 bay leaves
How to make it
- Preheat your oven to 300°F (150°C); a low and slow temperature is vital to breaking down the tough connective tissues in the chuck roast without drying it out.
- Season the entire roast liberally with salt and pepper, then sear it in a hot Dutch oven with oil until a dark, mahogany crust forms on all sides (about 4-5 minutes per side).
- Remove the roast and briefly sauté the onions and carrots in the remaining fat until they start to soften and brown slightly at the edges.
- Deglaze the pot with a splash of beef stock, scraping the bottom, then return the roast to the pot and tuck the potatoes and bay leaves around it.
- Pour in the remaining beef stock and Worcestershire sauce until the liquid comes about halfway up the side of the meat; you want a braise, not a boil.
- Cover tightly and bake in the oven for 3 to 4 hours; you’ll know it’s finished when the meat is ‘fork-tender,’ meaning a fork slides in and out with absolutely no resistance.
How to make fluffy pancake stacks

Why we love this
There is something inherently joyful about a stack of pancakes, their golden, porous surfaces just waiting to soak up a river of amber maple syrup. We love the contrast of the slightly crisp, buttery edges against the airy, cloud-like center that practically dissolves in your mouth. The sweet, vanilla-tinged aroma of the batter cooking is a universal signal for a slow, indulgent morning. On a food board, these little rounds act as the perfect canvas for fresh berries, whipped cream, or a dusting of snow-white powdered sugar, making them the ultimate brunch centerpiece.
Ingredients
- 2 cups all-purpose flour
- 2 tablespoons sugar
- 1 tablespoon baking powder
- 1/2 teaspoon salt
- 1 1/2 cups whole milk
- 1 large egg
- 4 tablespoons melted butter
- 1 teaspoon vanilla extract
How to make it
- In a large bowl, whisk together the dry ingredients (flour, sugar, baking powder, and salt); sifting the flour beforehand can lead to even lighter, airier results.
- In a separate measuring jug, whisk the milk, egg, melted butter, and vanilla; ensure the butter has cooled slightly so it doesn’t scramble the egg upon contact.
- Make a well in the center of the dry ingredients and pour in the wet mixture; fold gently with a spatula just until combined—the most important tip is to leave some lumps in the batter, as over-mixing develops gluten and makes pancakes tough.
- Heat a non-stick griddle or large skillet over medium-low heat and lightly coat with a small amount of butter or neutral oil.
- Pour 1/4 cup of batter for each pancake and wait patiently until bubbles form on the surface and the edges look set and matte; this is the visual cue that it’s ready to flip.
- Flip carefully and cook for another 1-2 minutes until the second side is golden brown; keep the finished pancakes in a low oven (200°F) to stay warm while you finish the rest of the stack.
How to roast fresh garden greens

Why we love this
Roasting garden greens like asparagus, broccolini, or kale transforms them from simple sides into charred, caramelized stars of the show. We love the way high heat intensifies their natural sweetness while creating crispy, salty tips that provide a satisfying snap with every bite. The bright, emerald green colors pop against the more muted tones of meats and breads, adding a necessary freshness and visual vitality to your board. Drizzled with a bit of lemon or sprinkled with zest, they offer a zesty punch that cleanses the palate between richer bites.
Ingredients
- 1 bunch of asparagus or broccolini
- 2 tablespoons extra-virgin olive oil
- 2 cloves garlic, sliced thin
- Zest of 1 lemon
- Flaky sea salt and red pepper flakes
How to make it
- Preheat your oven to 425°F (220°C); a high temperature is crucial for roasting greens quickly so they char on the outside before the inside becomes mushy.
- Trim the woody ends off your greens and pat them completely dry; moisture is the enemy of the roast, as it will cause the vegetables to steam instead of crisp.
- Spread the greens in a single layer on a large baking sheet—do not overlap them, as air circulation is what creates those delicious crispy bits.
- Drizzle with olive oil and toss with the sliced garlic, salt, and red pepper flakes until every spear or floret is lightly and evenly coated in oil.
- Roast for 10-12 minutes, tossing them halfway through the cooking time; look for the tips to be dark brown and the stems to be tender but still have a bit of a ‘bite.’
- Immediately upon removing from the oven, sprinkle with fresh lemon zest to brighten the flavors and add a final pop of aroma before arranging them in long, elegant rows on your board.
How to cook creamy dinner pasta

Why we love this
A pile of creamy pasta is pure, unadulterated decadence, offering a silky mouthfeel that coats the tongue in a blanket of cheese and cream. We love the way the sauce clings to every curve and ridge of the noodles, ensuring that every bite is a perfect balance of salt, fat, and starch. The gentle aroma of simmering cream and nutty Parmesan cheese creates an atmosphere of sophisticated comfort. It serves as a fantastic “filler” for a food board, tucked into a bowl or swirled into nests that invite guests to twirl their forks and enjoy.
Ingredients
- 12 oz Fettuccine or Penne pasta
- 1 cup heavy cream
- 1/2 cup unsalted butter
- 1 cup freshly grated Parmesan cheese
- Freshly cracked black pepper
- 1/2 cup reserved pasta water
How to make it
- Bring a large pot of heavily salted water to a rolling boil; the water should taste like the sea to properly season the pasta from the inside out.
- Cook the pasta until it is ‘al dente’ (firm to the bite), which is usually 1-2 minutes less than the package instructions; it will finish cooking in the sauce later.
- While the pasta cooks, melt the butter in a wide skillet over medium heat, then stir in the heavy cream and bring to a very gentle simmer for about 3 minutes to slightly thicken.
- Before draining the pasta, carefully scoop out a cup of the starchy pasta water—this is your ‘liquid gold’ that will help emulsify the sauce.
- Add the cooked pasta directly into the cream and butter mixture, then sprinkle the Parmesan cheese over the top and begin tossing vigorously with tongs.
- Add the reserved pasta water a tablespoon at a time while tossing; the heat and the starch will combine with the cheese to create a glossy, smooth sauce that clings to the noodles rather than pooling at the bottom.
How to fry crispy golden potatoes
Why we love this
There is perhaps no sound more satisfying than the loud, glass-like crunch of a perfectly fried potato. We love these golden nuggets for their fluffy, steam-filled centers and their rugged, salt-dusted exteriors that catch the light. They are the ultimate crowd-pleaser, offering a savory, earthy flavor that acts as the perfect companion to dips, meats, or even a simple squeeze of lemon. On a viral food board, they provide texture and height, creating little mountains of golden goodness that people simply cannot stop snacking on.
Ingredients
- 1.5 lbs Yukon Gold potatoes, cut into 1-inch cubes
- 1/2 cup neutral oil (or duck fat for extra flavor)
- 2 teaspoons sea salt
- 1 teaspoon dried rosemary or thyme
- 1/2 teaspoon garlic powder
How to make it
- Place the cubed potatoes in a pot of cold salted water and bring to a boil; parboil them for about 5-7 minutes until the edges are soft but the centers are still firm.
- Drain the potatoes and give them a vigorous shake in the colander to ‘scuff up’ the edges; those fuzzy, starchy bits are what will transform into the ultimate crispy crust once fried.
- Heat the oil or fat in a large heavy-bottomed skillet over medium-high heat until a drop of water sizzles instantly.
- Carefully add the potatoes in a single layer—work in batches if necessary to avoid crowding the pan, which would lower the oil temperature and lead to greasiness.
- Fry for 10-15 minutes, turning occasionally with a spatula, until every side is a deep, shattered-glass golden brown.
- Drain on paper towels for just a moment, then immediately toss with extra salt, garlic powder, and dried herbs while the oil is still wet on the surface so the seasoning sticks.
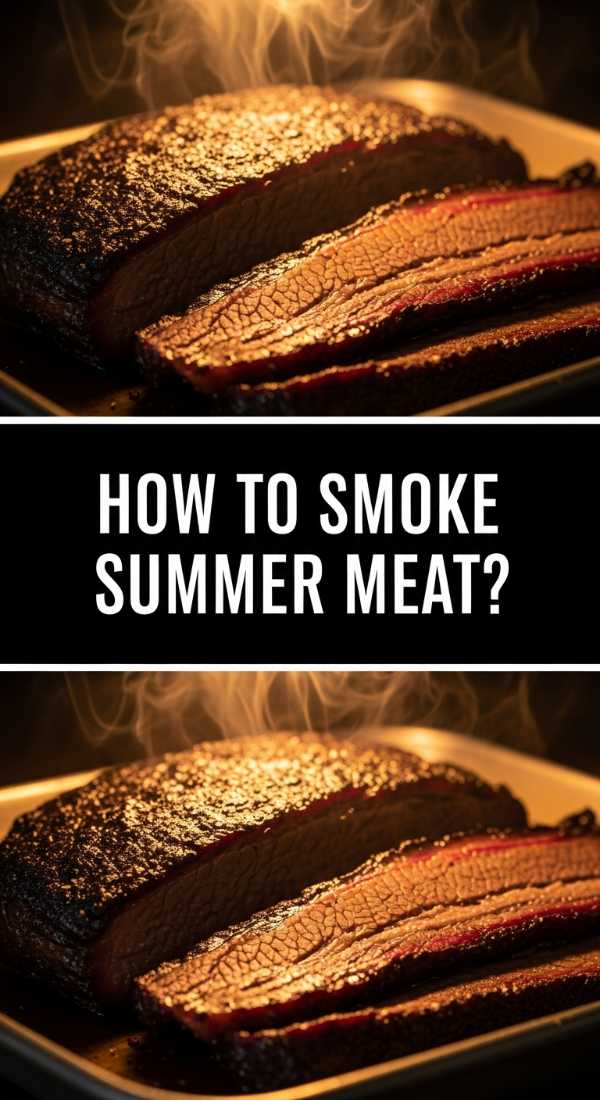
How to smoke summer BBQ meat
[IMAGE_10]
Why we love this
Smoking meat is an art form that rewards patience with a depth of flavor that is impossible to replicate any other way. We love the distinct ‘smoke ring’—that beautiful pink halo just beneath the dark, spiced bark—and the way the fat has rendered into a sweet, translucent glaze. The aroma of hickory or applewood smoke mingling with black pepper and brown sugar is the quintessential scent of summer gatherings. It adds a bold, masculine, and rustic element to a food board, providing a smoky punch that balances out sweeter or creamier components.
Ingredients
- 3 lbs Pork Shoulder or Beef Brisket
- 1/4 cup yellow mustard (as a binder)
- 1/2 cup BBQ dry rub (brown sugar, paprika, garlic, onion, pepper)
- Apple or Hickory wood chunks
- Apple juice in a spray bottle
How to make it
- Preheat your smoker to a steady 225°F (107°C); consistency is the most important factor in a successful smoke, so ensure your airflow is dialed in.
- Trim any excess thick fat caps to about 1/4 inch, then rub the entire surface of the meat with a thin layer of yellow mustard; you won’t taste the mustard, but it helps the dry rub adhere and build a better ‘bark.’
- Apply the dry rub generously, pressing it into the meat until every inch is covered in a thick layer of spices.
- Place the meat on the smoker grates and add your wood chunks to the coals; close the lid and resist the urge to peek, as ‘if you’re lookin’, you ain’t cookin’.’
- Every hour, lightly spritz the meat with apple juice to keep the surface moist, which helps the smoke penetrate and prevents the bark from becoming too hard or bitter.
- Smoke until the internal temperature reaches 195-205°F (depending on the cut); the meat should feel like butter when probed, then wrap it in butcher paper and let it rest in a cooler for at least one hour to allow the juices to redistribute before pulling or slicing for the board.
Conclusion
Building the ultimate viral food board is less about following a strict recipe and more about embracing the joy of variety and the warmth of shared experiences. By combining these ten master elements—from the crunch of golden potatoes to the smoky depth of BBQ meat—you create a landscape of flavor that caters to every craving. Remember, the best boards are the ones that look a little messy, feel a lot like home, and disappear quickly. So, grab your largest platter, gather your favorite people, and let the magic of the food board bring your table to life.
FAQ Section
Q: How do I keep the hot elements warm while I assemble the board?
A: The best trick is to use warmed stone or ceramic platters, or keep your meats resting in a low oven (around 170°F) until the very last second. You can also use small, pre-heated cast iron skillets placed directly on the board to hold things like potatoes or steak.
Q: Can I make any of these elements in advance?
A: Absolutely! The slow beef stew and pot roast actually taste better the next day as the flavors develop. You can also prep the pancake batter and chop the vegetables the night before to save time during assembly.
Q: What is the best way to arrange the board so it looks ‘viral’ and professional?
A: Start with your largest items first (the meats or bowls of pasta) to create ‘anchors,’ then fill in the gaps with your greens and potatoes. Finally, use ‘fillers’ like the garlic bread and small garnishes of fresh herbs to make the board look lush and overflowing.