

We have all been there: you’re scrolling through social media, and your feed is suddenly flooded with those impossibly elegant, sprawling food boards that look like they belong in a high-end editorial spread. There is something so welcoming about a beautifully curated board; it’s an invitation to gather, to linger over good conversation, and to indulge in something sweet. But let’s be honest—styling those magazine-worthy boards can feel like an expensive, daunting task that requires a professional culinary degree and a bottomless wallet.
I’m here to tell you that you don’t need a massive budget to create a viral-worthy centerpiece that will have your friends reaching for their phones before they even take a bite. By focusing on a single, vibrant hero ingredient—the humble, ruby-red strawberry—you can craft a variety of stunning dessert boards that feel incredibly luxurious without the premium price tag. Today, I’m sharing my favorite budget-friendly secrets to mastering the art of the strawberry food board, proving that simple, fresh ingredients are often the most sophisticated choice for any gathering.
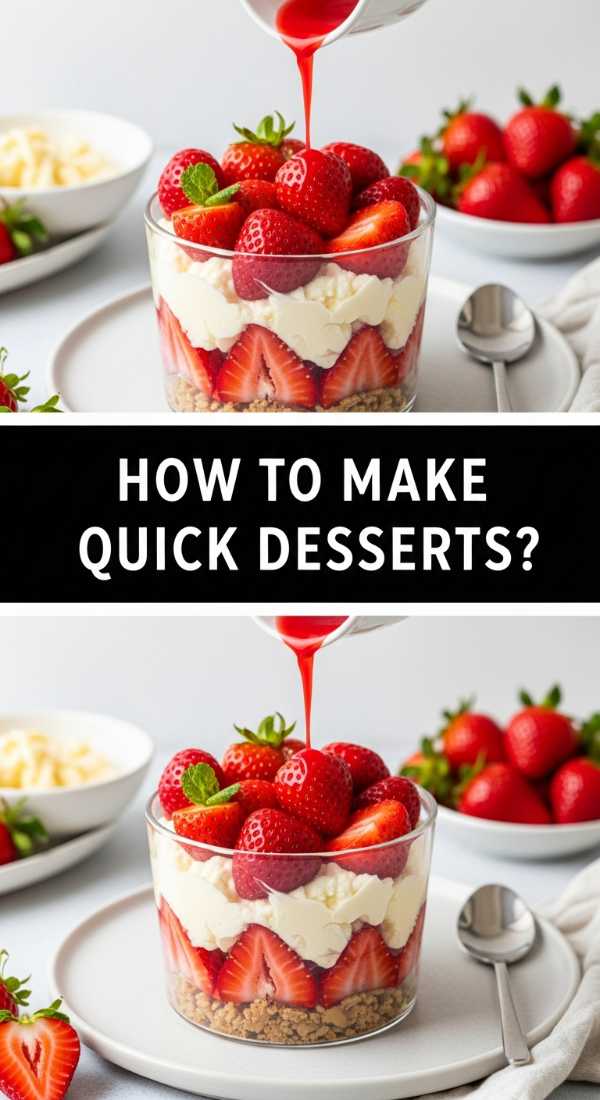
How to make easy strawberry desserts

Why we love this
There is an effortless elegance to a simple strawberry parfait board that instantly elevates a casual brunch or a cozy evening in. Imagine the scent of sun-ripened berries mingling with the cooling aroma of freshly whipped cream and a hint of vanilla bean. Each bite offers a satisfying contrast between the juicy, slightly tart burst of the fruit and the velvety, cloud-like texture of the cream, creating a sensory experience that feels like a warm summer afternoon. It’s the kind of dessert that feels indulgent and light all at once, making it a crowd-pleaser for every palate.
Ingredients
- 2 lbs fresh strawberries, washed and hulled
- 2 cups heavy whipping cream
- 1/4 cup powdered sugar
- 1 tsp vanilla bean paste
- 1 cup crushed graham crackers or digestive biscuits
- Fresh mint leaves for garnish
How to make it
- Begin by chilling your mixing bowl and whisk attachment in the freezer for 10 minutes; cold equipment is the secret to achieving a stable, voluminous whip.
- Pour the heavy cream into the chilled bowl and begin whisking on low speed, gradually increasing to medium-high as the cream begins to thicken and small bubbles form.
- Once soft peaks begin to appear (the cream will hold its shape but the tip will fold over), slowly sift in the powdered sugar and add the vanilla bean paste to ensure even distribution.
- Continue whisking until stiff peaks form, meaning the cream stands straight up when the whisk is lifted; be careful not to overbeat, or you will end up with butter.
- Slice half of your strawberries into uniform rounds and leave the others whole for visual variety on the board.
- Arrange the whipped cream in a central decorative bowl, surround it with the sliced and whole berries, and place the crushed crackers in small piles to create an interactive ‘build-your-own’ parfait station.
How to bake strawberry cake mix cookies

Why we love this
These cookies are a total game-changer for the busy host, offering a soft, pillowy texture that melts in your mouth with a nostalgic, sweet aroma that fills the entire kitchen. The vibrant pink hue adds an instant pop of color to your food board, making it look intentionally styled and professionally baked. When you pull these out of the oven, the scent of sweet cream and summer berries is absolutely intoxicating, and the chewy centers combined with slightly crisp edges provide a textural delight that keeps everyone coming back for seconds. They are the perfect budget-friendly ‘filler’ that looks and tastes like a gourmet bakery find.
Ingredients
- 1 box strawberry cake mix
- 2 large eggs
- 1/2 cup vegetable oil
- 1/2 cup white chocolate chips (optional)
- Extra powdered sugar for dusting
How to make it
- Preheat your oven to 350°F (175°C) and line two large baking sheets with parchment paper to ensure the cookies don’t stick and brown evenly on the bottom.
- In a large mixing bowl, combine the dry cake mix, eggs, and vegetable oil; use a sturdy spatula to fold the ingredients together until a thick, tacky dough forms and no dry streaks remain.
- If using white chocolate chips, gently fold them into the dough now, ensuring they are distributed evenly throughout the mixture for a burst of creamy sweetness in every bite.
- Using a small cookie scoop or a tablespoon, form the dough into 1-inch balls; for a professional look, roll the balls between your palms until they are perfectly smooth.
- Space the dough balls at least 2 inches apart on the baking sheets, as these cookies will spread slightly as they bake to create that classic soft-batch shape.
- Bake for 8 to 10 minutes; the key visual cue is that the edges should be just set and the tops may look slightly underdone—do not overbake, or they will lose their signature fudgy texture.
- Allow the cookies to cool on the pan for 5 minutes to firm up before transferring them to a wire rack to cool completely before adding them to your board.
How to prepare fresh strawberry desserts
Why we love this
Macerating strawberries is a simple culinary magic trick that transforms standard fruit into a glistening, syrupy masterpiece that tastes like the essence of luxury. As the berries sit in a light coating of sugar and citrus, they release their natural juices, creating a vibrant red glaze that catches the light beautifully on a serving board. The aroma becomes deeper and more floral, especially when paired with a sprig of fresh basil or a drizzle of aged balsamic. This preparation feels sophisticated and ‘chef-y,’ yet it relies entirely on the natural beauty and flavor of the fruit itself.
Ingredients
- 1 lb fresh strawberries, sliced
- 2 tbsp granulated sugar
- 1 tsp lemon zest
- 1 tbsp fresh lemon juice
- Small bunch of fresh basil leaves
How to make it
- Wash and pat the strawberries completely dry; excess moisture can dilute the natural juices we want to extract during the maceration process.
- Slice the strawberries into even vertical slivers, which maximizes the surface area for the sugar to penetrate and looks more elegant than simple halves.
- Place the slices in a glass bowl and sprinkle evenly with the granulated sugar, lemon zest, and lemon juice.
- Gently toss the mixture with a silicone spatula to coat every slice without bruising the delicate flesh of the fruit.
- Cover the bowl and let it sit at room temperature for at least 30 minutes, or up to 2 hours in the fridge; you will see a beautiful, clear red syrup pool at the bottom of the bowl.
- Just before serving on your board, chiffonade the basil (cut into thin ribbons) and toss it with the berries for a burst of herbal freshness and a striking green contrast against the red fruit.
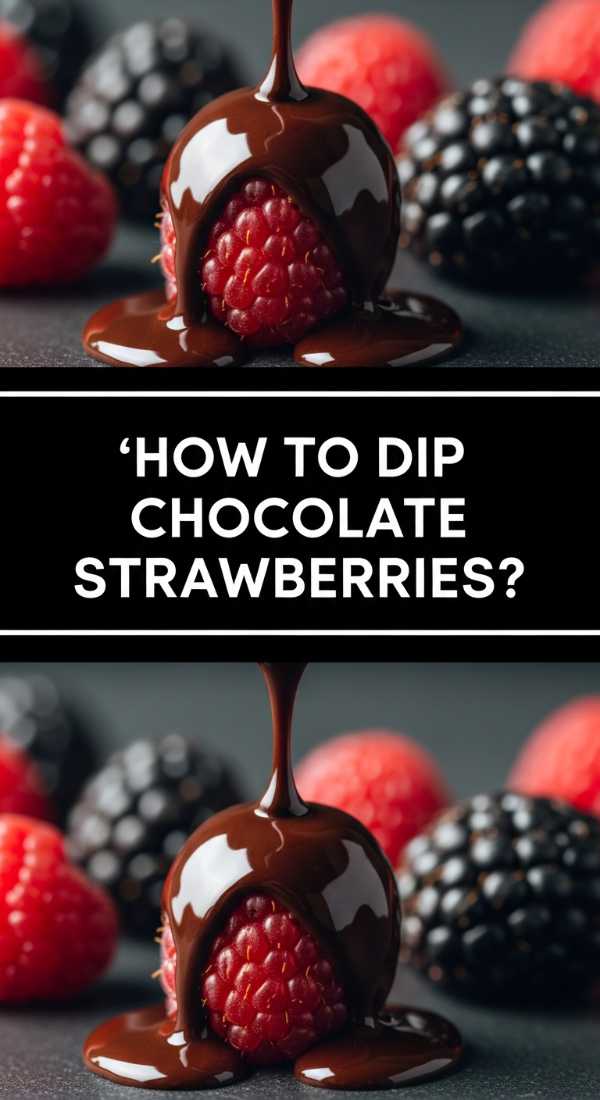
How to make chocolate covered strawberries
Why we love this
There is nothing that says ‘expensive’ quite like the glossy, dark sheen of a perfectly dipped chocolate strawberry nestled on a wooden board. The satisfying ‘snap’ of the tempered chocolate shell giving way to the cold, juicy burst of a ripe berry is the ultimate decadent experience. These treats provide a rich, bitter-sweet balance to the other elements on your board, and their sophisticated appearance makes them the undisputed star of the show. They evoke a sense of celebration and romance, turning a simple gathering into a truly special occasion without requiring a trip to a high-end chocolatier.
Ingredients
- 12-15 large, long-stemmed strawberries
- 8 oz high-quality dark chocolate (60% cacao or higher)
- 1 tsp coconut oil (for extra shine)
- Pinch of flaky sea salt
How to make it
- Ensure your strawberries are at room temperature and absolutely bone-dry; even a single drop of water will cause the chocolate to ‘seize’ and become a clumpy mess.
- Break the chocolate into small, uniform pieces and place them in a heat-proof glass bowl.
- Set up a double boiler by placing the bowl over a small saucepan of simmering water, ensuring the bottom of the bowl does not touch the water.
- Stir the chocolate constantly with a spatula as it melts, adding the coconut oil once it’s halfway melted to create a thin, glossy consistency.
- Once smooth, remove from heat; hold a strawberry by the stem or leaves and dip it into the chocolate, swirling it slightly to cover three-quarters of the berry.
- Lift the berry and shake gently to let the excess chocolate drip off, then scrape the bottom against the edge of the bowl to prevent a ‘foot’ of chocolate from forming on the tray.
- Place on parchment paper and immediately sprinkle with a tiny pinch of flaky sea salt while the chocolate is still wet to enhance the cocoa flavors.
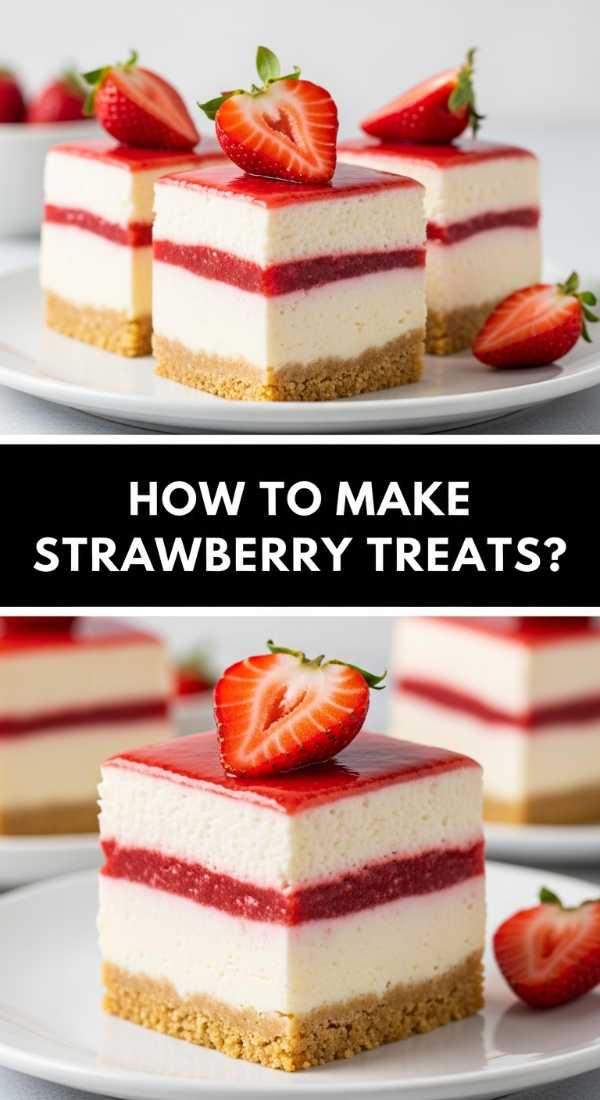
How to make no bake strawberry desserts
Why we love this
A whipped strawberry cheesecake dip is the ultimate low-effort, high-reward addition to a viral food board, offering a creamy, tangy profile that perfectly complements crunchy dippers. The texture is incredibly airy—almost like a mousse—and the pale pink color adds a soft, romantic aesthetic to your arrangement. It smells like sweet cream and tart berries, and there’s something so playful about a dip that encourages guests to interact with the board. It feels like a gourmet cheesecake without the hours of baking and the stress of a water bath, making it a perfect budget-friendly hack.
Ingredients
- 8 oz cream cheese, softened to room temperature
- 1/2 cup strawberry preserves or jam
- 1 cup heavy cream
- 1/4 cup powdered sugar
- Graham crackers and pretzel sticks for dipping
How to make it
- In a large bowl, beat the softened cream cheese with a hand mixer on medium speed until it is completely smooth and free of any lumps.
- Add the strawberry preserves to the cream cheese and continue beating until the mixture is a uniform pink color and the fruit pieces are well distributed.
- In a separate chilled bowl, whip the heavy cream and powdered sugar until stiff peaks form, ensuring you don’t over-mix.
- Using a large rubber spatula, gently fold the whipped cream into the cream cheese mixture in three stages; this ‘folding’ technique preserves the air bubbles and keeps the dip light and fluffy.
- Transfer the dip to a beautiful serving bowl and use the back of a spoon to create a decorative swirl on the top.
- Chill for at least one hour before serving to allow the flavors to meld and the texture to set into a spoonable, decadent consistency.
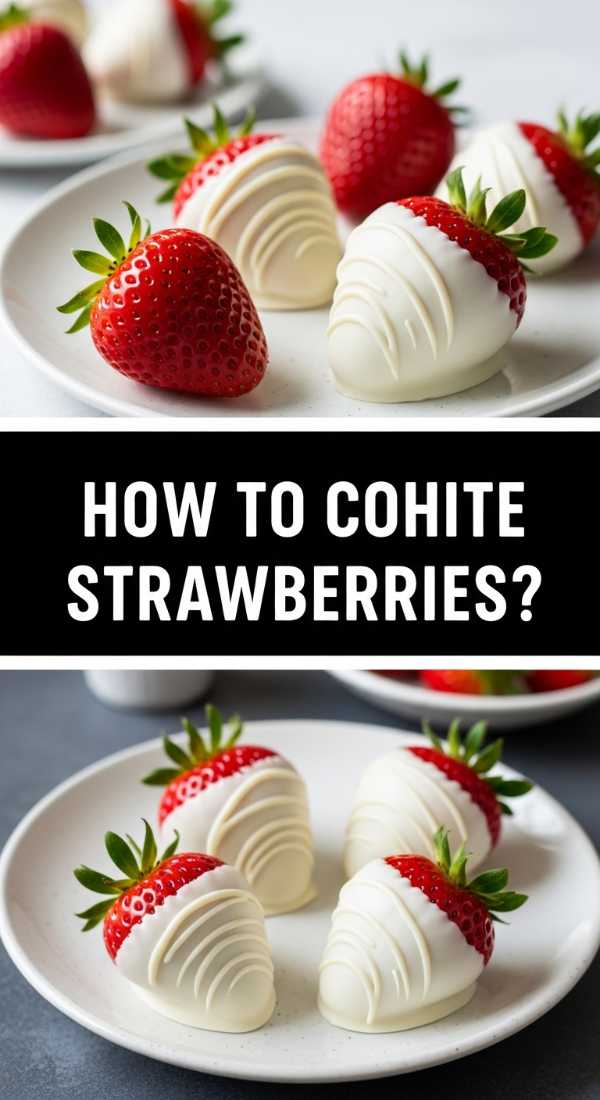
How to make white chocolate strawberries

Why we love this
White chocolate strawberries offer a creamy, vanilla-forward alternative to dark chocolate that looks incredibly chic and modern on a dessert board. The stark white coating against the deep red of the strawberry creates a high-contrast visual that feels very ‘bridal’ and upscale. The taste is much sweeter and more buttery than dark chocolate, providing a lovely variety for guests who prefer a mellow flavor profile. When drizzled with a bit of extra chocolate or dusted with edible glitter, they look like they were plucked straight from a luxury catering menu.
Ingredients
- 10-12 medium strawberries
- 6 oz high-quality white chocolate baking bars (avoid chocolate chips if possible)
- 1/2 tsp vanilla extract
- Optional: Gold sanding sugar or crushed freeze-dried strawberries
How to make it
- Chop the white chocolate into very fine, even shards; white chocolate has a lower melting point than dark chocolate and can burn easily, so small pieces are essential for even melting.
- Use the double boiler method (as described in the dark chocolate section), but keep the heat very low—the water should be barely simmering.
- Stir the chocolate frequently; once it is 75% melted, remove the bowl from the heat and continue stirring until the residual heat melts the remaining pieces.
- Add the vanilla extract and stir quickly; the chocolate may thicken slightly, but it should remain pourable and smooth.
- Dip the dry strawberries into the white chocolate, allowing the excess to flow back into the bowl before placing them on a parchment-lined sheet.
- While the chocolate is still tacky, roll the tips in gold sanding sugar or crushed freeze-dried strawberries for an added layer of texture and a professional, ‘expensive’ finish.
How to make healthy strawberry desserts
Why we love this
Including a healthy option on your board ensures that everyone can join in on the fun, and these yogurt-dipped strawberry ‘bites’ are as refreshing as they are beautiful. The tanginess of the Greek yogurt provides a sharp, clean contrast to the sweetness of the fruit, while a coating of crushed nuts or seeds adds a satisfying, earthy crunch. They look like little frozen jewels on the board, offering a cool, palate-cleansing sensation that is especially welcome if you are serving other rich, chocolatey items. It’s a guilt-free way to add volume and variety to your display.
Ingredients
- 15 small strawberries
- 1 cup thick Greek yogurt (honey or vanilla flavored)
- 1/2 cup crushed pistachios or toasted almonds
- Wooden skewers or toothpicks
How to make it
- Line a small tray with parchment paper and ensure it fits flat in your freezer before you begin the prep process.
- Insert a toothpick or small skewer into the green leafy top of each strawberry to act as a handle for dipping and eating.
- Dip each strawberry into the Greek yogurt, using a spoon to help coat it about halfway up the berry for a ‘dipped’ look.
- Immediately roll the yogurt-covered end into the crushed nuts, pressing gently so they adhere to the creamy surface.
- Place the strawberries on the prepared tray and freeze for at least 30 to 45 minutes; you want the yogurt to be firm to the touch but the strawberry not to be frozen solid.
- Serve these directly from the freezer onto your board, as the yogurt will begin to soften after about 15-20 minutes at room temperature.
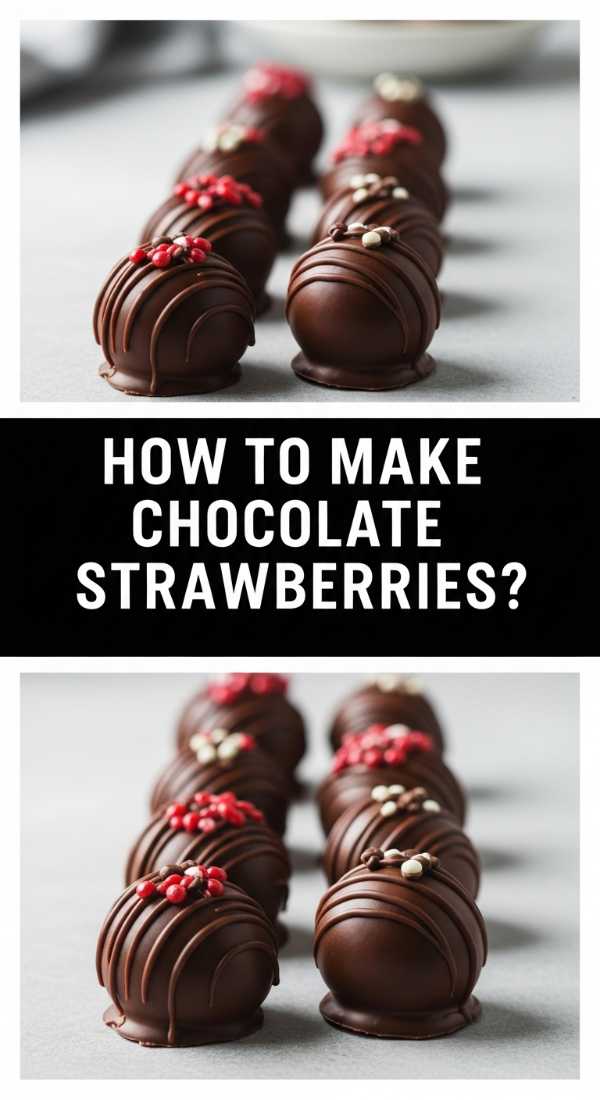
How to master chocolate covered strawberries recipe
Why we love this
Mastering the perfect chocolate drizzle is what separates a homemade board from a viral, professional-looking one. It’s all about the technique—the way the chocolate falls in thin, rhythmic lines creates a sense of movement and artistry that is incredibly pleasing to the eye. The smell of warm, tempered chocolate being worked into patterns is a true baker’s delight. When you nail this technique, your strawberries take on a polished, ‘finished’ look that anchors the entire board, making the whole spread feel more cohesive and expensive than it actually is.
Ingredients
- Leftover melted dark and white chocolate
- A small piping bag or a plastic sandwich bag
- Prepared chocolate-dipped strawberries
How to make it
- Wait until your base layer of dipped chocolate has fully set and hardened; if you drizzle on wet chocolate, the lines will bleed and lose their definition.
- Transfer your melted contrasting chocolate (white chocolate over dark, or vice versa) into a small plastic bag and snip the tiniest corner off to create a makeshift piping tip.
- Test your flow on a piece of parchment paper first; you want a steady, thin stream of chocolate, not thick globs.
- Hold the bag about 4 inches above the strawberries and move your hand in a fast, fluid back-and-forth motion across the entire row of berries.
- The key to the ‘pro look’ is to go past the edges of the fruit so the lines are straight and clean rather than loopy or curled at the ends.
- Let the drizzle set at room temperature for a matte finish or in the fridge for a high-gloss ‘snap’.
How to make quick strawberry desserts
Why we love this
Sometimes the most ‘expensive-looking’ items are the ones that take the least amount of time, like these elegant Strawberry and Goat Cheese Crostinis. The combination of creamy, tangy cheese with the bright acidity of the berries and a drizzle of honey creates a complex flavor profile that feels very sophisticated. The aroma is a wonderful mix of toasted bread and floral sweetness. On a board, these provide a much-needed structural element, adding height and a savory-sweet balance that makes the entire spread feel like a curated tasting experience rather than just a plate of treats.
Ingredients
- 1 baguette, sliced and toasted
- 4 oz soft goat cheese
- 1 cup sliced strawberries
- Honey for drizzling
- Fresh cracked black pepper
How to make it
- Slice the baguette on a sharp diagonal to create long, elegant oval shapes; brush lightly with olive oil and toast at 400°F for 5 minutes until the edges are golden brown.
- Let the bread cool slightly so it doesn’t melt the cheese completely; you want the goat cheese to be spreadable but still hold its white color.
- Spread a generous layer of goat cheese across each toast, using the back of a knife to create a little texture in the cheese.
- Top with 2-3 slices of fresh strawberry, overlapping them slightly like shingles for a decorative effect.
- Just before adding to the board, drizzle a thin ribbon of honey over the berries and finish with a tiny crack of black pepper to bring out the strawberry’s natural sweetness.
- Arrange them in a fan pattern on your board to create a sense of abundance and professional styling.
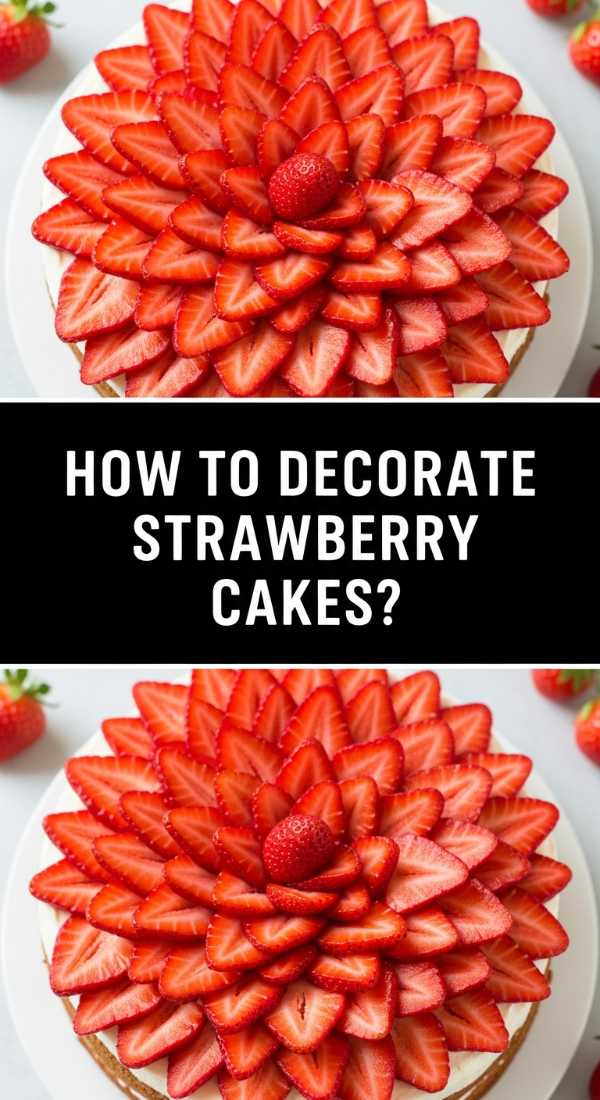
How to decorate strawberry cakes
[IMAGE_10]
Why we love this
A small, beautifully decorated cake can serve as the magnificent centerpiece of your food board, drawing the eye and providing a sense of scale. Using strawberries to create a ‘rose’ or a ‘fan’ pattern on top of a simple store-bought or home-baked cake instantly elevates it to ‘custom-order’ status. The visual of the bright red fruit arranged in geometric or floral patterns is incredibly satisfying and feels very high-end. It shows a level of care and attention to detail that guests truly appreciate, making the entire board feel like a labor of love.
Ingredients
- 1 small round cake (6-inch) frosted with white buttercream
- 10 large, uniform strawberries
- 1/4 cup apricot preserves (for glazing)
- Fresh mint sprigs
How to make it
- Wash and dry the strawberries, then slice them very thinly from top to bottom, keeping the slices in order to maintain a consistent size for your patterns.
- To create a ‘strawberry rose,’ start at the outer edge of the cake and place the largest slices in a circle, pointing the tips outward and slightly overlapping each one.
- Move inward, creating a second circle with slightly smaller slices, tucking them just behind the first row to create a layered, petal-like appearance.
- Continue this process until you reach the center, where you can place a small, whole strawberry or a tightly curled slice to finish the flower look.
- Heat the apricot preserves in the microwave for 15 seconds until liquid, then use a pastry brush to gently dab the glaze onto the strawberries; this provides a professional high-gloss shine and prevents the fruit from drying out.
- Tuck a few mint leaves around the base of the ‘rose’ to add a pop of green and complete the floral illusion.
Final Thoughts on Your Viral Strawberry Board
Creating a food board that looks expensive doesn’t require a massive budget; it simply requires a bit of heart and an eye for detail. By taking the time to prep your strawberries with different textures—some dipped, some macerated, some fresh—you create a visual and culinary journey for your guests. Remember, the best boards are the ones that feel abundant and lived-in, so don’t worry about perfect symmetry. Grab your favorite wooden plank, some fresh berries, and let your creativity lead the way!