
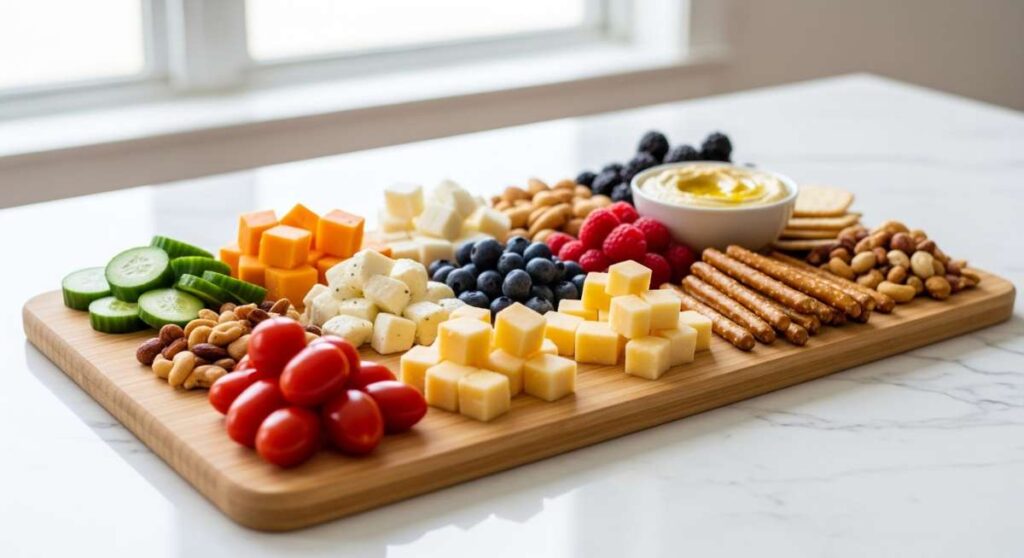
Have you ever scrolled through your feed and felt an immediate sense of calm mixed with intense hunger? That is exactly what happens when you stumble upon the ‘Simple Food Board’ trend. It’s not just about food; it’s about a lifestyle that celebrates the beauty of gathering around a table filled with honest, vibrant, and delicious dishes that don’t require a culinary degree to master. There is something so profoundly healing about seeing a spread of sun-drenched fruits, savory dips, and golden-brown breads laid out for friends to pick at throughout a long, lazy afternoon.
My kitchen has become a revolving door of these viral recipes lately, and honestly, my heart (and my stomach) has never been fuller. Whether it’s the way the light hits a bowl of fresh watermelon or the nostalgic scent of a cheesy dip melting on the stove, these dishes are taking over our feeds because they represent a return to what matters: simplicity, flavor, and connection. Today, I am sharing the ultimate collection of recipes that make up the viral board everyone is talking about.
From the sizzle of the grill to the sweet aroma of baking strawberries, let’s dive into the ten staples that will make your next gathering go viral in the best way possible. Grab a glass of iced tea and let’s get cooking!
How to make cheesey rotel dip?

Why we love this
There is a specific kind of magic in the way creamy, melted cheese envelopes spicy diced tomatoes and savory ground meat. This dip is the ultimate comfort food, offering a velvety texture that clings perfectly to a salty tortilla chip, providing a satisfying crunch followed by a slow, warming heat. The aroma of browned beef mixed with the zesty kick of green chilies fills the room instantly, signaling to everyone that the party has officially started. It’s gooey, messy, and absolutely irresistible, making it the undisputed crown jewel of any casual food board spread.
Ingredients
- 1 lb Ground Beef or Breakfast Sausage
- 1 block (32 oz) Velveeta or processed cheese, cubed
- 2 cans (10 oz each) Ro-Tel Diced Tomatoes and Green Chilies
- 1 tsp Garlic Powder
- 1/2 tsp Cumin
- Optional: Chopped cilantro and jalapeños for garnish
How to make it
- Begin by placing a large skillet over medium-high heat. Add your ground beef or sausage, breaking it apart with a wooden spoon or spatula. Cook until the meat is thoroughly browned and no pink remains, which usually takes about 7-10 minutes.
- Carefully drain the excess grease from the skillet to ensure your dip isn’t oily. Return the meat to the pan and lower the heat to medium-low.
- Open the cans of Ro-Tel. For a thicker dip, drain one can and leave the juices in the other; for a thinner dip, keep the juices from both. Pour them into the skillet with the meat.
- Add the cubed cheese into the mixture. Stir constantly to prevent the cheese from scorching on the bottom of the pan. The goal is a slow, even melt that maintains a silky consistency.
- Stir in the garlic powder and cumin. Continue stirring for about 5-8 minutes until the mixture is completely smooth and bubbly.
- Transfer to a slow cooker on the ‘warm’ setting if you are serving a crowd, or serve immediately in a pre-warmed ceramic bowl. Garnish with fresh cilantro for a pop of color.
How to prepare fresh watermelon salad?

Why we love this
This salad is like a breath of fresh air on a humid July afternoon, offering a sensory experience that is both hydrating and deeply sophisticated. The cold, crisp snap of the watermelon provides a sweet base that is unexpectedly elevated by the salty, crumbly texture of feta cheese and the cooling, aromatic punch of fresh mint leaves. Every bite is a balance of sweet and savory, finished with a bright zing of lime that makes the flavors dance on your tongue. It’s visually stunning, with the vibrant pink and deep green colors making it a centerpiece that looks as good as it tastes.
Ingredients
- 6 cups Seedless Watermelon, cubed
- 1/2 cup Feta Cheese, crumbled
- 1/4 cup Fresh Mint leaves, chiffonade
- 1/2 Red Onion, thinly sliced (optional)
- 2 tbsp Extra Virgin Olive Oil
- Juice of 1 Lime
- Flaky Sea Salt
How to make it
- Start with a chilled watermelon. Slice it into uniform 1-inch cubes, removing any tough rind. Place the cubes into a large, wide serving bowl rather than a deep one to prevent the weight of the fruit from crushing the bottom layers.
- If using red onion, soak the thin slices in ice water for 10 minutes first to remove the harsh ‘bite,’ then pat dry and scatter over the watermelon.
- Sprinkle the crumbled feta evenly across the top. Avoid over-mixing once the cheese is added to keep the cubes looking clean and distinct.
- Roll your mint leaves tightly and slice them into thin ribbons (chiffonade). Scatter these generously over the salad; the aroma will be released as soon as the knife hits the leaves.
- In a small jar, whisk together the olive oil and lime juice until emulsified. Drizzle this dressing slowly over the salad just before serving to maintain the fruit’s crispness.
- Finish with a light sprinkle of flaky sea salt to enhance the natural sweetness of the melon. Serve immediately while chilled.
How to bake easy sourdough discard?

Why we love this
There is a rustic, soulful satisfaction in transforming what would have been waste into a crispy, golden brown delight that smells of fermented grain and toasted seeds. Sourdough discard crackers or flatbreads have a complex, tangy depth that you simply cannot find in store-bought versions, offering a shattering crunch that stands up to the heaviest dips. The kitchen fills with a warm, yeasty scent that feels like a hug, and the sight of those jagged, salt-flecked edges on a wooden board adds an artisanal touch to your food spread that screams ‘homemade with love.’
Ingredients
- 1 cup Sourdough Discard (unfed)
- 1/4 cup Melted Butter or Olive Oil
- 1 cup All-Purpose Flour
- 1/2 tsp Sea Salt
- 2 tbsp Herbs de Provence or Everything Bagel Seasoning
- Additional salt for topping
How to make it
- Preheat your oven to 325°F (165°C). Prepare a large baking sheet by lining it with parchment paper; this is crucial for preventing sticking and ensuring even browning.
- In a medium mixing bowl, combine the sourdough discard and the melted butter or oil. Stir until the fat is fully incorporated into the starter.
- Add the flour, salt, and your chosen seasonings. Mix until a cohesive dough forms. It should be soft and slightly tacky but not stick to your fingers.
- Place the dough in the center of the parchment paper. Using a second sheet of parchment on top, roll the dough out as thin as possible—ideally about 1/16th of an inch. The thinner the dough, the better the crunch.
- Remove the top layer of parchment. Use a pizza cutter or a sharp knife to score the dough into squares or rectangles, but do not separate them yet.
- Bake for 20-25 minutes. At the 15-minute mark, check the edges; if they are browning too fast, rotate the pan. Bake until the center is firm and the edges are a deep golden brown.
- Let them cool completely on the pan. Once cool, snap them along the scored lines and serve in a rustic basket.
How to make chicken caesar wraps?

Why we love this
The chicken Caesar wrap is a masterclass in texture and classic flavor profiles, bringing together the warmth of grilled protein with the icy cold crunch of romaine lettuce. There is something incredibly satisfying about biting through a soft, toasted tortilla into a creamy, garlic-heavy dressing that has perfectly coated every leaf and crouton. The umami from the parmesan cheese and the slight tang of lemon create a savory profile that feels both indulgent and light. It’s the perfect hand-held addition to a food board, providing a hearty option that stays fresh and flavorful for hours.
Ingredients
- 2 large Flour Tortillas
- 2 cups Grilled Chicken Breast, sliced
- 2 cups Romaine Lettuce, chopped
- 1/4 cup Shredded Parmesan Cheese
- 1/2 cup Garlic Croutons, crushed
- 1/3 cup Caesar Dressing
- Black Pepper to taste
How to make it
- Start by preparing your chicken. Ensure it is seasoned with salt, pepper, and a hint of garlic powder, then grill or sear until the internal temperature reaches 165°F. Let it rest for 5 minutes before slicing into strips to keep the juices locked in.
- In a large bowl, toss the chopped romaine with the Caesar dressing until every leaf is lightly coated. Do not over-dress, or the tortilla will become soggy.
- Add the parmesan cheese and the crushed croutons to the lettuce. Crushing the croutons slightly ensures you get a bit of crunch in every single bite without having large, awkward chunks.
- Briefly warm your tortillas in a dry pan for 15 seconds per side. This makes them pliable and prevents them from tearing during the folding process.
- Lay the tortilla flat and place a generous portion of the Caesar salad in the center, followed by the warm chicken strips.
- Fold the sides of the tortilla inward, then roll from the bottom up, tucking the filling tightly as you go.
- Place the wrap back in the hot skillet for 30 seconds with the seam side down to seal it shut and add a delightful toasted exterior. Slice diagonally and serve.
How to grill on blackstone?

Why we love this
Cooking on a Blackstone griddle is a total sensory experience—the rhythmic ‘clack-clack’ of the spatulas, the dramatic clouds of steam, and that incredible sizzle as food hits the hot steel. It allows for a level of caramelization and ‘crust’ that you simply cannot achieve on a traditional grate, locking in juices while creating a crisp, charred exterior. Whether it’s the smell of searing onions or the sight of golden-brown smashed burgers, Blackstone cooking feels like bringing the energy of a high-end hibachi grill right to your backyard, making every meal feel like an event.
Ingredients
- Choice of protein (Burgers, Steaks, or Chicken)
- Vegetables (Onions, Peppers, or Zucchini)
- High-smoke point oil (Avocado or Grapeseed oil)
- Butter for finishing
- Coarse Salt and Cracked Black Pepper
How to make it
- Begin by seasoning your Blackstone. Turn the burners to high and let the surface heat up until it starts to smoke slightly. Apply a thin layer of oil and wipe it down with a paper towel.
- For the perfect sear, ensure your meat is at room temperature and patted dry with paper towels. Excess moisture is the enemy of a good crust.
- Squirt a small amount of oil onto the hot surface. Place your protein down and resist the urge to move it. For burgers, use a heavy press to ‘smash’ them into the griddle within the first 30 seconds to maximize surface contact.
- Cook the protein until a deep, dark brown crust forms. Flip only once. While the second side cooks, toss your vegetables on a separate zone of the griddle (Blackstones have multiple heat zones, so keep one side on medium-low for veggies).
- Add a knob of butter to the protein during the last minute of cooking. As it melts, use your spatula to spoon the bubbling butter over the meat for extra richness.
- Use a bench scraper to clean the griddle while it’s still hot, scraping debris into the grease trap. Apply a final thin coat of oil to protect the surface before turning it off.
How to bake strawberry pie?

Why we love this
A fresh strawberry pie is a celebration of peak summer, filled with fruit so vibrant and glossy it looks like stained glass. The scent of sweet, macerated berries mingling with a buttery, flaky crust is enough to draw anyone into the kitchen from three rooms away. Each slice offers a contrast between the tender, jammy filling and the crisp, golden pastry that shatters upon impact with a fork. It’s a nostalgic dessert that reminds you of country fairs and family picnics, providing a burst of sunshine and sweetness that rounds out any food board perfectly.
Ingredients
- 2 Refrigerated Pie Crusts (or homemade)
- 5 cups Fresh Strawberries, hulled and sliced
- 3/4 cup Granulated Sugar
- 1/4 cup Cornstarch
- 1 tbsp Lemon Juice
- 1 tsp Vanilla Extract
- 1 Egg (for egg wash)
How to make it
- Preheat your oven to 400°F (200°C). Place one pie crust into a 9-inch pie plate, pressing it gently against the bottom and sides. Trim any excess, leaving a half-inch overhang.
- In a large bowl, combine the sliced strawberries, sugar, cornstarch, lemon juice, and vanilla. Toss gently so you don’t crush the berries, but ensure the cornstarch is fully dissolved in the juices.
- Let the strawberry mixture sit for 10-15 minutes. This ‘maceration’ allows the juices to release, which the cornstarch will then thicken during baking to prevent a soggy bottom.
- Pour the filling into the prepared crust. Top with the second crust. You can do a solid top with vents cut in it, or a lattice design for a more viral-worthy look.
- Crimp the edges of the two crusts together tightly to seal in the juices. Brush the top with a beaten egg and sprinkle with a little extra sugar for a sparkling, golden finish.
- Bake for 45-55 minutes. If the edges are browning too quickly, cover them with foil. The pie is done when the crust is deep golden and the filling is bubbling through the vents.
- Crucially, let the pie cool for at least 3-4 hours before slicing. This allows the filling to set so it doesn’t run everywhere when you cut into it.
How to brew fresh sun tea?

Why we love this
Sun tea is the epitome of slow living, a beverage that requires nothing but patience and the natural warmth of a clear afternoon. There is something mesmerizing about watching the clear water slowly transform into a deep, amber hue as the tea leaves gently steep under the sun’s rays. The flavor is incredibly smooth—lacking the bitterness that sometimes comes from boiling water—and it carries a mellow, earthy sweetness that is perfectly complemented by a sprig of mint or a wheel of lemon. It’s a beautiful, low-effort centerpiece that glows like a jewel in a glass dispenser.
Ingredients
- 1 gallon Cool Filtered Water
- 8-10 Black Tea Bags (or Green Tea)
- Fresh Lemon slices
- Fresh Mint sprigs
- Honey or Simple Syrup (optional)
How to make it
- Find a large, clean glass jar or dispenser. Avoid plastic, as the sun can cause chemicals to leach and it doesn’t retain heat as effectively for the steeping process.
- Fill the jar with one gallon of cool, filtered water. Do not use hot water; the ‘sun’ part is what creates the specific mellow flavor profile.
- Place the tea bags into the water, hanging the strings over the edge of the jar and securing them with the lid.
- Find a spot in your yard or on your porch that receives direct, uninterrupted sunlight for at least 3 to 5 hours. Place the jar there.
- As the sun warms the water, you will see the tea begin to swirl and darken. Leave it for no more than 5 hours to prevent any bacterial growth.
- Once the tea has reached a deep amber color, bring it inside and remove the tea bags immediately.
- Stir in your sweetener while the tea is still slightly warm from the sun. Add fresh lemon slices and mint. Refrigerate immediately and serve over plenty of ice.
How to bake banana bread?

Why we love this
The aroma of banana bread baking in the oven is arguably the best scent in the world, evoking feelings of home, warmth, and cozy mornings. It has a dense, moist crumb that is rich with the natural sugars of overripe bananas, often accented by the crunch of toasted walnuts or the decadence of melting chocolate chips. The top crust gets slightly caramelized and tacky, offering a sweet contrast to the soft interior. It’s a versatile loaf that works just as well for a breakfast spread as it does for an after-dinner treat on your food board.
Ingredients
- 3 very ripe Bananas, mashed
- 1/2 cup Melted Butter
- 3/4 cup Sugar (Brown sugar adds more depth)
- 1 Egg, beaten
- 1 tsp Vanilla Extract
- 1 tsp Baking Soda
- Pinch of Salt
- 1.5 cups All-Purpose Flour
How to make it
- Preheat your oven to 350°F (175°C) and grease a 4×8 inch loaf pan thoroughly with butter or non-stick spray.
- In a large mixing bowl, mash the ripe bananas with a fork until they are almost liquid with just a few small chunks remaining for texture.
- Stir the melted butter into the mashed bananas. Add the sugar, beaten egg, and vanilla extract. Whisk until the mixture is pale and well-combined.
- Sprinkle the baking soda and salt over the wet mixture and stir in. Finally, fold in the flour. Mix only until the flour disappears; over-mixing will lead to a tough, rubbery loaf.
- Pour the batter into the prepared pan. Smooth the top with a spatula. For a professional look, slice a banana lengthwise and lay the two halves on top of the batter before baking.
- Bake for 50 to 60 minutes. Check for doneness by inserting a toothpick into the center; it should come out clean or with just a few moist crumbs.
- Let the bread cool in the pan for 10 minutes, then transfer to a wire rack. Slicing it while warm is tempting, but letting it cool completely helps the flavors develop and makes it easier to cut clean slices.
How to make pasta salad?
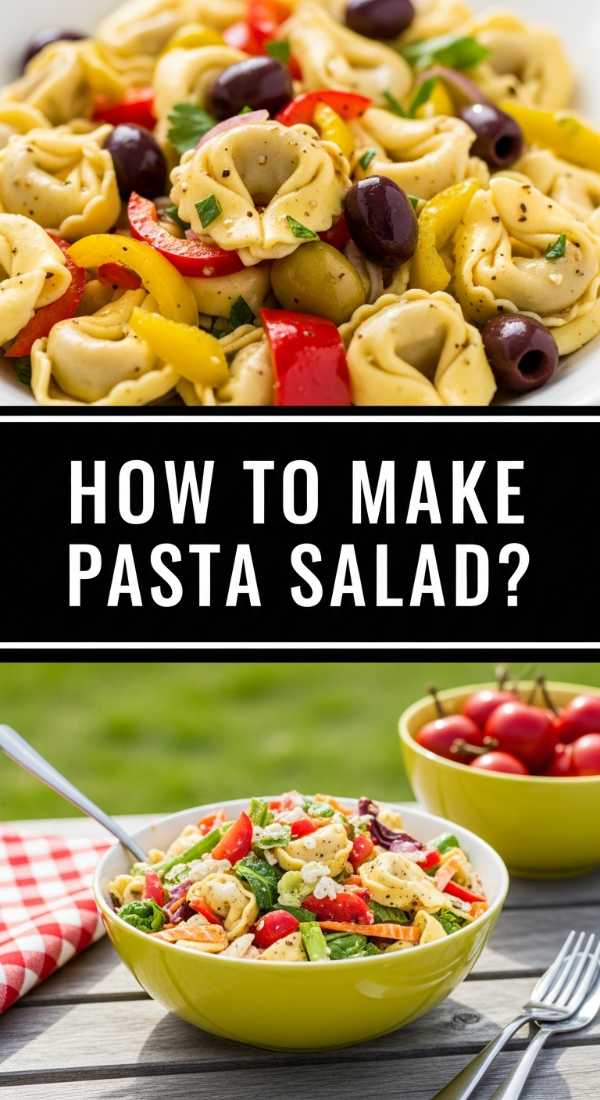
Why we love this
Pasta salad is the ultimate ‘chameleon’ dish, capable of being whatever you need it to be, but it’s always defined by its vibrant colors and zesty personality. The cold, al dente pasta provides a satisfying chew, while the variety of mix-ins—from crunchy peppers to silky olives and sharp cheeses—ensures that no two bites are the same. It’s drenched in a bright, herbaceous vinaigrette that seeps into the nooks and crannies of the pasta, creating a flavor explosion that is tangy, salty, and incredibly refreshing. It’s the reliable, crowd-pleasing workhorse of the viral food board.
Ingredients
- 1 lb Rotini or Fusilli Pasta
- 1 cup Cherry Tomatoes, halved
- 1 cup Cucumber, diced
- 1/2 cup Kalamata Olives
- 1/2 cup Red Onion, finely diced
- 1 cup Fresh Mozzarella pearls
- 1/2 cup Italian Vinaigrette
- 1/4 cup Fresh Parsley, chopped
How to make it
- Boil a large pot of heavily salted water. Cook the pasta according to the package directions, but aim for ‘al dente’—it should have a firm bite. Overcooked pasta will become mushy once it sits in the dressing.
- Drain the pasta and immediately rinse it under cold running water. This stops the cooking process and removes excess starch, which prevents the pasta from sticking together.
- In a very large bowl, combine the cooled pasta with the tomatoes, cucumbers, olives, onions, and mozzarella pearls.
- Pour half of the Italian vinaigrette over the mixture and toss well. Let the salad sit in the refrigerator for at least 30 minutes.
- Just before serving, add the remaining dressing. The pasta tends to soak up the liquid as it sits, so this ‘double dressing’ technique ensures it stays moist and flavorful.
- Garnish with fresh parsley and a final crack of black pepper. Serve chilled in a large wooden bowl for a rustic aesthetic.
How to marinate grilled chicken?

Why we love this
There is a profound difference between plain grilled chicken and chicken that has spent hours soaking in a well-crafted marinade. The process transforms the meat into something incredibly succulent and deeply infused with aromatics like garlic, lemon, and herbs. When it hits the grill, the sugars in the marinade caramelize, creating those beautiful, dark grill marks and a smoky-sweet charred flavor that is the hallmark of outdoor cooking. The result is tender, juicy chicken that pulls apart easily and carries a complex, layered taste that makes it the star of any plate.
Ingredients
- 1.5 lbs Chicken Breasts or Thighs
- 1/4 cup Olive Oil
- Juice of 1 Lemon
- 3 cloves Garlic, minced
- 1 tbsp Honey
- 1 tbsp Dijon Mustard
- 1 tsp Dried Oregano
- Salt and Pepper
How to make it
- Place your chicken in a large Ziploc bag or a shallow glass dish. If using chicken breasts, pound them to an even thickness using a meat mallet; this ensures they cook uniformly without drying out the edges.
- In a small bowl, whisk together the olive oil, lemon juice, minced garlic, honey, mustard, and oregano. The honey helps with caramelization, while the acid in the lemon tenderizes the meat.
- Pour the marinade over the chicken, ensuring every piece is completely submerged or coated. Seal the bag, squeezing out as much air as possible.
- Refrigerate for at least 30 minutes, though 4 to 6 hours is ideal for maximum flavor penetration. Avoid marinating for more than 12 hours, as the acid can start to break down the proteins too much, resulting in a mealy texture.
- Preheat your grill to medium-high heat. Remove the chicken from the marinade and let the excess drip off to prevent flare-ups on the grill.
- Grill for 6-8 minutes per side. Use a meat thermometer to pull the chicken once it reaches 160°F; the ‘carry-over’ cooking will bring it to the safe 165°F while it rests, keeping it perfectly juicy.
Conclusion
Creating a viral-worthy food board isn’t about perfection; it’s about the joy of variety and the love poured into each individual dish. From the tangy zip of a fresh pasta salad to the sweet, jammy centers of a strawberry pie, these recipes offer something for everyone. The next time you host, remember that the best feeds are the ones that celebrate simple, real food shared with even better company. Happy cooking!