
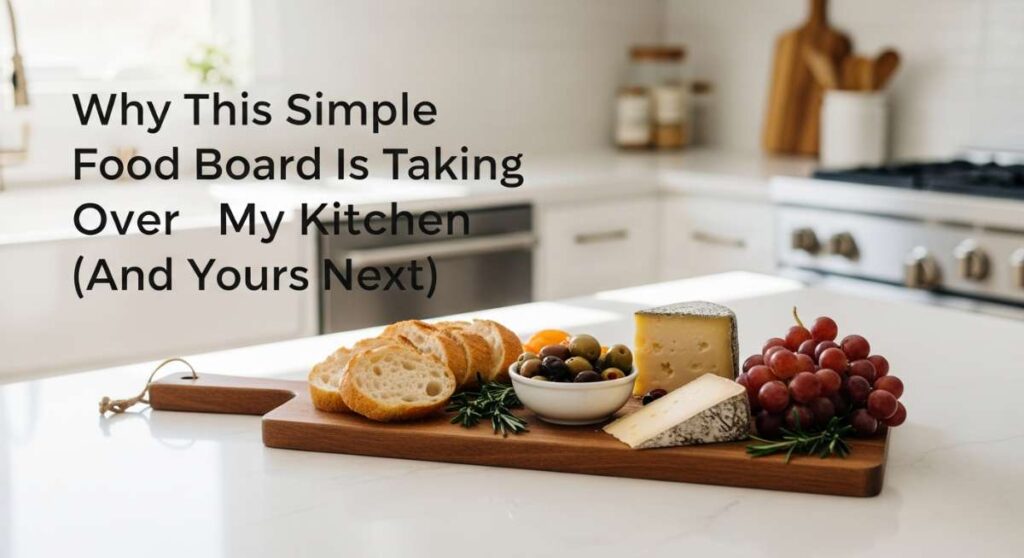
Why This Simple Food Board Is Taking Over My Kitchen (And Yours Next)
There is something inherently magical about a crowded kitchen, the kind where the air is thick with the scent of roasted garlic and the sound of shared laughter. For years, I struggled with the stress of hosting, worrying if every dish would stay hot or if the presentation was ‘Pinterest-perfect’ enough. Everything changed when I embraced the ‘Simple Food Board’—a curated, relaxed way of serving that turns every meal into a communal experience. It’s not just about the food; it’s about the permission to slow down and savor every bite together.
This transition to board-style dining has brought a sense of ease back into my home. Instead of plated meals that feel formal and stiff, these boards invite guests to graze, mix, and match. Whether it’s a lazy Sunday afternoon or a Friday night get-together, these ten recipes have become my go-to staples. They are designed to be vibrant, accessible, and utterly delicious, ensuring that your kitchen becomes the heart of the home, just like mine has. Let’s dive into the recipes that will make your next food board truly viral.
How to make cheesy rotel dip?

Why we love this
This dip is the ultimate comfort food, offering a velvety, molten river of cheese punctuated by the sharp, zesty kick of diced tomatoes and green chilies. As you dip a salty, crunchy tortilla chip into the bowl, you’re met with a satisfying pull of cheese and a smoky, savory aroma that fills the entire room. The texture is perfectly balanced—smooth enough to coat your chip but hearty enough to feel like a real indulgence. It’s the kind of dish that disappears in minutes because every bite is a warm, spicy hug for your taste buds.
Ingredients
- 1 lb Velveeta or processed cheese, cubed
- 1 can (10 oz) RoTel Diced Tomatoes and Green Chilies
- 1 lb ground breakfast sausage or lean ground beef
- 1/2 cup whole milk (optional for consistency)
- Fresh cilantro and sliced jalapeños for garnish
How to make it
- Begin by placing a large skillet over medium-high heat and adding your ground sausage or beef. Use a wooden spoon to break the meat into small, uniform crumbles as it browns, ensuring it cooks evenly for about 7-10 minutes until no pink remains.
- Once the meat is fully cooked, carefully drain the excess grease into a heat-safe container. This step is crucial for a clean, non-greasy dip.
- Reduce the heat to low and add the cubed cheese to the skillet. If using a slow cooker, transfer the meat to the crock and add the cheese there instead.
- Pour in the entire can of RoTel tomatoes, including the liquid, which provides that essential acidity and spice.
- Stir the mixture constantly with a spatula. As the cheese begins to melt, you may add the milk a tablespoon at a time if you prefer a thinner, silkier consistency.
- Continue heating until the mixture is completely smooth and bubbly. If using a slow cooker, set it to ‘Low’ for 1-2 hours, stirring occasionally.
- Garnish with fresh cilantro and serve immediately while the cheese is at its peak meltiness.
How to make fresh summer salad?

Why we love this
A fresh summer salad is like a garden party on a plate, bursting with the vibrant colors and crisp textures of peak-season produce. The crunch of fresh cucumbers against the softness of ripe avocado creates a sensory delight that feels incredibly light yet deeply satisfying. Every forkful is brightened by a zingy citrus vinaigrette that cuts through the heat of a July afternoon, leaving you feeling refreshed and energized. It’s a celebration of simplicity, where the natural sweetness of the vegetables is allowed to shine without being weighed down by heavy dressings.
Ingredients
- 4 cups mixed baby greens or arugula
- 1 large English cucumber, sliced into half-moons
- 1 pint cherry tomatoes, halved
- 1 ripe avocado, diced
- 1/4 cup red onion, thinly sliced
- Dressing: 3 tbsp olive oil, 1 tbsp lemon juice, 1 tsp honey, salt, and pepper
How to make it
- Start by washing your greens in cold water and using a salad spinner to ensure they are completely dry; wet greens will prevent the dressing from adhering properly.
- In a small glass jar or bowl, whisk together the olive oil, fresh lemon juice, honey, salt, and cracked black pepper until the mixture is emulsified and slightly thickened.
- Place the dried greens into a large wooden serving bowl, which helps keep the salad cool and provides a beautiful rustic look for your board.
- Layer the sliced cucumbers, cherry tomatoes, and red onions over the greens. Do not toss yet to keep the ingredients from bruising.
- Just before serving, add the diced avocado to ensure it doesn’t brown.
- Drizzle the dressing over the top in a slow, circular motion.
- Using salad tongs, gently toss the ingredients from the bottom up with a light touch, ensuring every leaf is lightly coated but not drenched in vinaigrette.
How to cook summer crockpot meals?

Why we love this
Summer crockpot meals are the ultimate ‘set it and forget it’ hack for busy sunny days when you’d rather be at the pool than standing over a hot stove. There is a unique joy in coming home to a house filled with the savory, slow-cooked aroma of tender shredded pork or tangy BBQ chicken that has been simmering all day. The meat becomes so incredibly succulent that it practically falls apart at the touch of a fork, infused with deep flavors that only time and low heat can achieve. It’s a stress-free way to feed a crowd while keeping your kitchen cool and comfortable.
Ingredients
- 3 lbs pork shoulder or chicken breasts
- 1 cup high-quality BBQ sauce
- 1/4 cup apple cider vinegar
- 1 tbsp smoked paprika
- 1 tsp garlic powder and 1 tsp onion powder
- 1/2 cup chicken broth or water
How to make it
- Place your meat of choice into the bottom of the slow cooker. If using pork shoulder, trim away any excessively large pieces of fat to prevent the sauce from becoming too oily.
- In a small bowl, whisk together the BBQ sauce, apple cider vinegar, smoked paprika, garlic powder, and onion powder to create a flavorful rub and liquid base.
- Pour the sauce over the meat and use tongs to turn the meat, ensuring it is thoroughly coated on all sides.
- Add the chicken broth or water to the side of the pot (don’t pour it directly over the seasoned meat) to provide enough moisture for the steaming process.
- Cover and cook on ‘Low’ for 7-8 hours for pork, or 4-5 hours for chicken. Cooking on low is essential for breaking down the connective tissues and ensuring the meat is tender rather than rubbery.
- Once the timer is up, remove the meat to a cutting board and use two forks to shred it into bite-sized pieces.
- Return the shredded meat to the pot and toss it with the remaining juices for 10 minutes on the ‘Warm’ setting before serving on your food board.
How to make chicken caesar wraps?

Why we love this
These wraps are a masterclass in texture and flavor contrast, combining warm, savory grilled chicken with the icy crunch of romaine lettuce and the creamy, salty punch of Caesar dressing. Each bite offers a satisfying ‘snap’ from the fresh greens followed by the rich, umami depth of shaved parmesan cheese and a hint of black pepper. Wrapped in a soft, pliable flour tortilla, it’s a portable feast that feels both indulgent and light at the same time. It’s the perfect lunch or dinner addition to a food board, providing a hand-held option that everyone gravitates toward.
Ingredients
- 2 large flour tortillas (burrito size)
- 2 cups cooked chicken breast, sliced or cubed
- 2 cups chopped romaine lettuce
- 1/4 cup Caesar dressing
- 1/4 cup shredded Parmesan cheese
- 1/2 cup seasoned croutons, slightly crushed
How to make it
- If your tortillas are cold, warm them slightly in a dry pan over low heat for 10 seconds per side. This makes them much more flexible and prevents tearing during the rolling process.
- In a medium mixing bowl, combine the chopped romaine, Parmesan cheese, and crushed croutons.
- Add the Caesar dressing to the bowl and toss thoroughly until every piece of lettuce is coated. Adding the dressing to the salad first ensures even distribution throughout the wrap.
- Lay the warm tortilla flat on a clean surface and place a generous portion of the Caesar salad in the center, leaving about two inches of space on the edges.
- Top the salad with the sliced chicken breast.
- Fold the left and right sides of the tortilla inward toward the center, then grab the bottom edge and roll it tightly upward, tucking the filling as you go.
- Slice the wrap diagonally with a sharp serrated knife to showcase the colorful interior layers and serve immediately.
How to make sweet strawberry pie?
Why we love this
A sweet strawberry pie is the crowning jewel of any dessert board, offering a stunning visual of bright, ruby-red berries glistening under a translucent glaze. The aroma is intoxicating—a concentrated scent of sun-ripened summer fruit and buttery, golden-brown pastry. When you cut into it, the berries retain just enough of their structure to provide a juicy pop of flavor that is perfectly tempered by a dollop of cold, whipped cream. It is the literal taste of summer, balancing sweetness and tartness in a way that feels timeless and incredibly comforting.
Ingredients
- 1 pre-baked 9-inch pie crust
- 6 cups fresh strawberries, hulled (divided)
- 1 cup granulated sugar
- 3 tbsp cornstarch
- 1 tbsp lemon juice
- 1/2 cup water
How to make it
- Start with a fully baked and cooled pie crust. Ensure it is crisp and golden to provide a sturdy base for the heavy fruit filling.
- Take 2 cups of the smaller or less-perfect strawberries and crush them in a medium saucepan using a potato masher or fork.
- Add the sugar, cornstarch, water, and lemon juice to the crushed strawberries. Whisk together over medium heat.
- Bring the mixture to a boil, stirring constantly. You will see the liquid transform from cloudy to a clear, thick, and vibrant red glaze. This usually takes about 2-3 minutes of boiling.
- Remove the glaze from the heat and let it cool to room temperature. This is a vital step; if the glaze is too hot, it will wilt the fresh berries.
- Place the remaining 4 cups of whole or halved fresh strawberries into the pie crust, arranging them so they are tightly packed.
- Pour the cooled glaze evenly over the fresh berries, using a spatula to ensure it seeps into all the crevices. Chill the pie for at least 3 hours before slicing to allow the glaze to set completely.
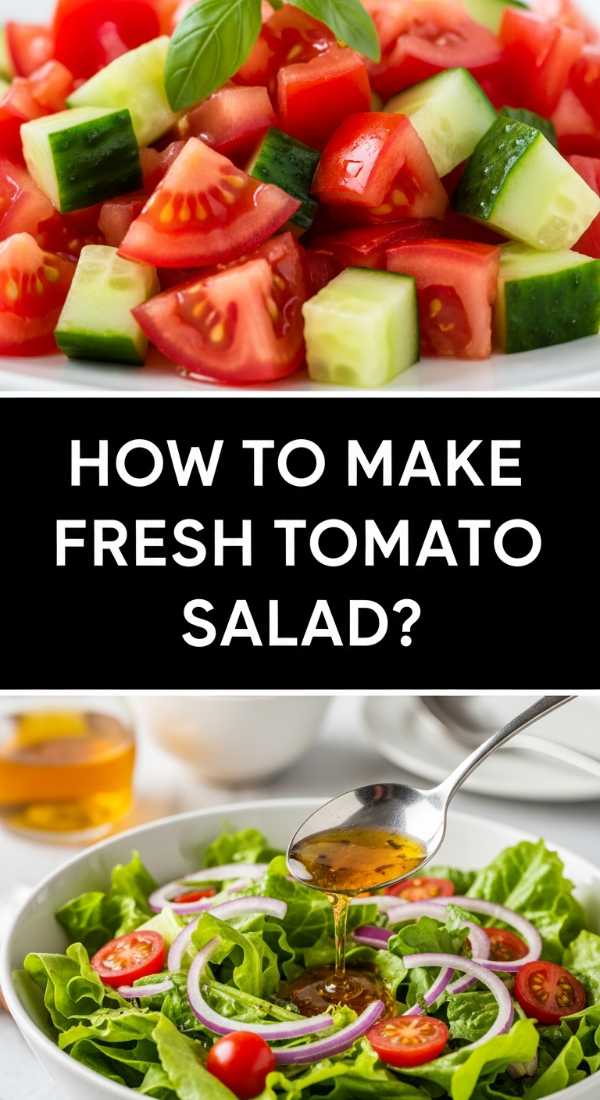
How to make fresh tomato salad?

Why we love this
There is nothing quite like a fresh tomato salad to highlight the bounty of a summer garden, where the tomatoes are so ripe they feel heavy with juice. The combination of acidic, sweet tomatoes and the aromatic, peppery scent of fresh basil creates a fragrance that is instantly recognizable and deeply appetizing. When drizzled with a high-quality balsamic glaze, the flavors deepen into something sophisticated yet rustic. The texture is a beautiful mix of soft, yielding fruit and the light crunch of flaky sea salt, making it an essential, cooling side for any board.
Ingredients
- 3-4 large heirloom tomatoes (different colors)
- 1 cup fresh mozzarella pearls or sliced buffalo mozzarella
- 1/2 cup fresh basil leaves, torn
- 2 tbsp extra virgin olive oil
- 1 tbsp balsamic glaze
- Flaky sea salt and cracked black pepper to taste
How to make it
- Select tomatoes that are ripe but still firm to the touch. Slice them into thick rounds or irregular wedges to create visual interest on the board.
- Arrange the tomato slices on a shallow platter, overlapping them slightly to create a shingled effect.
- Tuck the mozzarella pearls or slices into the gaps between the tomatoes.
- Scatter the torn basil leaves over the top. Tearing the basil by hand rather than chopping with a knife prevents the edges from bruising and turning black.
- Drizzle the extra virgin olive oil slowly over the entire dish, ensuring each tomato gets a bit of fat to carry the flavor.
- Finish with a generous drizzle of thick balsamic glaze in a zig-zag pattern for a professional look.
- Sprinkle with flaky sea salt and black pepper just seconds before serving to prevent the tomatoes from releasing too much water and becoming soggy.
How to make crunchy pound cake?

Why we love this
This pound cake is a texture lover’s dream, featuring a distinct, sugary crust that cracks delightfully under your fork to reveal a dense, buttery, and velvety interior. The aroma of vanilla and toasted butter wafts through the kitchen as it bakes, creating an atmosphere of pure warmth. It’s a sturdy cake that stands up beautifully on a food board, perfect for pairing with fresh berries or a side of whipped cream. Every slice is a balance of that outer ‘crunch’ and the melt-in-your-mouth crumb that feels like a decadent, old-fashioned treat.
Ingredients
- 1.5 cups unsalted butter, softened
- 3 cups granulated sugar
- 5 large eggs, room temperature
- 3 cups all-purpose flour
- 1/2 tsp salt
- 1/2 tsp baking soda
- 1 cup sour cream
- 2 tsp vanilla extract
How to make it
- Preheat your oven to 325°F (165°C). For a crunchy crust, a slightly lower temperature and longer bake time are key. Thoroughly grease and flour a bundt pan.
- In a large bowl, cream the softened butter and sugar together for at least 5 minutes. You want the mixture to be pale, fluffy, and significantly increased in volume.
- Add the eggs one at a time, beating well after each addition. This ensures the emulsion stays stable and the cake rises properly.
- In a separate bowl, sift together the flour, salt, and baking soda.
- Alternate adding the dry ingredients and the sour cream to the butter mixture, starting and ending with the dry ingredients. Mix on low speed just until combined; overmixing will make the cake tough.
- Fold in the vanilla extract with a spatula.
- Pour the thick batter into the prepared pan and smooth the top. Bake for 75-90 minutes. Do not open the oven door frequently, as this can cause the cake to sink.
- The cake is done when a long skewer inserted into the center comes out clean. Let it cool in the pan for 15 minutes before inverting it onto a wire rack. The sugars will continue to set, creating that iconic crunchy exterior.
How to make sweet watermelon salad?
Why we love this
Watermelon salad is the ultimate ‘cool-down’ dish, offering a surprising and sophisticated flavor profile that bridges the gap between sweet and savory. The icy, hydrating crunch of the melon is contrasted beautifully by the creamy, salty crumbles of feta cheese, creating a sensation that is incredibly refreshing on a hot day. A hint of fresh mint adds a cooling herbal note, while a squeeze of lime juice brings a bright, acidic finish that makes the whole dish pop. It looks like a bowl of jewels on your board and tastes even better than it looks.
Ingredients
- 6 cups seedless watermelon, cubed and chilled
- 1/2 cup crumbled feta cheese
- 1/4 cup red onion, very thinly sliced
- 1/2 cup fresh mint leaves, chiffonade
- 2 tbsp lime juice
- 1 tbsp extra virgin olive oil
How to make it
- Cut a cold watermelon into uniform 1-inch cubes. Keeping the watermelon very cold is essential for the texture of the salad.
- If the red onion is too pungent, soak the slices in ice water for 10 minutes, then pat dry. This mellows the flavor so it doesn’t overpower the fruit.
- In a small bowl, whisk together the lime juice and olive oil to create a light dressing.
- Place the watermelon cubes and red onion in a large, wide bowl.
- Drizzle the dressing over the melon and toss very gently with your hands or a large spoon to avoid breaking the cubes.
- Sprinkle the feta cheese and fresh mint over the top just before serving. If you toss the feta too much, it will coat the melon in a white film, so keeping it on top preserves the clean look.
- Finish with a tiny pinch of sea salt to enhance the natural sweetness of the fruit.
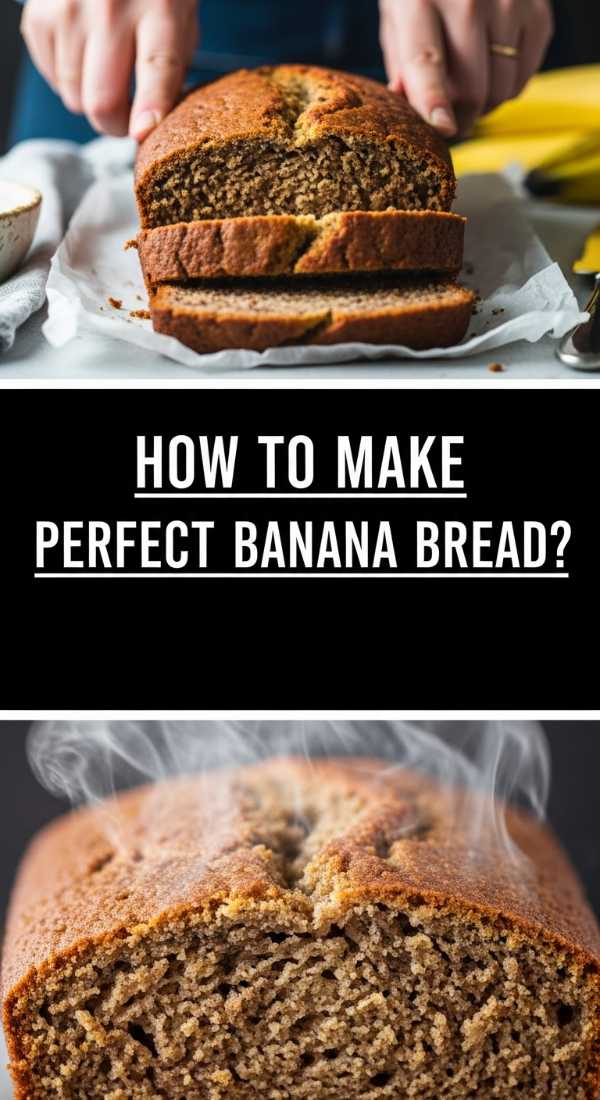
How to make perfect banana bread?

Why we love this
Perfect banana bread is all about that deep, caramelized sweetness and a moist, tender crumb that stays fresh for days. The scent of cinnamon and overripe bananas baking in the oven is perhaps the most welcoming aroma in the world, promising a slice of pure comfort. When sliced and placed on a food board, it serves as a wonderful bridge between breakfast and dessert, especially when served with a smear of salted butter. The dark, golden-brown crust provides a gentle resistance that gives way to a soft, cake-like interior that is rich and satisfying.
Ingredients
- 3 very overripe bananas, mashed
- 1/3 cup melted unsalted butter
- 1/2 cup granulated sugar
- 1/2 cup brown sugar, packed
- 1 large egg, beaten
- 1 tsp vanilla extract
- 1.5 cups all-purpose flour
- 1 tsp baking soda
- 1/2 tsp cinnamon and a pinch of salt
How to make it
- Preheat your oven to 350°F (175°C) and grease a 4×8-inch loaf pan.
- In a large bowl, mash the bananas until they are almost liquid with just a few small chunks remaining for texture.
- Stir the melted butter into the mashed bananas until fully incorporated.
- Mix in the granulated sugar, brown sugar, beaten egg, and vanilla extract. The brown sugar is the secret to a deep, molasses-like flavor and extra moisture.
- In a separate bowl, whisk together the flour, baking soda, cinnamon, and salt.
- Gently fold the dry ingredients into the wet ingredients using a spatula. Stop the moment you see no more white streaks of flour; overmixing will activate the gluten and result in a rubbery loaf.
- Pour the batter into the pan and bake for 50-60 minutes. Check the bread at 45 minutes; if the top is browning too quickly, tent it loosely with foil.
- Let the bread cool in the pan for 10 minutes before moving to a wire rack. Slicing it while too hot will cause it to crumble, so patience is key!
How to make sourdough discard recipes?
[IMAGE_10]
Why we love this
Using sourdough discard is a beautiful way to bring a complex, tangy depth to everyday bakes while honoring the tradition of minimizing kitchen waste. The discard adds a subtle fermented zing that elevates crackers, pancakes, or muffins into something artisanal and unique. There is a tactile satisfaction in working with the stretchy, bubbling starter, knowing that you are creating something delicious from an ingredient that might otherwise be discarded. It’s a wonderful way to add a ‘homemade bakery’ vibe to your food board with items that have a story behind them.
Ingredients
- 1 cup sourdough discard (unfed)
- 1 cup all-purpose flour
- 1/4 cup unsalted butter, softened
- 1/2 tsp sea salt
- 2 tbsp dried herbs (like rosemary or thyme)
- Oil for brushing
How to make it
- In a medium bowl, combine the sourdough discard, flour, softened butter, salt, and dried herbs.
- Mix by hand until a cohesive dough forms. It should be slightly tacky but not stick to your fingers. If it’s too wet, add a tablespoon of flour at a time.
- Wrap the dough in plastic wrap and let it rest in the fridge for at least 30 minutes. This allows the flour to hydrate and the gluten to relax, making it easier to roll out thinly.
- Preheat your oven to 350°F (175°C) and line a baking sheet with parchment paper.
- Divide the dough into two pieces and roll each out directly onto a piece of parchment paper until it is paper-thin (about 1/16 of an inch). The thinner the dough, the crunchier the cracker!
- Brush the surface lightly with oil and sprinkle with extra sea salt. Use a pizza cutter to score the dough into squares or diamonds.
- Bake for 15-20 minutes, or until the edges are golden brown and the centers are crisp. Let them cool completely on the pan to finish crisping up before breaking them apart.
Conclusion
Building a ‘Simple Food Board’ isn’t just about the recipes; it’s about creating a moment where everyone feels welcome to reach in and grab a bite. Whether you’re serving up the spicy warmth of Rotel dip or the artisanal tang of sourdough crackers, these dishes are designed to bring people together. I hope these kitchen staples find a permanent place on your table and bring as much joy to your home as they have to mine. Happy hosting!