
Why This Simple Food Board is Going Viral Right Now
There is something magical about those golden hour moments where the sun dips just low enough to paint the kitchen in a warm amber glow. Lately, I’ve found myself moving away from the heavy, multi-course meals of winter and gravitating toward something much more communal, relaxed, and visually stunning. This season, it’s all about the ‘Simple Food Board’—a way of eating that feels less like a chore and more like an invitation to slow down and savor the breeze.
I remember the first time I set out a massive spread on our weathered patio table. The kids stopped running, the phones were tucked away, and for an hour, we just grazed. We talked about everything and nothing while picking at vibrant berries, crisp greens, and perfectly charred skewers. It wasn’t just about the food; it was about the ease of it all. This viral trend isn’t just a TikTok aesthetic; it’s a lifestyle shift toward intentional, effortless hosting that celebrates the bounty of the season.
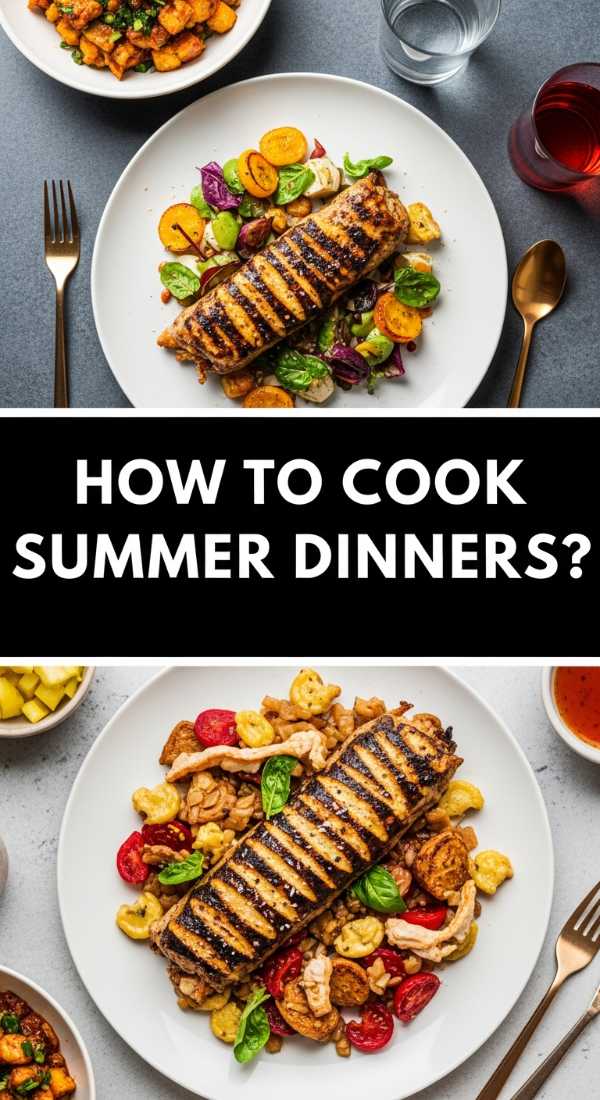
How to cook summer dinners?
Why we love this
Nothing says summer quite like a pan of garlic butter salmon paired with blistered cherry tomatoes. We love this dish because it captures the essence of coastal living, where the aroma of melting butter and fresh herbs fills the air. The salmon skin gets incredibly crisp, providing a satisfying snap that gives way to flaky, buttery protein that melts on your tongue. When the tomatoes burst under the heat, they create a natural, jammy sauce that coats everything in a sweet, acidic brightness that feels incredibly light yet indulgent.
Ingredients
- 2 large salmon fillets (center-cut)
- 1 pint cherry tomatoes
- 4 cloves garlic, minced
- 3 tablespoons unsalted butter
- 1 tablespoon olive oil
- Fresh sprigs of thyme and rosemary
- Zest and juice of one lemon
- Flaky sea salt and cracked black pepper
How to make it
- Begin by patting your salmon fillets completely dry with paper towels; moisture is the enemy of a crisp skin. Season generously with salt and pepper on both sides.
- Heat a heavy cast-iron skillet over medium-high heat for about 3-4 minutes until it is wispy with smoke. Add the olive oil and swirl to coat the bottom.
- Place the salmon skin-side down in the hot pan. Press down lightly with a spatula for 30 seconds to ensure even contact. Let it sear undisturbed for 5-6 minutes until the skin is golden and releases easily from the pan.
- Flip the fillets gently and immediately turn the heat down to medium. Add the butter, minced garlic, and fresh herb sprigs to the empty spaces in the pan.
- As the butter foams, toss in the cherry tomatoes. Use a large spoon to continuously baste the salmon with the hot garlic butter for the final 3 minutes of cooking.
- Once the salmon reaches an internal temperature of 125°F (for medium-rare) and the tomatoes have begun to shrivel and burst, remove from heat. Squeeze fresh lemon juice over the top and serve immediately.
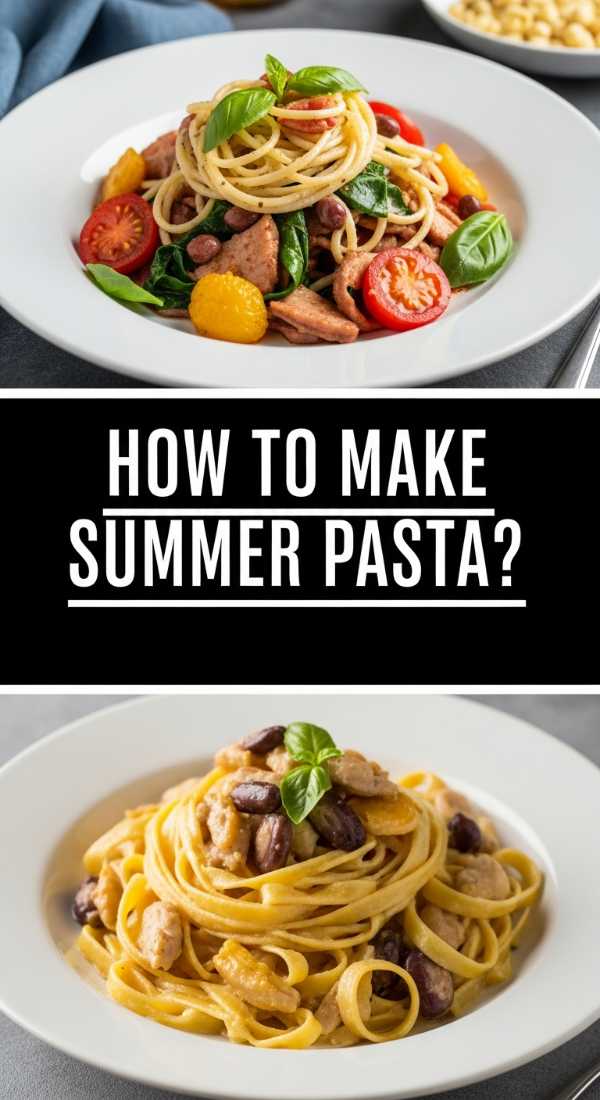
How to make summer pasta?
Why we love this
This Zucchini and Lemon Cream Pasta is the ultimate tribute to garden-fresh produce. The texture is a beautiful play between the silken, velvety sauce and the slight crunch of thinly shaved zucchini ribbons. There is a fragrant, floral quality to the lemon zest that cuts through the richness of the cream, making the entire dish feel airy and bright rather than heavy. It’s the kind of meal that smells like a sun-drenched Italian terrace, with the peppery bite of fresh basil leaves providing the perfect finishing touch to every forkful.
Ingredients
- 1 lb linguine or spaghetti
- 2 medium zucchinis, shaved into ribbons
- 1 cup heavy cream
- 1/2 cup grated Parmesan cheese
- 2 lemons (zest and juice)
- 3 cloves garlic, thinly sliced
- Fresh basil leaves
- Red pepper flakes
How to make it
- Bring a large pot of heavily salted water (it should taste like the sea) to a rolling boil. Cook the pasta for 1 minute less than the package directions for a perfect al dente texture.
- Reserve 1 cup of starchy pasta water before draining—this is the secret to a glossy, cohesive sauce.
- In a large skillet, sauté the sliced garlic in a drizzle of olive oil over medium-low heat. You want the garlic to become translucent and fragrant without turning brown or bitter.
- Pour in the heavy cream and bring to a gentle simmer. Whisk in the Parmesan cheese and lemon juice until the sauce thickens slightly and becomes smooth.
- Add the shaved zucchini ribbons to the sauce; they only need about 60 seconds to soften while maintaining their vibrant green color.
- Toss the pasta into the skillet, adding splashes of the reserved pasta water as needed to emulsify the sauce so it clings to every strand. Top with lemon zest, red pepper flakes, and torn basil.
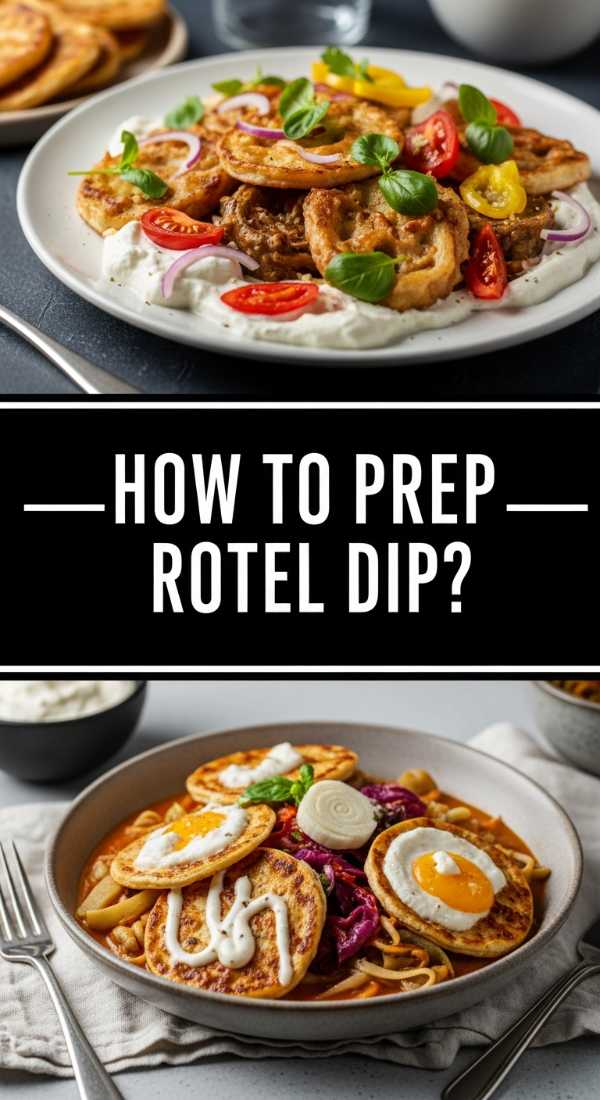
How to prep rotel dip?
Why we love this
Every food board needs a center of gravity, and this elevated Rotel dip is exactly that. It’s a nostalgic, crowd-pleasing classic that balances the smokiness of browned sausage with the creamy, molten texture of high-quality cheese. The diced green chilies provide a subtle, lingering warmth that dances on the palate without being overwhelming. Dipping a thick, salty tortilla chip into this warm pool of gold is a sensory delight, offering a crunch that shatters into a gooey, savory explosion of flavor that keeps everyone coming back for more.
Ingredients
- 1 lb spicy ground breakfast sausage
- 16 oz Velveeta or high-quality American cheese, cubed
- 2 cans (10 oz each) Rotel Diced Tomatoes and Green Chilies
- 4 oz cream cheese
- 1/2 cup chopped cilantro
- 1/4 cup diced red onion for garnish
How to make it
- In a large skillet over medium-high heat, brown the breakfast sausage. Use a wooden spoon to break it into very small crumbles; you want even distribution in every bite.
- Once the sausage is fully cooked and slightly crispy, drain the excess grease thoroughly. This prevents the dip from becoming oily.
- Switch your heat to low and add the cubed Velveeta and cream cheese. The cream cheese is the secret to a smoother, richer consistency that doesn’t ‘skin over’ as it cools.
- Pour in both cans of Rotel, including the liquid. The juices from the tomatoes help thin the cheese to the perfect dipping consistency.
- Stir constantly with a silicone spatula until the cheese is completely melted and the dip is a uniform, creamy pinkish-gold color.
- Transfer to a warm serving bowl or a small slow cooker on the ‘warm’ setting. Garnish with fresh cilantro and red onions to add a crisp, fresh contrast to the rich dip.
How to bake summer desserts?

Why we love this
The Peach and Blueberry Galette is the epitome of rustic summer elegance. We love it because it’s purposefully imperfect, with its folded buttery crust housing a bubbling, jammy center of stone fruit and berries. The smell of caramelizing sugars and toasted pastry wafting from the oven is enough to draw anyone into the kitchen. The crust provides a flaky, salt-kissed crunch that perfectly offsets the soft, succulent peaches that have softened just enough to release their floral nectar while retaining their shape.
Ingredients
- 1 refrigerated pie crust (or homemade shortcrust)
- 3 large peaches, sliced into wedges
- 1 cup fresh blueberries
- 1/4 cup granulated sugar
- 1 tablespoon cornstarch
- 1 teaspoon vanilla extract
- 1 egg (for wash)
- Turbinado sugar for topping
How to make it
- Preheat your oven to 400°F and line a large baking sheet with parchment paper. This ensures the bottom of the galette gets golden brown without sticking.
- In a large mixing bowl, gently toss the sliced peaches and blueberries with the granulated sugar, cornstarch, and vanilla. The cornstarch is vital as it thickens the fruit juices into a glossy glaze.
- Roll out your pastry dough on the parchment paper into a rough 12-inch circle. It doesn’t need to be perfect; the charm is in the uneven edges.
- Mound the fruit mixture in the center of the dough, leaving a 2-inch border all around the edge.
- Fold the edges of the dough up and over the fruit, pleating the dough as you go. The center should remain open, showing off the vibrant fruit colors.
- Brush the folded crust with a beaten egg wash and sprinkle heavily with turbinado sugar for a crunchy, glittering finish.
- Bake for 30-35 minutes until the crust is a deep golden brown and the fruit filling is bubbling vigorously in the center. Let cool for 15 minutes before slicing.
How to make hummingbird food?
Why we love this
Creating your own hummingbird nectar is a small but deeply rewarding ritual that brings nature right to your window. There is a quiet joy in watching these tiny, iridescent jewels dart back and forth, their wings humming in a blur of motion. This simple syrup mimics the natural sucrose found in flowers, providing a clean and safe energy source for our feathered friends. It feels wholesome to know exactly what is in the food you’re providing—no dyes, no preservatives, just pure, clear sustenance that keeps your garden alive with movement.
Ingredients
- 1 cup white granulated sugar
- 4 cups filtered water
How to make it
- In a small saucepan, combine the sugar and water. It is essential to use only plain white granulated sugar; honey, brown sugar, or artificial sweeteners can be harmful or even fatal to hummingbirds.
- Place the pan over medium heat and stir constantly until the sugar is completely dissolved. You do not need to bring it to a rolling boil, but heating it helps the sugar bond and kills any potential bacteria in the water.
- Once dissolved, remove from the heat and allow the mixture to cool to room temperature. Never put hot nectar into a feeder, as it can warp the plastic and harm the birds.
- Fill your clean hummingbird feeders with the cooled nectar. Do not add red food coloring; the red parts of the feeder itself are enough to attract the birds, and the dye is unnecessary and potentially toxic.
- Store any leftover nectar in a sealed glass jar in the refrigerator for up to two weeks.
- Clean your feeders every 2-3 days (more often in extreme heat) with hot water and a brush to prevent mold growth, which is the biggest danger to hummingbirds.
How to toss summer salad?
Why we love this
A Strawberry Balsamic Spinach Salad is a masterclass in balance. We love the way the earthy, tender baby spinach leaves act as a canvas for the explosive sweetness of sun-ripened strawberries and the creamy, tangy pop of goat cheese. Every bite offers a different texture—the crunch of toasted pecans, the soft give of the fruit, and the slick, acidic zip of the balsamic glaze. It feels incredibly refreshing on a hot afternoon, acting as a palate cleanser that leaves you feeling energized rather than weighed down.
Ingredients
- 5 oz baby spinach
- 1 pint strawberries, hulled and sliced
- 4 oz goat cheese, crumbled
- 1/2 cup pecans, toasted
- 1/4 red onion, thinly sliced
- Balsamic glaze for drizzling
- Extra virgin olive oil and a pinch of salt
How to make it
- Start by toasting your pecans in a dry skillet over medium heat for 3-5 minutes. Shake the pan frequently; they are done when they smell nutty and look a shade darker. Set aside to cool.
- In a very large wooden bowl, place the spinach and red onions. Drizzle with just a teaspoon of olive oil and a pinch of salt, then toss gently with your hands to lightly coat the leaves.
- Add the sliced strawberries and the cooled toasted pecans. The key to a great salad is layering, so don’t over-mix once the delicate ingredients are added.
- Crumble the goat cheese over the top in large chunks. This prevents the cheese from smearing and keeps the salad looking clean and professional.
- Just before serving, drizzle the balsamic glaze in a zig-zag pattern over the top. The glaze is thicker and sweeter than vinegar, allowing it to sit on top of the ingredients rather than pooling at the bottom.
- Toss very lightly one final time right at the table to ensure everyone gets a bit of every component.
How to grill summer kabobs?
Why we love this
There is an undeniable primal joy in cooking over an open flame, and these Mediterranean Chicken Kabobs are the highlight of any food board. The aroma of charred lemon and oregano drifting from the grill is synonymous with summer nights. The chicken becomes incredibly tender thanks to a yogurt-based marinade, which creates a protective barrier that seals in the juices while the exterior develops those beautiful, smoky grill marks. It’s a tactile, fun way to eat that encourages everyone to roll up their sleeves and dig in.
Ingredients
- 1.5 lbs chicken thighs, cut into 1-inch chunks
- 2 bell peppers (mixed colors), cut into squares
- 1 large red onion, cut into wedges
- 1 cup Greek yogurt
- 2 tablespoons olive oil
- 3 cloves garlic, smashed
- 1 tablespoon dried oregano
- 1 teaspoon smoked paprika
- Wooden or metal skewers
How to make it
- In a large bowl, whisk together the Greek yogurt, olive oil, garlic, oregano, and paprika. This yogurt marinade is the secret to preventing the chicken from drying out on the high heat of the grill.
- Add the chicken chunks to the marinade and refrigerate for at least 2 hours, or ideally overnight.
- If using wooden skewers, soak them in water for at least 30 minutes to prevent them from catching fire on the grill.
- Thread the skewers, alternating between chicken, pepper, and onion. Don’t crowd the pieces too tightly; leaving a tiny bit of space ensures the heat can circulate and cook the meat evenly.
- Preheat your grill to medium-high (about 400°F). Clean and oil the grates to prevent sticking.
- Grill the skewers for 10-12 minutes, turning a quarter-turn every 3 minutes. Look for clear juices and an internal temperature of 165°F. The yogurt will create a beautiful, slightly charred crust that tastes incredible.
How to mix summer drinks?

Why we love this
The Cucumber Mint Cooler is the ultimate thirst-quencher. This drink is all about the crisp, clean notes of garden cucumber combined with the sharp, cooling sensation of fresh mint. We love how the bubbles from the sparkling water dance on the tongue, carrying the subtle botanical scents upward. It is a visual stunner in a glass pitcher, with thin ribbons of green swirling through clear ice, making it feel like a spa-day treat that you can enjoy right in your backyard. It’s light, sophisticated, and incredibly hydrating.
Ingredients
- 1 large English cucumber
- 1 bunch fresh mint leaves
- 2 limes, juiced
- 2 tablespoons agave nectar or simple syrup
- 1 liter sparkling mineral water
- Ice cubes
How to make it
- Using a vegetable peeler, shave several long, thin ribbons from the cucumber for garnish. Finely dice the remaining cucumber.
- In a large pitcher, combine the diced cucumber, lime juice, and agave nectar. Use a muddler or a wooden spoon to firmly bruise the cucumber and release its juices.
- Add the mint leaves to the pitcher and muddle very gently. You want to release the oils, not shred the leaves into bitter bits.
- Fill the pitcher halfway with ice cubes, then pour in the sparkling mineral water. Stir gently with a long spoon to integrate the flavors without losing the carbonation.
- To serve, place a cucumber ribbon inside each glass, pressing it against the side so it spirals upward.
- Fill glasses with ice, pour the cooler over the top, and garnish with a fresh sprig of mint and a lime wheel.
How to prep camping meals?

Why we love this
Foil pack meals are the unsung heroes of outdoor dining. We love the ‘set it and forget it’ nature of these Tin Foil Fajitas, which steam the vegetables to tender perfection while the steak develops a rich, concentrated flavor. There is something deeply satisfying about peeling back the hot foil to reveal a puff of seasoned steam and a colorful array of sizzling ingredients. It eliminates the need for messy pots and pans, allowing you to focus on the campfire and the stars rather than the cleanup. It’s rustic, hearty, and tastes even better in the fresh air.
Ingredients
- 1 lb flank steak, thinly sliced
- 3 bell peppers, sliced into strips
- 1 large onion, sliced
- 2 tablespoons taco seasoning
- 1 tablespoon olive oil
- Heavy-duty aluminum foil
- Optional: Tortillas, avocado, and lime for serving
How to make it
- In a large bowl or a zip-top bag, toss the steak, peppers, and onions with olive oil and taco seasoning until everything is thoroughly coated.
- Tear off four large sheets of heavy-duty aluminum foil (about 12×12 inches each). If you only have thin foil, double it up to prevent tearing.
- Divide the steak and vegetable mixture evenly among the sheets, placing the food in the center.
- Fold the sides of the foil up to meet in the middle and fold over twice to create a seal. Then, fold the ends in tightly. You want a little bit of air space inside for steam, but the seal must be airtight.
- Place the packs on a grill grate over a hot campfire or a portable camping stove.
- Cook for 12-15 minutes, flipping the pack once halfway through using tongs. Since flank steak is thin, it cooks quickly.
- Carefully open the packs (watch out for the hot steam!), squeeze fresh lime juice over the top, and serve directly from the foil or tucked into warm tortillas.
How to make snackle boxes?
Why we love this
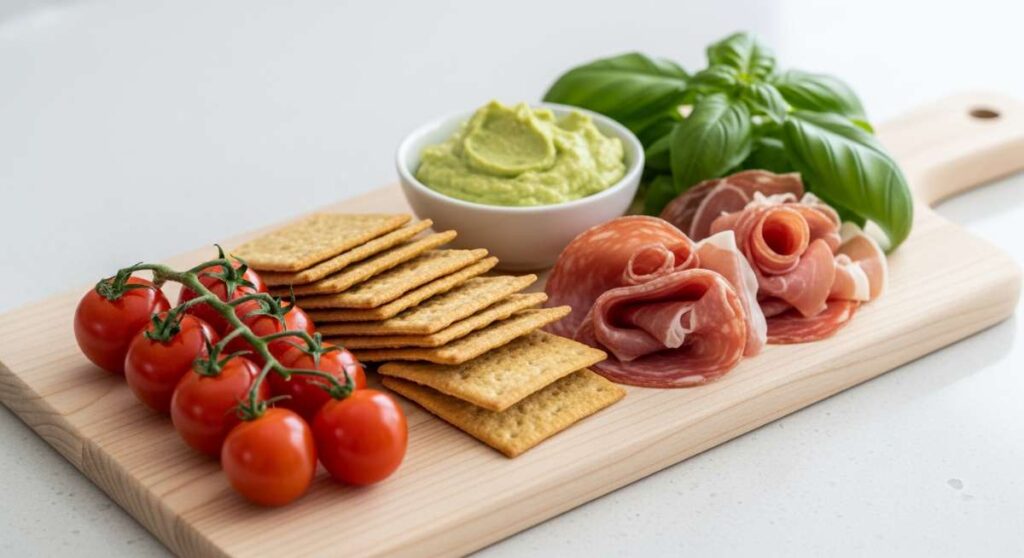
The ‘Snackle Box’ is the viral trend that changed the way we travel and graze. It’s essentially a portable charcuterie board housed in a multi-compartment tackle box, and we love it for its sheer variety and convenience. Every little square offers a different sensory experience—the salty crunch of a pretzel, the creamy tang of a cheddar cube, the snap of a fresh grape, and the chew of a dried apricot. It’s the ultimate way to keep a crowd satisfied during a road trip or a beach day, ensuring that no one gets ‘hangry’ while providing a beautiful mosaic of snacks that is as fun to look at as it is to eat.
Ingredients
- A clean, food-safe multi-compartment organizer (tackle box style)
- Assorted cheeses (cubed cheddar, brie, gouda)
- Cured meats (salami rosettes, prosciutto)
- Crunchy items (almonds, pretzels, crackers)
- Fresh fruit (grapes, berries, orange slices)
- Sweet treats (dark chocolate squares, dried cranberries)
- Olives or cornichons
How to make it
- Ensure your container is thoroughly washed and dried. If it isn’t specifically labeled ‘food safe,’ line the compartments with small cupcake liners.
- Start by placing the ‘messier’ or wetter items like olives and pickles into their own individual compartments to prevent their juices from soaking the crackers.
- Build ‘meat roses’ by folding salami slices in half and layering them in a circle to add height and visual flair to the box.
- Intersperse colors and textures. Place vibrant orange apricots next to white sharp cheddar, and green grapes next to dark almonds. This contrast makes the box look ‘viral-ready.’
- Fill the smaller center compartments with tiny treats like chocolate-covered raisins or sunflower seeds to maximize space.
- Keep the crackers in a separate airtight container if you are traveling a long distance to ensure they stay perfectly crisp, then tuck them into their designated slots just before serving.
- Snap the lid shut and store in a cooler bag until you’ve reached your picnic or beach destination.
Conclusion
Whether you’re packing a Snackle Box for a weekend getaway or firing up the grill for some honey-garlic kabobs, the secret to a viral-worthy food board isn’t perfection—it’s variety and connection. Summer is fleeting, and these recipes are designed to help you spend less time over a hot stove and more time laughing with the people you love. So, grab a board, some fresh ingredients, and start creating your own delicious memories.