
Minimal Effort, Maximum Wow: The Ultimate Viral Food Board Guide
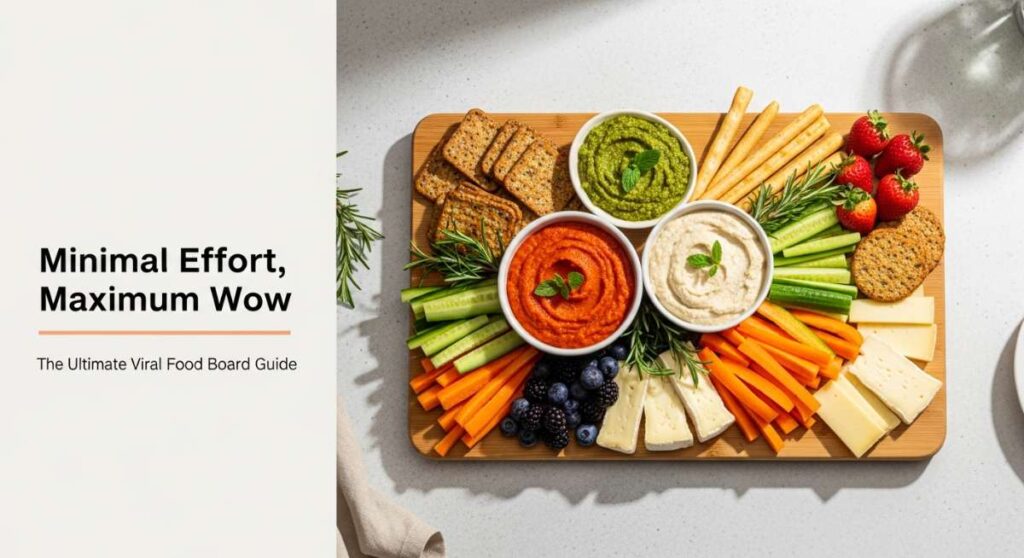
There is something magical about the way food brings us together, especially when the sun stays high in the sky and the evenings feel like they could last forever. I remember a specific July evening last year, barefoot on the patio, watching my friends dive into a spread that took me less than twenty minutes to assemble, yet looked like a professional catering job. That is the power of the viral ‘simple food board’—it is less about technical perfection and more about the curated chaos of colors, textures, and flavors that invite everyone to grab a plate and linger a little longer.
We have all felt that hosting fatigue, where the idea of a four-course meal feels more like a chore than a celebration. This guide is your secret weapon to reclaiming the joy of entertaining. By mastering a few key summer staples and learning how to present them with flair, you will turn every casual Tuesday or weekend camping trip into a memory-making event. Let’s dive into these ten viral-worthy ways to elevate your summer dining experience with minimal stress and maximum impact.
How to prep summer meals?

Why we love this
Prepping summer meals is all about embracing the vibrancy of the season while keeping your kitchen cool. There is an incredible sensory satisfaction in the crisp snap of a fresh bell pepper and the earthy, sweet fragrance of basil leaves being torn by hand. When you prep with a ‘board first’ mindset, your fridge becomes a palette of pre-washed, pre-sliced gems that make assembly feel like an art project rather than a task. It is the ultimate relief to come home after a long day and see a rainbow of chilled ingredients ready to be tossed together into something beautiful.
Ingredients
- Assorted heirloom tomatoes
- English cucumbers
- Blanched snap peas
- Pre-cooked quinoa or farro
- Lemon-tahini dressing
- Fresh garden herbs (mint, dill, parsley)
- Crumbled feta or goat cheese
How to make it
- Start by washing all your produce in ice-cold water to ensure maximum crispness; pat them completely dry with a lint-free towel to prevent sogginess.
- Slice the tomatoes into thick rounds and the cucumbers into thin ribbons using a mandoline or a sharp knife, aiming for varied shapes to add visual interest to your board.
- Prepare your grain base by boiling quinoa in salted water for 12-15 minutes until the ‘tails’ appear, then fluff with a fork and let it cool to room temperature.
- Blanch your snap peas by dropping them into boiling water for exactly 60 seconds, then immediately plunging them into an ice bath to lock in that neon green color.
- Arrange the components in clusters on a large wooden board, keeping the heavier grains in the center and the delicate herbs tucked around the edges to maintain their freshness.
How to cook rotel dip?

Why we love this
Rotel dip is the undisputed king of viral comfort food, offering a decadent, velvety texture that coats every chip perfectly. The aroma of melted cheese mingling with zesty green chilies and savory browned meat creates an atmosphere of pure nostalgia and indulgence. It is the kind of dish that disappears in minutes, leaving everyone scraping the bottom of the bowl for one last spicy, creamy bite. It’s warm, it’s bold, and it provides that perfect salty-savory balance that makes it a mandatory centerpiece for any casual food board.
Ingredients
- 1 lb ground beef or spicy sausage
- 1 block (32 oz) Velveeta or processed melting cheese
- 2 cans (10 oz each) Ro-Tel Diced Tomatoes and Green Chilies
- 1/2 cup whole milk (for consistency)
- 1 tsp smoked paprika
- Fresh cilantro for garnish
How to make it
- Place a large skillet over medium-high heat and brown the meat, breaking it into very small crumbles with a wooden spoon until no pink remains and it has a deep brown sear.
- Drain the excess fat thoroughly to ensure your dip remains silky and not oily, then return the skillet to low heat.
- Cube the melting cheese into 1-inch squares to facilitate even melting; add them to the skillet along with the undrained cans of tomatoes and chilies.
- Stir constantly with a heat-resistant spatula, allowing the cheese to melt slowly over low heat to prevent scorching or graininess.
- Once the mixture is smooth, stir in the milk a tablespoon at a time until you reach a pourable yet thick consistency, then finish with a sprinkle of smoked paprika before serving warm.
How to make summer pasta?

Why we love this
Summer pasta is the antithesis of heavy winter sauces; it is light, ethereal, and bursting with the citrusy brightness of lemons. The way the warm pasta tendrils soak up a simple emulsion of olive oil, garlic, and pasta water creates a glossy sheen that is visually stunning on a platter. You can smell the garlic sizzling softly and the sharp, clean scent of lemon zest as it hits the hot noodles. It feels like a sun-drenched afternoon on the Italian coast, providing a satisfying meal that won’t leave you feeling weighed down in the heat.
Ingredients
- 1 lb spaghetti or linguine
- 1/2 cup high-quality extra virgin olive oil
- 6 cloves of garlic, thinly sliced
- Zest and juice of 2 large organic lemons
- 1 cup grated Parmesan Reggiano
- Red pepper flakes and fresh basil
How to make it
- Bring a large pot of heavily salted water—it should taste like the sea—to a rolling boil and cook your pasta for 1-2 minutes less than the package directions for a true ‘al dente’ bite.
- While the pasta cooks, heat the olive oil in a wide pan over low-medium heat and add the garlic slices, cooking them gently until they are pale gold and fragrant; do not let them turn brown or bitter.
- Reserve exactly 1 cup of starchy pasta water before draining the noodles, as this is the secret to a viral-worthy glossy sauce.
- Add the drained pasta to the garlic oil, then pour in the lemon juice and half of the reserved pasta water, tossing vigorously with tongs to emulsify the liquid into a sauce.
- Remove from heat, stir in the lemon zest and Parmesan, adding more pasta water if it looks too dry, and serve immediately topped with torn basil and red pepper flakes.
How to mix hummingbird food?

Why we love this
Mixing hummingbird food is a meditative ritual that connects your home to the vibrant life of your garden. There is a simple, crystalline beauty in the way sugar dissolves into clear water, creating a life-giving nectar that attracts these tiny, shimmering jewels to your window. Watching their iridescent feathers catch the light while they feed is the ultimate reward for a few minutes of effort. It’s a clean, pure process that avoids the artificial dyes found in store-bought mixes, ensuring your feathered friends stay healthy and happy all summer long.
Ingredients
- 1 cup granulated white sugar
- 4 cups filtered water
How to make it
- Measure out your water and pour it into a clean saucepan, bringing it to a light simmer over medium heat; you don’t need a rolling boil, just enough heat to dissolve the solids.
- Add the white sugar to the water and stir continuously with a clean whisk until the liquid is perfectly clear and no sugar crystals remain visible at the bottom of the pan.
- Let the mixture boil for exactly two minutes to neutralize any impurities or bacteria that might be present in the water or sugar.
- Remove the pan from the heat and allow the nectar to cool completely to room temperature; never put warm nectar in a feeder as it can warp the plastic or harm the birds.
- Store any excess in a clean glass jar in the refrigerator for up to two week, and remember to clean your feeders thoroughly every few days to keep the nectar fresh.
How to grill summer kabobs?

Why we love this
Summer kabobs are the ultimate interactive food board element, offering charred edges and juicy, tender centers in every bite. The smell of smoke and caramelizing marinade wafting from the grill is the universal signal that summer has arrived. There is a tactile joy in sliding the colorful pieces of meat and vegetables off the wooden skewer and onto a bed of fluffy rice or pita bread. Each skewer is a miniature masterpiece of texture—the crunch of a charred onion against the succulent richness of grilled steak or chicken.
Ingredients
- 2 lbs sirloin steak or chicken breast, cut into 1.5-inch cubes
- 2 bell peppers (mixed colors), cut into squares
- 1 red onion, cut into wedges
- Whole cremini mushrooms
- Balsamic-herb marinade (oil, vinegar, honey, rosemary)
How to make it
- If using wooden skewers, soak them in water for at least 30 minutes prior to grilling to prevent them from catching fire over the high heat of the grates.
- Thread the meat and vegetables onto the skewers, alternating colors and ensuring you leave a tiny bit of space between each item so the heat can circulate and cook everything evenly.
- Preheat your grill to medium-high heat (about 400°F) and lightly oil the grates using a folded paper towel dipped in vegetable oil and held with tongs.
- Place the kabobs on the grill and cook for 10-12 minutes, turning them a quarter-turn every 3 minutes to achieve beautiful sear marks and an even internal temperature.
- During the last 2 minutes of cooking, brush a fresh layer of marinade over the kabobs to create a sticky, flavorful glaze, then let them rest for 5 minutes before serving.
How to make cucumber salad?

Why we love this
Cucumber salad is the refreshing, cooling backbone of any successful summer food board. The sheer crunch of a cold cucumber combined with the sharp tang of vinegar and the sweetness of red onions is incredibly revitalizing on a humid day. It looks beautiful when served in a glass bowl, with the translucent green slices shimmering in a light dressing flecked with fresh dill. It is a palate cleanser that balances out richer, grilled meats, offering a burst of hydration and a zesty finish that makes you want to go back for seconds.
Ingredients
- 3 large English cucumbers
- 1/2 small red onion, paper-thinly sliced
- 1/2 cup white wine vinegar
- 2 tbsp granulated sugar
- 1 tsp sea salt
- 1/4 cup fresh dill, chopped
How to make it
- Wash the cucumbers and slice them into very thin rounds; if you prefer a decorative look, run the tines of a fork down the length of the peel before slicing to create a ridged edge.
- Place the sliced cucumbers in a colander and sprinkle with the sea salt, letting them sit for 15 minutes to draw out excess moisture—this ensures your salad stays crunchy and not watery.
- In a separate small bowl, whisk together the white wine vinegar and sugar until the sugar is completely dissolved, creating a bright, balanced brine.
- Pat the cucumbers dry with a paper towel and place them in a mixing bowl with the sliced red onions and chopped dill.
- Pour the dressing over the vegetables, toss gently to coat, and refrigerate for at least 30 minutes before serving to allow the flavors to meld and the onions to soften slightly.
How to bake summer desserts?

Why we love this
Summer desserts should feel effortless and fruit-forward, celebrating the peak ripeness of the season’s harvest. There is nothing like the aroma of bubbling berries and buttery pastry filling the kitchen as the sun begins to set. A viral summer dessert board often features a rustic galette or a crisp, where the focus is on the jammy texture of the fruit and the golden, flaky crunch of the crust. It’s a warm, comforting hug of a dish that feels sophisticated yet homey, especially when topped with a melting scoop of vanilla bean ice cream.
Ingredients
- 4 cups fresh berries or sliced peaches
- 1/2 cup granulated sugar
- 1 tbsp cornstarch
- 1 tsp vanilla extract
- 1 pre-made pie crust or puff pastry sheet
- 1 egg (for egg wash)
How to make it
- Preheat your oven to 400°F (200°C) and line a large baking sheet with parchment paper to prevent the fruit juices from sticking.
- In a large bowl, toss your fruit with the sugar, cornstarch, and vanilla extract until every piece is evenly coated; the cornstarch is vital for thickening the juices into a glossy sauce.
- Roll out your pastry on the parchment paper and pile the fruit mixture into the center, leaving a 2-inch border of dough all the way around.
- Fold the edges of the dough over the fruit, pleating as you go to create a rustic ‘galette’ shape; don’t worry about it being perfect, as the irregularities add to its charm.
- Brush the edges of the crust with a beaten egg for a golden finish and bake for 25-30 minutes until the pastry is deep golden brown and the fruit filling is bubbling vigorously.
How to prepare camping meals?

Why we love this
Camping meals bring a sense of adventure and smoky depth to the food board concept. There is a primal satisfaction in cooking over an open flame, with the crackle of the wood and the scent of pine needles providing the ultimate backdrop. These meals are designed for ease and portability, yet they don’t sacrifice flavor. The charred edges of a foil-packet meal or the gooey melt of a campfire sandwich feel like a luxury in the middle of the wilderness, proving that great food doesn’t require a gourmet kitchen—just a little bit of fire and fresh air.
Ingredients
- Heavy-duty aluminum foil
- Pre-sliced smoked sausages
- Baby potatoes, halved
- Corn on the cob, cut into rounds
- Old Bay seasoning and butter
- Diced bell peppers
How to make it
- Cut large squares of heavy-duty aluminum foil—heavy-duty is essential to prevent tearing over the direct heat of the coals.
- Place a portion of sausages, potatoes, corn, and peppers in the center of each foil square, ensuring the potatoes are sliced small enough to cook through in the same time as the other items.
- Add a generous pat of butter to each pile and sprinkle liberally with Old Bay seasoning or your favorite spice blend.
- Fold the foil over the food and crimp the edges tightly to create a sealed packet that will steam the ingredients inside while they char on the outside.
- Place the packets on a grate over hot coals (not active flames) and cook for 20-25 minutes, flipping once halfway through, then carefully open the steam-filled packets and serve immediately.
How to mix summer drinks?

Why we love this
Summer drinks are the jewel-toned highlights of any gathering, offering a cool, effervescent relief from the afternoon heat. The sound of ice clinking against glass and the spray of citrus oils as you squeeze a lime over a drink is the ultimate sensory experience. A great summer beverage is all about the balance of tartness and sweetness, often infused with fresh herbs that add an unexpected, sophisticated layer of aroma. They are visually stunning when served in large pitchers filled with floating fruit, inviting everyone to pour themselves a glass of liquid sunshine.
Ingredients
- Fresh watermelon juice or muddled berries
- Sparkling water or ginger ale
- Fresh lime juice
- Simple syrup (sugar and water)
- Fresh mint leaves
- Plenty of crushed ice
How to make it
- Muddle your fresh fruit and mint leaves in the bottom of a large pitcher using a muddling tool or the back of a wooden spoon to release the essential oils and juices.
- Add the lime juice and simple syrup, stirring vigorously to combine the flavors into a concentrated base.
- Fill the pitcher three-quarters full with crushed ice—crushed ice provides more surface area and cools the drink significantly faster than large cubes.
- Slowly pour in the sparkling water or ginger ale, stirring gently with a long spoon to incorporate without losing the carbonation.
- Taste and adjust the sweetness or acidity as needed, then garnish with extra mint sprigs and lime wheels for a professional, viral-ready look.
How to make summer soup?

Why we love this
Summer soup, specifically chilled varieties like Gazpacho, is a revelation for those used to heavy, hot stews. It is a vibrant, liquid salad that feels incredibly healthy and revitalizing. The smooth, velvety texture of blended garden vegetables is punctuated by the sharp bite of red onion and the richness of a drizzle of high-quality olive oil. It is refreshing, savory, and remarkably complex in flavor, offering a cooling sensation that is perfect for a starter or a light lunch. Served in small glasses on a food board, it adds an elegant, sophisticated touch that always impresses.
Ingredients
- 6 large ripe tomatoes, cored
- 1 green bell pepper, deseeded
- 1 cucumber, peeled
- 1/2 red onion
- 2 cloves of garlic
- 2 tbsp sherry vinegar or red wine vinegar
- 1/3 cup extra virgin olive oil
- Salt and black pepper
How to make it
- Roughly chop all your vegetables into 1-inch chunks to prepare them for the blender; using very ripe tomatoes is crucial for the best flavor and color.
- Place the tomatoes, pepper, cucumber, onion, and garlic in a high-speed blender and pulse until the mixture is completely smooth and liquid.
- With the blender running on low, slowly drizzle in the olive oil and vinegar, which will emulsify the soup and give it a creamy, rich mouthfeel without adding any dairy.
- Season generously with salt and pepper, then pour the soup through a fine-mesh sieve if you prefer a perfectly silky, restaurant-style texture.
- Transfer the soup to a glass container and chill in the refrigerator for at least 4 hours—this soup must be served ice-cold to truly experience the depth of the garden flavors.
The Final Word on Summer Hosting
Hosting doesn’t have to be a performance; it should be a pleasure. By focusing on these simple yet impactful recipes, you can create a viral-worthy food board that feels as good to eat as it looks on your social media feed. The key is in the details—the fresh herbs, the right temperature, and the communal way the food is served. So, grab a board, pick a few of these favorites, and enjoy every bite of the season with the people who matter most. Happy hosting!