

Why This Simple Food Board Is Breaking My Social Media Feed
I remember the first time I scrolled past it—a sprawling, rustic board filled with textures so vibrant they practically jumped off my phone screen. It wasn’t just a cheese plate; it was a curated collection of home-cooked comfort, a ‘everything board’ that felt like a warm hug in a digital world of polished perfection. It felt real, messy in the best way, and utterly delicious, sparking an immediate need to recreate that cozy magic in my own kitchen.
There is something deeply human about sharing a board filled with the basics done perfectly. It’s the scent of fresh banana bread mingling with roasted rosemary potatoes that turns a house into a home. This trend is breaking the internet because it celebrates the art of the simple meal, proving that you don’t need fancy garnishes when you have the secrets to the perfect juicy chicken or the chewiest cookie. Let’s dive into the ten staples that make this board a viral sensation.
How to make juicy chicken breast

Why we love this
There is nothing quite as satisfying as a perfectly seared chicken breast that remains incredibly tender and moist on the inside. When you slice into it, the juices should run clear, and the exterior should boast a beautiful, golden-brown crust infused with garlic and herbs. The aroma is classic and comforting, filling the kitchen with a savory promise of a meal that is both healthy and indulgent. It is the versatile anchor of our food board, providing a lean protein that pairs beautifully with everything from creamy pasta to crisp salads.
Ingredients
- 2 large boneless, skinless chicken breasts
- 2 tablespoons olive oil
- 1 teaspoon garlic powder
- 1 teaspoon smoked paprika
- Salt and freshly cracked black pepper to taste
- 2 tablespoons unsalted butter
- Fresh thyme or rosemary sprigs
How to make it
- Begin by removing the chicken from the refrigerator at least 15-20 minutes before cooking to bring it to room temperature; this ensures even cooking throughout the meat.
- Pat the chicken breasts completely dry with paper towels to remove excess moisture, which is the secret to achieving a deep, caramelized sear rather than steaming the meat.
- Season both sides generously with salt, pepper, garlic powder, and smoked paprika, pressing the spices into the flesh so they adhere well during the searing process.
- Heat a heavy-bottomed skillet or cast iron pan over medium-high heat and add the olive oil; once the oil shimmers and just begins to smoke slightly, carefully lay the chicken in the pan.
- Sear the first side undisturbed for 5-6 minutes until a rich golden crust forms, then flip and add the butter and fresh herbs to the pan.
- Baste the chicken by spooning the melting, herb-infused butter over the meat repeatedly for another 5 minutes, or until the internal temperature reaches exactly 165°F (74°C).
- Remove the chicken from the pan and let it rest on a cutting board for at least 8 minutes before slicing; this allows the fibers to relax and the juices to redistribute for maximum succulence.
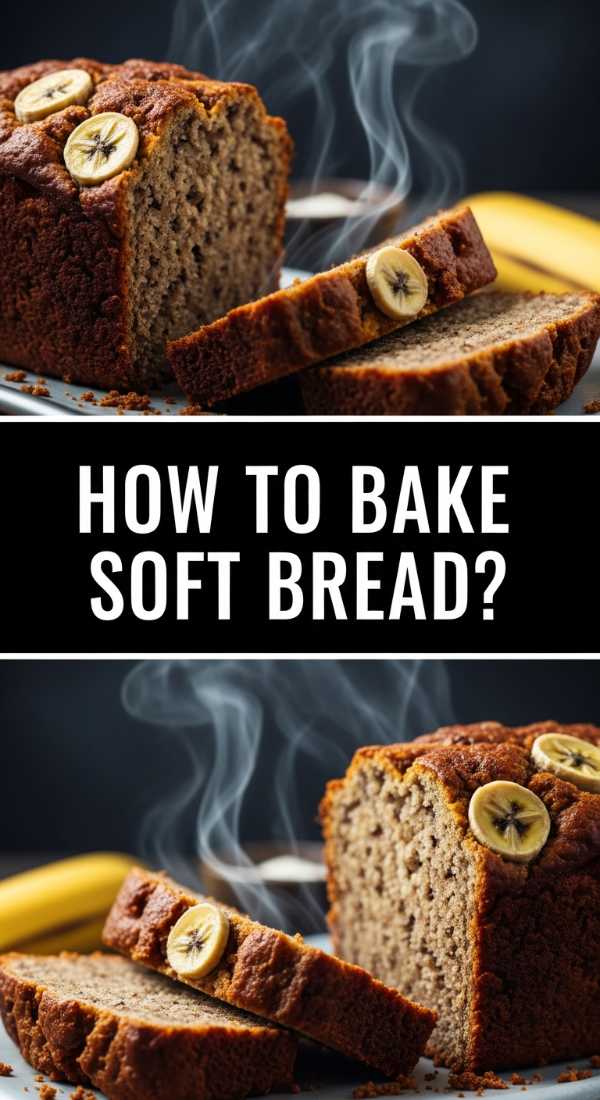
How to bake soft banana bread
Why we love this
Walking into a kitchen where banana bread is baking feels like a literal embrace of nostalgia and warmth. This loaf is celebrated for its incredibly soft, tight crumb and the way the natural sugars from overripe bananas caramelize into a deep, honey-like sweetness. The texture is almost fudgy, dense yet airy enough to melt on your tongue, especially when served warm with a thick smear of salted butter. It provides that essential sweet element to our viral food board, offering a comforting contrast to the savory components.
Ingredients
- 3 very overripe bananas, mashed
- 1/3 cup melted butter
- 3/4 cup granulated sugar
- 1 large egg, beaten
- 1 teaspoon vanilla extract
- 1 teaspoon baking soda
- Pinch of salt
- 1 1/2 cups all-purpose flour
How to make it
- Preheat your oven to 350°F (175°C) and grease a standard 4×8-inch loaf pan with butter or non-stick spray to ensure an easy release after baking.
- In a large mixing bowl, mash the peeled overripe bananas using a fork or a potato masher until they reach a smooth consistency with only a few small lumps remaining for texture.
- Stir the melted butter into the mashed bananas until fully incorporated, then whisk in the sugar, beaten egg, and vanilla extract until the mixture is pale and fragrant.
- Sprinkle the baking soda and salt over the wet mixture and stir gently, then fold in the flour using a spatula, being careful not to overmix, which can lead to a tough, rubbery bread.
- Pour the batter into the prepared loaf pan, smoothing the top with your spatula to ensure an even rise during the baking process.
- Bake for 50 to 60 minutes, or until a wooden skewer inserted into the center comes out clean or with just a few moist crumbs attached; the top should be a deep mahogany brown.
- Let the bread cool in the pan for 10 minutes before transferring it to a wire rack to cool completely, which prevents the bottom from becoming soggy.
How to cook perfect salmon

Why we love this
Perfectly cooked salmon is a masterclass in texture, offering a shatteringly crisp skin that protects a delicate, flaky, and buttery interior. The flavor is clean and rich, enhanced by the bright zing of lemon and the earthy fragrance of fresh dill that cuts through the natural oils of the fish. It looks stunning on a food board, with its vibrant pink hue providing a pop of color that signals freshness and elegance. Every bite offers a satisfying contrast between the crunch of the sear and the melt-in-your-mouth tenderness of the center.
Ingredients
- 2 salmon fillets (6 oz each), skin-on
- 1 tablespoon high-smoke point oil (like avocado or grapeseed)
- Kosher salt and black pepper
- 1 tablespoon unsalted butter
- Half a lemon, sliced into rounds
- Fresh dill for garnish
How to make it
- Take the salmon out of the fridge 15 minutes early and use a sharp knife to gently score the skin, which prevents the fillet from curling when it hits the hot pan.
- Pat the skin side extremely dry with a paper towel; any moisture left on the skin will prevent it from becoming truly crispy and may cause it to stick to the pan.
- Season the flesh side with salt and pepper, then heat your skillet over medium-high heat and add the oil until it is shimmering and hot.
- Place the salmon fillets skin-side down in the pan, pressing down firmly with a spatula for 10 seconds to ensure the skin makes full contact with the heat.
- Lower the heat to medium and cook the salmon on the skin side for about 6-7 minutes, watching the color of the flesh change from the bottom up until it is cooked 70% of the way through.
- Flip the fillets gently and add the butter and lemon slices to the pan, cooking for only another 1-2 minutes to finish the interior while keeping it medium-rare to medium.
- Remove the salmon from the heat immediately and let it rest for 2 minutes, then garnish with fresh dill and a squeeze of the charred lemon.
How to make creamy pasta

Why we love this
There is a luxurious, velvet-like quality to a truly well-made creamy pasta that coats every single strand of noodle in a glossy, savory embrace. The aroma of sautéed garlic and aged parmesan cheese creates a sensory experience that is deeply indulgent and sophisticated yet fundamentally simple. It is the ultimate comfort food, providing a rich, satisfying mouthfeel that lingers, making it the perfect centerpiece for a shared board. The way the sauce clings to the pasta without pooling at the bottom is the hallmark of a recipe perfected through technique.
Ingredients
- 8 oz long pasta (like fettuccine or linguine)
- 1 cup heavy cream
- 1/2 cup freshly grated Parmesan cheese
- 2 cloves garlic, minced
- 2 tablespoons unsalted butter
- 1/2 cup reserved pasta water
- Salt, pepper, and fresh parsley
How to make it
- Bring a large pot of heavily salted water to a rolling boil—it should taste like the sea to properly season the pasta from the inside out.
- Add the pasta and cook it for 1-2 minutes less than the package directions specify to ensure it stays ‘al dente,’ as it will finish cooking in the sauce later.
- While the pasta boils, melt the butter in a large skillet over medium heat and sauté the minced garlic for about 1 minute until it is fragrant but not browned.
- Pour in the heavy cream and bring it to a gentle simmer, letting it reduce slightly for 3-4 minutes until it begins to thicken and coat the back of a spoon.
- Before draining the pasta, use a measuring cup to reserve at least a cup of the starchy pasta water, which is the magic ingredient for emulsifying the sauce.
- Transfer the pasta directly into the cream sauce, add the grated Parmesan, and toss vigorously while adding splashes of the reserved pasta water to create a smooth, glossy emulsion.
- Continue tossing over low heat until the sauce is thick and perfectly clings to the noodles, then season with pepper and fresh parsley before serving immediately.
How to make chewy cookies

Why we love this
A perfect chewy cookie is a landscape of textures, featuring golden, crisp edges that give way to a soft, almost doughy center filled with pools of molten chocolate. The balance of salty and sweet is enhanced by the deep, toffee-like notes of browned butter and molasses-rich brown sugar, creating a complex flavor profile. They smell like pure joy, a sugary, vanilla-scented perfume that draws everyone to the kitchen the moment the timer dings. These cookies are the ultimate crowd-pleaser on any food board, offering a hand-held treat that feels both nostalgic and gourmet.
Ingredients
- 1 cup unsalted butter, softened
- 3/4 cup granulated sugar
- 3/4 cup packed brown sugar
- 1 teaspoon vanilla extract
- 1 large egg
- 2 1/4 cups all-purpose flour
- 1 teaspoon baking soda
- 1/2 teaspoon salt
- 2 cups semi-sweet chocolate chips
How to make it
- In a large bowl, cream together the softened butter, granulated sugar, and brown sugar using an electric mixer on medium-high for at least 3-5 minutes until the mixture is pale and fluffy.
- Add the egg and vanilla extract, beating again until fully combined and the mixture looks smooth and slightly aerated.
- In a separate bowl, whisk together the flour, baking soda, and salt to ensure the leavening agents are evenly distributed throughout the dough.
- Turn the mixer to low and gradually add the dry ingredients to the wet ingredients, mixing only until the white streaks of flour just disappear; overmixing at this stage will make the cookies tough.
- Fold in the chocolate chips by hand using a spatula, then cover the dough and chill it in the refrigerator for at least 30 minutes to prevent the cookies from spreading too thin.
- Scoop rounded tablespoons of dough onto a parchment-lined baking sheet, spacing them 2 inches apart, and bake at 350°F (175°C) for 9-11 minutes.
- The key is to remove them when the edges are just barely golden but the centers still look slightly underbaked; they will firm up on the hot baking sheet for 5 minutes after being removed from the oven.
How to roast crispy potatoes

Why we love this
These roasted potatoes are the definition of textural contrast: a glass-like, salty outer shell that shatters upon impact to reveal a fluffy, cloud-like interior that tastes of pure earth and butter. The addition of fresh rosemary and sea salt creates an aromatic profile that is rustic and irresistible, making them the most swiped item on the entire board. They catch the light with their golden, craggy surfaces, promising a crunch that is deeply satisfying to the ears as much as the palate. They are the humble potato elevated to its highest, most addictive form through the magic of high-heat roasting.
Ingredients
- 2 lbs Yukon Gold potatoes, peeled and chopped into 1-inch chunks
- 1/4 cup extra virgin olive oil
- 3 sprigs fresh rosemary, finely chopped
- 1 teaspoon sea salt
- 1/2 teaspoon cracked black pepper
- 1/2 teaspoon garlic powder
How to make it
- Place the potato chunks in a large pot of cold, salted water and bring to a boil; parboil them for exactly 8-10 minutes until the outsides are softened but the centers are still firm.
- Drain the potatoes and let them steam dry in the colander for a minute, then shake them vigorously to roughen up the edges; these ‘fuzzy’ edges are what turn into the crispy crust.
- Preheat your oven to 425°F (220°C) and place an empty rimmed baking sheet inside to get screaming hot.
- In a bowl, toss the parboiled potatoes with the olive oil, rosemary, salt, pepper, and garlic powder until every piece is thoroughly coated in oil and herbs.
- Carefully spread the potatoes onto the preheated baking sheet in a single layer, ensuring they aren’t crowded, which would cause them to steam rather than roast.
- Roast for 35-45 minutes, flipping the potatoes with a metal spatula every 15 minutes to ensure they develop an even, deep golden-brown crunch on all sides.
- Remove from the oven and sprinkle with an extra pinch of flaky sea salt while still hot, serving them immediately while the exterior is at its maximum crispness.
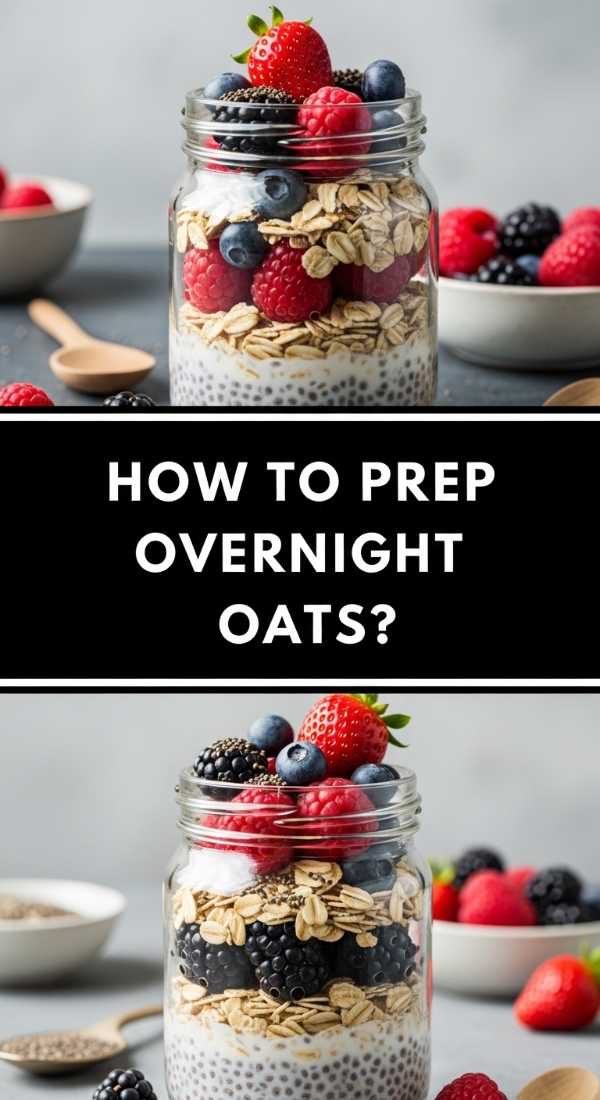
How to prep overnight oats
Why we love this
Overnight oats are the ultimate ‘gift to your future self,’ offering a cool, creamy, and incredibly convenient breakfast that feels like eating dessert for a meal. The texture is thick and pudding-like, with the oats absorbing the milk and spices to create a base that is both hearty and refreshing. When topped with fresh fruit or crunchy nuts, it provides a beautiful aesthetic touch to a morning-themed food board, inviting everyone to customize their own jar. The subtle sweetness of maple syrup combined with the earthy oats makes for a balanced, nourishing bite that keeps you satisfied for hours.
Ingredients
- 1/2 cup rolled oats (not instant or steel-cut)
- 1/2 cup milk of choice (dairy, almond, or oat milk)
- 1/4 cup plain Greek yogurt
- 1 tablespoon chia seeds
- 1 tablespoon maple syrup or honey
- 1/4 teaspoon vanilla extract
- Toppings: fresh berries, sliced almonds, or nut butter
How to make it
- In a clean glass jar or airtight container, combine the rolled oats and chia seeds, which act as a thickening agent and provide a nutritional boost.
- Pour in the milk of your choice and add the Greek yogurt, which provides a tangy creaminess and extra protein to the mixture.
- Add the maple syrup and vanilla extract, then stir the mixture thoroughly with a spoon or secure the lid and shake vigorously to ensure no dry clumps of oats remain.
- Wipe the rim of the jar and seal it tightly, then place it in the refrigerator for a minimum of 6 hours, though leaving it overnight produces the best, most hydrated texture.
- In the morning, give the oats a quick stir; if the mixture is too thick for your preference, add a small splash of extra milk to loosen it up.
- Layer your fresh toppings—like vibrant blueberries, crunchy granola, or a swirl of almond butter—right before serving to maintain their individual textures.
- These can be prepped up to 4 days in advance, making them the perfect solution for busy weekdays or a pre-planned brunch board.
How to cook crockpot chicken

Why we love this
Crockpot chicken is the epitome of ‘set it and forget it’ brilliance, resulting in meat so tender that it literally falls apart with the gentlest touch of a fork. As it slow-cooks, the chicken bathes in its own juices and aromatics, developing a deep, concentrated flavor that you simply can’t achieve with faster cooking methods. The aroma that fills your home throughout the day is mouthwatering, a savory scent that promises a stress-free and delicious dinner. It’s perfect for the board because it can be piled high in succulent, shredded mounds, ready to be stuffed into tacos, topped on salads, or eaten plain.
Ingredients
- 1.5 lbs boneless, skinless chicken thighs (more flavorful than breasts for slow cooking)
- 1/2 cup chicken broth
- 1 yellow onion, sliced
- 3 cloves garlic, smashed
- 1 teaspoon dried oregano
- 1/2 teaspoon cumin
- Salt and pepper to taste
How to make it
- Start by placing the sliced onions and smashed garlic at the bottom of the slow cooker to create a flavorful ‘rack’ for the chicken to rest on.
- Season the chicken thighs generously on all sides with salt, pepper, oregano, and cumin, then arrange them in a single layer over the onions.
- Pour the chicken broth around the sides of the meat, being careful not to wash the spices off the top of the chicken.
- Cover the slow cooker with a tight-fitting lid and set it to ‘Low’ for 6-7 hours or ‘High’ for 3-4 hours; the low setting is generally preferred for the most tender results.
- Avoid opening the lid during the cooking process, as this releases the built-up steam and heat, which can significantly increase the cooking time.
- Once the chicken is fork-tender, remove the thighs from the pot and place them in a large bowl, using two forks to shred the meat into bite-sized pieces.
- Moisten the shredded chicken with a few spoonfuls of the concentrated cooking liquid from the pot before serving to keep it extra juicy and flavorful.
How to bake savory meatloaf

Why we love this
A classic savory meatloaf is a nostalgic masterpiece, offering a dense, hearty texture and a complex flavor profile that is both salty and slightly sweet thanks to its iconic glaze. The exterior develops a sticky, caramelized coating that contrasts beautifully with the moist, tender interior filled with sautéed aromatics and herbs. It is the ultimate anchor for a family-style board, providing a sense of home-cooked tradition and satisfying heartiness. Sliced thick, it reveals a beautiful cross-section that looks as good as it tastes, especially when paired with creamy mashed potatoes or roasted greens.
Ingredients
- 1.5 lbs lean ground beef (85/15 is ideal for flavor)
- 1/2 cup breadcrumbs
- 1/2 cup whole milk
- 1 egg, lightly beaten
- 1/2 yellow onion, finely minced
- 2 tablespoons Worcestershire sauce
- 1/2 cup ketchup (for the glaze)
- 1 tablespoon brown sugar and 1 teaspoon mustard (for the glaze)
How to make it
- Preheat your oven to 350°F (175°C) and line a baking sheet or a loaf pan with parchment paper to prevent sticking and make cleanup easier.
- In a small bowl, soak the breadcrumbs in the milk for about 5 minutes; this ‘panade’ is the professional secret to keeping meatloaf moist and preventing it from becoming crumbly.
- In a large mixing bowl, combine the ground beef, the soaked breadcrumbs, the beaten egg, minced onion, and Worcestershire sauce.
- Using your hands, mix the ingredients together gently—overworking the meat will result in a dense, tough loaf, so stop as soon as everything is just combined.
- Shape the mixture into a 9×5-inch loaf on your prepared pan, ensuring it is even in thickness so that it cooks at the same rate throughout.
- Whisk together the ketchup, brown sugar, and mustard in a small bowl and brush half of this glaze over the top and sides of the meatloaf.
- Bake for 45 minutes, then apply the remaining glaze and bake for another 10-15 minutes until the internal temperature reaches 160°F (71°C) and the glaze is bubbly and set.
How to use sourdough discard

Why we love this
There is something incredibly rewarding about turning ‘discard’ into a culinary highlight, and sourdough discard recipes offer a unique, tangy depth of flavor that you can’t find anywhere else. The texture can range from a thin, shatteringly crisp cracker to a chewy, artisanal pancake, all carrying that signature sourdough fermented note. It adds an air of ‘homemade mastery’ to your food board, signaling a kitchen that values resourcefulness and slow-food traditions. The aroma of baking sourdough—even just the discard—is yeasty and sophisticated, making it the perfect conversation starter for your guests.
Ingredients
- 1 cup sourdough discard (unfed, straight from the fridge)
- 2 tablespoons melted butter or olive oil
- 1/2 teaspoon sea salt
- 1 tablespoon fresh herbs (like rosemary or thyme), chopped
- Optional: Flaky salt for finishing
How to make it
- Preheat your oven to 325°F (165°C) and prepare a large rimmed baking sheet by lining it with high-quality parchment paper or a silicone baking mat.
- In a medium bowl, combine the sourdough discard with the melted butter and chopped herbs, stirring until the fat is fully incorporated and the mixture is smooth.
- Pour the mixture onto the center of the parchment paper and use an offset spatula to spread it into a very thin, even layer across the entire sheet.
- The thinner the layer, the crispier the final product will be; try to get it as close to transparent as possible without creating holes.
- Bake for 10 minutes, then remove the pan from the oven and use a pizza cutter or a sharp knife to score the soft dough into squares or diamonds.
- Return the pan to the oven and bake for another 20-30 minutes, or until the crackers are a deep golden brown and feel firm to the touch.
- Allow them to cool completely on the baking sheet, which will finish the crisping process, before snapping them along the score lines and serving them as a rustic addition to your board.
The Secret to a Viral Food Board
The magic of the ‘everything board’ that is taking over social media isn’t just about the food—it’s about the feeling of abundance and the celebration of the basics. When you combine juicy chicken, crispy potatoes, and chewy cookies on one giant platter, you’re creating an experience that invites people to linger, pick, and enjoy. It’s a return to communal eating that prioritizes flavor and heart over fussy presentation. By mastering these ten essential recipes, you aren’t just making a meal; you’re creating a viral-worthy moment that nourishes the soul as much as the body. So, grab your biggest wooden board, start cooking, and watch your feed—and your kitchen—come to life.