
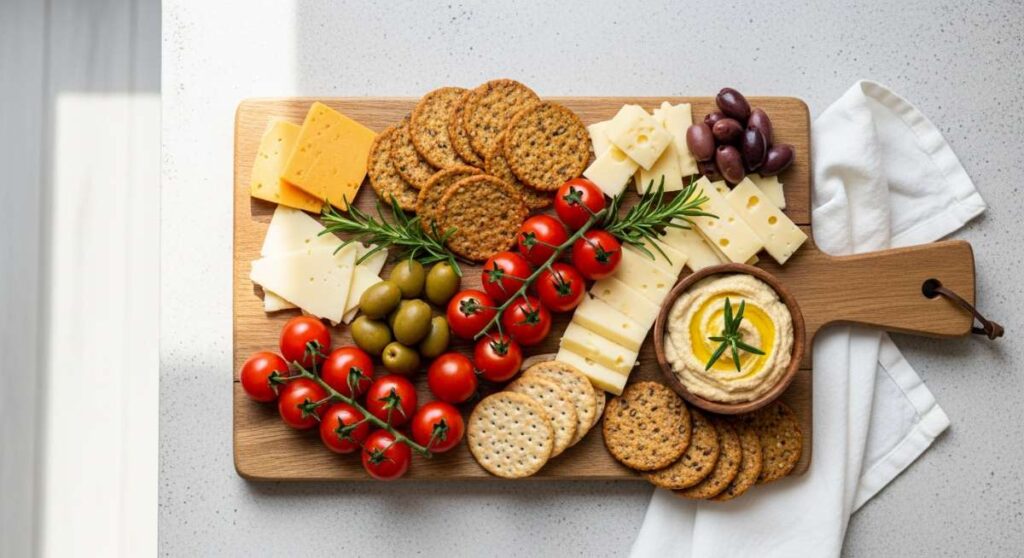
There is something undeniably magical about the moment a large, overflowing food board is placed in the center of a table. It’s an immediate signal for everyone to lean in, reach out, and share in the bounty together. For years, I felt like I couldn’t participate in this trend because of the sheer cost of artisanal cheeses and imported cured meats, but I’ve recently discovered a secret: the ‘Simple Food Board’ is actually where the real heart is. It’s not about how much you spend; it’s about how you curate the textures, colors, and flavors of everyday ingredients to create a feast for the senses.
Lately, my kitchen has become a laboratory for these budget-friendly yet stunning spreads. Whether it’s a pile of golden, grilled corn or a mountain of whipped, salty butter, the goal is to celebrate the season without draining your wallet. This approach focuses on seasonal produce and pantry staples, turning them into the stars of the show. I want to show you how to master this aesthetic, bringing your loved ones together around food that feels luxurious, tastes incredible, and respects your monthly budget.
By mastering a few key techniques—like the perfect sourdough discard cracker or a vibrantly chilled soup—you can create a board that looks like it belongs in a high-end editorial but feels like home. Let’s dive into these ten essential elements that will elevate your hosting game and make your next gathering unforgettable.
How to make fresh summer pasta

Why we love this
Nothing says summer quite like the aroma of fresh basil and the bright acidity of vine-ripened tomatoes tossing through silk-smooth pasta strands. The texture is a revelation; it’s light yet satisfyingly chewy, carrying the weight of a simple olive oil sauce with effortless grace. When you take that first bite, you can almost taste the sunshine captured in the ingredients, providing a refreshing but hearty center for any garden-side food board. It transforms a humble pantry staple into a gourmet experience that feels both rustic and incredibly sophisticated.
Ingredients
- 500g fresh egg pasta or high-quality dried linguine
- 2 cups cherry tomatoes, halved
- 3 cloves garlic, thinly sliced
- 1/2 cup extra virgin olive oil
- 1 large bunch fresh basil
- Parmesan cheese shavings
- Sea salt and cracked black pepper
How to make it
- Fill a large pot with water and add enough salt so it tastes like the sea; bring to a rolling boil over high heat.
- While the water heats, place a large skillet over medium-low heat and add the olive oil and sliced garlic, allowing the garlic to infuse the oil until it is pale gold and fragrant (do not let it brown).
- Increase the skillet heat to medium and add the halved cherry tomatoes, cooking them for about 5-7 minutes until they just begin to burst and create a light, emulsified sauce with the oil.
- Drop your pasta into the boiling water; if fresh, it will only need 2-3 minutes, if dried, follow package instructions until just shy of al dente.
- Using tongs, transfer the pasta directly from the water into the skillet with the tomatoes, bringing a little pasta water with it to help bind the sauce.
- Toss vigorously for 60 seconds over medium heat, adding more pasta water if it looks dry, until every strand is glossy and coated.
- Remove from heat, fold in hand-torn basil leaves, and top with generous shavings of Parmesan before serving on your board.
How to cook perfect cookout sides

Why we love this
The perfect cookout side should offer a delightful contrast to charred meats, providing a cooling crunch and a burst of smoky sweetness. We love the way grilled corn kernels pop between your teeth, releasing their natural sugars that have been concentrated by the heat of the flames. When seasoned correctly with a hint of lime and paprika, these sides become more than just an accompaniment—they are the vibrant, colorful anchors of the food board. The aroma of slightly charred husks and melted herb butter creates an atmosphere of pure, relaxed summer joy.
Ingredients
- 6 ears of fresh sweet corn, husks removed
- 1/4 cup unsalted butter, softened
- 1 tsp smoked paprika
- 1 lime, cut into wedges
- Fresh cilantro, chopped
- Flaky sea salt
How to make it
- Preheat your grill to medium-high heat (about 400°F) and ensure the grates are clean and lightly oiled to prevent sticking.
- In a small bowl, whip the softened butter with the smoked paprika until the color is a uniform, vibrant orange-red.
- Place the corn ears directly onto the grill grates; close the lid and cook for about 2-3 minutes per side.
- Rotate the corn using long tongs every few minutes; you are looking for even char marks and for the kernels to turn a bright, translucent yellow.
- Once the corn is charred on all sides (about 10-12 minutes total), remove it from the grill and immediately slather with the paprika butter while it is still steaming hot.
- Squeeze fresh lime juice over the buttery ears to cut through the richness and sprinkle with cilantro and flaky salt.
- Arrange them in a stack on your board, allowing the extra butter to pool slightly for guests to dip other items into.
How to bake sweet summer desserts

Why we love this
A rustic summer fruit galette is the epitome of effortless elegance, featuring a buttery, flaky crust that shatters perfectly upon entry. The center is filled with bubbling, jammy stone fruits or berries that have surrendered their juices to the heat of the oven, creating a concentrate of pure summer flavor. We love the contrast between the slightly savory, crisp pastry edges and the warm, syrupy fruit heart. Serving this on a board allows guests to break off pieces, making the dessert course feel communal and wonderfully unpretentious.
Ingredients
- 1 1/4 cups all-purpose flour
- 1/2 cup cold unsalted butter, cubed
- 1 tbsp granulated sugar
- 3-4 tbsp ice water
- 2 cups sliced peaches or blueberries
- 1 tbsp cornstarch
- 1 egg (for wash)
How to make it
- In a large bowl, whisk the flour and sugar; use a pastry cutter or your fingertips to work the cold butter into the flour until it resembles coarse crumbs with some pea-sized bits remaining.
- Add the ice water one tablespoon at a time, mixing gently until the dough just starts to come together; wrap in plastic and chill in the fridge for at least 30 minutes.
- Preheat your oven to 400°F (200°C) and line a baking sheet with parchment paper.
- In a separate bowl, toss your fruit with cornstarch and a little extra sugar, ensuring the fruit is evenly coated to prevent a soggy bottom.
- On a floured surface, roll the dough into a rough 12-inch circle (perfection is not required!) and transfer it to the parchment.
- Pile the fruit in the center, leaving a 2-inch border; fold the edges of the dough up over the fruit, pleating as you go to create a rustic rim.
- Brush the crust with a beaten egg, sprinkle with coarse sugar, and bake for 35-40 minutes until the crust is deep golden brown and the fruit juices are bubbling vigorously.
How to make whipped squishy butter

Why we love this
This trend has taken the internet by storm for a reason: it turns a basic condiment into a luxurious, cloud-like experience that melts the moment it touches warm bread. The texture is incredibly light and airy, almost like a savory whipped cream, which makes it much easier to spread without tearing your crackers or loaves. We love the way it catches flakes of sea salt and pools of honey in its soft peaks, creating a visual and tactile centerpiece for any board. It feels indulgent and high-end, yet it’s simply a clever use of air and temperature.
Ingredients
- 2 sticks (1 cup) high-quality salted butter, softened to room temperature
- 2 tbsp heavy cream
- 1 tsp honey (optional)
- Flaky sea salt and edible flower petals for garnish
How to make it
- Place the softened butter into the bowl of a stand mixer fitted with the whisk attachment (you can use a hand mixer, but it takes longer).
- Start whisking on low speed to break up the butter, then gradually increase to high speed.
- Whisk for 3-5 minutes, stopping once to scrape down the sides of the bowl with a silicone spatula to ensure every bit is aerated.
- Slowly pour in the heavy cream and honey while the mixer is running; this adds a silken richness and helps the butter achieve that ‘squishy’ texture.
- Continue whisking on high for another 2 minutes until the butter has doubled in volume and turned almost white in color.
- Use a spoon or a small offset spatula to ‘swoosh’ the butter onto your board, creating deep ridges and peaks.
- Finish with a generous sprinkle of flaky salt and edible petals to make it look like a professional catering spread.
How to use easy sourdough discard

Why we love this
Sourdough discard crackers are the ultimate sustainable snack, offering a complex, tangy flavor profile that you simply can’t find in store-bought options. They have a satisfying, crisp snap and a rustic appearance that adds an authentic, artisanal feel to your food board. We love the way the subtle acidity of the sourdough cuts through rich cheeses and creamy dips, cleansing the palate with every bite. Plus, there is a deep sense of satisfaction in turning something that would have been wasted into the most-requested item on your grazing table.
Ingredients
- 1 cup sourdough discard (unfed)
- 1/4 cup all-purpose flour
- 2 tbsp melted butter or olive oil
- 1/2 tsp fine sea salt
- 1 tbsp dried herbs (rosemary or thyme)
- Coarse salt for topping
How to make it
- Preheat your oven to 325°F (160°C) and prepare a piece of parchment paper the exact size of your baking sheet.
- In a medium bowl, whisk together the sourdough discard, flour, melted fat, salt, and herbs until a smooth, thick paste forms.
- Place the paste in the center of the parchment paper and use an offset spatula to spread it as thinly and evenly as possible; it should be nearly translucent.
- Sprinkle the top with coarse salt and any additional herbs you like.
- Bake for 10 minutes, then remove from the oven and use a pizza cutter or knife to score the dough into squares or rectangles (this ensures clean breaks later).
- Return to the oven for another 15-20 minutes, or until the crackers are completely golden brown and feel firm to the touch.
- Let them cool completely on the pan to reach maximum crispness before snapping them along the score lines and piling them on your board.
How to style colorful spring brunch

Why we love this
A spring brunch board is a celebration of renewal, filled with the soft pastels of radishes, the vibrant green of asparagus, and the sunshine-yellow of soft-boiled eggs. We love how this board feels inherently healthy and fresh, offering a lighter alternative to the heavy meats of winter. The combination of crisp, raw vegetables and creamy elements like herbed goat cheese creates a symphony of textures that keeps guests coming back for more. It’s a visual masterpiece that requires very little cooking, relying instead on the natural beauty of the season’s first harvest.
Ingredients
- 1 bunch breakfast radishes, halved with tops on
- 1 bunch asparagus, blanched
- 4 soft-boiled eggs, halved
- 1 cup herbed goat cheese or labneh
- Sourdough toast points
- Smoked salmon ribbons
- Fresh dill and chives
How to make it
- Start by preparing your ‘anchor’ items: boil your eggs for exactly 6.5 minutes for a jammy yolk, then shock in ice water and peel.
- Blanch the asparagus in boiling water for 60 seconds, then immediately plunge into ice water to preserve that bright, neon green color.
- Spread the herbed cheese into a shallow bowl or directly onto the board, creating a ‘bed’ for the other ingredients.
- Place the smoked salmon in loose ribbons near the cheese, creating height and movement on the board.
- Arrange the halved radishes and blanched asparagus in fans around the edges, pointing toward the center.
- Nestle the halved eggs into the gaps, ensuring the jammy yolks are facing upward to act as a natural sauce.
- Garnish the entire board with a shower of fresh dill and chives, and serve with warm toast points for assembly.
How to decorate pretty spring cookies

Why we love this
Spring cookies are like edible art, bringing a touch of whimsy and delicate sweetness to your dessert board. We love the contrast between a buttery, shortbread-like base and the smooth, matte finish of royal icing. These treats are perfect for boards because they are bite-sized and hold their shape well at room temperature. The subtle hint of vanilla and almond, paired with the crunch of the icing, provides a comforting and nostalgic finish to a meal. They aren’t just snacks; they are conversation starters that showcase your creativity and attention to detail.
Ingredients
- 2 cups all-purpose flour
- 1/2 cup sugar
- 1 cup cold butter, cubed
- 1 tsp almond extract
- 2 cups powdered sugar
- 2 tbsp milk or water
- Gel food coloring (pastels)
How to make it
- Make the dough by pulsing flour, sugar, and butter in a food processor until it forms a ball; add almond extract and chill for 1 hour.
- Preheat oven to 350°F (175°C) and roll dough to 1/4 inch thickness; cut into floral or egg shapes.
- Bake for 10-12 minutes until the edges are just barely beginning to turn a pale gold; cool completely on a wire rack.
- Whisk powdered sugar and milk together until you reach a ’10-second consistency’ (when a ribbon of icing takes 10 seconds to disappear back into the bowl).
- Divide the icing into small bowls and tint with gel coloring using a toothpick to keep the colors soft and pastel.
- Transfer icing to piping bags and outline the cookie first, then ‘flood’ the center with more icing, using a toothpick to pop any bubbles.
- While still wet, drop tiny dots of a different color onto the icing to create ‘polka dots’ or use a scribe tool to drag through them for a marbled effect.
How to make chilled summer soups

Why we love this
In the height of summer, a chilled soup is a refreshing revelation that cools the palate and hydrates the body. We love the vibrant, electric green of a chilled cucumber and honeydew soup or the deep, earthy red of a classic gazpacho. The texture is silky and light, providing a sophisticated contrast to the crunchy elements on your food board. Serving these in small glass votives or shooters adds a level of elegance to the spread, allowing guests to sip their soup while they mingle. It is the ultimate ‘spa-like’ addition to a hot afternoon gathering.
Ingredients
- 2 large English cucumbers, peeled and seeded
- 1 cup plain Greek yogurt
- 1 clove garlic, minced
- 2 tbsp fresh lemon juice
- 1/4 cup fresh mint leaves
- 1/4 cup extra virgin olive oil
- Salt and white pepper to taste
How to make it
- Roughly chop the cucumbers and place them into a high-speed blender.
- Add the Greek yogurt, garlic, lemon juice, and fresh mint leaves to the blender.
- Blend on high speed for at least 2 minutes until the soup is completely liquefied and aerated.
- With the blender running on low, slowly drizzle in the olive oil; this will emulsify the soup, giving it a creamy, luxurious mouthfeel without needing heavy cream.
- Season with salt and white pepper, then pour the mixture through a fine-mesh sieve into a bowl to remove any remaining pulp.
- Chill the soup in the refrigerator for at least 3 hours; chilled soup must be served very cold to be refreshing.
- Pour into small glasses, garnish with a tiny sprig of mint or a drop of chili oil, and nestle them directly onto your food board among the crackers.
How to master easy grilling recipes

Why we love this
Grilling is the soul of outdoor dining, offering a smoky depth of flavor that you simply can’t replicate in an oven. We love the way high heat caramelizes the natural sugars in meats and vegetables, creating those beautiful, savory grill marks that promise a depth of flavor. This technique is perfect for food boards because ‘skewer-style’ foods are easy for guests to grab and enjoy without needing a full set of cutlery. The aroma of char and woodsmoke wafting from the board immediately sets a festive, relaxed tone for the entire event.
Ingredients
- 1 lb chicken thighs or firm tofu, cubed
- 2 bell peppers, cut into chunks
- 1 red onion, wedged
- 1/4 cup soy sauce
- 2 tbsp honey
- 1 tbsp grated ginger
- Wooden skewers (soaked in water for 30 mins)
How to make it
- Whisk together the soy sauce, honey, and ginger in a bowl to create a simple, high-impact marinade.
- Toss your protein (chicken or tofu) in the marinade and let it sit for at least 30 minutes in the fridge to absorb the flavors.
- Thread the protein and vegetables onto the soaked skewers, alternating colors to make them look visually appealing on the board.
- Preheat your grill to medium-high heat and clean the grates thoroughly.
- Place the skewers on the grill; cook for 4-5 minutes per side for chicken (ensure internal temp is 165°F) or 3 minutes per side for tofu.
- During the last minute of cooking, brush any remaining marinade over the skewers to create a sticky, glossy glaze.
- Remove from the heat and let them rest for 2 minutes before piling them onto the board; the resting period ensures the juices stay inside the meat.
How to bake moist spring cake

Why we love this
A spring cake should be a cloud of moisture and light citrus notes, acting as a gentle finale to a wonderful meal. We love a lemon and elderflower sponge that feels incredibly tender, almost melting on the tongue with a zesty brightness. The key is a fine, tight crumb that isn’t heavy or oily, but rather feels like a breath of fresh air. When featured on a food board, a sliced cake provides a beautiful structural element, especially when garnished with fresh berries or edible spring blossoms. It’s the kind of dessert that makes guests linger just a little bit longer.
Ingredients
- 1 1/2 cups cake flour (sifted)
- 1 cup granulated sugar
- 1 1/2 tsp baking powder
- 1/2 cup unsalted butter, room temperature
- 2 large eggs
- 1/2 cup whole milk mixed with 1 tbsp lemon juice
- Zest of 2 lemons
How to make it
- Preheat your oven to 350°F (175°C) and grease and flour a 9-inch round cake pan or a loaf pan.
- In a stand mixer, cream the butter and sugar together for at least 5 minutes until the mixture is pale, almost white, and very fluffy; this aeration is key for a light crumb.
- Add the eggs one at a time, beating well after each addition to ensure they are fully emulsified.
- In a separate bowl, whisk together the sifted cake flour and baking powder.
- Alternate adding the flour mixture and the lemon-milk mixture to the butter, starting and ending with the flour; mix on the lowest speed just until combined.
- Gently fold in the lemon zest by hand to avoid overworking the gluten, which would make the cake tough.
- Pour the batter into the prepared pan and bake for 30-35 minutes, or until a toothpick inserted into the center comes out clean; cool in the pan for 10 minutes before transferring to a wire rack to cool completely.
Conclusion
Mastering the simple food board trend isn’t about luxury—it’s about the love of the craft and the joy of sharing. By focusing on seasonal ingredients, DIY techniques like whipped butter and sourdough crackers, and a bit of thoughtful styling, you can create a viral-worthy spread that is as easy on the wallet as it is beautiful to behold. So, clear your table, grab a board, and start building your own edible masterpiece today!