
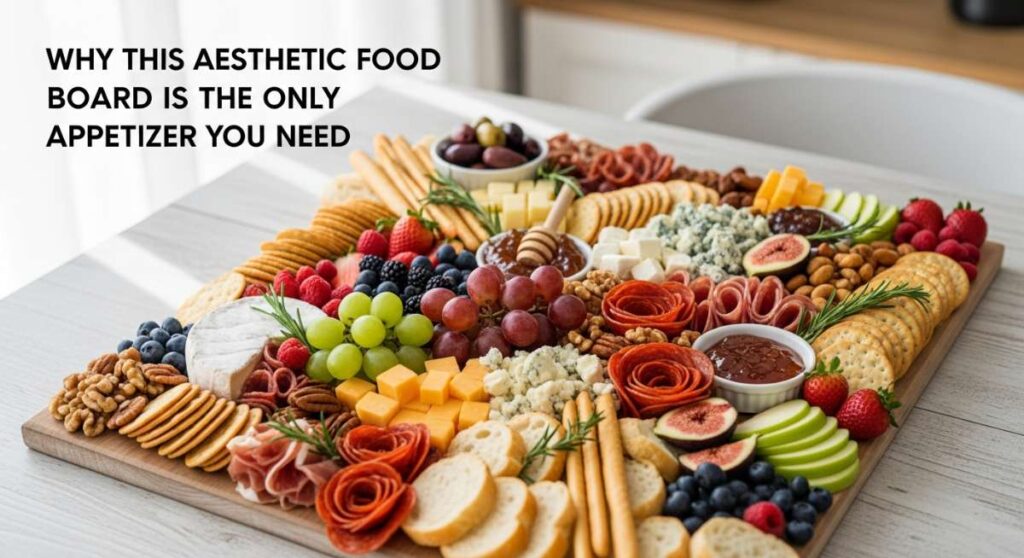
Why This Aesthetic Food Board is the Only Appetizer You Need
There is something truly magical about a table filled with colors, textures, and the hum of happy conversation. I remember the first time I set out a massive, overflowing board for my closest friends; the room instantly transformed from a simple gathering into a shared experience. It’s not just about the food; it’s about the art of grazing, the tactile joy of picking up a crisp wrap, and the way the afternoon sun hits a bowl of fresh strawberries. This viral simple food board is designed to be the heartbeat of your next party, offering a little bit of everything for everyone.
The beauty of this aesthetic approach is that it removes the formality of a sit-down meal while keeping the quality of a five-star feast. Whether you’re lounging on the patio or hosting a cozy indoor brunch, these recipes are curated to look as good as they taste. We are diving deep into the essentials that make a board iconic—from savory grilled proteins to the sweetest summer bakes. Get ready to level up your hosting game and create memories that taste like sunshine and salt air.
How to make chicken wraps?

Why we love this
There is an undeniable crunch and freshness to a perfectly rolled chicken wrap that makes it the ultimate handheld luxury. Imagine the contrast between a warm, seasoned chicken breast and the cool, crisp snap of romaine lettuce, all bound together by a creamy, tangy sauce. Every bite offers a symphony of textures, from the soft pull of the flour tortilla to the juicy burst of cherry tomatoes tucked inside. It’s the kind of light yet satisfying meal that makes a summer afternoon feel complete, leaving you fueled but never weighed down.
Ingredients
- 2 large flour tortillas
- 1 lb grilled chicken breast, sliced into strips
- 1 cup shredded romaine lettuce
- 1/2 cup diced tomatoes
- 1/4 cup shredded cheddar cheese
- 2 tbsp ranch or Caesar dressing
- 1/2 avocado, sliced
How to make it
- Begin by warming your tortillas on a dry skillet over medium heat for about 15 seconds per side; this makes them pliable and prevents tearing during the rolling process.
- Lay the tortilla flat on a clean surface and spread a thin layer of your chosen dressing across the center, leaving about an inch of space from the edges to avoid leakage.
- Layer your bed of shredded lettuce first to act as a barrier, then top with the warm chicken strips, diced tomatoes, cheese, and avocado slices.
- To fold, tuck the left and right sides toward the center over the filling, then grab the bottom edge and roll tightly upward while keeping the side flaps tucked in.
- Place the wrap seam-side down on a cutting board and slice diagonally with a sharp serrated knife to showcase the vibrant layers inside before serving.
How to make strawberry pie?

Why we love this
A strawberry pie is the quintessential taste of early summer, bursting with the bright, jammy sweetness of sun-ripened berries. The aroma that wafts through the kitchen as the crust turns golden brown is nothing short of intoxicating—a mix of buttery pastry and simmering fruit nectar. When you cut into it, the vibrant red filling spills out slightly, inviting you to enjoy the balance of the tart fruit against a flaky, salt-kissed crust. It’s a nostalgic dessert that feels like a warm hug, perfect for enjoying a-la-mode on a breezy porch evening.
Ingredients
- 2 deep-dish pie crusts (homemade or store-bought)
- 6 cups fresh strawberries, hulled and halved
- 3/4 cup granulated sugar
- 1/4 cup cornstarch
- 1 tbsp lemon juice
- 1/2 tsp vanilla extract
- 1 egg (for egg wash)
How to make it
- Preheat your oven to 400°F (200°C) and place one pie crust into a 9-inch pie plate, pressing firmly against the bottom and sides.
- In a large mixing bowl, gently toss the strawberries with sugar, cornstarch, lemon juice, and vanilla until the berries are evenly coated and the cornstarch is no longer visible.
- Pour the fruit mixture into the prepared bottom crust, mounding it slightly in the center to account for the fruit shrinking during the baking process.
- Top with the second crust, either whole with vent slits or cut into strips for a lattice design; crimp the edges tightly to seal in the juices.
- Brush the top with a beaten egg wash for a glossy finish and bake for 45-50 minutes until the crust is deep golden and the filling is bubbling thick; let it cool completely for at least 4 hours to set before slicing.
How to make summer salad?
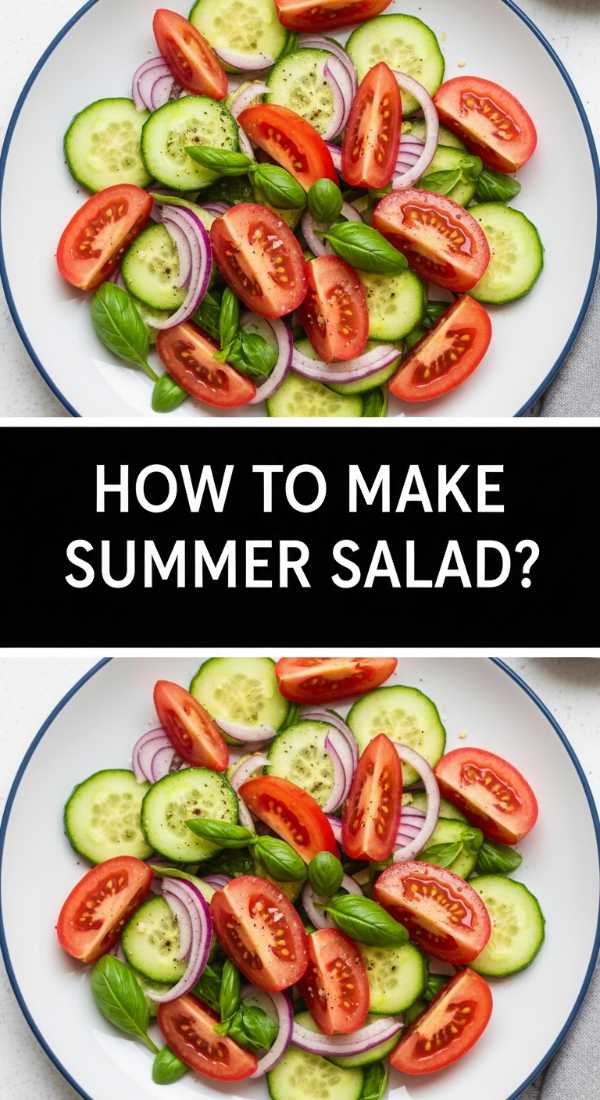
Why we love this
This summer salad is a celebration of the season’s harvest, featuring a kaleidoscope of colors that look like a garden on a plate. The mixture of peppery arugula and buttery bibb lettuce provides a sophisticated base for the sweetness of fresh peaches and the earthy crunch of toasted pecans. Every forkful is a discovery of flavors—salty goat cheese melting into a light balsamic glaze while fresh blueberries provide a tart pop of juice. It’s refreshing, elegant, and provides that much-needed hit of acidity to balance out heavier grilled dishes on your board.
Ingredients
- 5 cups mixed spring greens (arugula, spinach, and bibb)
- 1 ripe peach, thinly sliced
- 1/2 cup fresh blueberries
- 1/4 cup crumbled goat cheese
- 1/4 cup toasted pecans
- 3 tbsp balsamic vinaigrette
How to make it
- Start by washing your greens in ice-cold water and drying them thoroughly with a salad spinner; dry leaves ensure the dressing clings to the greens rather than pooling at the bottom.
- Place the greens in a large wooden bowl and drizzle with half of the balsamic vinaigrette, tossing gently with tongs to ensure every leaf is lightly coated.
- Arrange the peach slices in a radial pattern on top of the greens, followed by a scattered handful of blueberries and toasted pecans for texture.
- Crumble the goat cheese over the top using your fingers to create rustic, varied chunks that will provide creamy hits of flavor throughout the salad.
- Finish with a final light drizzle of dressing and a crack of fresh black pepper right before serving to maintain the crispness of the fruit and greens.
How to make watermelon salad?
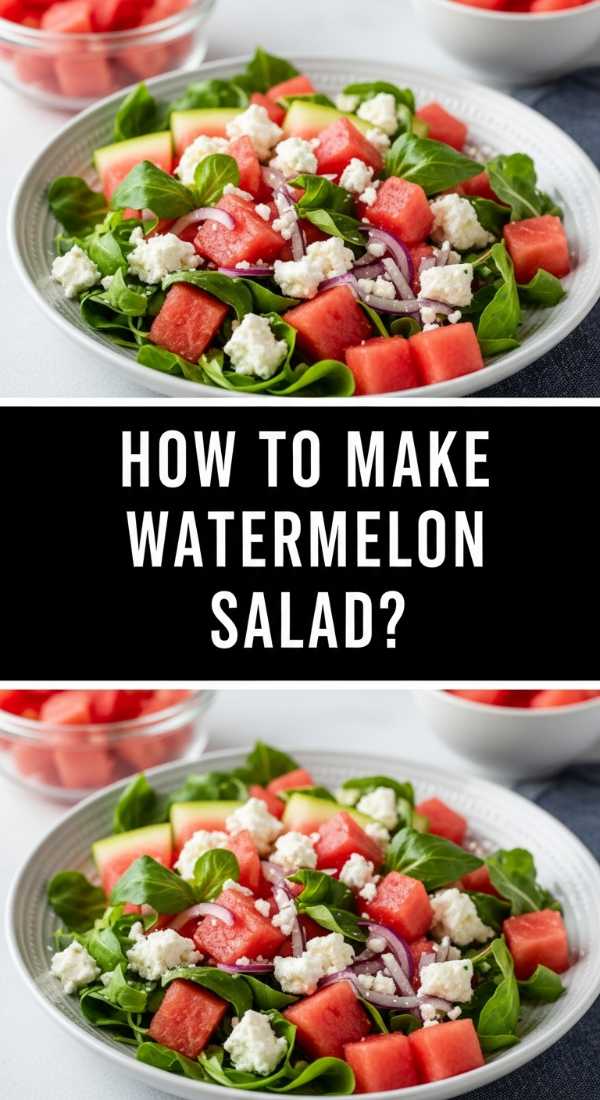
Why we love this
Few things are as revitalizing as the combination of cold, juicy watermelon and the salty, savory punch of feta cheese. This salad is a masterclass in flavor contrast, where the hydrating sweetness of the melon meets the aromatic freshness of torn mint leaves. It smells like a summer breeze and feels incredibly light on the palate, making it the perfect palate cleanser between bites of richer foods. The addition of a lime zest finish elevates the dish, providing a zippy, citrusy high note that makes the fruit flavors truly sing.
Ingredients
- 6 cups seedless watermelon, cut into 1-inch cubes
- 1/2 cup crumbled feta cheese
- 1/4 cup fresh mint leaves, chiffonade
- 1 tbsp extra virgin olive oil
- Juice and zest of 1 lime
- Pinch of flaky sea salt
How to make it
- Chill your watermelon in the refrigerator for at least two hours before preparation; a cold base is essential for the refreshing nature of this specific salad.
- Cube the watermelon into uniform 1-inch pieces, ensuring you remove any stray seeds, and place them into a wide, shallow serving bowl to prevent crushing the bottom layers.
- Whisk together the lime juice and extra virgin olive oil in a small ramekin until emulsified, then drizzle this mixture evenly over the cubed melon.
- Sprinkle the crumbled feta and the finely sliced mint leaves over the top, tossing very gently with your hands or a large spoon to avoid breaking the cheese into a paste.
- Garnish with the lime zest and a generous pinch of flaky sea salt, which helps to draw out the natural sweetness of the fruit; serve immediately for the best texture.
How to marinate grilled chicken?
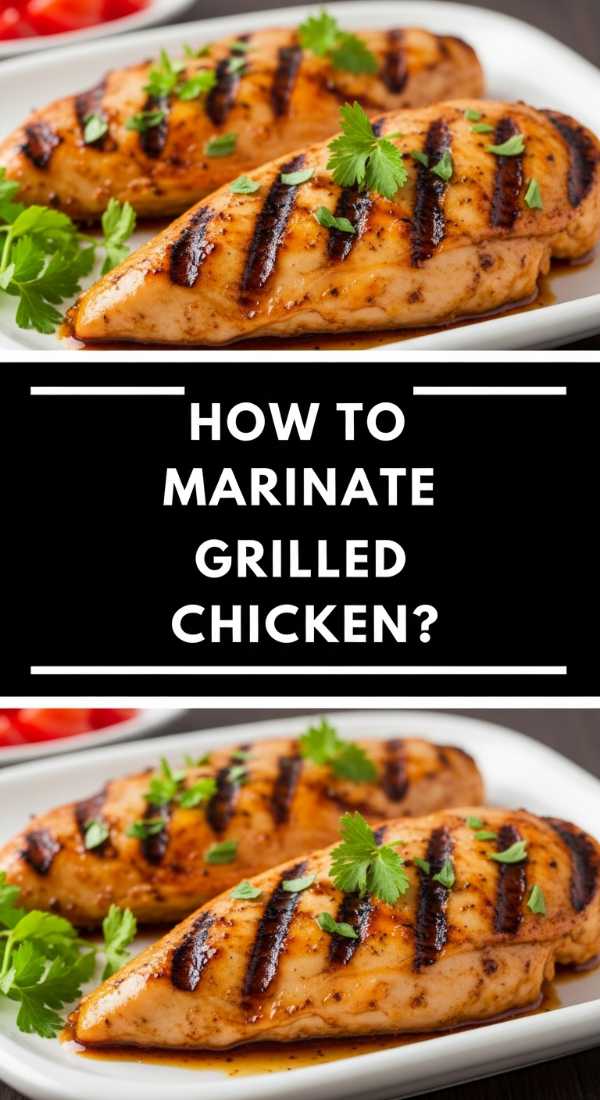
Why we love this
A great marinade is the secret weapon of any outdoor host, transforming a simple protein into a tender, flavor-packed centerpiece. The aroma of garlic, lemon, and rosemary hitting the hot grill grates is enough to draw neighbors from across the street. This technique ensures that the chicken stays incredibly succulent inside while developing a beautiful, caramelized char on the outside. It’s deep, savory, and carries a hint of citrus brightness that cuts through the smoke, making every slice a highlight of the appetizer board.
Ingredients
- 1.5 lbs chicken thighs or breasts
- 1/3 cup olive oil
- 1/4 cup fresh lemon juice
- 4 cloves garlic, minced
- 1 tbsp fresh rosemary, chopped
- 1 tsp smoked paprika
- 1 tsp salt and 1/2 tsp black pepper
How to make it
- In a medium glass bowl or a heavy-duty gallon-sized zip-top bag, combine the olive oil, lemon juice, minced garlic, rosemary, paprika, salt, and pepper.
- Whisk or shake the ingredients until the spices are fully integrated and the oil and acid have formed a cloudy, consistent marinade.
- Place the chicken into the bag, pressing out as much air as possible before sealing; massage the bag to ensure every inch of the meat is submerged in the liquid.
- Refrigerate the chicken for at least 30 minutes, but preferably 4 to 6 hours; avoid marinating longer than 12 hours as the lemon juice can begin to break down the meat fibers too much, affecting the texture.
- Remove the chicken from the fridge 15 minutes before grilling to take the chill off, then sear over medium-high heat until the internal temperature reaches 165°F (74°C), allowing it to rest for 5 minutes before slicing.
How to make pasta salad?

Why we love this
Pasta salad is the ultimate crowd-pleaser because it’s hearty, versatile, and only gets better as it sits and absorbs the dressing. We love the way the rotini spirals catch the herbs and vinaigrette in every crevice, ensuring a burst of flavor in every mouthful. The inclusion of sharp salami, milky mozzarella pearls, and briny olives creates a Mediterranean-inspired profile that feels both rustic and sophisticated. It’s the perfect anchor for a food board, providing a satisfying carb element that pairs beautifully with fresh vegetables and grilled meats.
Ingredients
- 1 lb rotini or fusilli pasta
- 1/2 cup Italian vinaigrette
- 1 cup cherry tomatoes, halved
- 1/2 cup cucumber, diced
- 1/2 cup mozzarella pearls
- 1/4 cup sliced black olives
- 1/4 cup diced salami or pepperoni
- Fresh parsley for garnish
How to make it
- Bring a large pot of heavily salted water to a rolling boil and cook the pasta for exactly one minute less than the package directions for ‘al dente’ texture.
- Drain the pasta and immediately rinse it under cold running water to stop the cooking process and wash away excess starch, which prevents the pasta from becoming gummy.
- In a large mixing bowl, combine the cooled pasta with the tomatoes, cucumbers, mozzarella, olives, and salami.
- Pour the Italian dressing over the mixture and toss thoroughly with a large spatula until every ingredient is glossed with the vinaigrette.
- Cover and refrigerate for at least one hour to allow the flavors to meld; right before serving, give it another quick toss and garnish with fresh parsley and an extra splash of dressing if the pasta has absorbed it all.
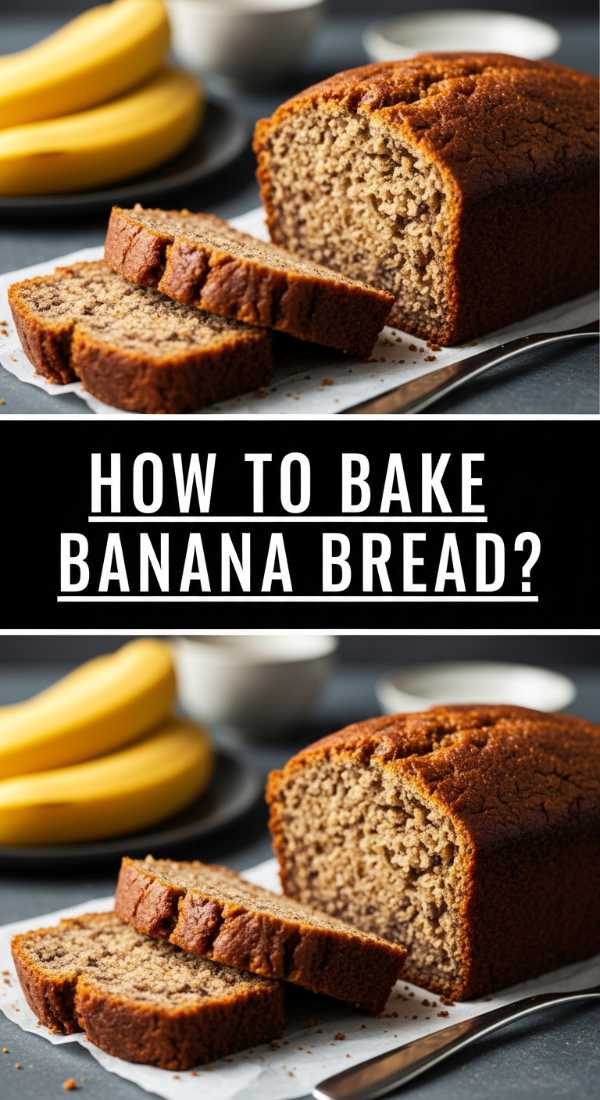
How to bake banana bread?
Why we love this
There is a soul-warming comfort in the scent of banana bread baking in the oven—it’s the smell of a cozy Sunday morning. This bread is incredibly moist with a dense, tender crumb that practically melts on the tongue, especially when served with a smear of salted butter. The deep sweetness of overripe bananas is enhanced by a hint of cinnamon and the rich, caramel notes of brown sugar. Including thick slices of this on your food board adds a delightful “breakfast-for-dinner” vibe that guests find absolutely irresistible and nostalgic.
Ingredients
- 3 very ripe bananas, mashed
- 1/2 cup melted unsalted butter
- 3/4 cup brown sugar
- 1 large egg, beaten
- 1 tsp vanilla extract
- 1.5 cups all-purpose flour
- 1 tsp baking soda
- 1/2 tsp cinnamon and a pinch of salt
How to make it
- Preheat your oven to 350°F (175°C) and generously grease a 4×8-inch loaf pan with butter or line it with parchment paper for easy removal.
- In a large bowl, mash the peeled bananas with a fork until they reach a smooth consistency with only a few small lumps remaining for texture.
- Stir the melted butter into the mashed bananas, then whisk in the brown sugar, beaten egg, and vanilla extract until the mixture is cohesive and pale.
- Sift the flour, baking soda, cinnamon, and salt directly into the wet ingredients; use a rubber spatula to fold the dry ingredients in gently—stop the moment you see no more streaks of white flour to avoid over-mixing.
- Pour the batter into the prepared pan and bake for 50-60 minutes, or until a wooden skewer inserted into the center comes out clean; let it cool in the pan for 10 minutes before transferring to a wire rack.
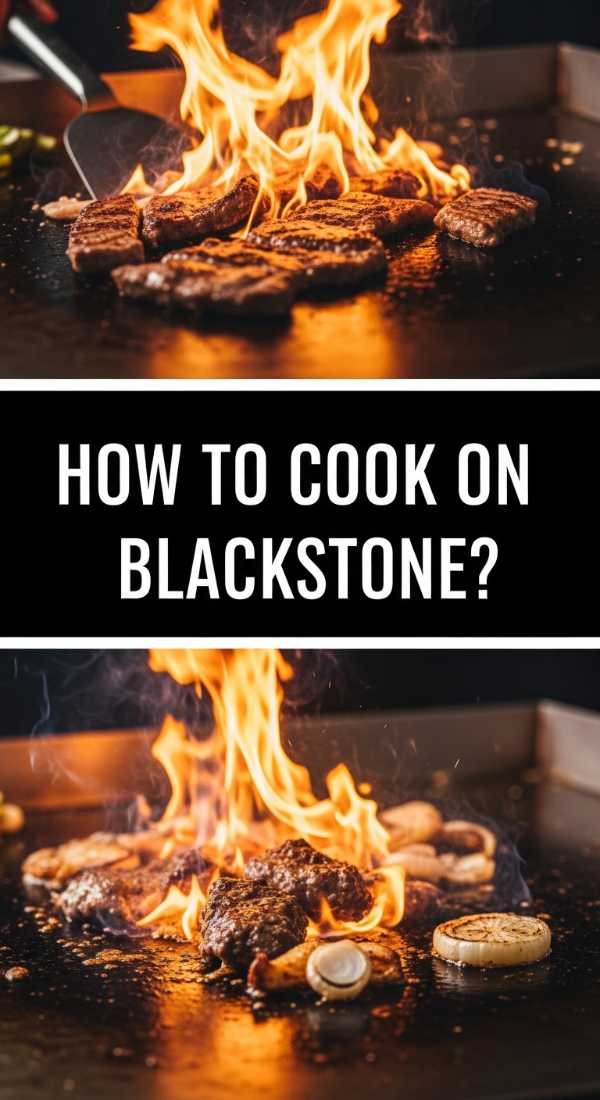
How to cook on blackstone?
Why we love this
Cooking on a Blackstone griddle is about theater, scale, and that perfect, even sear that you just can’t get in a standard pan. The large flat surface allows you to cook entire components of your board at once, from searing vegetables to crisping up proteins with incredible speed. We love the way the high heat creates a “smash” effect, locking in juices while creating a crisp, flavorful crust on everything it touches. It’s a social way to cook, allowing the chef to stay part of the party while managing multiple heat zones for a diverse range of appetizers.
Ingredients
- 2 tbsp high-smoke point oil (avocado or canola)
- Assorted bell peppers and onions, sliced
- Steak strips or shrimp
- Salt, pepper, and garlic powder
How to make it
- Begin by preheating your Blackstone griddle on medium-high for about 10 minutes; use an infrared thermometer to ensure the surface has reached at least 400°F (200°C) before adding oil.
- Apply a thin layer of oil across the surface using a long-handled spatula, spreading it evenly to create a non-stick barrier and heat conductor.
- Place your denser items, like sliced peppers and onions, on one side of the griddle, tossing them frequently with two spatulas to get a consistent char without burning.
- On the other side of the griddle (or a separate heat zone turned to high), place your proteins; for steak strips, let them sear undisturbed for 2 minutes to develop a crust before flipping.
- Use the spatulas to combine the meat and vegetables at the very end, seasoning generously with salt, pepper, and garlic powder, then use the scraper tool to move the entire feast onto a serving tray in one swift motion.
How to make summer drinks?

Why we love this
A refreshing summer drink is the crowning jewel of any aesthetic food board, providing a cool, sparkling contrast to the savory snacks. We adore the visual appeal of floating herbs and muddled fruit trapped in a glass filled with crushed ice. Whether it’s a zesty lemonade or a botanical-infused spritz, these drinks are designed to be light and effervescent. The scent of slapped mint and squeezed citrus creates an immediate sensory bridge to vacation mode, making every sip feel like a tiny celebration of the season’s warmth.
Ingredients
- 1 cup fresh berries (strawberries or raspberries)
- 2 tbsp honey or simple syrup
- Juice of 2 lemons
- Sparkling water or club soda
- Fresh mint leaves and ice
How to make it
- In the bottom of a large pitcher or individual highball glasses, place the fresh berries and the honey; use a muddler or the back of a wooden spoon to crush the fruit until it releases its juices.
- Add the fresh lemon juice to the muddled fruit and stir vigorously to combine the flavors into a concentrated syrup base.
- Fill the glasses to the brim with crushed ice; the smaller surface area of crushed ice chills the drink faster and creates a more professional, “aesthetic” look.
- Pour the sparkling water over the ice, leaving a little room at the top, and watch the fruit juices swirl upwards through the bubbles.
- Take a sprig of fresh mint, slap it between your palms to release the essential oils, and tuck it into the glass along with a few whole berries for a stunning, fragrant garnish.
How to master summer grilling?

Why we love this
Mastering the grill is about more than just cooking; it’s about controlling fire to create deep, smoky complexities that a kitchen stove simply cannot replicate. We love the ritual of the prep—the cleaning of the grates, the steady rise of the temperature, and the first hiss of food hitting the metal. A perfectly grilled item has those iconic cross-hatch marks and a tender interior that speaks of patience and precision. It brings an earthy, rustic element to your food board that anchors the lighter salads and fruits with sheer, smoky satisfaction.
Ingredients
- Selection of meats (burgers, sausages, or kabobs)
- Grapeseed oil (for the grates)
- Dry rub or steak seasoning
- A reliable meat thermometer
How to make it
- Clean your grill grates thoroughly with a wire brush while the grill is heating up; once hot, dip a folded paper towel in oil and use tongs to wipe the grates down—this prevents sticking and creates better sear marks.
- Set up a two-zone fire: heap coals on one side or turn only half the gas burners to high, creating a ‘hot zone’ for searing and a ‘cool zone’ for indirect cooking or keeping food warm.
- Season your meat generously on all sides at least 15 minutes before it hits the grill to allow the salt to penetrate the surface.
- Place the meat on the hot zone and close the lid; for a 1-inch thick steak or burger, flip only once after 4-5 minutes to ensure a thick crust develops.
- Always use a meat thermometer to check for doneness rather than cutting into the meat, and most importantly, let the meat rest on a warm plate for 5 to 10 minutes before slicing to allow the juices to redistribute.
Creating the Perfect Spread
Building an aesthetic food board is an act of love. It’s about taking these individual components—the savory chicken, the sweet pie, the refreshing salads—and arranging them in a way that invites people to linger. Don’t be afraid to let colors overlap and textures touch. Use small bowls for dressings and garnishes to create height and visual interest. When you bring this board to the table, you aren’t just serving dinner; you’re setting the stage for stories to be told and laughter to be shared. Happy hosting!
Frequently Asked Questions
Q: How do I keep the board looking fresh for hours?
A: Keep your wetter items like the watermelon salad and pasta salad in separate small bowls nestled into the board. This prevents the juices from soaking into the wraps or bread. Also, keep the board in a shaded area if outdoors.
Q: Can I prepare these items in advance?
A: Absolutely! The pasta salad and banana bread actually taste better the next day. You can marinate the chicken and chop the salad veggies a few hours early, then simply assemble the board right before guests arrive.
Q: What if I don’t have a large wooden board?
A: You can use a clean parchment-lined baking sheet or even arrange multiple smaller plates and platters close together to create the same communal, “grazing” effect.