
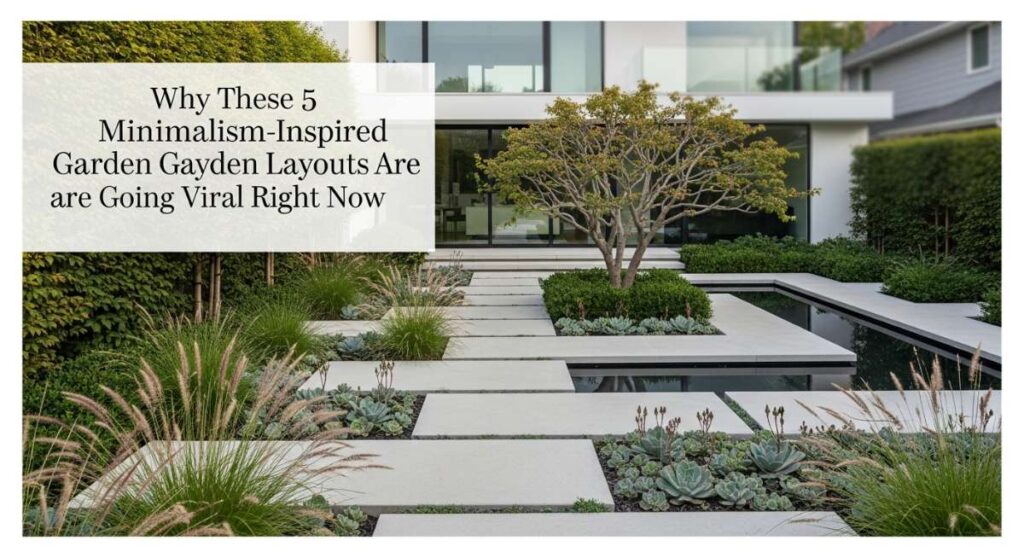
There is something about a perfectly balanced garden that just makes the soul exhale. We’ve all seen those stunning Pinterest boards where every blade of grass seems to have a purpose, and the outdoor space feels like a natural extension of a high-end interior. It’s not just about spending thousands; it’s about the intentionality of minimalism—the idea that ‘less is more’ applies just as much to your flower beds as it does to your living room.
Lately, I’ve been obsessed with how a few smart design choices can transform a chaotic backyard into a serene sanctuary. Whether you’re dealing with a tiny urban patch or a sprawling suburban lawn, these minimalism-inspired layouts are taking over social media for a reason. They offer a breath of fresh air in a cluttered world, focusing on clean lines, functional zones, and subtle textures that invite you to slow down, sip your morning coffee, and actually enjoy the view.
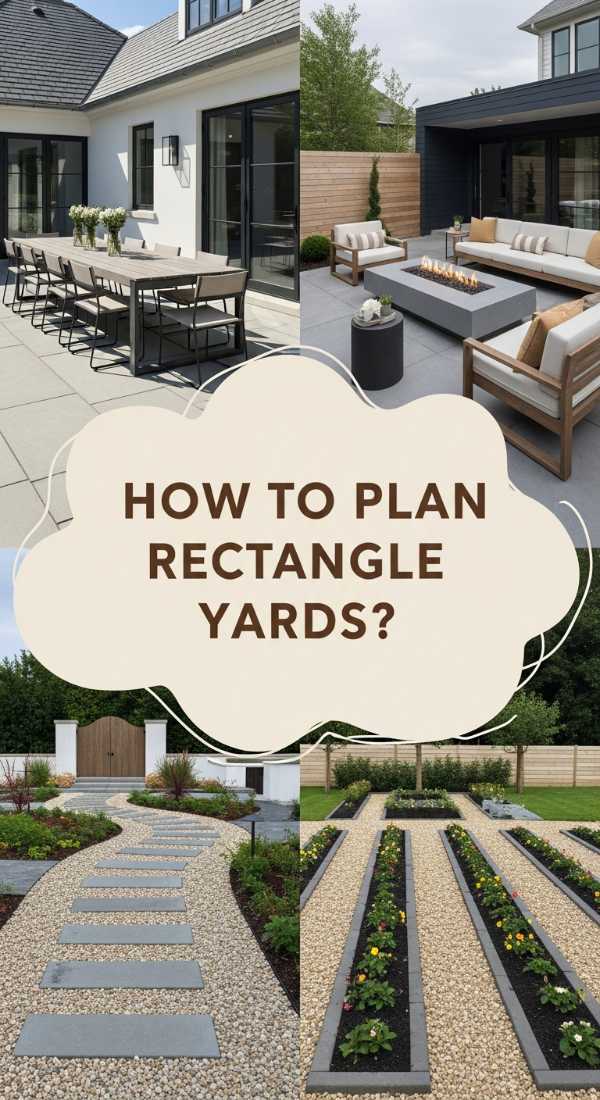
How to Master Rectangle Yard Zones for Maximum Function

Why we love this
This layout is all about the satisfaction of geometric precision and visual order. Imagine stepping out onto a patio where every edge is crisp, the scent of crushed slate and lavender fills the air, and your eyes are immediately drawn to the clear, defined paths that lead you through the space. The tactile contrast between smooth paving stones and the soft, fine-textured grass creates a sensory experience that feels both modern and grounding. It’s the ultimate way to make a medium-sized yard feel infinitely larger and more purposeful, turning every square inch into a usable ‘room’ without the clutter of traditional garden beds.
Essential Elements:
- Large-format rectangular pavers (concrete or slate)
- Steel or aluminum landscape edging for crisp borders
- Low-maintenance ground cover like Thyme or Sedum
- Minimalist outdoor furniture with clean profiles
- Monochromatic gravel or river stones for drainage zones
How to make it
- Begin by sketching your yard on graph paper, dividing the total area into three distinct rectangles: a dining zone, a lounge zone, and a green buffer zone. This visual mapping ensures a balanced weight distribution across the property.
- Excavate the soil in your designated patio zones to a depth of 6 inches, ensuring a slight 1% grade away from your home’s foundation to manage water runoff effectively.
- Install professional-grade landscape fabric over the excavated area to prevent weed growth, securing the edges with U-shaped sod staples.
- Pour and level a 4-inch base of crushed limestone or ‘3/4-minus’ gravel. Use a power plate compactor to ensure the base is rock-solid; this prevents pavers from shifting or dipping over time.
- Apply a 1-inch layer of leveling sand over the compacted gravel, using a long straight-edge board to create a perfectly flat surface for your pavers.
- Lay your rectangular pavers in a ‘running bond’ pattern, using spacers to maintain 1/8-inch gaps. Tap each stone into place with a rubber mallet, checking for levelness at every third stone.
- Fill the joints with polymeric sand, sweeping it into the cracks and then lightly misting with water to activate the binding agent for a weed-proof, permanent seal.
How to Organize Long Backyards for a Cozy Gathering Space
Why we love this
Long, narrow backyards often feel like a ‘bowling alley,’ but this layout turns that challenge into a journey of discovery. By breaking the length into intimate, cozy pods, you create a sense of mystery and depth that feels incredibly high-end. Picture a path of warm cedar wood leading you past swaying ornamental grasses that whisper in the wind, eventually opening up to a hidden fire pit area tucked at the back. The aroma of woodsmoke mixed with the earthy scent of mulched paths creates an inviting atmosphere that makes you want to linger long after the sun goes down, providing a perfect escape from the bustle of the house.
Essential Elements:
- Decomposed granite or wood chip walkways
- Tall, vertical ornamental grasses (like Karl Foerster)
- Strategic ‘focal point’ trees or large planters
- Built-in bench seating to save horizontal space
- Subtle path lighting to lead the eye downward
How to make it
- Identify the ‘long axis’ of your yard and plan a winding or staggered path that breaks the straight sightline from the back door to the rear fence. This visual interruption makes the yard feel wider.
- Define the mid-point of the yard as a ‘transition zone’ using tall plantings or a simple pergola structure to create a physical doorway between the patio and the back garden.
- Dig out the path area to a depth of 3 inches and fill with decomposed granite. Tamp it down firmly until it feels like a hard, walkable surface that still allows for natural drainage.
- Install deep garden beds on alternating sides of the path. On the left, plant tall grasses; twenty feet further on the right, plant a cluster of mid-height shrubs. This ‘zig-zag’ planting forced the eye to move horizontally.
- In the final third of the yard, clear a circular area for a gathering space. Lay a base of pea gravel and place a low-profile steel fire pit in the center to serve as a visual anchor.
- Install 4×4 cedar posts at the corners of this rear zone to string Edison bulbs, creating a ‘ceiling’ of light that makes the space feel like a cozy outdoor room.
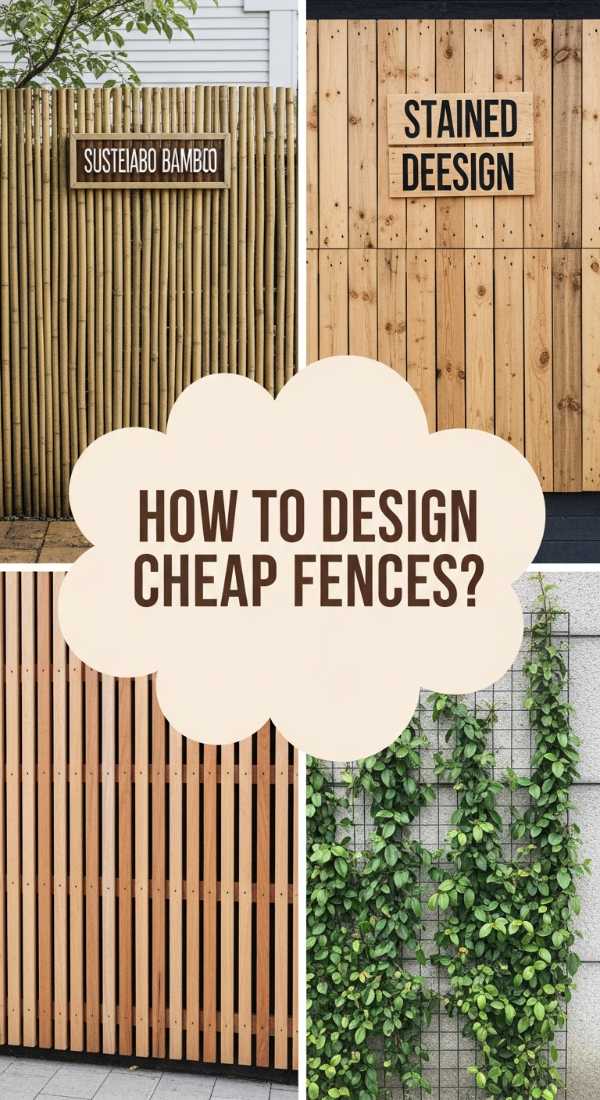
How to Build Budget Privacy Fences for a Serene Sanctuary

Why we love this
Privacy is the cornerstone of any minimalist sanctuary, and this budget-friendly fence design focuses on horizontal lines to elongate the perimeter of your yard. The warmth of natural wood stain against the cool green of a manicured lawn is a classic minimalist pairing that never fails to impress. When you sit in a yard enclosed by these sleek, horizontal slats, the world outside simply disappears. The filtered light peeking through the narrow gaps creates a beautiful play of shadows across the ground, while the solid structure provides a sense of security and quiet that is essential for true relaxation.
Essential Elements:
- Pressure-treated 4×4 posts for structural integrity
- 1×4 or 1×6 cedar or pine slats
- Exterior-grade wood stain in a modern ‘teak’ or ‘ebony’ finish
- Stainless steel deck screws to prevent rust streaks
- Spacer blocks for consistent 1/2-inch gaps
How to make it
- Mark your fence line using string and stakes, ensuring you are at least 2 inches inside your property boundary. Space your post holes exactly 6 feet apart to prevent the horizontal slats from sagging over time.
- Dig post holes 24 to 36 inches deep (depending on your local frost line). Add 3 inches of gravel to the bottom of each hole for drainage to prevent post rot.
- Set the 4×4 posts in the holes, using a post level to ensure they are perfectly vertical. Pour fast-setting concrete into the holes and let cure for at least 24 hours.
- Start installing your horizontal slats from the top down. Use a long level to ensure the first board is perfectly straight, as this will dictate the alignment of the entire fence.
- Use 1/2-inch plywood scraps as spacer blocks between each slat. Secure each board to the posts using two screws per post to prevent warping.
- Sand any rough edges or splinters along the slats to ensure a smooth, professional finish that catches the light evenly.
- Apply a high-quality UV-rated transparent or semi-transparent stain using a pump sprayer for even coverage, back-brushing the liquid into the wood grain for maximum protection.
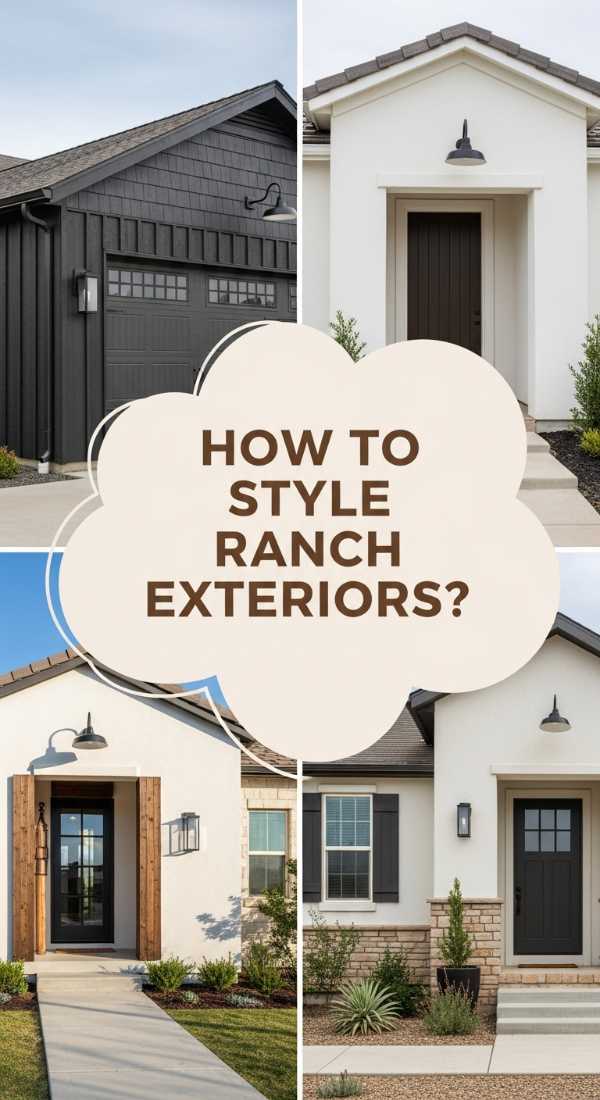
How to Hide Ugly Vent Covers for a Seamless Home Aesthetic
Why we love this
Minimalism is found in the details, and nothing ruins a clean exterior aesthetic like a clunky, plastic dryer vent or a rusted foundation grate. Customizing these elements allows the architecture of your home to shine without distraction. By integrating these necessary utilities into the overall design—perhaps using a sleek metal cover or a camouflaged wooden screen—you create a seamless visual flow that feels incredibly intentional and polished. It’s that ‘finished’ look that characterizes high-end modern homes, where even the most functional parts of the house are treated with artistic care and attention.
Essential Elements:
- Paintable metal vent covers or custom laser-cut grilles
- Exterior-grade paint matching the home’s siding
- Magnetic mounting strips for easy maintenance access
- Small-scale river rocks or mulch for ground-level vents
- Rust-oleum primer for metal surfaces
How to make it
- Measure the exterior dimensions of your existing vent, including any protruding flaps or pipes. Ensure the new cover will not restrict airflow, which is critical for appliance safety.
- Purchase a modern, flat-profile vent cover or a decorative laser-cut steel panel. If using a panel, ensure it has a mesh backing to keep out pests.
- Lightly sand the surface of the new cover with 220-grit sandpaper to create ‘tooth’ for the paint to adhere to.
- Apply a thin coat of metal-etching primer and let dry for 2 hours. This prevents the paint from peeling in extreme weather.
- Apply two thin coats of exterior paint that perfectly matches your home’s trim or siding color. Using a high-density foam roller will provide a factory-smooth finish without brush marks.
- For foundation vents, build a small ‘picture frame’ out of rot-resistant pressure-treated wood that sits around the vent. Attach the decorative grille to this frame.
- Mount the cover using magnetic strips or color-matched screws so you can easily remove it for cleaning lint or debris from the vent line.
How to Style Garden Glass for a Magical Backyard Glow
Why we love this
Garden glass adds a layer of ethereal beauty that balances the rigid lines of minimalist landscaping. Whether it’s a series of hand-blown glass spheres nestled among ferns or a sleek glass privacy panel that catches the setting sun, these accents provide a fluid, reflective quality that mimics the appearance of water. The way glass interacts with light—casting prismatic patterns across your patio and glowing softly under moonlight—adds a touch of magic without feeling cluttered. It provides a sophisticated focal point that feels more like an outdoor art gallery than a standard backyard, making every evening feel like a special occasion.
Essential Elements:
- Solid glass garden spheres or ‘gazing balls’
- Frosted glass privacy panels or ‘totems’
- Hidden LED uplighting or solar spotlights
- Neutral-colored stones or black mulch as a backdrop
- Clear silicone adhesive for securing glass to stone bases
How to make it
- Select a ‘quiet’ corner of the garden where the glass won’t be competing with busy flower patterns. A bed of uniform green hostas or a simple gravel patch is the ideal canvas.
- For glass spheres, create a small ‘nest’ by digging a shallow indentation in the soil and lining it with sand. This prevents the glass from rolling or shifting during heavy winds.
- Position the glass objects in odd-numbered clusters (threes or fives). Vary the heights by placing some spheres directly on the ground and others on simple stone plinths.
- Angle a low-voltage LED spotlight (3000K warm white) so it hits the glass from a 45-degree angle. This creates a soft internal glow rather than a harsh external reflection.
- If using glass panels, install them into pre-slotted wooden posts or metal channels. Ensure the base is set in concrete to handle wind loads against the flat surface.
- Clean the glass monthly using a mixture of white vinegar and water to remove hard water spots from sprinklers, keeping the ‘sparkle’ high for maximum visual impact.
The Future of Minimalism Outdoors
Transforming your backyard doesn’t require a total overhaul or a massive budget. By focusing on these five viral layout strategies—from mastering your yard zones to hiding those pesky vents—you can create a space that feels curated, calm, and effortlessly stylish. Minimalism in the garden isn’t about having nothing; it’s about having exactly what you need to find peace in your own little corner of the world.