
Why Simple Food Boards are the Only Hosting Hack You Need This Season
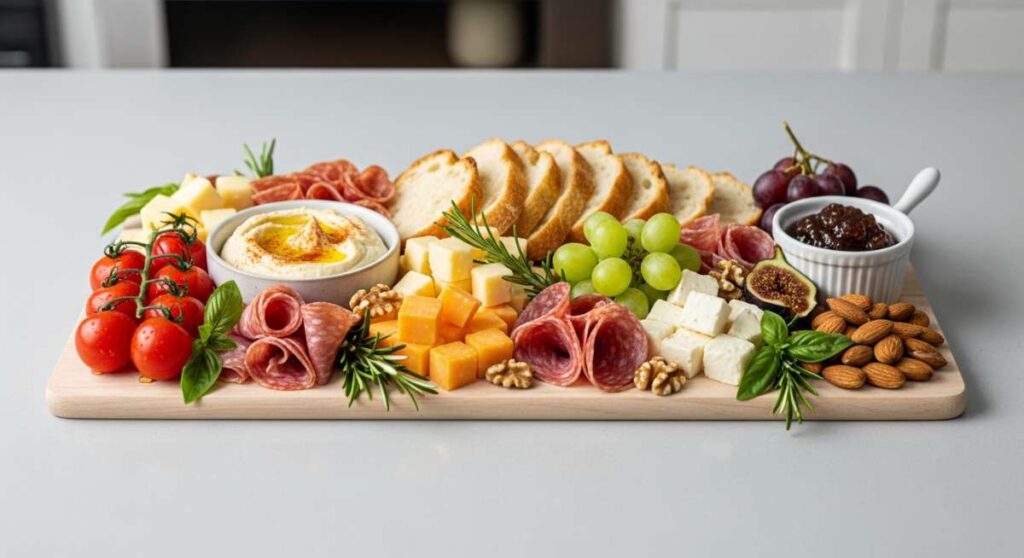
There is a specific kind of magic that happens when you set down a massive, over-flowing food board in the middle of a patio table. The conversation shifts from polite small talk to excited murmurs of ‘Oh, look at those berries!’ or ‘You have to try this dip.’ For years, I stressed myself out trying to time three-course meals so they’d hit the table at the perfect temperature, only to find myself stuck in the kitchen while my guests laughed without me in the backyard. That all changed when I embraced the ‘Board Life.’ It’s more than just cheese and crackers; it’s a lifestyle that prioritizes connection over perfection.
This season, I’ve mastered the art of the ‘Simple Food Board’—a curated, relaxed way to serve everything from hearty camping meals to delicate summer desserts. Whether you are hosting a formal garden party or just having the neighbors over for a spontaneous Wednesday night hang, these boards allow you to prep ahead and actually enjoy the sunset. The secret is in the variety: a mix of textures, colors, and temperatures that invite people to graze, linger, and help themselves. Let’s dive into the ultimate hacks for your most delicious season yet.
How to make summer crockpot?
Why we love this
There is something incredibly satisfying about the aroma of slow-cooked pulled chicken wafting through the house while the sun blazes outside. By using a crockpot in the summer, you keep the kitchen cool while achieving a level of tenderness that is simply impossible with a quick sear. The meat becomes so succulent it practically melts into the sauce, offering a rich, savory depth that contrasts beautifully with a crisp, cold slaw. It’s the ultimate low-effort, high-reward centerpiece for a backyard slider board.
Ingredients
- 2 lbs boneless skinless chicken thighs
- 1 cup zesty BBQ sauce
- 1/4 cup apple cider vinegar
- 1 tablespoon smoked paprika
- 1 teaspoon garlic powder
- 1/2 teaspoon cayenne pepper
- Salt and pepper to taste
How to make it
- Begin by patting your chicken thighs completely dry with paper towels; this ensures the seasoning sticks and prevents excess moisture from diluting your sauce. Place the chicken in a single layer at the bottom of your slow cooker.
- In a small mixing bowl, whisk together the BBQ sauce, apple cider vinegar, smoked paprika, garlic powder, and cayenne until the mixture is glossy and well-combined. This vinegar addition is crucial as it breaks down the proteins for that signature fall-apart texture.
- Pour the sauce over the chicken, using a spatula to ensure every piece is thoroughly coated. Cover the crockpot and set it to ‘Low’ for 6 to 7 hours. Cooking on low is the professional secret to preventing the meat from becoming rubbery.
- Once the time is up, use two forks to shred the meat directly in the pot. The chicken should pull apart with almost no resistance. Allow the shredded chicken to sit in the juices on the ‘Warm’ setting for another 20 minutes to soak up all that concentrated flavor before serving on a board with mini brioche buns.
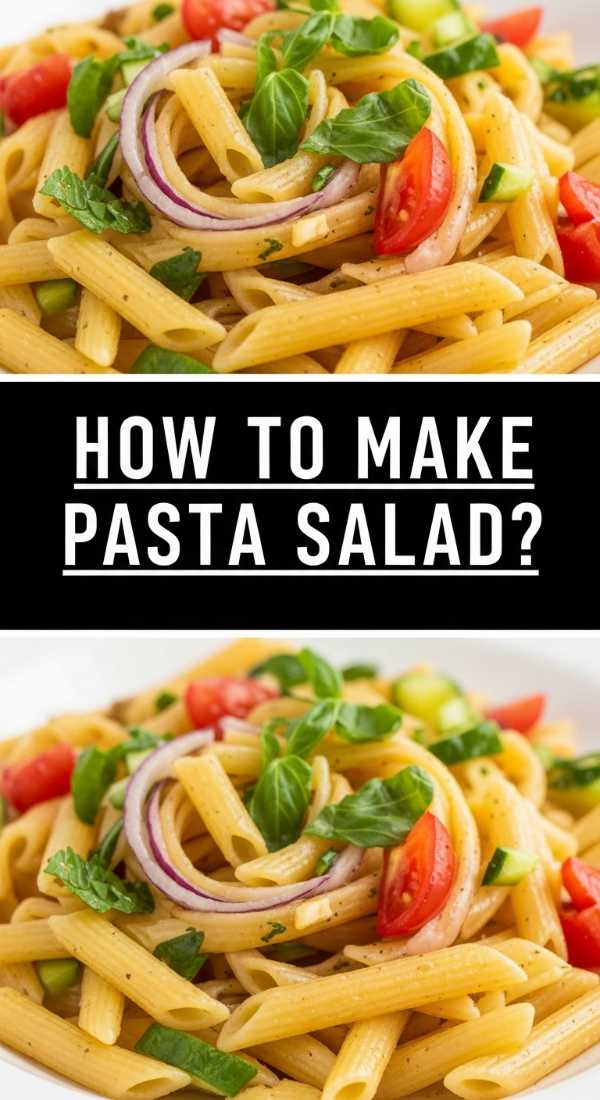
How to make pasta salad?

Why we love this
A great pasta salad is the unsung hero of the summer board, providing a cool, chewy base that carries bright, acidic flavors beautifully. We love this version because it’s a vibrant celebration of Mediterranean textures—salty feta, juicy cherry tomatoes, and the earthy snap of fresh basil. When the pasta is tossed in a homemade vinaigrette while still warm, it absorbs the dressing, ensuring that every single bite is an explosion of herb-infused brightness that stays fresh even after hours on the table.
Ingredients
- 1 lb fusilli or rotini pasta
- 1 cup cherry tomatoes, halved
- 1/2 cup English cucumber, diced
- 1/4 cup red onion, finely minced
- 1/2 cup crumbled feta cheese
- 1/2 cup Kalamata olives, sliced
- Homemade Lemon-Herb Vinaigrette (olive oil, lemon juice, dried oregano)
How to make it
- Bring a large pot of heavily salted water to a rolling boil. The water should taste like the ocean; this is your only chance to season the pasta itself. Cook the pasta for exactly 1 minute less than the package instructions for ‘al dente’ to ensure it holds its shape when dressed.
- While the pasta cooks, prep your vegetables. Ensure the cucumber and red onion are cut into uniform, bite-sized pieces so that they distribute evenly throughout the salad.
- Drain the pasta and immediately transfer it to a large bowl. While the steam is still rising, pour half of your vinaigrette over the noodles. This technique allows the pasta to ‘drink’ the dressing as it cools, flavoring it from the inside out.
- Allow the pasta to reach room temperature before folding in the tomatoes, cucumbers, onions, and olives. If you add the cheese while the pasta is hot, it will melt and become greasy. Finish with the remaining dressing and a generous handful of fresh basil leaves just before placing it on your serving board.
How to make rotel dip?
Why we love this
Nothing says ‘viral hosting hack’ like a bubbling pot of Rotel dip centered on a board surrounded by colorful tortilla chips. It’s the ultimate comfort food—creamy, slightly spicy, and deeply nostalgic. The way the melted cheese clings to the savory bits of sausage and the tangy kick of green chilies creates a sensory experience that is both indulgent and addictive. It provides a warm, gooey element to an otherwise cold board, making the whole spread feel more substantial and satisfying.
Ingredients
- 1 lb ground pork sausage (spicy or mild)
- 1 block (16 oz) Velveeta or high-quality melting cheese
- 1 can (10 oz) Ro-Tel Diced Tomatoes and Green Chilies
- 1/4 cup heavy cream (for extra silkiness)
- Fresh cilantro for garnish
How to make it
- In a large skillet over medium-high heat, brown the sausage. Use a wooden spoon to break it into very small crumbles; smaller bits ensure that you get meat in every single dip. Cook until no pink remains and the edges are slightly crispy for a better texture.
- Drain the excess fat from the skillet thoroughly. Excess grease will cause the cheese dip to separate and look oily on your board.
- Reduce the heat to low and add the cubed melting cheese and the entire can of Ro-Tel (do not drain the can, as the juice provides essential flavor and acidity). Add the splash of heavy cream to maintain a silky consistency even as the dip cools.
- Stir constantly until the cheese is completely melted and the mixture is uniform. If the dip feels too thick, add a tablespoon of milk at a time. Transfer to a small slow cooker or a pre-heated ceramic bowl to keep it warm while serving.
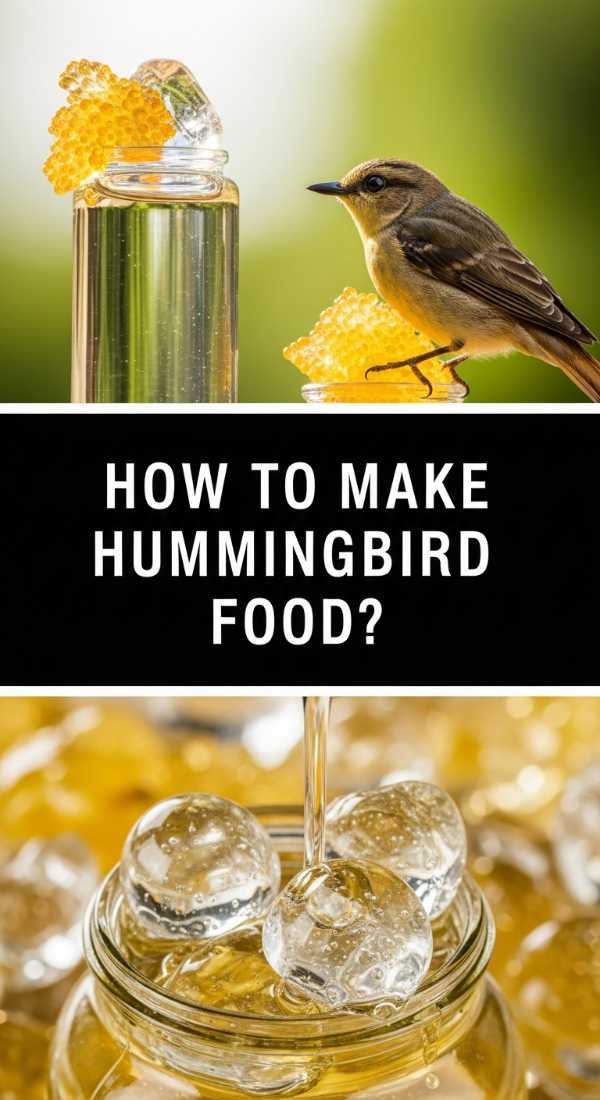
How to make hummingbird food?

Why we love this
While not for the guests to eat, setting out fresh hummingbird food is the ultimate ‘hostess with the mostest’ move for creating a magical backyard atmosphere. Watching these tiny, iridescent jewels dart around your garden adds a layer of entertainment that no playlist can match. It feels intentional and caring, signaling to your guests that you’ve curated an entire ecosystem for their enjoyment. The simple clarity of homemade nectar—free from red dyes—shows a commitment to nature that is both beautiful and ethical.
Ingredients
- 1 cup granulated white sugar
- 4 cups filtered water
- Note: Never use honey, brown sugar, or red dye.
How to make it
- Mix the sugar and water in a medium saucepan. It is vital to use the 1:4 ratio to mimic the natural sucrose levels found in flowers; anything stronger can be hard on a hummingbird’s kidneys.
- Heat the mixture over medium heat, stirring constantly until the sugar is completely dissolved. You do not need to bring it to a full rolling boil, but a gentle simmer for 1-2 minutes can help remove impurities from the water and extend the shelf life of the nectar.
- Remove from heat and let the liquid cool completely to room temperature. This is a critical step; pouring hot nectar into a feeder can warp the plastic or harm the birds.
- Fill your clean feeders and store any extra nectar in a glass jar in the refrigerator for up to two weeks. Ensure you hang the feeders near your outdoor dining area so guests can enjoy the view while they graze on your food boards.
How to make summer soup?

Why we love this
Summer soup, specifically a chilled Gazpacho, is like a concentrated shot of garden freshness served in a bowl. It is incredibly refreshing on a humid afternoon, offering a complex profile of garden-ripe tomatoes, crisp bell peppers, and a sharp hit of garlic and vinegar. The texture is key here—partially smooth but with enough finely diced vegetables to provide a satisfying crunch. It’s light, vibrant, and acts as a palate cleanser that perfectly bridges the gap between heavier snacks and main courses.
Ingredients
- 2 lbs ripe Roma tomatoes
- 1 English cucumber, peeled
- 1 red bell pepper, deseeded
- 1 small red onion
- 2 cloves garlic
- 3 tablespoons extra virgin olive oil
- 2 tablespoons sherry vinegar
- Salt and black pepper to taste
How to make it
- Roughly chop all your vegetables into large chunks. Since we are blending them, the shape doesn’t need to be perfect, but ensure the tomatoes are very ripe to get the best color and natural sweetness.
- Place the tomatoes, cucumber, bell pepper, onion, and garlic into a high-speed blender. Pulse until you reach your desired consistency; some prefer it completely liquefied, while others like a rustic, chunky texture.
- While the blender is running on low, slowly stream in the olive oil and sherry vinegar. This emulsifies the soup, giving it a creamy mouthfeel without the need for dairy. Season generously with salt and pepper.
- Pour the soup into a glass container and refrigerate for at least 4 hours—overnight is even better. The flavors need time to marry and chill thoroughly. Serve in small chilled shot glasses on your food board for a sophisticated, easy-to-grab appetizer.
How to make summer desserts?
Why we love this
A summer dessert board is the ultimate crowd-pleaser because it caters to everyone’s sweet tooth without the formality of a sliced cake. We love a ‘Build-Your-Own Strawberry Shortcake’ board because it’s interactive and visually stunning. The combination of warm, buttery biscuits, macerated strawberries bleeding their ruby juices, and pillows of freshly whipped cream creates a DIY experience that feels whimsical and nostalgic. It encourages guests to linger over the table long after the sun has gone down, assembling their perfect bite.
Ingredients
- 1 quart fresh strawberries, sliced
- 2 tablespoons granulated sugar
- Store-bought or homemade shortcakes/biscuits
- 2 cups heavy whipping cream
- 1 teaspoon vanilla extract
- Fresh mint for garnish
How to make it
- At least one hour before serving, toss your sliced strawberries with two tablespoons of sugar in a bowl. Let them sit at room temperature; the sugar will draw out the moisture, creating a natural, glossy syrup that is much better than anything store-bought.
- Chill a metal mixing bowl and whisk in the freezer for 10 minutes. Pour the heavy cream and vanilla extract into the cold bowl and beat on medium-high speed until soft peaks form. Do not overbeat, or you’ll end up with butter; you want it light and airy.
- Split your shortcakes or biscuits in half and lightly toast them in the oven at 350°F for 5 minutes just to get the edges golden and crisp.
- On a large wooden board, place the bowl of macerated strawberries in the center. Arrange the warm biscuits around it, and dollop the whipped cream into a separate bowl. Garnish with fresh mint and allow guests to stack their own desserts.
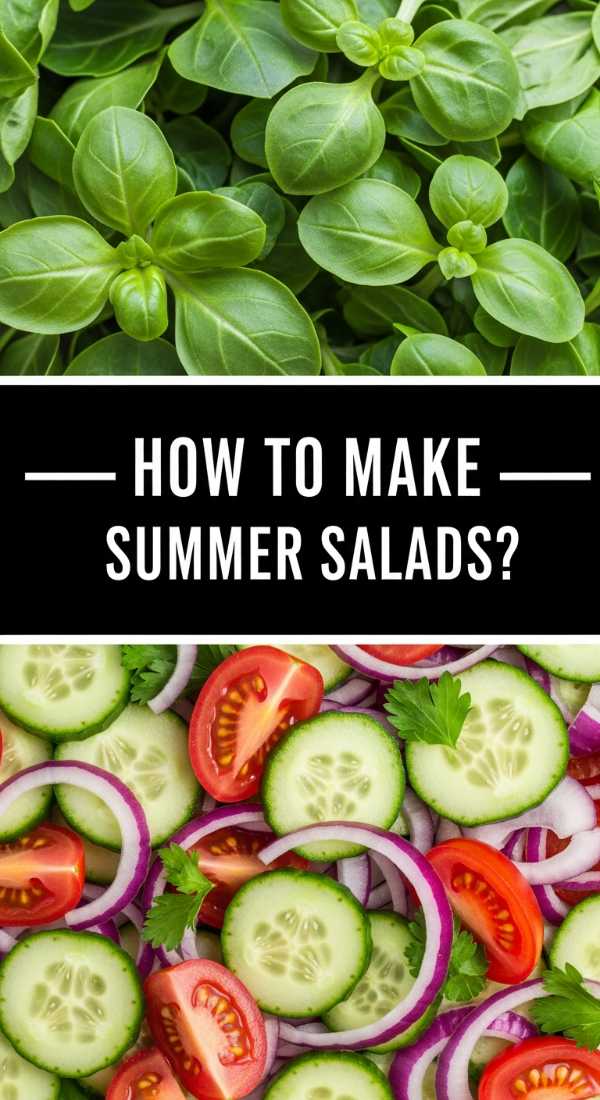
How to make summer salads?
Why we love this
A viral summer salad board is all about the ‘Deconstructed’ look, and nothing beats a Watermelon and Feta spread. It is the definition of summer in a single bite: the explosive sweetness of cold watermelon, the salty tang of sheep’s milk feta, and the cooling finish of fresh mint. It’s aesthetically breathtaking on a board, with the vibrant pinks and greens popping against the wood. This dish is sensory perfection, offering a hydrating crunch that feels like a breeze on a hot July afternoon.
Ingredients
- 1 medium seedless watermelon
- 8 oz block of high-quality feta cheese
- 1/2 cup fresh mint leaves, torn
- 1/4 cup extra virgin olive oil
- Balsamic glaze for drizzling
- Flaky sea salt
How to make it
- Cube the watermelon into uniform 1-inch squares. To make it ‘board-friendly,’ ensure the cubes are large enough to be pierced by a toothpick but small enough to be eaten in one bite.
- Pat the watermelon cubes dry with a paper towel. This prevents the fruit from ‘weeping’ too much juice onto the board, which can make other items soggy.
- Crumble the feta by hand into large, rustic chunks rather than using pre-crumbled cheese, which often contains anti-caking agents that affect the creamy mouthfeel.
- Layer the watermelon cubes on your board, tucking the feta chunks and mint leaves into the crevices. Just before serving, drizzle with the olive oil and balsamic glaze, then finish with a sprinkle of flaky sea salt to amplify the sweetness of the fruit.
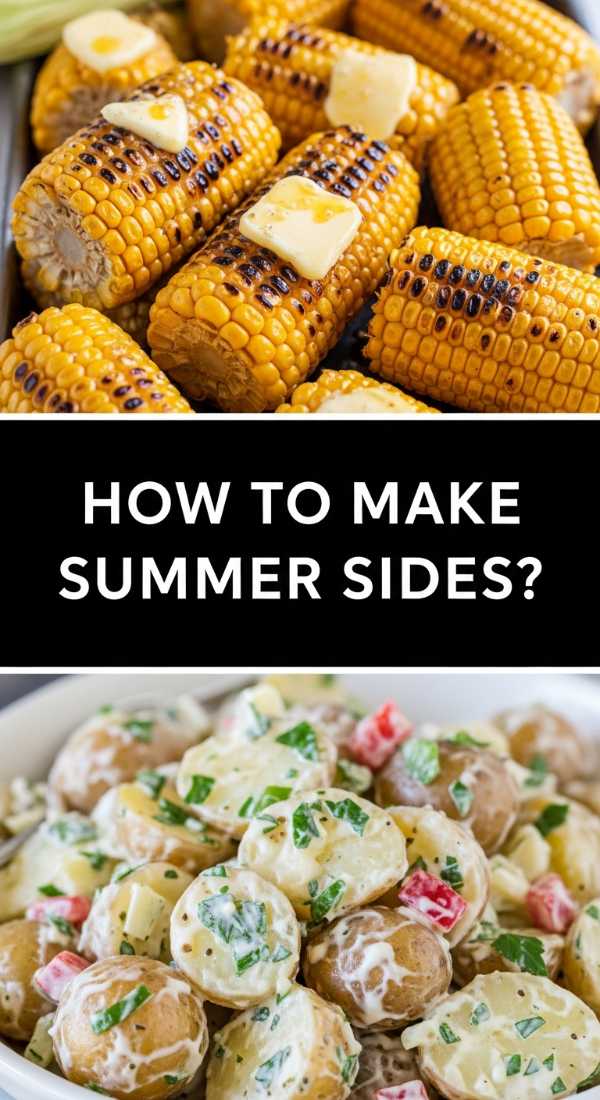
How to make summer sides?

Why we love this
Summer sides should be easy to share, and Mexican Street Corn (Elote) served off-the-cob is the reigning king of the board. We love this ‘Esquites’ style because it packs all the smoky, creamy, zesty flavors of traditional elote into a format that is much cleaner for guests to eat. The charred corn kernels provide a nutty, caramelized sweetness that is balanced by the creamy mayo-lime sauce and the fiery kick of chili powder. It’s a side dish that usually steals the show from the main course.
Ingredients
- 4 cups charred corn kernels (fresh or frozen)
- 1/4 cup mayonnaise
- 2 tablespoons sour cream
- 1/2 cup Cotija cheese, crumbled
- 1 lime, juiced
- 1 teaspoon chili powder or Tajin
How to make it
- If using fresh corn, grill the cobs until charred on all sides, then cut the kernels off. If using frozen, sear them in a cast-iron skillet over high heat with a touch of oil until they are dark brown and ‘popping.’ That char is where the depth of flavor lives.
- In a large bowl, whisk together the mayonnaise, sour cream, lime juice, and chili powder until smooth. This creates the ‘crema’ that binds the salad together.
- Fold the warm corn into the crema mixture. The residual heat from the corn will slightly melt the Cotija cheese, creating a thick, savory coating.
- Transfer to a bowl and place on your board. Top with extra Cotija, a dusting of chili powder, and fresh cilantro. Surround the bowl with lime wedges so guests can add an extra hit of acidity to their portion.
How to make summer drinks?

Why we love this
A drink board is the ultimate hosting flex. Instead of playing bartender all night, you set out a ‘Sparkling Berry Lemonade’ station that looks like a work of art. We love this because it’s interactive and customizable; guests can choose their level of sweetness and garnish. The sight of fresh lemons, muddled berries, and sparkling water in glass carafes creates an instant focal point. It’s light, effervescent, and incredibly photogenic, making it the perfect beverage to accompany a grazing lifestyle.
Ingredients
- 1 cup fresh lemon juice
- 3/4 cup simple syrup
- 2 cups sparkling water or club soda
- 1 cup fresh raspberries or blueberries
- Lemon slices and thyme sprigs for garnish
How to make it
- Prepare your ‘base’ by mixing the fresh lemon juice and simple syrup in a large pitcher. Stir well to ensure the syrup is fully integrated; this can be done up to 24 hours in advance.
- On your drink board, place a small bowl of berries and a muddler. Guests can muddle a few berries at the bottom of their glass to release the juices and create a beautiful ombré effect.
- Provide a large bucket of clear ice—cloudy ice melts faster and dilutes the drink. Instruct guests to fill their glass with ice, add 2 ounces of the lemon base, and top with sparkling water.
- Provide fresh thyme sprigs and lemon slices as garnishes. The aroma of the thyme as they take a sip adds a sophisticated, earthy note to the bright citrus.
How to make camping meals?
[IMAGE_10]
Why we love this
Camping meals don’t have to be basic, and bringing the ‘Camping Board’ into your backyard or out to the woods is a game changer. We love the ‘Foil-Pack Fajita’ board because it minimizes cleanup while maximizing flavor. The way the peppers and onions steam inside the foil alongside seasoned steak or chicken creates a concentrated fajita juice that is perfect for dipping tortillas. It’s rustic, smoky, and feels like a true adventure, whether you’re under the stars or just on your back deck.
Ingredients
- 1 lb flank steak, thinly sliced
- 2 bell peppers, sliced into strips
- 1 large onion, sliced
- 2 tablespoons taco seasoning
- 2 tablespoons olive oil
- Small flour tortillas
How to make it
- Toss the steak, peppers, and onions in a large bowl with the olive oil and taco seasoning. Ensure every strip of steak is coated; this fat will help the meat brown inside the foil.
- Cut four large squares of heavy-duty aluminum foil. Distribute the steak and veggie mixture evenly into the center of each square. Fold the edges up tightly to create a sealed packet, leaving a little room for steam to circulate.
- Place the packets on a hot grill (or over campfire coals) for 10-12 minutes. For the best result, flip the packets halfway through using tongs to ensure the steak sears on both sides.
- Carefully open the packets (watch out for the hot steam!) and slide the contents onto a large board. Serve with warm tortillas, lime wedges, and a bowl of sour cream for a rustic, communal meal that requires zero plates.
The Art of the Stress-Free Summer
Hosting doesn’t have to be a performance; it should be a shared experience. By leaning into the food board trend, you’re not just serving a meal—you’re setting a scene where people feel comfortable to grab what they like and stay as long as they want. From the slow-cooked goodness of a crockpot meal to the DIY fun of a dessert board, these recipes are designed to keep you out of the kitchen and in the moment. So, grab your biggest wooden board, invite your favorite people, and let the season of simple hosting begin!