
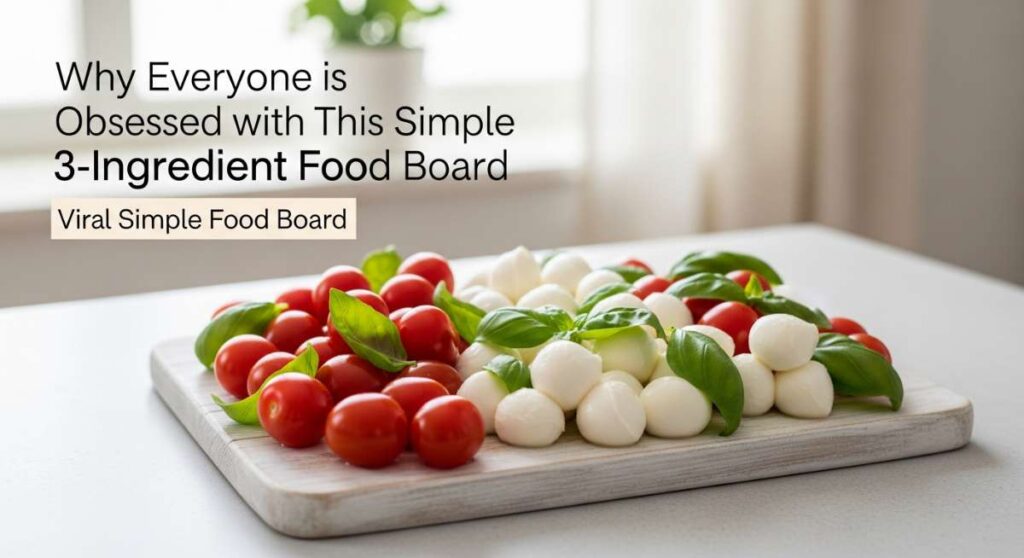
Why Everyone is Obsessed with This Simple 3-Ingredient Food Board
There is something inherently magical about the way a simple wooden board can transform a regular afternoon into a curated experience. I remember the first time I set out a humble spread of crusty bread, a wedge of sharp cheddar, and a handful of sun-warmed grapes; the conversation flowed easier, the room felt warmer, and the stress of a complicated meal simply evaporated. It’s not just about the food; it’s about the permission to slow down and enjoy the textures and colors of the season without the burden of a sink full of dishes.
Lately, social media has been buzzing with this return to simplicity, and for good reason. We are all craving connection over complexity. This ‘3-ingredient’ philosophy isn’t a strict rule, but a mindset: picking a few high-quality components and letting them shine. Whether you are hosting a backyard bash or just looking to elevate your Tuesday night, these variations and techniques will help you master the art of the effortless food board lifestyle.
How to make summer salads?
Why we love this
Nothing captures the essence of a sun-drenched July afternoon like a vibrant summer salad. We love the way the crisp, cold leaves provide a base for the explosive sweetness of seasonal fruits, creating a symphony of textures that dance on the palate. The aroma of freshly torn basil mixed with the tang of a balsamic glaze evokes memories of garden parties and golden hour laughter. Every bite feels like a refreshing reset, hydrating the body while satisfying that craving for something both light and deeply flavorful.
Ingredients
- Fresh baby spinach or arugula
- Sliced ripe strawberries or peaches
- Crumbled goat cheese or feta
- Balsamic glaze and extra virgin olive oil
How to make it
- Begin by chilling your serving bowl in the refrigerator for 15 minutes; a cold bowl keeps the greens crisp longer in summer heat.
- Thoroughly wash and spin-dry your greens. Moisture is the enemy of a good salad, as it prevents the dressing from adhering to the leaves.
- In a small glass jar, whisk together three parts olive oil to one part balsamic vinegar until emulsified, adding a pinch of flaky sea salt to enhance the fruit’s sweetness.
- Layer the greens at the bottom of the bowl, then gently nestle the sliced fruit on top to prevent the heavy fruit from sinking to the bottom.
- Sprinkle the cheese over the top just before serving to maintain its creamy texture against the crunch of the greens.
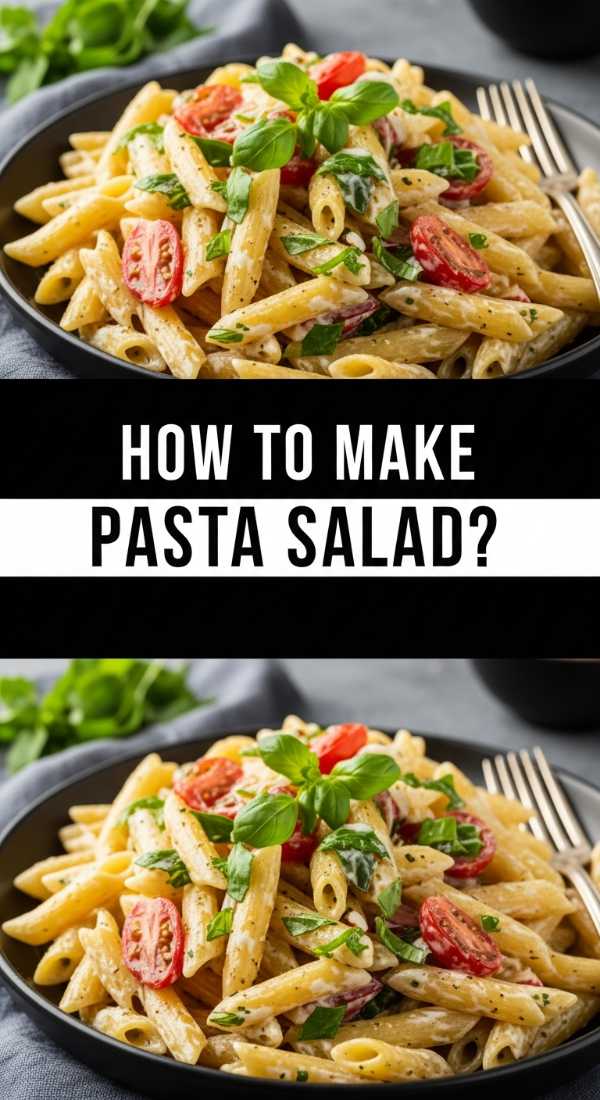
How to make pasta salad?

Why we love this
Pasta salad is the ultimate nostalgic comfort food, reimagined for the heat of the summer months. There is a specific joy in the al dente bite of a rotini noodle coated in a zesty, herbaceous vinaigrette that has had time to soak into every crevice. We love the rainbow of colors provided by diced peppers and olives, and the way the dish actually tastes better the next day after the flavors have spent the night getting to know one another. It is the perfect, portable companion for picnics and potlucks alike.
Ingredients
- 1 pound rotini or fusilli pasta
- Assorted diced vegetables (bell peppers, cucumbers, cherry tomatoes)
- Zesty Italian dressing
- Grated parmesan cheese and fresh parsley
How to make it
- Boil a large pot of water and add enough salt so that it tastes like the ocean; this is your only chance to season the pasta itself.
- Cook the pasta until it is just past al dente, as pasta tends to firm up when cooled. Drain and rinse under cold water immediately to stop the cooking process and remove excess starch.
- While the pasta is still slightly damp, toss it with half of the dressing. This allows the pasta to absorb the flavors while it’s porous.
- Fold in your finely diced vegetables, ensuring everything is cut to roughly the same size for a consistent mouthfeel in every spoonful.
- Refrigerate for at least two hours, then add the remaining dressing and a generous dusting of parmesan cheese right before the board is set out.
How to cook crockpot dinner?

Why we love this
The beauty of a crockpot dinner lies in the anticipation; the way the savory aroma of slow-cooked meat fills the house throughout the afternoon is better than any scented candle. We love the melt-in-your-mouth tenderness that only hours of low-and-slow heat can achieve, turning humble ingredients into a rich, velvety masterpiece. It is the ultimate ‘set it and forget it’ luxury that allows you to spend your evening relaxing with a glass of wine while the ceramic pot does all the heavy lifting.
Ingredients
- 3-pound chuck roast or pork shoulder
- Root vegetables (carrots, potatoes, onions)
- Beef broth or dry onion soup mix
- Fresh rosemary and thyme sprigs
How to make it
- Pat the meat completely dry with paper towels and sear it in a hot skillet with a splash of oil for 3-4 minutes per side until a deep brown crust forms.
- Place the sturdier root vegetables at the bottom of the slow cooker to act as a natural rack for the meat, preventing it from boiling in its own juices.
- Place the seared meat on top of the vegetables and pour over your broth or seasoning mix, being careful not to submerge the meat entirely; you want a braise, not a boil.
- Set the cooker to ‘Low’ and allow it to cook for a full 8 to 10 hours. Resisting the urge to lift the lid is crucial, as each peek releases heat and adds 20 minutes to the cook time.
- Check for doneness by using two forks; the meat should shred effortlessly with almost no resistance.
How to make rotel dip?

Why we love this
There is a reason this dip is the king of every game day board: it is pure, unadulterated cheesy bliss. We love the smooth, velvety texture of the melted cheese contrasted with the bright, acidic pop of diced tomatoes and the subtle heat of green chilies. The aroma is instantly recognizable and evokes a sense of casual, fun-filled hospitality where double-dipping is almost encouraged. It’s the kind of warm, gooey indulgence that brings everyone to the center of the room within seconds.
Ingredients
- 16 oz block of processed cheese (like Velveeta)
- 1 can of Ro-Tel Diced Tomatoes and Green Chilies
- 1 pound ground sausage or chorizo
- Tortilla chips for serving
How to make it
- In a large skillet over medium-high heat, brown the sausage until it is crumbly and no longer pink, ensuring you drain the excess fat thoroughly.
- Cut the cheese block into 1-inch cubes; smaller pieces will melt more evenly and prevent the bottom from scorching.
- Combine the cheese cubes and the entire can of Ro-Tel (do not drain the liquid!) into a heavy-bottomed pot or a small slow cooker.
- Melt over low heat, stirring constantly with a rubber spatula to prevent the cheese from sticking to the bottom of the pan.
- Once the mixture is smooth and glossy, fold in the cooked sausage and serve immediately while the dip is at its peak fluidity.
How to make summer desserts?

Why we love this
Summer desserts should feel like an extension of the garden—bright, sweet, and incredibly fresh. We love the flaky, buttery crunch of a puff pastry base paired with the honeyed juices of a perfectly ripe peach. There’s a rustic elegance to a fruit-forward dessert that doesn’t try too hard, finished with a cooling dollop of whipped cream that melts into the warm fruit. It is the perfect end to a board-style dinner, providing a sweet note that isn’t overly heavy or cloying.
Ingredients
- Store-bought puff pastry sheet
- 3 ripe peaches or nectarines, thinly sliced
- Granulated sugar and cinnamon
- 1 egg (for egg wash)
How to make it
- Preheat your oven to 400°F (200°C) and line a baking sheet with parchment paper to ensure the fruit sugars don’t stick.
- Roll out the thawed puff pastry and use a knife to lightly score a 1-inch border around the edge, being careful not to cut all the way through.
- Arrange the peach slices in overlapping rows within the border, then sprinkle generously with the sugar and cinnamon mixture.
- Brush the outer border with a beaten egg wash, which will provide that iconic professional golden-brown sheen once baked.
- Bake for 15-20 minutes until the pastry has puffed up significantly and the edges are a deep, toasted gold, then let it cool for 5 minutes before slicing.
How to prep healthy meals?

Why we love this
Meal prepping is the ultimate gift to your future self, turning a chaotic work week into a series of nourishing, stress-free moments. We love the visual satisfaction of a fridge filled with glass containers of vibrant roasted vegetables and perfectly portioned proteins. The feeling of knowing you have a clean, fueling meal ready to go prevents the afternoon slump and keeps your energy levels consistent. It’s about creating a lifestyle of wellness that feels like a luxury rather than a chore.
Ingredients
- Chicken breasts or firm tofu
- Quinoa or brown rice
- Broccoli, sweet potatoes, and kale
- Lemon-tahini dressing
How to make it
- Dedicate a two-hour window on Sunday to batch-cook your base grains; simmer quinoa in vegetable broth instead of water for added depth of flavor.
- Roast all your vegetables on large sheet pans at 425°F (220°C). Toss them in avocado oil—which has a high smoke point—and spread them out so they roast rather than steam.
- Grill or bake your protein until it reaches an internal temperature of 165°F for chicken, then let it rest for 10 minutes before slicing to keep the juices locked in.
- Allow all components to cool to room temperature before sealing them in airtight containers; this prevents condensation which leads to soggy textures.
- Store dressings in separate small containers and only add them right before eating to keep the greens and grains fresh and vibrant.
How to make refreshing drinks?

Why we love this
There is nothing more restorative on a humid day than the clinking of ice against glass and the sharp, clean zing of citrus. We love the way a refreshing drink can serve as a palate cleanser between bites on a food board, with the bubbles of sparkling water lifting the heavier flavors. The aroma of muddled mint and the visual of a sweat-beaded pitcher make any gathering feel like an occasion. It’s an easy way to hydrate while feeling like you’re indulging in something truly special.
Ingredients
- Fresh lemons and limes
- Sparkling mineral water or club soda
- Fresh mint leaves and honey or agave
- Plenty of crushed ice
How to make it
- Create a ‘flavor base’ by muddling 10-12 mint leaves with a tablespoon of honey at the bottom of a large pitcher to release the essential oils.
- Squeeze the juice of four lemons into the pitcher, ensuring you strain out any seeds which can add an unwanted bitterness.
- Fill the pitcher three-quarters of the way with ice; using high-quality filtered water for your ice cubes ensures a cleaner taste as they melt.
- Slowly pour the sparkling water over the ice, stirring gently with a long spoon to incorporate the honey and mint without losing the carbonation.
- Garnish each individual glass with a slapped mint leaf (slapping it between your hands releases the aroma) and a thin citrus wheel for a professional touch.
How to grill summer side dishes?

Why we love this
Grilling transforms simple vegetables into something smoky, charred, and complexly sweet. We love the way the high heat caramelizes the natural sugars in corn and asparagus, creating a texture that is both tender and snappy. There is something primal and satisfying about cooking over an open flame while the sun sets, and the minimal cleanup makes it the perfect addition to a relaxed food board. These sides bring a rustic, outdoor energy to the table that you just can’t get from a stovetop.
Ingredients
- Fresh corn on the cob (husks removed)
- Asparagus or zucchini spears
- Olive oil, sea salt, and smoked paprika
- Lime wedges
How to make it
- Preheat your grill to medium-high (about 400°F). Clean the grates thoroughly and lightly oil them to prevent the vegetables from tearing.
- Coat the vegetables in a thin layer of olive oil and a generous sprinkling of salt and paprika; the oil acts as a heat conductor for even browning.
- Place the corn directly over the heat, turning every 2-3 minutes until charred spots appear all around the circumference.
- For thinner vegetables like asparagus, use a grill basket or lay them perpendicular to the grates so they don’t fall through, cooking for only 4-5 minutes.
- Finish with a squeeze of fresh lime juice immediately after removing them from the grill to brighten the smoky flavors.
How to make summer pasta?

Why we love this
Summer pasta is all about lightness and the vibrancy of the garden, steering away from heavy creams and meat sauces. We love the way a simple emulsion of garlic, olive oil, and lemon zest creates a silky coating that celebrates the noodle. The fragrance of fresh parsley and the heat of red pepper flakes provide a sophisticated profile that feels high-end yet takes minutes to prepare. It’s a dish that feels elegant enough for a dinner party but simple enough for a solo porch meal.
Ingredients
- Angel hair or spaghetti
- Extra virgin olive oil and 4 cloves of garlic
- Fresh lemon (zest and juice)
- Red pepper flakes and fresh flat-leaf parsley
How to make it
- Cook your pasta in salted water, but pull it out exactly 1 minute before the ‘al dente’ time listed on the box; it will finish cooking in the sauce.
- In a wide pan, gently heat a generous 1/4 cup of olive oil and thinly sliced garlic over medium-low heat. Do not let the garlic brown; you want it to become translucent and fragrant.
- Before draining the pasta, reserve 1 full cup of the starchy pasta water—this is the secret to a professional sauce.
- Add the pasta, lemon zest, and half the reserved water to the garlic oil. Toss vigorously over medium heat to create a creamy, emulsified sauce.
- Remove from heat, stir in the lemon juice and chopped parsley, and add more pasta water if the noodles look dry.
How to cook summer soup?
[IMAGE_10]
Why we love this
While many associate soup with winter, a chilled summer soup like gazpacho is a revelation of freshness. We love the way the blended raw vegetables provide a concentrated burst of garden flavor, served ice-cold to beat the heat. The texture is smooth yet substantial, and the vibrant red or green color makes it a stunning centerpiece for any board. It’s a healthy, hydrating, and sophisticated way to utilize an overabundance of summer produce without ever turning on the oven.
Ingredients
- 6 large ripe tomatoes
- 1 cucumber and 1 red bell pepper
- 2 cloves of garlic and a splash of sherry vinegar
- High-quality olive oil for drizzling
How to make it
- Roughly chop the tomatoes, cucumber (peeled), and pepper, removing any large seeds to ensure the smoothest possible texture.
- Place the vegetables in a high-speed blender with the garlic, vinegar, and a pinch of salt. Blend on high until the mixture is completely liquid.
- With the blender running on low, slowly drizzle in 1/4 cup of olive oil; this creates an emulsion that gives the soup a creamy, luxurious mouthfeel without any dairy.
- For a truly professional finish, pour the soup through a fine-mesh sieve into a glass bowl to remove any remaining bits of skin or fiber.
- Chill the soup in the refrigerator for at least 4 hours—overnight is better—to allow the flavors to deepen and the temperature to drop to a refreshing level.
The Art of the Effortless Board
At the end of the day, whether you are serving a chilled soup or a warm crockpot roast, the magic of the food board lies in the assembly. It is about creating a visual and culinary landscape that invites people to linger, to pick, and to enjoy. By focusing on these simple techniques and high-quality ingredients, you remove the stress of hosting and replace it with the joy of sharing. So, grab your favorite board, pick a recipe from this list, and start creating your own viral food moment.
Frequently Asked Questions
Common questions about creating the perfect simple food board.