
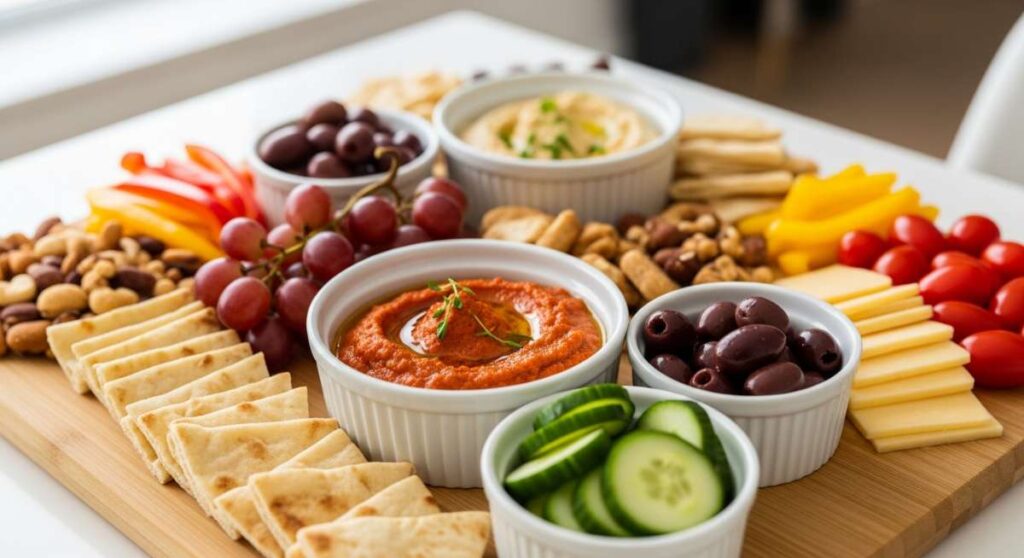
We’ve all been there: the Sunday evening slump where the thought of another complicated dinner feels like a mountain we just can’t climb. But what if I told you there’s a way to turn the humble chicken thigh into a show-stopping, viral-worthy centerpiece? The ‘Chicken Thigh Board’ is the latest lifestyle hack sweeping through my kitchen, and honestly, it’s a game-changer for anyone who loves low-stress hosting and high-flavor rewards.
There is something so inherently soulful about gathering around a large wooden board overflowing with different textures and aromas. It’s communal, it’s rustic, and it’s surprisingly elegant. Instead of the traditional charcuterie of cold meats and cheeses, we are elevating the board concept with warm, succulent chicken prepared in ways that satisfy every craving—from the ultimate crunch to the most tender, melt-in-your-mouth bites.
How to bake crispy chicken thighs?

Why we love this
There is nothing quite like the sound of a knife edge scraping against perfectly rendered, shatteringly crisp chicken skin. As you bite through that golden, salty exterior, you are met with a rush of savory juices that only bone-in thighs can provide. The aroma of toasted poultry fat and garlic wafting from the oven creates a nostalgic, cozy atmosphere that instantly makes a house feel like a home. It’s the ultimate comfort food that looks as good as it tastes on your board.
Ingredients
- 4-6 Bone-in, skin-on chicken thighs
- 2 tablespoons avocado oil
- 1 teaspoon sea salt
- 1/2 teaspoon smoked paprika
- 1/2 teaspoon garlic powder
How to make it
- Preheat your oven to 425°F (218°C). This high heat is crucial for rendering the fat and achieving that signature crunch.
- Pat the chicken thighs completely dry with paper towels. Any moisture on the skin will lead to steaming rather than crisping, so be thorough.
- In a small bowl, whisk together the oil, salt, paprika, and garlic powder until a thin paste forms.
- Rub the mixture evenly over the skin and the undersides of the chicken.
- Place a wire rack over a rimmed baking sheet. This allows hot air to circulate under the meat, ensuring the bottom doesn’t get soggy.
- Arrange the thighs on the rack, skin-side up, leaving space between each piece.
- Bake for 35-40 minutes. You are looking for a deep mahogany color and skin that feels hard to the touch of a fork.
- Let rest for 5 minutes before adding to your food board to keep the juices locked in.
How to cook juicy chicken thighs?

Why we love this
A truly juicy chicken thigh is a revelation of culinary simplicity, offering a silky texture that practically dissolves on the tongue. When prepared with care, the meat retains a lustrous sheen and a deep, savory profile that pairs beautifully with bright, acidic dips or creamy sauces. The gentle aroma of fresh thyme and melted butter permeating the meat provides a sensory experience that is both luxurious and deeply satisfying, making it a centerpiece favorite for any gathering.
Ingredients
- 1 lb boneless chicken thighs
- 1/4 cup low-sodium chicken broth
- 2 tablespoons unsalted butter
- 2 cloves garlic, smashed
- Fresh thyme sprigs
- Salt and black pepper
How to make it
- Allow the chicken to sit at room temperature for about 15 minutes before cooking to ensure even heat penetration.
- Season both sides generously with salt and pepper.
- Heat a heavy-bottomed skillet over medium heat and add a splash of oil.
- Place thighs in the pan and sear for 5-6 minutes per side until they reach an internal temperature of 165°F (74°C).
- Once cooked, reduce the heat to low and add the butter, smashed garlic, and thyme sprigs to the pan.
- As the butter foams, tilt the pan and use a spoon to continuously baste the chicken with the flavored fat for 2 minutes.
- Add the chicken broth to the pan, scraping up any browned bits, and let it simmer for 60 seconds to create a light jus.
- Remove from heat and let the chicken soak in the pan juices for 3 minutes before serving.
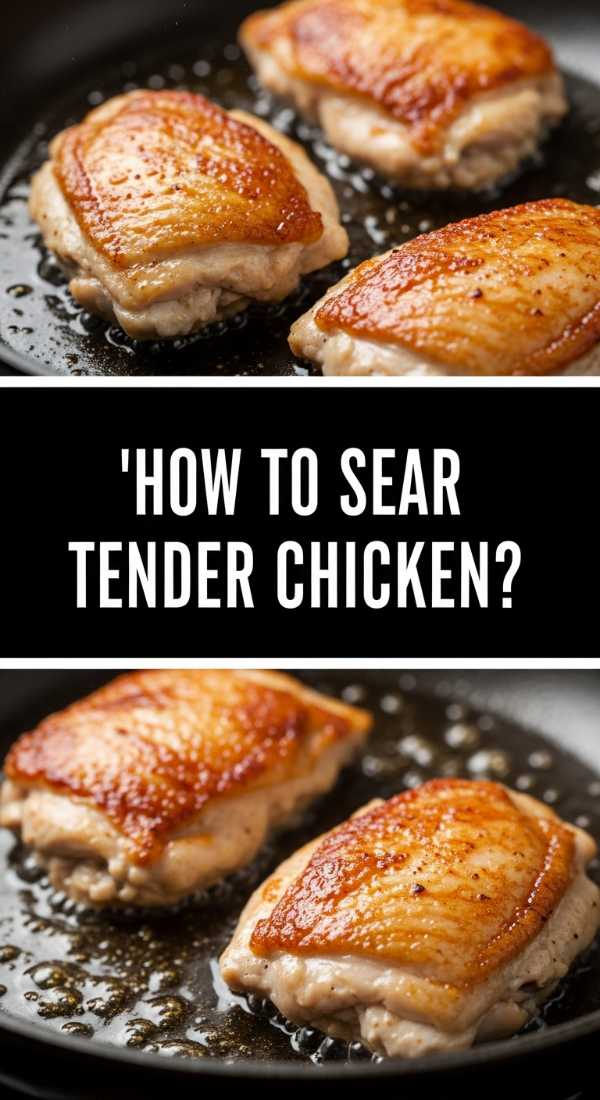
How to sear tender chicken?
Why we love this
The magic of a perfect sear lies in the Maillard reaction—that beautiful chemical dance that creates a complex, savory crust full of umami depth. As the meat hits the hot pan, it creates a sizzling symphony that promises a tender, supple interior protected by a flavorful exterior. The scent of caramelizing proteins and toasted spices is intoxicating, drawing everyone into the kitchen before the board is even assembled. It’s a technique that feels professional yet remains delightfully accessible.
Ingredients
- 1 lb chicken thigh fillets
- 1 tablespoon high-smoke point oil (like grapeseed)
- 1/2 teaspoon onion powder
- 1/4 teaspoon cumin
- Salt and pepper
How to make it
- Select a heavy cast-iron or stainless steel skillet for the best heat retention.
- Heat the oil over medium-high heat until it begins to shimmer and just starts to smoke slightly.
- Season the chicken thoroughly with the spice blend just moments before it hits the pan to prevent the salt from drawing out moisture prematurely.
- Place the chicken in the skillet, pressing down slightly with a spatula to ensure full contact with the metal.
- Do not move the chicken for at least 4 minutes; this allows the crust to develop and release naturally from the pan.
- Flip the chicken once the edges appear opaque and the bottom is a rich, dark gold.
- Cook for another 3-4 minutes on the second side.
- Verify doneness with a meat thermometer, aiming for 170°F (77°C) for maximum tenderness in thigh meat.
How to slow cook chicken?

Why we love this
Slow-cooked chicken thighs are the ultimate ‘set it and forget it’ luxury, resulting in meat so tender it yields to the mere suggestion of a fork. The long, gentle braise allows the connective tissues to transform into a rich, velvety sauce that coats every strand of protein. The deep, concentrated aroma of slow-simmered aromatics like onions and bay leaves fills the home for hours, building anticipation for a meal that feels like a warm hug in food form.
Ingredients
- 2 lbs boneless, skinless chicken thighs
- 1 cup chicken stock
- 1 onion, sliced thinly
- 3 cloves garlic, minced
- 1 bay leaf
- 1 teaspoon dried oregano
How to make it
- Layer the sliced onions and minced garlic at the bottom of your slow cooker to create a flavorful bed for the meat.
- Season the chicken thighs with salt, pepper, and oregano, then place them on top of the vegetables.
- Pour the chicken stock over the meat, ensuring it doesn’t fully submerge the chicken to prevent it from becoming ‘boiled’ in texture.
- Tuck the bay leaf into the liquid.
- Cover and cook on the ‘Low’ setting for 6-7 hours or ‘High’ for 3-4 hours. Low is preferred for a more succulent texture.
- Once the chicken is tender enough to shred, remove the lid and let it sit for 10 minutes to reabsorb some of the concentrated juices.
- Use two forks to gently pull the meat apart into large, rustic chunks for your food board.
How to roast golden thighs?

Why we love this
Golden roasted thighs are the aesthetic stars of any food board, boasting a vibrant, sun-kissed hue that looks absolutely stunning against a backdrop of green herbs and bright lemons. The texture is a delightful balance of soft meat and a slightly firm, caramelized exterior that carries the flavors of honey and citrus beautifully. Each bite offers a sweet-and-savory profile that feels light yet indulgent, making it a sophisticated addition to a brunch or dinner spread.
Ingredients
- 6 skin-on chicken thighs
- 2 tablespoons honey
- 1 tablespoon Dijon mustard
- 1 tablespoon lemon juice
- 2 tablespoons melted butter
- Lemon slices for the pan
How to make it
- Preheat your oven to 400°F (204°C).
- In a small bowl, whisk together the honey, Dijon mustard, lemon juice, and melted butter until smooth.
- Line a baking sheet with parchment paper and scatter the lemon slices across the surface.
- Place the chicken thighs on top of the lemon slices, which will infuse the bottom of the meat with bright citrus notes.
- Brush half of the honey-mustard glaze generously over the chicken.
- Roast for 20 minutes, then remove from the oven and brush with the remaining glaze.
- Return to the oven for another 15-20 minutes. The sugars in the honey will caramelize into a stunning golden-brown lacquer.
- Wait for the glaze to set slightly (about 3 minutes) before transferring to your serving board.
How to season chicken legs?

Why we love this
Seasoning chicken legs is an art form that transforms a simple cut into a flavor-packed experience that tingles the senses. The robust combination of earthy herbs and sharp spices creates a crust that is both aromatic and visually striking with its speckled colors. There’s a playful, hands-on joy in eating a perfectly seasoned drumstick from a board, where the complexity of the rub balances the rich, dark meat. The scent of toasted paprika and dried herbs provides an earthy foundation that makes the whole meal feel grounded and rustic.
Ingredients
- 8 chicken drumsticks
- 2 tablespoons olive oil
- 1 tablespoon paprika
- 1 teaspoon onion powder
- 1 teaspoon dried thyme
- 1/2 teaspoon cayenne pepper (optional)
- 1 teaspoon Kosher salt
How to make it
- Start by drying the chicken legs thoroughly with paper towels so the oil and spices adhere properly.
- Place the legs in a large mixing bowl and drizzle with olive oil, tossing to coat every inch.
- In a separate small bowl, combine all the dry spices. Mixing them first ensures you don’t end up with a ‘hot spot’ of one flavor on a single leg.
- Sprinkle the seasoning over the chicken gradually while tossing them with your hands or tongs.
- Massage the spices into the meat and under the skin where possible for deep flavor penetration.
- Let the seasoned legs sit for at least 20 minutes at room temperature; this allows the salt to penetrate the fibers.
- Roast or grill as desired, but keep the heat at a medium level (around 375°F/190°C) to prevent the dry spices from burning before the meat is cooked through.
How to marinate chicken thighs?

Why we love this
A well-marinated chicken thigh is a masterclass in depth, where acids and aromatics work together to tenderize the meat from the inside out. The process infuses the protein with a brightness that cuts through the natural richness of the dark meat, creating a vibrant flavor profile that dances on the palate. The aroma of garlic, ginger, and citrus zest lingering on the meat as it cooks is nothing short of hypnotic, promising a bite that is as refreshing as it is savory. It’s the secret to making your food board feel curated and thoughtfully prepared.
Ingredients
- 1.5 lbs chicken thighs
- 1/4 cup olive oil
- 3 tablespoons soy sauce
- Zest and juice of 1 lime
- 1 tablespoon grated fresh ginger
- 2 cloves garlic, minced
How to make it
- Whisk the oil, soy sauce, lime juice, zest, ginger, and garlic in a medium bowl or a gallon-sized zip-top bag.
- Trim any excess fat from the chicken thighs but leave them whole to maximize surface area for the marinade.
- Place the chicken in the marinade, ensuring every piece is fully submerged or coated.
- Seal the bag or cover the bowl and refrigerate for at least 2 hours, though 6-8 hours is ideal for the flavors to truly marry.
- Do not marinate for longer than 24 hours, as the acid in the lime juice will begin to break down the proteins too much, resulting in a mushy texture.
- Before cooking, remove the chicken from the fridge and let it sit for 20 minutes to take the chill off.
- Wipe off excess marinade before searing or grilling to prevent flare-ups and allow for better browning.
How to prepare boneless thighs?

Why we love this
Boneless thighs are the versatile workhorses of the food board, offering a uniform shape that is easy to slice and arrange with artistic precision. Without the bone, the meat cooks quickly and evenly, maintaining a supple, buttery texture that is incredibly easy to eat. The lack of bone also allows you to stuff or roll the meat, adding an element of surprise to your board. The subtle, savory scent of seasoned meat cooking quickly over high heat makes this a fast favorite for busy weeknight ‘board nights’.
Ingredients
- 1 lb boneless, skinless chicken thighs
- 1 tablespoon olive oil
- 1 teaspoon Italian seasoning
- Salt and pepper to taste
- Lemon wedges for serving
How to make it
- Lay the boneless thighs flat on a cutting board and trim away any large pockets of fat or gristle.
- If the thighs are of uneven thickness, place them under plastic wrap and gently pound the thicker parts with a meat mallet to ensure even cooking.
- Season both sides with salt, pepper, and Italian seasoning.
- Heat a skillet over medium-high heat with the olive oil.
- Place the thighs in the pan, ‘smooth’ side down first.
- Cook for 5-6 minutes on the first side without moving them to develop a nice crust.
- Flip and cook for another 5 minutes. Because there is no bone to act as an insulator, these cook faster than bone-in varieties.
- Slice into 1-inch strips against the grain before arranging them in a fan shape on your food board.
How to grill tender chicken?

Why we love this
Grilling chicken thighs introduces a primitive, smoky element that is impossible to replicate in an oven. The charred edges provide a bitter-salty contrast to the sweet, juicy meat, creating a multi-dimensional flavor profile that feels like summer in every bite. The sight of those perfect grill marks and the intoxicating scent of woodsmoke and rendered fat make this preparation a total crowd-pleaser. It’s the kind of food that encourages people to linger around the board, enjoying the outdoorsy, charred goodness.
Ingredients
- 6-8 chicken thighs (skin-on for best results)
- 2 tablespoons vegetable oil
- 1 teaspoon smoked sea salt
- 1/2 teaspoon cracked black pepper
- Your favorite BBQ sauce (optional glaze)
How to make it
- Clean your grill grates thoroughly and preheat to medium-high heat (about 400°F).
- Lightly oil the chicken skin to prevent it from sticking to the grates.
- Place the chicken skin-side down on the hot grill. This helps render the fat directly into the flames, creating that classic smoky flavor.
- Grill for 8-10 minutes on the skin side. If flare-ups occur, move the chicken to a cooler part of the grill momentarily.
- Flip the chicken and continue cooking for 8-10 minutes.
- If using BBQ sauce, brush it on only during the last 5 minutes of cooking to prevent the sugars in the sauce from burning.
- Look for an internal temperature of 175°F (80°C); thighs benefit from a slightly higher temp than breasts to break down the darker meat.
- Let the chicken rest on a warm plate for 5 minutes before placing it on your board to ensure the juices redistribute.
How to make perfect thighs?

Why we love this
The ‘perfect’ chicken thigh is a harmonious blend of all the best techniques: a crisp skin, a tender interior, and a flavor profile that is perfectly balanced between salt, fat, and acid. It represents the pinnacle of home cooking—where simple ingredients are treated with respect and precision. The aroma of a perfectly roasted thigh, seasoned with just the right amount of salt and herbs, is a universal signal of a great meal ahead. It’s the piece everyone reaches for first on the board, a testament to its irresistible appeal.
Ingredients
- 4 large bone-in, skin-on chicken thighs
- Kosher salt (plenty of it)
- Freshly cracked black pepper
- 2 sprigs of rosemary
- 1 tablespoon extra virgin olive oil
How to make it
- The secret to perfection starts 24 hours in advance: Salt your chicken thighs liberally and leave them uncovered in the fridge overnight. This ‘dry brines’ the meat and dries out the skin.
- Take the chicken out of the fridge 30 minutes before cooking to bring it to room temperature.
- Preheat your oven to 425°F (218°C).
- Pat the skin one last time with a paper towel, then lightly brush with olive oil.
- Place the thighs in a cold cast-iron skillet, skin-side down, and then turn the burner to medium-high. This gradual heating renders the fat more effectively than a hot pan.
- Once the skin is golden and starting to crisp (about 5-8 minutes), toss the rosemary sprigs into the pan and transfer the whole skillet to the oven.
- Roast for 15-20 minutes until the internal temperature is exactly 175°F.
- Remove from the oven and let the meat rest in the pan for 5 minutes before serving. The result is a level of juicy-crisp perfection that will make your food board legendary.
Conclusion: The Art of the Chicken Board
And there you have it! The secret to a viral food board isn’t about expensive cheeses or rare fruits; it’s about taking a versatile, beloved ingredient like the chicken thigh and showing it some serious love. By mixing and matching these different preparation styles—crispy, seared, grilled, and slow-cooked—you create a tapestry of flavors that invites your guests to explore and enjoy. So, grab your biggest wooden board, whip up a few of these recipes, and get ready for the ‘oohs’ and ‘aahs’ that are sure to follow. Happy hosting!