
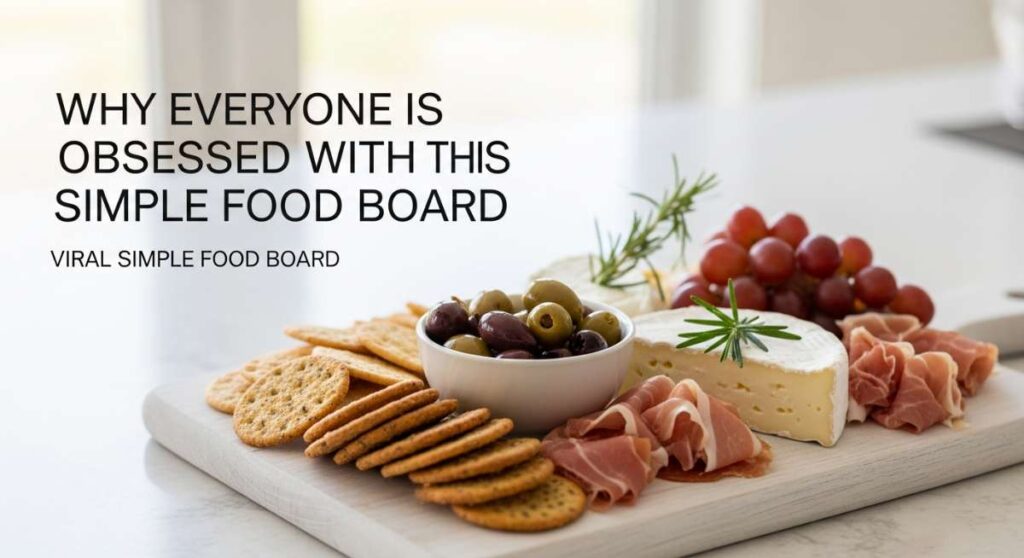
There is something inherently magical about gathering friends and family around a large, beautifully styled wooden board piled high with home-cooked favorites. In a world that often feels rushed and digital, the viral ‘Simple Food Board’ movement has reclaimed the dining table, turning dinner into an interactive, slow-burning experience of shared stories and even better bites. It’s not just about the food; it’s about the warmth of the wood, the clinking of glasses, and the collective sigh of relief when that first perfect morsel hits your tongue.
I remember the first time I set out one of these boards; the room transformed from a quiet gathering into a vibrant hub of laughter and passing platters. There is no pretension here—just the honest, rustic beauty of well-prepared ingredients and the joy of seeing your loved ones dive into a feast that looks as good as it tastes. Whether you are hosting a weekend brunch or a cozy weeknight dinner, these techniques will help you master the components of the ultimate viral food board.
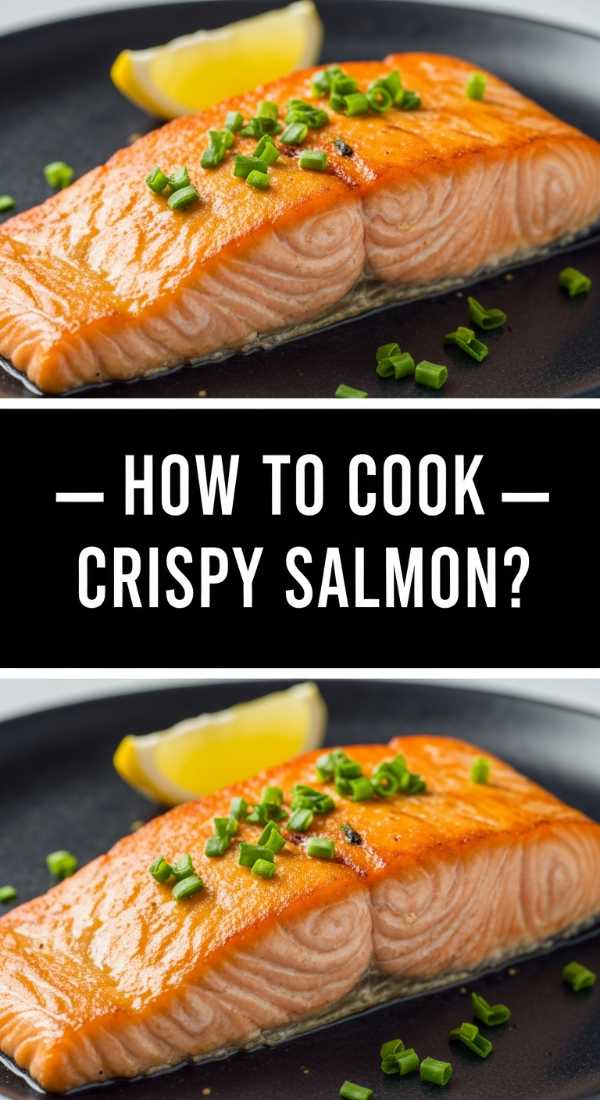
How to cook crispy salmon?
Why we love this
There is something incredibly satisfying about the sound of a fork breaking through the perfectly seared, golden-brown skin of a salmon fillet to reveal the tender, pink flakes beneath. As the buttery richness of the fish melts on your tongue, the subtle notes of lemon and fresh herbs dance across your palate, creating a symphony of flavors that feels both indulgent and light. The contrast between the crunch and the silkiness is what makes this a centerpiece of our board, filling the kitchen with an irresistible aroma that calls everyone to the table before the plates are even set.
Ingredients
- 4 (6-ounce) salmon fillets, skin-on
- 2 tablespoons high-smoke-point oil (avocado or grapeseed)
- Flaky sea salt and freshly cracked black pepper
- 2 tablespoons unsalted butter
- Fresh lemon wedges and dill for garnish
How to make it
- Begin by removing the salmon from the refrigerator 15 minutes before cooking to bring it to room temperature, ensuring even cooking throughout the fillet.
- Pat the skin of the salmon extremely dry using paper towels; any residual moisture will steam the fish rather than sear it, preventing that coveted crunch.
- Season the skin side generously with flaky sea salt. Heat a heavy-bottomed stainless steel or cast-iron skillet over medium-high heat until the oil is shimmering but not smoking.
- Place the fillets skin-side down in the pan, pressing down firmly with a spatula for 10 seconds to ensure the skin makes full contact with the hot surface and doesn’t curl.
- Reduce the heat to medium and let the salmon cook undisturbed for about 5–6 minutes. You will see the color of the flesh change from translucent to opaque from the bottom up; when it is 75% cooked through, it is time to flip.
- Flip the fillets gently and add the butter to the pan, letting it foam. Cook for only 1 more minute while spooning the melted butter over the skin to add richness. Remove immediately for a perfect medium-rare center.
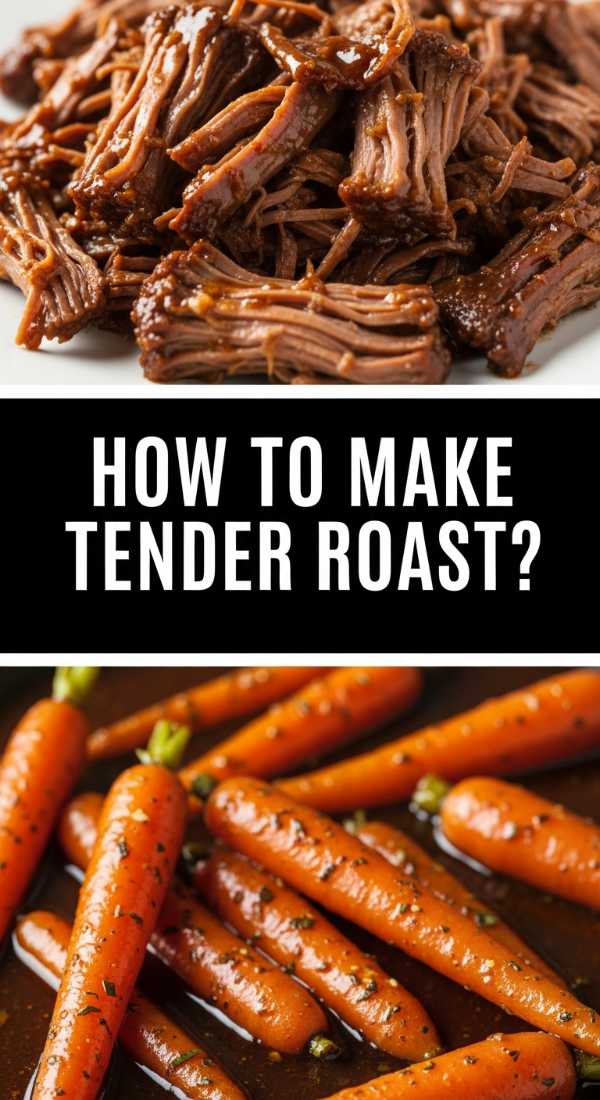
How to make tender roast?
Why we love this
The aroma of a slow-roasting beef joint is the universal scent of comfort, filling every corner of the home with a deep, savory promise of a hearty meal. When executed correctly, the meat becomes so tender it practically dissolves, releasing juices that are concentrated and rich with the essence of rosemary and garlic. It is the ultimate anchor for any food board, offering a rustic elegance that encourages guests to carve off thick, succulent slices and pass them around with enthusiasm.
Ingredients
- 3-4 lb chuck roast or top round
- 3 tablespoons olive oil
- 1 large onion, quartered
- 4 cloves garlic, smashed
- 2 cups beef bone broth
- Fresh sprigs of rosemary and thyme
- Kosher salt and black pepper
How to make it
- Preheat your oven to 300°F (150°C). Low and slow is the secret to breaking down the tough connective tissues in the roast to achieve that melt-in-the-mouth texture.
- Generously season all sides of the meat with salt and pepper. In a large Dutch oven, heat olive oil over medium-high heat until it begins to ripple.
- Sear the meat on all sides until a deep, dark brown crust forms—this ‘Maillard reaction’ is crucial for developing the foundational flavor of the dish. This should take about 3-4 minutes per side.
- Remove the meat temporarily and toss in the onions and garlic, stirring for 2 minutes until fragrant and slightly softened.
- Deglaze the pot by pouring in the beef broth, scraping up all the browned bits from the bottom with a wooden spoon. Return the roast to the pot and tuck the herbs around it.
- Cover with a tight-fitting lid and transfer to the oven. Roast for 3 to 4 hours. The visual cue for doneness is when the meat easily pulls apart with two forks without any resistance. Let it rest for 20 minutes before serving on your board.
How to grill perfect pizza?

Why we love this
Grilling pizza adds a sophisticated, smoky depth of flavor that a standard indoor oven simply cannot replicate, mimicking the intense heat of a professional wood-fired brick oven. The dough develops beautiful charred ‘leopard spots’ on the bottom while remaining airy and chewy in the center, providing a perfect canvas for bubbling mozzarella and vibrant basil. It brings a festive, outdoor energy to your food board, inviting guests to watch the process and enjoy the charred, yeasty scent of fresh bread hitting the grates.
Ingredients
- 1 lb pizza dough (room temperature)
- 1/2 cup San Marzano tomato sauce
- 8 oz fresh mozzarella, sliced
- Extra virgin olive oil for brushing
- Fresh basil leaves and red pepper flakes
How to make it
- Preheat your grill to its highest setting (at least 500°F). Ensure the grates are meticulously cleaned and lightly oiled to prevent the dough from sticking.
- Stretch your dough out on a floured surface into a thin circle or oval. Don’t worry about perfection; a rustic shape looks better on a board.
- Brush one side of the dough lightly with olive oil. Place the oiled side directly onto the hot grill grates. Close the lid and cook for 1-2 minutes until the bottom is charred and the top starts to bubble.
- Flip the dough using long tongs. Quickly spread a thin layer of sauce and arrange the mozzarella slices on the cooked side.
- Close the lid again and grill for another 2-3 minutes. You are looking for the cheese to be fully melted and the bottom of the crust to be crisp and firm.
- Slide the pizza onto a cutting board, garnish with fresh basil and a drizzle of oil, and let it sit for two minutes before slicing so the cheese sets perfectly.
How to bake apple pie?

Why we love this
A warm apple pie is the crown jewel of any dessert-focused food board, offering a nostalgic sweetness that reminds everyone of simpler times. The scent of cinnamon, nutmeg, and caramelized sugar wafting from the oven creates an atmosphere of pure cozy bliss. With every bite, you get the contrast of the flaky, buttery crust against the soft, spiced apples, creating a textural experience that is both comforting and sophisticated, especially when served with a dollop of cool cream.
Ingredients
- 6-7 Granny Smith apples, peeled and sliced
- 3/4 cup granulated sugar
- 2 tablespoons cinnamon
- 1/2 teaspoon nutmeg
- Double crust pie dough (store-bought or homemade)
- 1 egg (for egg wash)
How to make it
- Preheat your oven to 425°F (220°C). Toss your sliced apples with sugar, cinnamon, and nutmeg in a large bowl, ensuring every slice is evenly coated in the spice mixture.
- Roll out your bottom crust and fit it into a 9-inch pie plate. Fill the crust with the apple mixture, mounding them slightly in the center as they will shrink during baking.
- Place the second crust over the top. You can do a solid top with vents or a lattice for a more ‘viral’ aesthetic. Crimp the edges tightly to seal in the juices.
- Brush the top of the crust with a beaten egg wash and sprinkle with a little extra sugar. This provides that professional, golden-brown sheen and a slight crunch.
- Bake at 425°F for the first 15 minutes to set the crust, then reduce the heat to 375°F (190°C) and bake for another 40-45 minutes.
- The pie is ready when the crust is deep golden and the fruit juices are bubbling through the vents. Crucially, let the pie cool for at least 2 hours before placing it on your board to ensure the filling sets into a sliceable consistency.
How to make hearty chowder?

Why we love this
There is nothing quite like a thick, velvety chowder to soothe the soul on a chilly evening, making it a wonderful addition to a communal food board when served in small, rustic crocks. The creaminess of the broth, enriched with the smoky undertones of bacon and the earthiness of tender potatoes, creates a flavor profile that is deeply satisfying and complex. It is a dish that invites dipping—think crusty sourdough bread soaking up every last drop of that savory, oceanic or corn-based goodness.
Ingredients
- 4 strips of thick-cut bacon, diced
- 1 onion, finely chopped
- 2 cups chicken or clam broth
- 2 large potatoes, peeled and cubed
- 1 cup heavy cream
- Fresh chives and black pepper for garnish
How to make it
- In a large heavy pot, cook the diced bacon over medium heat until it is crispy and the fat has rendered out. Remove the bacon bits with a slotted spoon and set aside for garnishing.
- Sauté the onions in the remaining bacon fat until they are translucent and soft, which should take about 5 minutes. This builds a rich flavor base.
- Add the cubed potatoes and the broth. Bring the mixture to a gentle boil, then reduce the heat to low. Simmer for about 15-20 minutes until the potatoes are fork-tender.
- For a thicker consistency, use a potato masher to lightly crush a few of the potato cubes directly in the pot; this releases natural starches to thicken the broth without needing flour.
- Stir in the heavy cream and heat through gently—do not let it come to a hard boil at this stage or the cream may break and lose its silky texture.
- Taste and adjust seasoning with salt and plenty of black pepper. Serve in small bowls on your board, topped with the reserved crispy bacon and fresh chives.
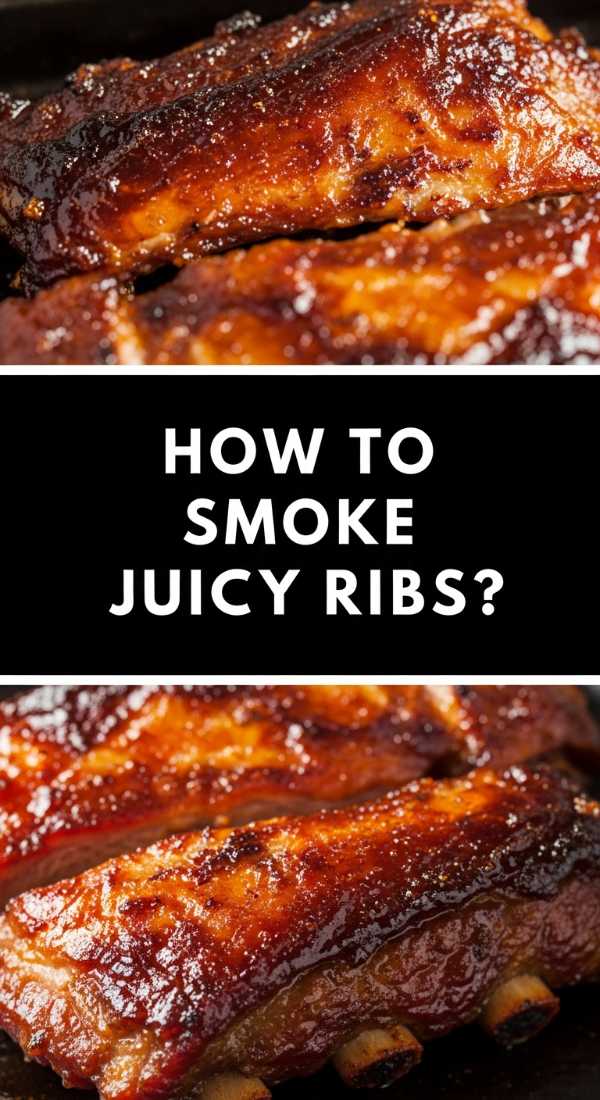
How to smoke juicy ribs?
Why we love this
Smoked ribs are the ultimate labor of love, offering a deep, primal satisfaction that only comes from hours of slow-cooking over a low flame. When the meat pulls away from the bone with the slightest tug, revealing a pink smoke ring and a sticky, caramelized glaze, you know you’ve achieved barbecue perfection. They add a rugged, impressive visual to your food board, with the sweet and savory aroma of hickory or applewood smoke drawing everyone in for a messy, delicious hands-on experience.
Ingredients
- 2 racks of St. Louis style ribs
- 1/2 cup dry spice rub (paprika, brown sugar, garlic powder)
- 1 cup high-quality BBQ sauce
- Apple juice in a spray bottle
How to make it
- Prepare your smoker to a steady temperature of 225°F (107°C) using your choice of hardwood. Remove the thin membrane (silverskin) from the back of the ribs to ensure they are tender.
- Apply your dry rub generously to all sides of the ribs, pressing the spices into the meat. Let them sit for 30 minutes at room temperature before placing them on the smoker.
- Place the ribs bone-side down on the smoker. Use the ‘3-2-1 method’: Smoke them uncovered for 3 hours, spritzing with apple juice every hour to keep the surface moist.
- Wrap the ribs tightly in heavy-duty aluminum foil with a splash of apple juice or a few pads of butter inside. Place them back on the smoker for 2 hours to steam and tenderize.
- Carefully unwrap the ribs—they should be very flexible now. Brush them with your favorite BBQ sauce and smoke for one final hour uncovered to let the sauce ‘set’ and caramelize into a sticky lacquer.
- Let the ribs rest for 10 minutes before slicing them into individual bones to display across your board.
How to saute garlic shrimp?
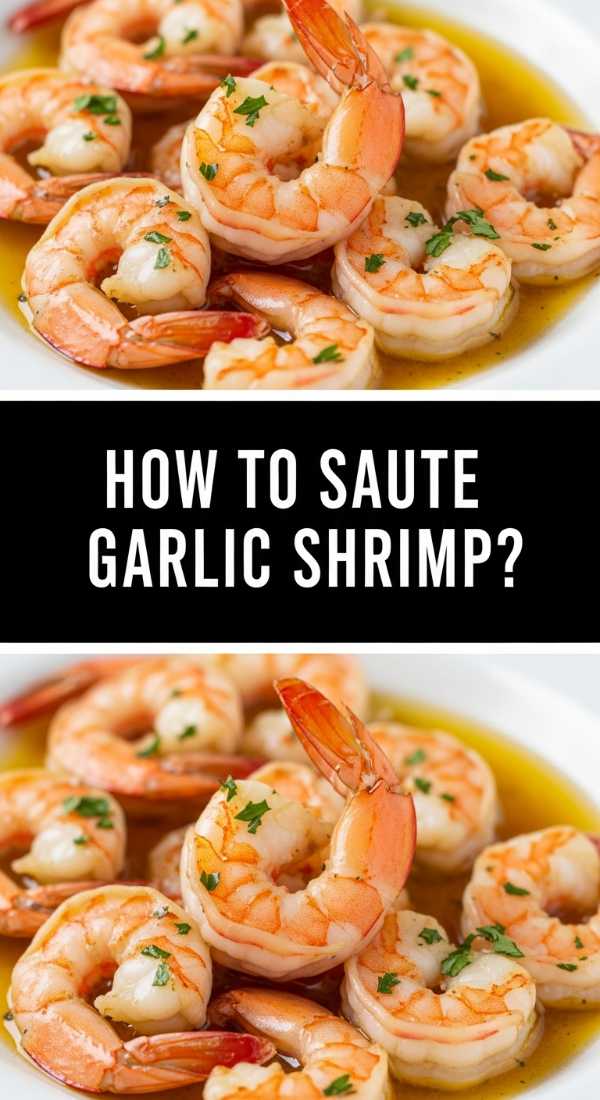
Why we love this
Garlic shrimp is the ultimate quick-fix luxury, bringing a burst of bright, Mediterranean flavor to your board in just minutes. The sight of plump, pink shrimp shimmering in a pool of golden garlic butter is enough to make anyone’s mouth water, while the sharp aroma of toasted garlic and fresh lemon zest awakens the senses. It’s a light yet punchy dish that balances the heavier meats on a board, offering a succulent, snap-tender texture that guests will keep reaching for.
Ingredients
- 1 lb large shrimp, peeled and deveined
- 4 cloves garlic, thinly sliced
- 3 tablespoons unsalted butter
- 1/2 teaspoon red pepper flakes
- Fresh parsley and lemon juice
How to make it
- Ensure your shrimp are completely dry before cooking by patting them with paper towels. Season them lightly with salt.
- Heat a large skillet over medium-high heat and add a tablespoon of oil along with the butter. The oil prevents the butter from burning too quickly.
- Once the butter is foaming, add the garlic slices and red pepper flakes. Cook for about 1 minute, just until the garlic is fragrant and turns a very pale golden brown—do not let it burn or it will turn bitter.
- Add the shrimp in a single layer. Do not crowd the pan; cook in batches if necessary. Let them sear undisturbed for 2 minutes until the bottoms turn pink and slightly charred.
- Flip the shrimp and cook for another 1-2 minutes. The visual cue for perfect doneness is when the shrimp form a ‘C’ shape; if they curl into an ‘O’, they are overcooked.
- Turn off the heat and toss in the fresh parsley and a squeeze of lemon juice. The residual heat will finish the cooking while creating a bright, emulsified sauce.
How to slow cook cobbler?
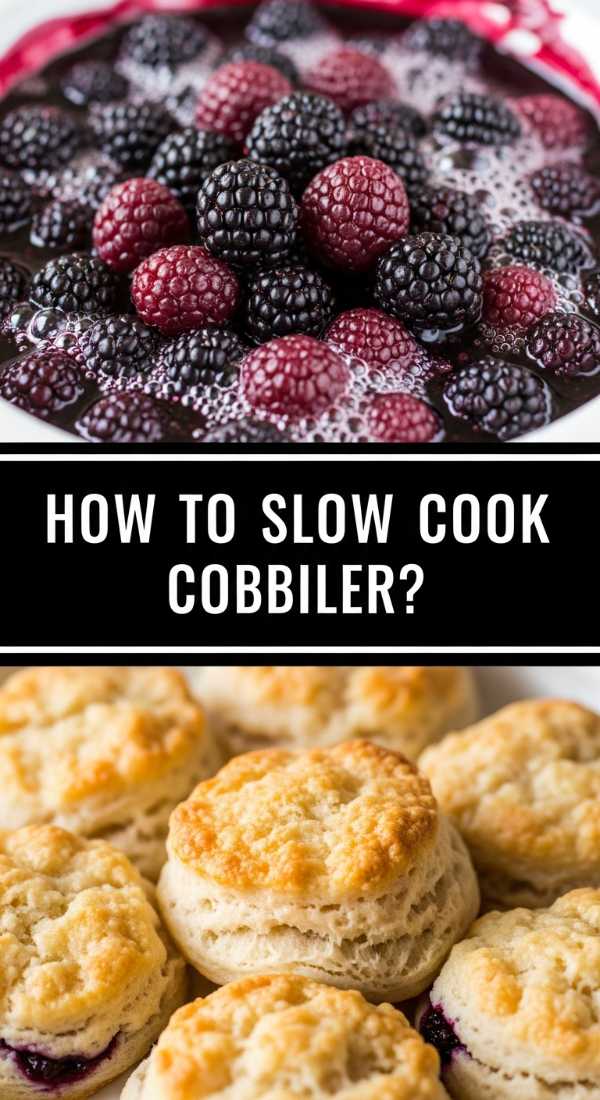
Why we love this
The slow cooker isn’t just for savory roasts—it is a secret weapon for creating a fruit cobbler that is impossibly moist and infused with deep flavor. As the fruit breaks down over several hours, it creates a thick, syrupy jam that bubbles up through the soft, cake-like topping. This dish brings a rustic, effortless charm to your food board, allowing you to serve a warm, comforting dessert without spending your entire evening in the kitchen, filling the air with the scent of cooked berries and sweet vanilla.
Ingredients
- 4 cups fresh or frozen berries (blueberries, blackberries, raspberries)
- 1/2 cup granulated sugar
- 1 box yellow cake mix
- 1/2 cup melted butter
- 1 teaspoon vanilla extract
How to make it
- Grease the inside of your slow cooker with butter or non-stick spray. Layer the fruit at the bottom and sprinkle with the granulated sugar and vanilla extract.
- In a separate bowl, stir the dry cake mix together with the melted butter until it forms a crumbly, sandy texture.
- Sprinkle the cake mix crumble evenly over the top of the fruit. Do not stir the layers; keeping the topping on top allows it to steam and bake into a tender crust.
- Place a double layer of paper towels over the top of the slow cooker before putting the lid on. This catches any condensation so the topping stays fluffy rather than getting soggy.
- Cook on High for 2 to 3 hours or on Low for 4 to 5 hours. You will know it is done when the fruit juices are bubbling up the sides and the topping is set and slightly golden.
- Serve warm directly from the pot or scoop into small jars to place around the edges of your board.
How to make creamy pasta?

Why we love this
A pile of glossy, cream-coated pasta is the ultimate crowd-pleaser, offering a luxurious mouthfeel that feels like a warm hug in bowl form. The way a well-emulsified sauce clings to every ridge of the pasta ensures that each bite is a perfect balance of salt, fat, and starch. Whether you’re using sharp parmesan or a touch of heavy cream, the result is an elegant, comforting dish that provides a neutral yet decadent base for the other bold flavors on your food board.
Ingredients
- 12 oz long pasta (fettuccine or linguine)
- 1 cup heavy cream
- 1 cup freshly grated Parmesan cheese
- 2 tablespoons butter
- 1/2 cup reserved pasta water
- Salt and cracked black pepper
How to make it
- Boil your pasta in a large pot of heavily salted water. Aim for ‘al dente’—about 2 minutes less than the package instructions—as the pasta will finish cooking in the sauce.
- Crucially, before draining, reserve at least 1 cup of the starchy pasta water. This is the liquid gold that helps the sauce bind to the noodles.
- In a wide skillet, melt the butter over medium heat and add the heavy cream. Let it come to a gentle simmer for about 3 minutes until it slightly thickens.
- Reduce the heat to low and whisk in the Parmesan cheese gradually, stirring constantly to prevent clumps from forming.
- Add the drained pasta directly into the sauce. Pour in half of the reserved pasta water and toss vigorously with tongs. The starch in the water and the fat in the cheese will emulsify into a glossy, smooth coating.
- If the sauce is too thick, add more pasta water a tablespoon at a time. Season with plenty of black pepper and serve immediately while the sauce is at its creamiest.
How to prep easy tacos?

Why we love this
Tacos are the life of the party on any food board, offering a customizable, vibrant explosion of colors and textures. There is something so joyful about the ‘build-your-own’ aspect, where guests can pile charred tortillas high with seasoned meats, crunchy radishes, and creamy avocado. The combination of heat from the spices, acidity from the lime, and the freshness of the cilantro creates a balanced bite that keeps the palate excited and the conversation flowing.
Ingredients
- 1 lb ground beef or shredded chicken
- 1 packet taco seasoning (or cumin, chili powder, and garlic salt)
- Small corn or flour tortillas
- Toppings: Shredded cabbage, pickled onions, lime wedges, cotija cheese
How to make it
- Brown your protein of choice in a large skillet over medium-high heat. Drain any excess fat to ensure the tacos aren’t greasy.
- Add the spices and a splash of water, simmering for 5 minutes until the liquid has evaporated and the meat is deeply seasoned and moist.
- The secret to great tacos is in the tortillas: Never serve them cold. Char them directly over a gas flame for 10 seconds per side or in a dry cast-iron skillet until they have toasted brown spots and become pliable.
- Keep the tortillas warm by wrapping them in a clean kitchen towel until you are ready to assemble the board.
- Prep your ‘cold’ ingredients: Finely shred the cabbage, slice the limes into wedges, and crumble the cheese. Place these in small, colorful bowls.
- Layout the components on your board in ‘stations’—meat in the center, surrounded by the warm tortillas and the bowls of toppings, allowing guests to customize their perfect taco.
The Joy of the Shared Board
Mastering these simple yet effective cooking techniques is the key to creating a viral-worthy food board that actually tastes as good as it looks. It’s about taking the time to get that perfect sear on the salmon or the ideal fluffiness in your cobbler, then bringing it all together in a celebration of home cooking. So, clear off your biggest wooden board, pour some wine, and invite your favorite people over. The best meals aren’t just eaten; they are experienced together.