
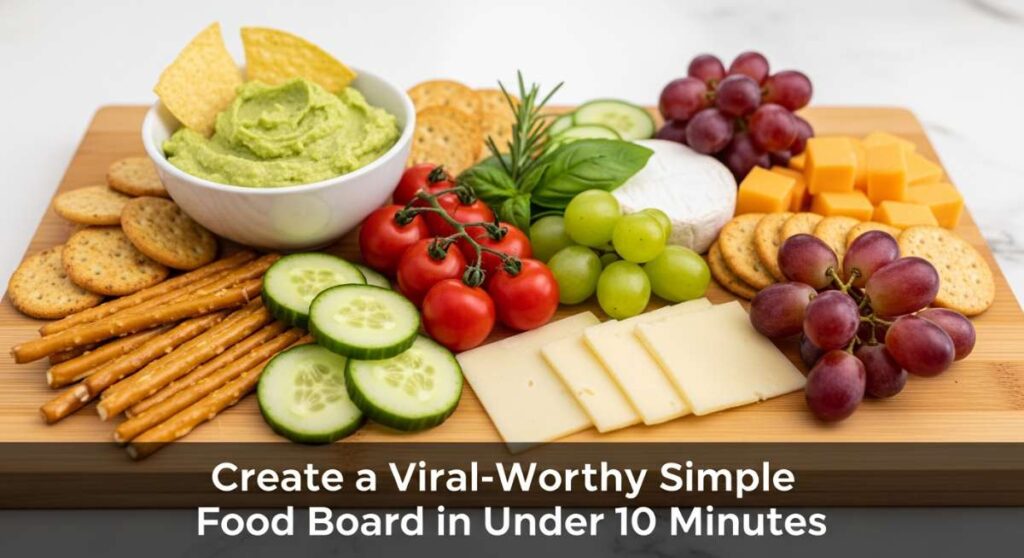
Create a Viral-Worthy Simple Food Board in Under 10 Minutes
There is something almost magical about the way food brings us together, isn’t there? I remember the first time I hosted a summer gathering; I was a nervous wreck, worrying if the snacks were too simple or the presentation too plain. But then I realized that the most viral-worthy moments aren’t about complicated molecular gastronomy—they are about vibrant colors, communal sharing, and those classic, comforting flavors that make everyone reach for a second helping. Creating a ‘Food Board’ is more than just a trend; it’s a way to tell a story through textures and tastes that invite your guests to linger a little longer around the table.
Today, I’m sharing my secrets for building a spread that looks like it stepped right out of a high-end lifestyle magazine but actually comes together with minimal stress. Whether you’re looking for that perfectly creamy dip to anchor your board or a zesty salad to add a pop of freshness, these recipes are the building blocks of a memorable afternoon. Let’s dive into these ten crowd-pleasers that will turn your next get-together into a viral sensation!
How to make the creamiest rotel dip

Why we love this
This dip is the ultimate soul-soothing comfort food, offering a velvety, molten texture that clings perfectly to every single tortilla chip. As the warmth of the melted cheese hits your palate, it’s immediately followed by the bright, acidic burst of diced tomatoes and the subtle, smoky heat of green chiles. The aroma is nostalgic and inviting, filling the room with the scent of savory spices and rich dairy that promises a party in every bite. It’s the kind of dish that disappears in minutes because it strikes that perfect balance between decadent creaminess and a zesty kick.
Ingredients
- 16 oz processed cheese (like Velveeta), cubed
- 1 can (10 oz) RoTel diced tomatoes and green chilies, undrained
- 1/2 lb ground sausage or beef (optional)
- 1/2 tsp chili powder
- 1/4 cup heavy cream (for extra silkiness)
- Fresh cilantro for garnish
How to make it
- If using meat, start by browning it in a skillet over medium-high heat until no pink remains, breaking it into very small crumbles for an even distribution; drain the excess fat thoroughly.
- Lower your heat to medium-low to prevent the cheese from scorching or becoming grainy; add the cubed cheese and the entire can of RoTel (liquid included) to a heavy-bottomed pot or a slow cooker.
- Stir constantly with a silicone spatula, using a folding motion to ensure the cheese melts evenly and doesn’t stick to the bottom of the pan.
- Once the cheese is about 80% melted, whisk in the heavy cream and chili powder; this creates a professional, glossy finish that stays dippable even as it cools slightly.
- Continue heating until the mixture is completely smooth and bubbles gently at the edges; if using a slow cooker, keep it on the ‘warm’ setting to maintain that perfect silkiness throughout your event.
How to bake a fresh strawberry pie

Why we love this
Nothing says summer quite like a ruby-red strawberry pie, glistening under a delicate glaze that captures the very essence of sun-ripened fruit. The texture is a masterful contrast between the flaky, buttery shatter of the golden crust and the soft, jammy heart of the berries that yield gently to the fork. Each bite is an explosion of natural sweetness, heightened by a hint of lemon zest that makes the flavors sing against the backdrop of cool whipped cream. It smells like a warm afternoon in a berry patch, sweet and floral, evoking memories of childhood picnics and garden parties.
Ingredients
- 1 pre-baked 9-inch pie crust
- 6 cups fresh strawberries, hulled and halved
- 1 cup granulated sugar
- 3 tbsp cornstarch
- 1/2 cup water
- 1 tsp lemon juice
- Whipped cream for serving
How to make it
- Begin by selecting the firmest, brightest berries; set aside half of them (the prettiest ones) to remain whole or halved in the crust, and roughly mash the other half in a medium saucepan.
- In a small bowl, whisk the cornstarch into the water until a smooth slurry forms with no lumps; pour this into the saucepan with the mashed berries, sugar, and lemon juice.
- Cook the mixture over medium heat, stirring constantly with a wooden spoon; watch for the color to transition from a cloudy pink to a deep, translucent crimson, which indicates the cornstarch has fully activated and thickened.
- Once the glaze is thick enough to coat the back of a spoon (usually after 2-3 minutes of boiling), remove from heat and let it cool to room temperature so it doesn’t wilt the fresh berries.
- Arrange the remaining fresh berries decoratively in your pre-baked crust, pour the cooled glaze evenly over the top, and chill in the refrigerator for at least 3 hours to allow the pie to set firmly before slicing.
How to toss a zesty pasta salad
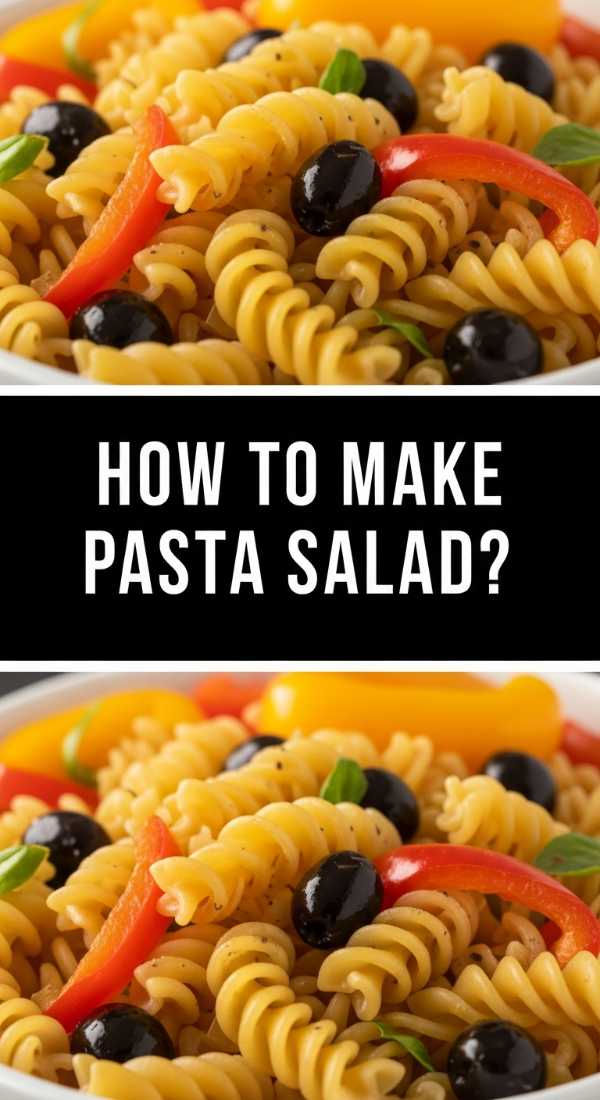
Why we love this
This pasta salad is a symphony of textures and vibrant colors, making it the visual centerpiece of any food board. The al dente pasta provides a satisfying chew that acts as the perfect canvas for the crisp snap of bell peppers, the brine of kalamata olives, and the creamy crumble of feta cheese. Every forkful is coated in a sharp, herbaceous vinaigrette that awakens the senses with its tangy zip and garlic undertones. It’s light yet filling, offering a refreshing coolness that makes it an essential companion for grilled meats and sunny afternoons.
Ingredients
- 1 lb rotini or fusilli pasta
- 1 cup cherry tomatoes, halved
- 1 bell pepper, diced
- 1/2 red onion, finely minced
- 1/2 cup sliced black or kalamata olives
- 4 oz feta cheese, crumbled
- 1/2 cup Italian dressing (homemade or high-quality store-bought)
- Fresh parsley and dried oregano
How to make it
- Boil your pasta in heavily salted water (it should taste like the sea) until it is just past al dente; overcooking slightly helps the pasta absorb more dressing as it cools, but avoid making it mushy.
- Immediately drain the pasta and rinse it under cold running water to stop the cooking process and remove excess starch, which prevents the noodles from sticking together.
- In a very large mixing bowl, combine the cooled pasta with the diced vegetables and olives, ensuring everything is chopped to a uniform size for the perfect ‘everything’ bite.
- Drizzle half of the dressing over the mixture and toss gently with large spoons; let it sit for 20 minutes so the pasta can ‘drink’ the flavors.
- Just before serving, add the remaining dressing, the crumbled feta, and fresh herbs; tossing at the end preserves the texture of the cheese and ensures the salad looks glossy and fresh.
How to prepare a fresh cucumber salad
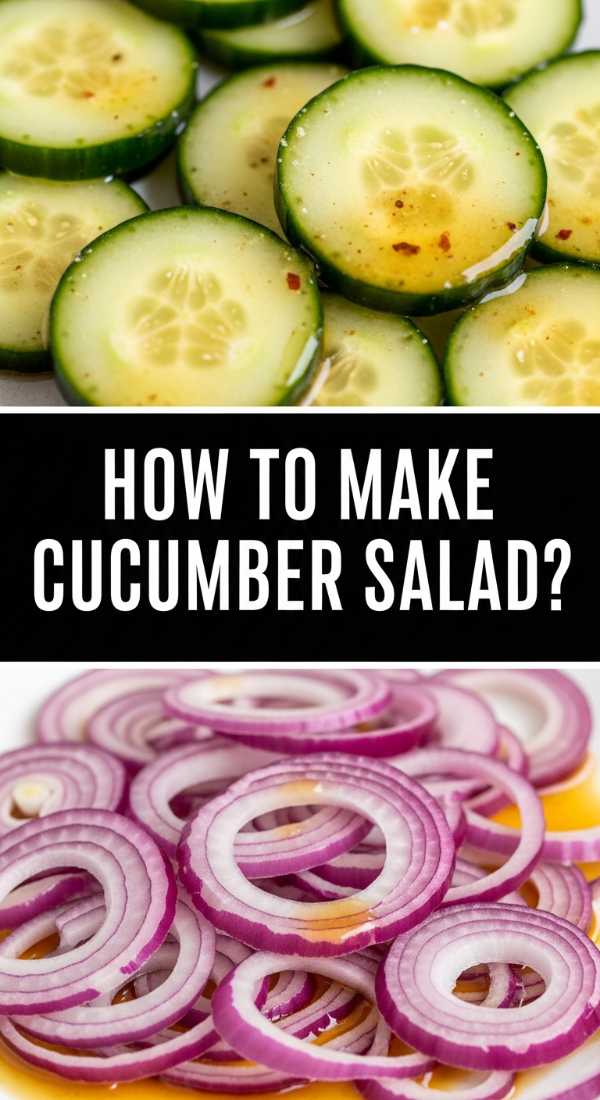
Why we love this
The sheer simplicity of a fresh cucumber salad is its greatest strength, offering a clean, hydrating crunch that cuts through the richness of any spread. The cucumbers are sliced paper-thin, allowing them to soak up a delicate brine of vinegar and sugar that creates a sophisticated sweet-and-sour profile. The addition of thin red onion slivers adds a subtle bite, while fresh dill provides a fragrant, earthy top note that lingers beautifully. It’s incredibly light and refreshing, acting as a palate cleanser that feels like a cool breeze on a humid day.
Ingredients
- 2 large English cucumbers, thinly sliced
- 1/2 red onion, thinly sliced
- 1/2 cup white vinegar or apple cider vinegar
- 2 tbsp sugar
- 1 tsp salt
- 2 tbsp fresh dill, chopped
- 1/2 tsp black pepper
How to make it
- Use a mandoline slicer set to the thinnest setting to achieve translucent cucumber rounds; this maximum surface area allows for the fastest marination.
- Place the sliced cucumbers in a colander, sprinkle with the salt, and let them sit for 10 minutes to draw out excess moisture; squeeze them gently to ensure the finished salad isn’t watery.
- In a separate glass bowl, whisk the vinegar and sugar together until the sugar crystals are completely dissolved, creating a clear, sharp pickling liquid.
- Toss the drained cucumbers and red onions into the vinegar mixture, ensuring every slice is submerged or well-coated.
- Fold in the fresh dill and black pepper, then refrigerate for at least 30 minutes; the cucumbers will lose some of their opacity and take on a bright, pickled flavor that is incredibly crisp.
How to grill juicy summer chicken

Why we love this
There is nothing quite like the aroma of chicken hitting a hot grill, creating those iconic charred marks that promise a smoky, caramelized depth of flavor. When done right, the exterior is crisp and seasoned to perfection, while the inside remains incredibly tender and bursting with savory juices. The secret lies in a balanced marinade that infuses the meat with citrus and herbs, ensuring every bite is succulent rather than dry. It’s a protein staple that feels both rustic and refined, making it the perfect anchor for a hearty food board.
Ingredients
- 1.5 lbs chicken breasts or thighs
- 1/4 cup olive oil
- 3 cloves garlic, minced
- Juice of 1 lemon
- 1 tsp smoked paprika
- Salt and pepper to taste
- Fresh rosemary or thyme
How to make it
- Pound the chicken breasts to an even thickness (about 1/2 inch) using a meat mallet; this ensures that the thinner edges don’t dry out before the center is cooked through.
- Marinate the chicken in the olive oil, lemon, garlic, and spices for at least 30 minutes, but no longer than 4 hours (the acid in the lemon will start to ‘cook’ the texture if left too long).
- Preheat your grill to medium-high heat (about 400°F) and oil the grates thoroughly to prevent sticking, which can tear the beautiful sear off the meat.
- Place the chicken on the grill and leave it undisturbed for 5-6 minutes; look for the edges to turn opaque and for the meat to release easily from the grate before flipping.
- Flip once and grill for another 5 minutes, or until the internal temperature reaches exactly 165°F; remove immediately and let the meat rest for 5-8 minutes under foil to allow the juices to redistribute.
How to mix a virgin pina colada

Why we love this
This mocktail is a tropical vacation in a glass, offering a thick, frothy consistency that feels indulgent without the need for alcohol. The creamy richness of coconut milk blends seamlessly with the bright, acidic sweetness of pineapple, creating a smooth flavor profile that is both cooling and satisfying. As you sip, the icy texture melts away into a velvety finish, leaving behind hints of vanilla and sun-drenched fruit. Garnished with a maraschino cherry, it adds a playful, festive vibe to your food board that guests of all ages will absolutely adore.
Ingredients
- 1 cup frozen pineapple chunks
- 1/2 cup pineapple juice
- 1/2 cup cream of coconut (sweetened)
- 1 cup ice cubes
- Squeeze of lime juice
- Fresh pineapple wedges for garnish
How to make it
- Place your blender jar in the freezer for 10 minutes before starting; a chilled jar prevents the friction of the blades from melting the ice too quickly.
- Add the frozen pineapple chunks first, followed by the pineapple juice and the cream of coconut; using frozen fruit instead of just ice ensures a more concentrated flavor that won’t get watered down.
- Add the lime juice, which acts as a flavor brightener to cut through the heavy sweetness of the coconut cream.
- Blend on high speed for at least 45-60 seconds; you are looking for a perfectly homogenous, ‘snow-like’ texture without any stray ice crystals.
- Pour into chilled glasses and serve immediately, topping with a wedge of pineapple or a cherry to complete the viral aesthetic.
How to utilize sourdough discard easily

Why we love this
Sourdough discard is the secret weapon of the home baker, offering a complex, tangy depth that elevates simple batters into something truly artisanal. When transformed into crackers or pancakes, it provides a unique fermentation snap and a chewy-yet-crisp texture that you just can’t find in store-bought options. The aroma is yeast-forward and slightly sour, which pairs exceptionally well with rich cheeses or sweet jams on a food board. It’s a sustainable way to bring a touch of ‘slow living’ to your table, proving that even leftovers can be the star of the show.
Ingredients
- 1 cup sourdough discard (unfed)
- 2 tbsp melted butter or olive oil
- 1/2 tsp salt
- 1 tsp dried herbs (rosemary or za’atar)
- Flaky sea salt for topping
How to make it
- Preheat your oven to 325°F and line a large baking sheet with parchment paper; the low temp allows the discard to dehydrate and crisp up without burning the delicate flour.
- In a medium bowl, whisk together the discard, oil, salt, and herbs until the mixture is the consistency of a thick pancake batter.
- Pour the mixture onto the parchment paper and use an offset spatula to spread it into a paper-thin, even layer; the thinner you go, the crispier the final cracker will be.
- Bake for 10 minutes, then remove briefly to score the surface into squares or diamonds using a pizza cutter; this ensures they break into perfect shapes later.
- Return to the oven for another 15-20 minutes until golden brown and firm to the touch; let them cool completely on the pan to reach maximum crunchiness.
How to create a watermelon feta salad
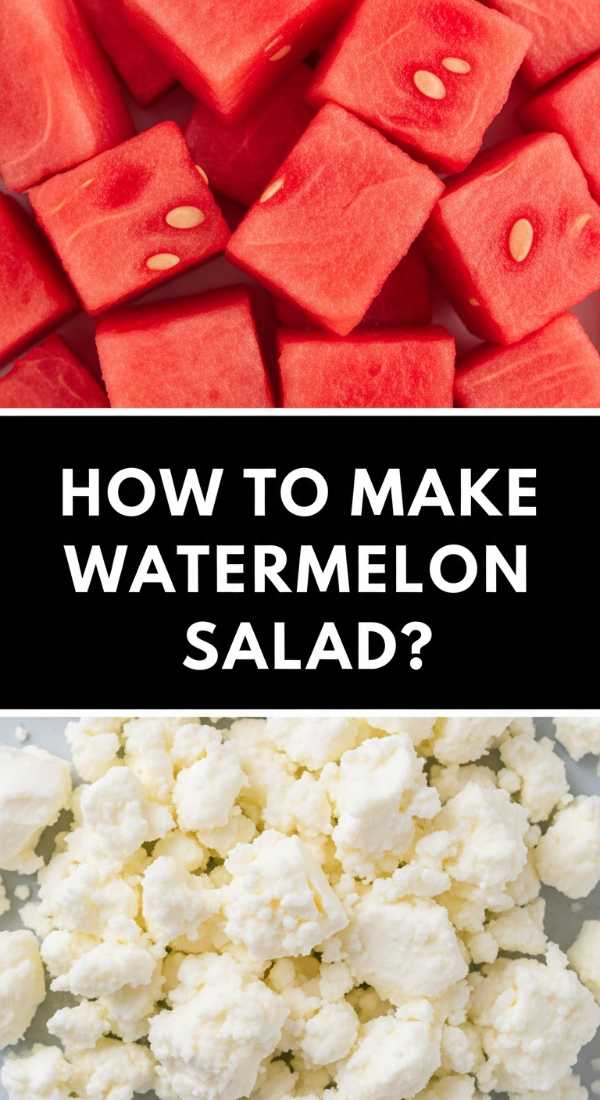
Why we love this
This salad is the ultimate study in flavor contrasts: the icy, aqueous sweetness of watermelon meets the salty, pungent creaminess of Greek feta. It’s a daring combination that works beautifully, especially when topped with the cooling, peppery notes of fresh mint leaves. Each bite offers a satisfying ‘crunch’ followed by a melt-in-your-mouth finish that is incredibly revitalizing on a hot day. The vibrant pink and white hues make it an instant eye-catcher, providing a modern, sophisticated edge to your summer food spread.
Ingredients
- 4 cups seedless watermelon, cubed
- 1/2 cup feta cheese, cubed or crumbled
- 1/4 cup fresh mint leaves, torn
- 2 tbsp extra virgin olive oil
- 1 tbsp balsamic glaze (optional)
- A pinch of sea salt
How to make it
- Chill your watermelon in the refrigerator for at least 4 hours before cutting; the colder the fruit, the better the contrast with the room-temperature cheese.
- Cut the watermelon into uniform 1-inch cubes, discarding any excess juice that accumulates on the cutting board to keep the salad from becoming soggy.
- Arrange the watermelon cubes in a shallow bowl or on a platter in a single layer; this prevents the weight of the fruit from crushing the delicate feta.
- Sprinkle the feta and mint leaves evenly over the top; tearing the mint instead of chopping it prevents the leaves from bruising and keeps them looking bright green.
- Drizzle with the high-quality olive oil and a whisper of sea salt just seconds before serving to enhance the natural sugars of the melon without making the fruit weep.
How to roast perfect grilled asparagus
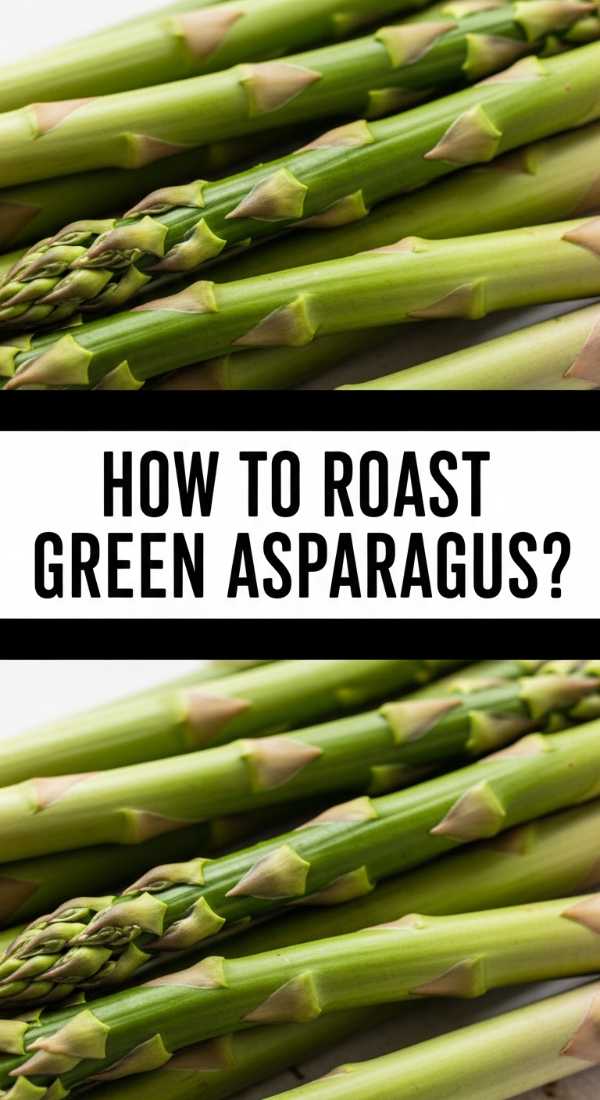
Why we love this
Asparagus on the grill undergoes a magical transformation, with the tips becoming crisp and nutty while the stalks remain tender with a slight, juicy snap. The high heat coaxes out a natural sweetness that is perfectly complemented by the char and a finishing squeeze of bright lemon. It’s an elegant vegetable side that adds height and a beautiful deep green color to your food board, offering an earthy, savory element that balances out sweeter fruits or rich dips. Simple, healthy, and visually stunning, it’s a masterclass in minimalist cooking.
Ingredients
- 1 bunch fresh asparagus, woody ends trimmed
- 2 tbsp olive oil
- 1/2 tsp garlic powder
- Salt and cracked black pepper
- Lemon wedges for serving
- Optional: 1 tbsp grated Parmesan
How to make it
- Snap the bottom of one asparagus spear to find where it naturally breaks; use that as a guide to trim the rest of the bunch so you are left with only the tender portions.
- Toss the spears in a bowl with olive oil, salt, pepper, and garlic powder until every inch is lightly coated; the oil is crucial for conducting heat and preventing the spears from shriveling.
- Place a grill basket on the grates or lay the spears perpendicular to the grill bars to prevent them from falling through; the grill should be at medium-high heat.
- Grill for 3-5 minutes, rolling the spears occasionally with tongs; look for the tips to become slightly charred and the stalks to turn a vibrant, bright green.
- Remove from heat while they still have a slight ‘bite’ (they will continue to cook for a minute off the grill) and immediately douse with fresh lemon juice to preserve the color.
How to bake moist banana bread
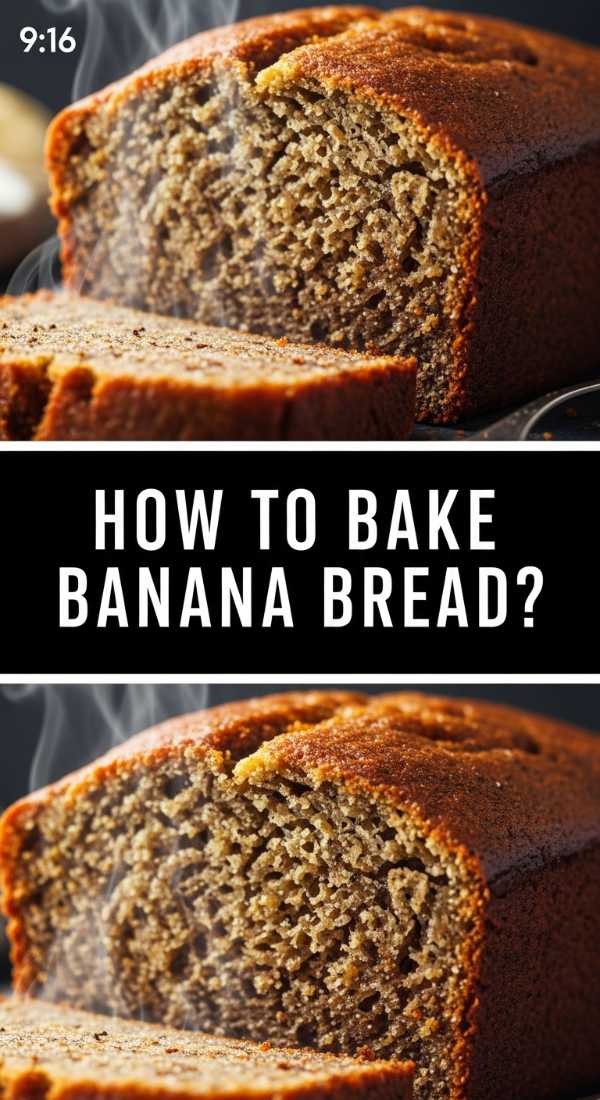
Why we love this
A thick slice of moist banana bread is the ultimate comfort, filling the kitchen with an intoxicating aroma of caramelized sugar, warm cinnamon, and ripe fruit. The texture is dense yet soft, with a tight crumb that holds together perfectly whether you’re spreading it with butter or eating it on the go. Each bite is packed with deep, concentrated banana flavor, punctuated by the occasional crunch of a walnut or the sweetness of a chocolate chip. It’s a timeless classic that feels like a warm hug, making it a beloved addition to the dessert section of any board.
Ingredients
- 3 very ripe bananas, mashed
- 1/3 cup melted butter
- 1/2 cup sugar
- 1 egg, beaten
- 1 tsp vanilla extract
- 1 tsp baking soda
- 1.5 cups all-purpose flour
- A pinch of salt
How to make it
- Preheat your oven to 350°F and grease a 4×8 inch loaf pan; using a metal pan will result in a better crust than glass or silicone.
- In a large bowl, mash the bananas until they are almost liquid with only a few small lumps; the more you mash, the moister the bread will be.
- Stir the melted butter into the mashed bananas first, followed by the sugar, egg, and vanilla; whisking the wet ingredients thoroughly ensures an even rise.
- Sift the baking soda and flour directly into the wet mixture; fold gently with a spatula only until the flour streaks disappear—overmixing will develop gluten and make the bread tough.
- Pour into the pan and bake for 50-60 minutes; test with a toothpick in the very center—it should come out clean or with just a few moist crumbs, but no wet batter.
Final Thoughts on Your Viral Food Spread
Building a food board is all about the joy of sharing and the beauty of variety. By combining these savory dips, fresh salads, and sweet treats, you create an experience that appeals to every palate and looks absolutely stunning on camera. Remember, the best part of hosting is the memories you make, so don’t be afraid to get creative and make these recipes your own!