
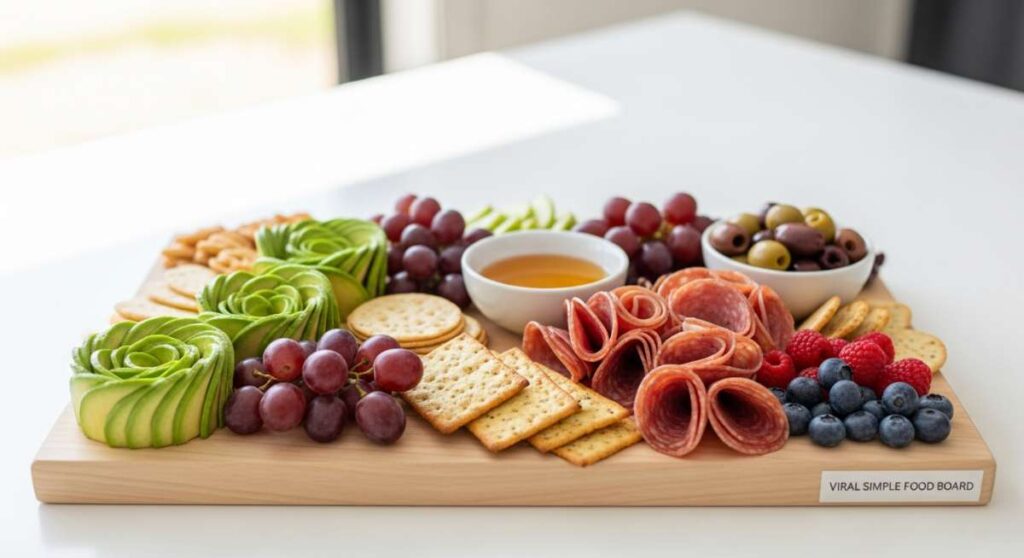
There is something almost magical about the way a perfectly arranged food board can turn a regular Tuesday evening into a celebration of life’s simple pleasures. I remember the first time I set one of these out for my friends; the room went quiet for a split second as everyone just took in the colors, the textures, and the sheer abundance of it all. It’s not just about the food; it’s about the permission to slow down, pick at your favorite bits, and actually enjoy the company you’re with without the formality of a sit-down dinner.
Lately, my feed has been absolutely flooded with these ‘aesthetic food boards,’ and I totally get the obsession. They are the ultimate low-stress, high-impact way to entertain or even just treat yourself after a long week. Whether you’re craving something sweet like a deconstructed pie or a savory spread of grilled meats and zesty salads, the beauty lies in the variety. Today, I’m sharing the heart of my latest viral board—a collection of recipes that are as beautiful to look at as they are delicious to eat.
How to make the best strawberry pie

Why we love this
This strawberry pie is the definition of summer captured in a flaky, golden crust. Imagine the scent of sun-ripened berries macerating in sugar, releasing their ruby-red juices that thicken into a glossy, jam-like nectar as they bake. Every bite offers a perfect contrast between the buttery, shattering layers of the pastry and the soft, slightly tart burst of the fruit, making it feel like a warm hug on a plate. It is best enjoyed slightly warm with a dollop of cold whipped cream melting slowly into the crevices.
Ingredients
- 2 quarts fresh strawberries, hulled and halved
- 1 cup granulated sugar
- 3 tablespoons cornstarch
- 1 tablespoon lemon juice
- 1/4 teaspoon salt
- Double pie crust (homemade or store-bought)
- 1 egg (for egg wash)
How to make it
- Preheat your oven to 425°F (218°C) and place a baking sheet on the lower rack to catch any drips.
- In a large mixing bowl, gently toss the halved strawberries with sugar, cornstarch, lemon juice, and salt until the berries are evenly coated. Let them sit for 15 minutes to allow the juices to begin to release.
- Roll out your bottom pie crust and fit it into a 9-inch pie plate, trimming the edges to leave a 1/2-inch overhang.
- Pour the strawberry mixture into the crust, piling them slightly higher in the center for that classic dome shape.
- Roll out the second crust and place it over the berries; you can do a full crust with steam vents or a lattice pattern for extra aesthetic points.
- Crimp the edges tightly to seal in the juices. Brush the top with a beaten egg wash and sprinkle with a little extra sugar.
- Bake at 425°F for 15 minutes, then reduce the heat to 375°F (190°C) and bake for another 40-45 minutes until the crust is deep golden brown and the filling is bubbling thick.
- Crucially, let the pie cool completely (at least 4 hours) before slicing so the filling sets properly.
How to make creamy rotel dip

Why we love this
There is a reason this dip is a staple at every single one of my gatherings—it is the ultimate crowd-pleaser that balances rich, melty cheese with the bright, acidic kick of diced tomatoes and green chilies. The texture is incredibly velvety, coating every nook and cranny of a salty tortilla chip, while the savory depth of the browned sausage provides a hearty backbone. It’s the kind of comfort food that keeps people hovering around the snack board, unable to resist just one more scoop of that spicy, cheesy goodness.
Ingredients
- 1 lb Velveeta cheese, cubed
- 1 can (10 oz) Ro-Tel Diced Tomatoes and Green Chilies
- 1 lb ground breakfast sausage or chorizo
- 1/2 cup heavy cream (optional for extra silkiness)
- Fresh cilantro for garnish
How to make it
- In a large skillet over medium-high heat, brown the ground sausage, breaking it into small crumbles with a wooden spoon until it is fully cooked and slightly crispy. Drain the excess fat thoroughly.
- Reduce the heat to low and add the cubed Velveeta cheese to the skillet. Stir constantly to ensure the cheese melts evenly without scorching on the bottom.
- Once the cheese is about halfway melted, pour in the entire can of Ro-Tel (do not drain the liquid, as this provides essential flavor and acidity).
- Slowly stir the mixture until it becomes a smooth, homogenous lava of cheese and spice. If the dip feels too thick, whisk in the heavy cream a tablespoon at a time until you reach your desired consistency.
- Transfer the dip to a small slow cooker on the ‘warm’ setting to keep it dip-able for the duration of your party.
- Garnish with fresh cilantro and serve immediately with sturdy corn chips.
How to make fresh tomato cucumber salad

Why we love this
This salad is like a breath of fresh air on a plate, offering a crisp, hydrating crunch that cuts through richer dishes perfectly. The aroma of fresh parsley and red onion mingles with the earthy sweetness of vine-ripened tomatoes, creating a sensory experience that feels like a summer garden in mid-July. Every forkful delivers a cooling sensation, followed by the tangy zip of a red wine vinaigrette that wakes up your palate and makes the flavors of the vegetables truly sing.
Ingredients
- 3 large Roma tomatoes, chopped
- 2 English cucumbers, sliced and quartered
- 1/2 red onion, thinly sliced
- 1/4 cup fresh parsley, chopped
- 1/2 cup feta cheese crumbles
- 3 tbsp olive oil
- 2 tbsp red wine vinegar
- Salt and cracked black pepper to taste
How to make it
- Begin by prepping your vegetables: ensure the tomatoes and cucumbers are cut into uniform, bite-sized pieces so that every mouthful has a bit of everything.
- Place the chopped tomatoes, cucumbers, and red onions into a large glass bowl.
- In a separate small jar or bowl, whisk together the olive oil, red wine vinegar, salt, and pepper until the dressing is emulsified.
- Drizzle the dressing over the vegetables and toss gently with large spoons, being careful not to bruise the tomatoes.
- Add the fresh parsley and feta cheese last, folding them in lightly so the cheese doesn’t turn the dressing cloudy.
- For the best flavor, let the salad sit at room temperature for about 20 minutes before serving to let the juices mingle, or refrigerate for an hour if you prefer it chilled.
How to make chicken caesar wraps

Why we love this
The chicken Caesar wrap is the ultimate ‘cool girl’ lunch that looks sophisticated on a board but is secretly so easy to assemble. It combines the smoky char of grilled chicken with the iconic, salty punch of Parmesan and the refreshing snap of romaine lettuce, all swaddled in a soft, chewy tortilla. It’s a handheld masterpiece of textures—creamy dressing, crunchy croutons, and tender protein—that makes for a satisfying, mess-free addition to any social spread.
Ingredients
- 2 large flour tortillas
- 2 cups grilled chicken breast, sliced into strips
- 2 cups Romaine lettuce, shredded
- 1/4 cup Caesar dressing
- 1/4 cup shredded Parmesan cheese
- 1/2 cup crushed croutons
- Black pepper to taste
How to make it
- Start with warm tortillas; heating them for 10 seconds in the microwave or on a dry skillet makes them much more pliable and less likely to tear.
- In a medium bowl, toss the shredded romaine, grilled chicken, and crushed croutons with the Caesar dressing and Parmesan cheese until everything is lightly coated.
- Lay the tortillas flat and distribute the mixture evenly across the center of each, leaving about two inches of space at the edges.
- Fold the sides of the tortilla inward toward the center, then grab the bottom edge and roll it tightly over the filling, tucking it in as you go to create a snug cylinder.
- Place the wrap seam-side down on a cutting board and slice diagonally with a sharp serrated knife for a beautiful presentation.
- Secure with a toothpick if the wraps feel loose, and serve immediately to maintain the crunch of the croutons.
How to grill steak kabobs

Why we love this
Steak kabobs are the showstoppers of the grill, offering a savory, caramelized exterior and a juicy, tender center that melts in your mouth. There is something deeply satisfying about the charred edges of the bell peppers and onions, which take on a smoky sweetness that complements the rich, umami flavors of the marinated beef. As they sizzle over the open flame, the aroma of garlic and soy sauce fills the air, creating an irresistible invitation for everyone to gather around the grill with a cold drink in hand.
Ingredients
- 1.5 lbs top sirloin or ribeye, cut into 1-inch cubes
- 2 bell peppers (any color), cut into chunks
- 1 large red onion, cut into chunks
- 1/4 cup soy sauce
- 2 tbsp olive oil
- 1 tbsp honey
- 3 cloves garlic, minced
- Wooden or metal skewers
How to make it
- If using wooden skewers, soak them in water for at least 30 minutes to prevent them from burning on the grill.
- In a resealable bag or bowl, whisk together the soy sauce, olive oil, honey, and minced garlic. Add the steak cubes and marinate in the refrigerator for at least 2 hours (or up to 6 hours for maximum flavor).
- Preheat your grill to medium-high heat (about 400°F/200°C) and lightly oil the grates.
- Thread the steak, peppers, and onions onto the skewers in an alternating pattern, making sure not to pack them too tightly so the heat can circulate around each piece.
- Place the kabobs on the grill and cook for about 8-10 minutes, turning them every few minutes to ensure an even char on all sides.
- Check for doneness using a meat thermometer; 135°F (57°C) is perfect for medium-rare.
- Remove from the grill and let the meat rest for 5 minutes before serving to allow the juices to redistribute.
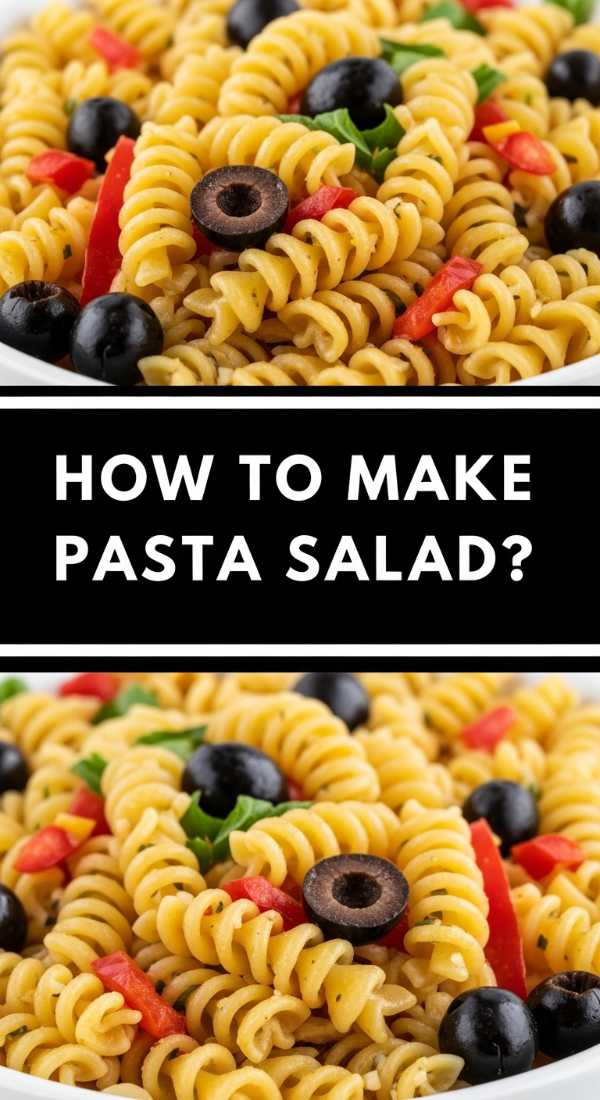
How to make zesty pasta salad
Why we love this
This zesty pasta salad is the vibrant, colorful heart of any food board, providing a tangy and herb-forward flavor profile that everyone craves. Each spiral of rotini pasta acts as a vessel for the sharp Italian dressing, while the bits of salty pepperoni and briny olives provide exciting pops of flavor in every forkful. It’s a versatile dish that tastes even better as it sits, making it the perfect make-ahead component for a stress-free hosting experience that looks like a mosaic of Mediterranean goodness.
Ingredients
- 1 lb rotini pasta
- 1 cup Italian vinaigrette dressing
- 1/2 cup mini pepperoni slices
- 1/2 cup black olives, sliced
- 1/2 cup cherry tomatoes, halved
- 1/4 cup green bell pepper, diced
- 1/2 cup mozzarella pearls
- 1 tsp dried oregano
How to make it
- Boil a large pot of salted water and cook the rotini until it is exactly ‘al dente’—usually about 1 minute less than the package directions suggest. This prevents the pasta from becoming mushy after it absorbs the dressing.
- Drain the pasta and immediately rinse it under cold running water to stop the cooking process and remove excess starch.
- In a large mixing bowl, combine the cooled pasta with the pepperoni, olives, tomatoes, bell peppers, and mozzarella pearls.
- Pour the Italian dressing over the mixture and sprinkle with dried oregano. Toss thoroughly to ensure every piece of pasta is coated.
- Cover and refrigerate for at least 2 hours before serving. This step is vital as the pasta will soak up the dressing and the flavors will intensify.
- Give the salad one last toss before serving, adding an extra splash of dressing if it looks a little dry.
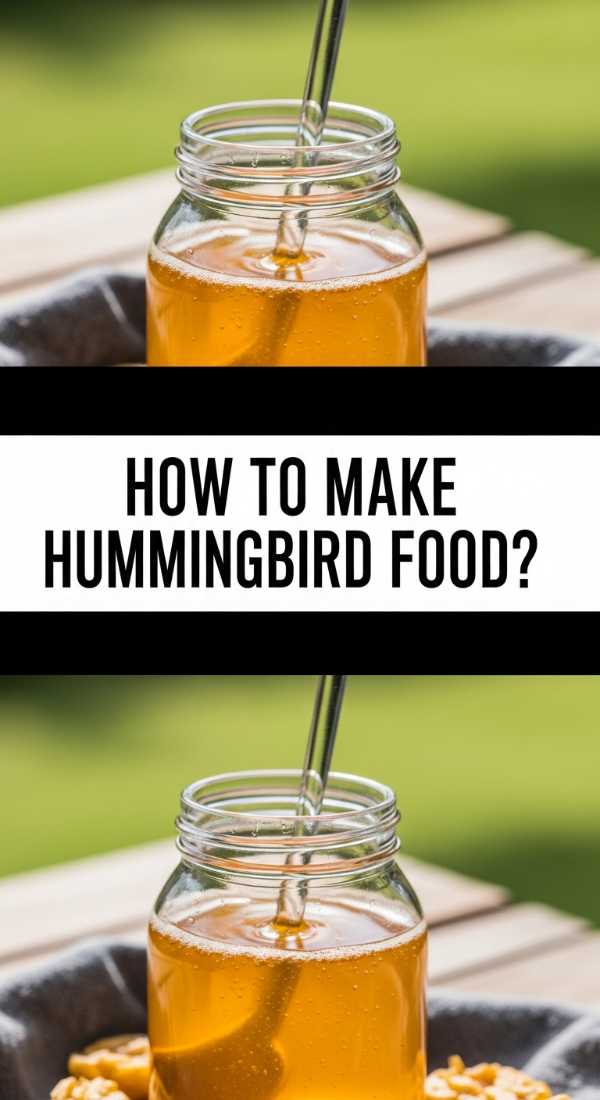
How to make hummingbird nectar
Why we love this
While not for human consumption, making your own hummingbird nectar is a beautiful lifestyle ritual that brings the fluttering magic of nature right to your window. There is a simple, meditative joy in boiling the sugar water and knowing you are providing a pure, clean energy source for these tiny, iridescent creatures. Seeing a hummingbird hover at your feeder is the ultimate reward for a few minutes of effort, adding a layer of peace and wonder to your outdoor living space.
Ingredients
- 1 cup granulated white sugar
- 4 cups water
How to make it
- Combine the sugar and water in a medium saucepan over medium heat.
- Stir the mixture constantly until the sugar is completely dissolved. Bring the solution to a low boil for about 1-2 minutes; this helps to slow the growth of bacteria and mold once it’s in the feeder.
- Remove the pan from the heat and allow the nectar to cool completely to room temperature. Never put hot nectar into a feeder as it can warp the plastic or harm the birds.
- Fill your hummingbird feeder with the cooled solution. Do not add red food coloring, as it is unnecessary and can be harmful to the birds’ health.
- Store any extra nectar in a clean jar in the refrigerator for up to two week.
- Clean your feeder thoroughly with hot water every 3-5 days to keep the birds healthy and happy.
How to mix summer cocktails

Why we love this
The perfect summer cocktail should feel like a vacation in a glass—bright, effervescent, and incredibly refreshing. I love the way the ice clinks against the glass and the citrus oils spray into the air as you twist a garnish over the top. Whether you choose a base of botanical gin or clean vodka, the addition of elderflower and mint creates a sophisticated, floral profile that dances on the tongue, making it the ideal accompaniment for a sun-drenched afternoon on the patio.
Ingredients
- 2 oz Gin or Vodka
- 1 oz Elderflower liqueur
- 1/2 oz fresh lime juice
- 4 oz Club soda or Sparkling water
- Fresh mint leaves and lime wheels for garnish
- Ice cubes
How to make it
- Start by chilling your glassware in the freezer for 5 minutes to ensure your drink stays ice-cold from the first sip to the last.
- In a cocktail shaker, place 3-4 fresh mint leaves and the lime juice. Use a muddler to gently press the mint—don’t shred it—just enough to release the fragrant oils.
- Add the gin (or vodka) and elderflower liqueur to the shaker, then fill it halfway with ice.
- Shake vigorously for about 15 seconds until the outside of the shaker feels frost-cold to the touch.
- Strain the mixture into your chilled glass filled with fresh ice.
- Top with the club soda and give it one very gentle stir with a bar spoon to combine the bubbles without losing the carbonation.
- Slap a sprig of mint against your hand to release its aroma, tuck it into the glass along with a lime wheel, and serve immediately.
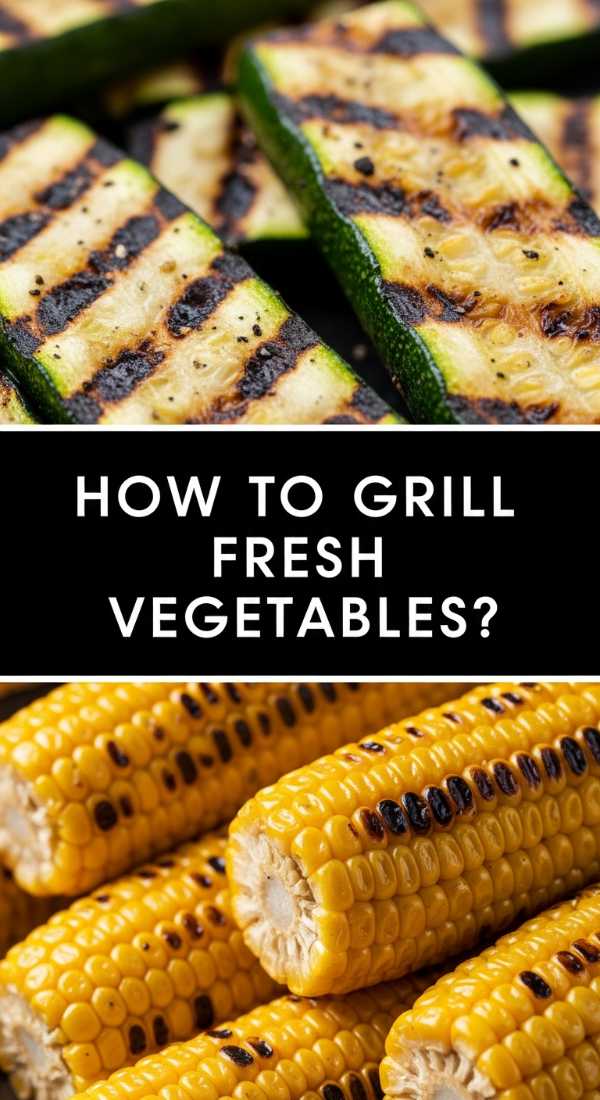
How to grill fresh vegetables
Why we love this
Grilling vegetables transforms them from simple sides into the stars of the show, intensifying their natural sugars and adding a complex, smoky depth of flavor. The sight of those charred, dark grill marks against the vibrant greens of asparagus and the deep purples of onion is pure culinary art. There’s a wonderful contrast between the softened, tender interior and the slightly crisp, caramelized exterior that makes eating your greens feel like an absolute indulgence rather than a chore.
Ingredients
- 2 zucchinis, sliced into planks
- 1 bunch asparagus, woody ends trimmed
- 2 ears of corn, husks removed and halved
- 1 red onion, cut into thick rounds
- 3 tbsp olive oil
- 1 tbsp balsamic glaze
- Sea salt and cracked black pepper
How to make it
- Preheat your grill to medium-high (around 400°F). Ensure the grates are scrubbed clean to prevent the delicate vegetables from sticking.
- Lay all the prepared vegetables out on a large baking sheet. Drizzle generously with olive oil and sprinkle with a liberal amount of sea salt and pepper. Toss with your hands to ensure every surface is lightly coated in oil.
- Place the corn and onions on the grill first, as they take the longest to cook. Grill for about 4-5 minutes per side.
- Add the zucchini and asparagus to the grill. These only need about 2-3 minutes per side. Watch them closely; you want them to be tender-crisp, not mushy.
- Use tongs to flip the vegetables once you see distinct, dark char marks.
- Remove everything from the grill and arrange them on a platter. Drizzle the balsamic glaze over the warm vegetables just before serving to add a hit of sweetness and acidity.
How to cook summer soup

Why we love this
Summer soup, like this chilled Zucchini Basil blend, is the ultimate way to utilize an overabundance of garden produce in a way that feels light and sophisticated. It has a silky, velvety texture that feels incredibly luxurious on the tongue, balanced by the sharp, peppery bite of fresh basil and a hint of garlic. It is cooling, nourishing, and possesses a beautiful, pale green hue that looks stunning when served in small glass bowls as part of a larger, communal food board spread.
Ingredients
- 4 medium zucchinis, chopped
- 1 yellow onion, diced
- 3 cloves garlic, minced
- 4 cups vegetable broth
- 1 cup fresh basil leaves
- 1/2 cup Greek yogurt or heavy cream (optional)
- 2 tbsp olive oil
- Lemon juice to finish
How to make it
- In a large pot, heat the olive oil over medium heat. Sauté the diced onion until it is translucent and fragrant, about 5 minutes. Add the minced garlic and cook for just 60 seconds more, being careful not to let it brown.
- Add the chopped zucchini to the pot and cook for 5-7 minutes, stirring occasionally, until they begin to soften slightly.
- Pour in the vegetable broth and bring the mixture to a gentle boil. Reduce the heat to low, cover, and simmer for about 15 minutes until the zucchini is very tender.
- Remove the pot from the heat and stir in the fresh basil leaves. The residual heat will wilt them and release their flavor without dulling their bright green color.
- Use an immersion blender to puree the soup directly in the pot until it is completely smooth. If using a standard blender, work in batches and be careful with the hot liquid.
- Stir in the Greek yogurt or cream if you want a richer finish. Season with salt, pepper, and a squeeze of fresh lemon juice to brighten the flavors.
- Serve warm, or for a true summer treat, chill the soup in the refrigerator for at least 3 hours and serve cold.
The Joy of the Shared Board
At the end of the day, the obsession with these aesthetic food boards comes down to one thing: connection. There is something so primal and beautiful about gathering around a spread of delicious, thoughtfully prepared food and just sharing. Whether you’re making a pie from scratch or just assembling some quick wraps, the effort you put into the presentation makes your guests feel seen and cared for. So, grab a board, pick a few of these recipes, and start creating your own viral-worthy spread tonight!