
We’ve all been there—the sun is setting, the patio lights are twinkling, and friends are arriving, but you’re stuck in the kitchen over a hot stove while everyone else is laughing outside. It’s my absolute mission this season to change that! I truly believe that the best summer memories are made when the food is spectacular but the effort is minimal. That is exactly why I’ve fallen in love with the ‘Viral Food Board’ aesthetic; it’s about taking simple, high-quality ingredients and arranging them in a way that feels like a celebration.
In this guide, I’m sharing my favorite ways to transform classic summer staples into stunning, board-style presentations that will have your guests reaching for their phones to take a picture before they even take a bite. From zesty salads to refreshing cocktails and everything in between, these ideas are designed to let you be the ‘host with the most’ without actually breaking a sweat. Let’s dive into how we can make your next gathering effortless and unforgettable!
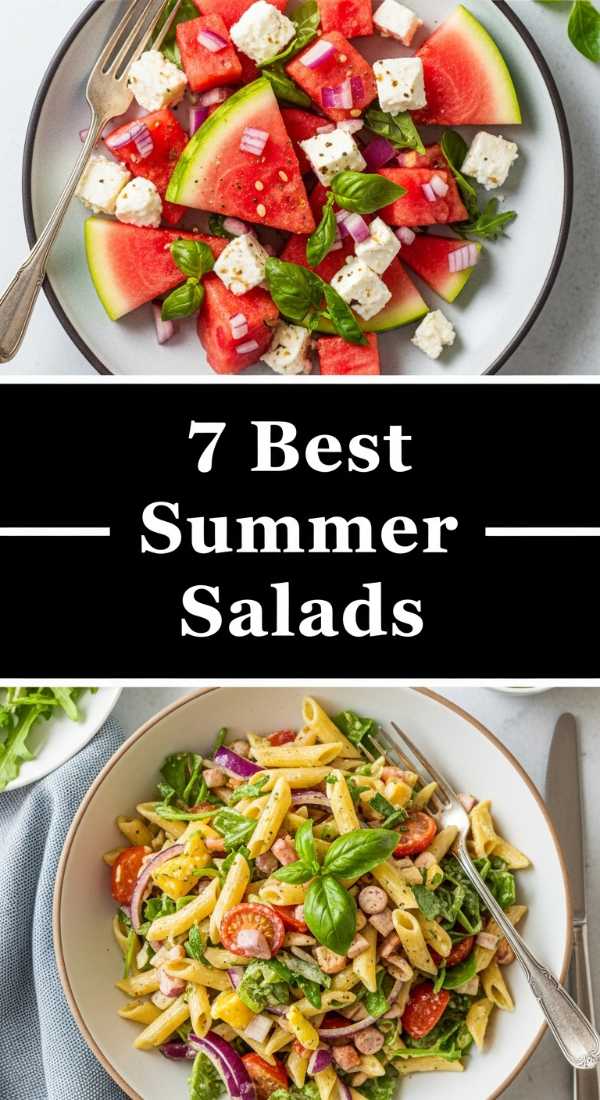
7 Best Fresh Summer Salads (Step-by-Step Guide)
Why we love this
There is nothing quite like the crunch of a perfectly ripe cucumber or the burst of a sun-warmed cherry tomato to signal that summer has truly arrived. We love these salad boards because they move away from the soggy, overdressed bowls of the past and instead celebrate the vibrant textures and jewel-toned colors of seasonal produce. Imagine the aroma of freshly torn basil leaves mingling with the tang of balsamic glaze and the creamy, cooling sensation of sliced avocado on your tongue. It’s a sensory explosion that feels light, nourishing, and incredibly sophisticated all at once.
Ingredients
- Seedless English cucumbers
- Heirloom cherry tomatoes
- Fresh mozzarella pearls
- Red onion, thinly sliced
- Fresh basil and mint leaves
- Extra virgin olive oil
- Aged balsamic glaze
- Flaky sea salt and cracked black pepper
How to make it
- Start by washing all your produce in cold water and patting them completely dry; moisture is the enemy of a crisp salad board, so don’t skip the drying step.
- Slice your cucumbers into uneven, rustic chunks to create more surface area for the dressing to cling to, and halve the cherry tomatoes to reveal their juicy interiors.
- Arrange the greens—like arugula or spinach—as a soft bed on a large wooden board, then scatter the cucumbers, tomatoes, and mozzarella pearls evenly across the top.
- For the red onion, soak the slices in ice water for 10 minutes before adding them; this removes the harsh ‘bite’ while keeping them incredibly crunchy.
- Tear the basil and mint by hand rather than chopping with a knife to prevent bruising and to release the aromatic oils right before serving.
- Drizzle the olive oil in a slow, steady stream, followed by the balsamic glaze in a decorative zigzag pattern.
- Finish with a generous sprinkle of flaky sea salt and cracked pepper from a height of about 12 inches to ensure even distribution across the entire board.
5 Best Refreshing Summer Cocktails (Step-by-Step Guide)

Why we love this
A great summer cocktail is more than just a drink; it is an invitation to slow down and savor the moment as the ice clinks against the glass. These recipes are designed to be served in ‘board style’ with all the garnishes laid out, allowing guests to customize their own refreshing sips. We adore the way the bright citrus scents of lemon and lime zest invigorate the senses, paired with the effervescent bubble of club soda that dances on the palate. Whether it’s a spicy margarita or a botanical spritz, these drinks are the ultimate cooling companion for a humid afternoon.
Ingredients
- Fresh lime and lemon juice
- Agave nectar or simple syrup
- High-quality tequila or gin
- Club soda or sparkling mineral water
- Fresh jalapeño slices
- Fresh berries (strawberries, blueberries)
- Sprigs of rosemary and thyme
- Chili-salt or sugar for glass rims
How to make it
- Begin by chilling your glassware in the freezer for at least 20 minutes; a frosted glass is the hallmark of a professional-grade summer cocktail.
- Prepare your garnishes by slicing citrus into thin rounds and arranging them on a small slate board alongside the herbs and berries.
- To make a base, combine your spirit of choice with fresh citrus juice and a sweetener in a large glass pitcher, stirring gently with a long bar spoon to integrate the flavors without bruising them.
- If making a spicy version, muddle two thin slices of jalapeño at the bottom of the glass before adding ice to release the capsaicin oils for a controlled heat.
- Fill each chilled glass to the brim with large, clear ice cubes—smaller ice melts too fast and dilutes the delicate balance of the drink.
- Pour the spirit base over the ice, leaving about an inch of space at the top, then top off with the sparkling water for that signature fizz.
- Finish by expressing a citrus peel over the glass (twisting it to release oils) and dropping it in, then serve immediately while the carbonation is at its peak.
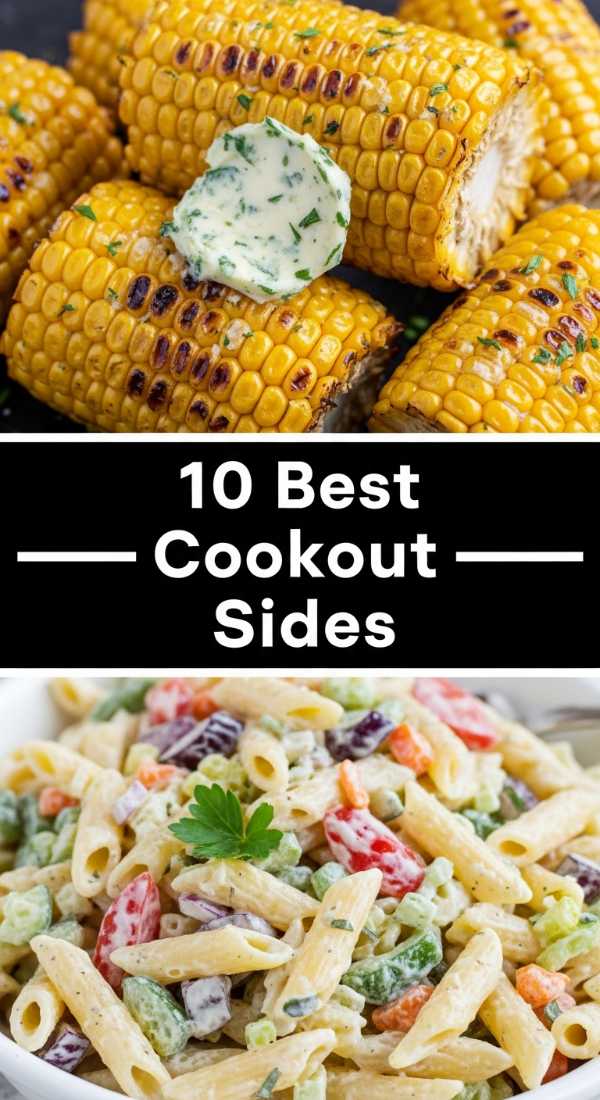
10 Best Cookout Side Dishes (Step-by-Step Guide)
Why we love this
Side dishes are often the secret stars of any cookout, providing the creamy, smoky, and charred flavors that complement the main course perfectly. We love this selection because it focuses on the harmony of hot and cold—think warm, grilled corn slathered in zesty crema alongside a chilled, herb-flecked potato salad. The aroma of charring vegetables on the grill creates an instant atmosphere of nostalgia and comfort. Every bite offers a different texture, from the snap of a grilled bean to the velvety richness of a well-made mac and cheese, making the meal feel abundant and thoughtful.
Ingredients
- Sweet corn on the cob
- Baby gold potatoes
- Greek yogurt or light mayo
- Smoked paprika and cumin
- Fresh cilantro and chives
- Cotija cheese or feta
- Garlic cloves, minced
- Honey and dijon mustard
How to make it
- For the ‘Street Corn’ style sides, peel back the husks but leave them attached to act as a natural handle, then grill over medium-high heat until the kernels are charred in spots (about 8-10 minutes).
- While the corn is hot, brush it with a mixture of Greek yogurt, lime juice, and minced garlic, then immediately roll it in crumbled Cotija cheese so it sticks.
- For the potatoes, boil them in heavily salted water until fork-tender, then drain and let them steam-dry for 5 minutes; this ensures they absorb the dressing rather than becoming watery.
- Whisk together a dressing of dijon mustard, honey, and apple cider vinegar, and toss with the potatoes while they are still warm to maximize flavor absorption.
- Incorporate your fresh herbs at the very last second to maintain their bright green color and punchy flavor profile.
- Assemble all the sides on a massive platter, using small bowls for the creamier components to prevent the juices from running into the crispier items.
- Keep the platter covered with a damp cloth until the moment of serving to keep the chilled items cold and the grilled items succulent.
8 Best Picnic Food Ideas (Step-by-Step Guide)

Why we love this
Picnic food is all about the romance of eating outdoors, but it requires a specific kind of magic to stay fresh and appetizing after a journey to the park. We love these ideas because they focus on structural integrity and ‘handheld’ ease, eliminating the need for messy cutlery. There is something so satisfying about unwrapping a tightly packed pressed sandwich to find layers of colorful meats and cheeses perfectly fused together. The scent of fresh fruit and artisanal bread in the open air makes even a simple lunch feel like a grand adventure under the trees.
Ingredients
- Ciabatta or baguette loaves
- Prosciutto or deli turkey
- Provolone or sharp cheddar slices
- Roasted red peppers and arugula
- Pesto or sun-dried tomato spread
- Hard-boiled eggs
- Grapes and apple slices
- Mixed nuts and dried apricots
How to make it
- To create a ‘pressed’ picnic sandwich, slice your bread lengthwise and hollow out a bit of the crumb to make room for the fillings without the sandwich becoming too tall.
- Layer your ingredients strategically: spreads go on the bread first to create a moisture barrier, followed by meats, then cheeses, and finally the greens in the middle.
- Wrap the entire loaf tightly in parchment paper and tie it with kitchen twine, then place a heavy cast-iron skillet on top in the fridge for 2 hours to compress the layers.
- Prepare fruit skewers by alternating grapes and apple slices (tossed in lemon juice to prevent browning) for an easy-to-grab sweet treat.
- Peel your hard-boiled eggs ahead of time and store them in a container with a damp paper towel to keep them from drying out or smelling too strong.
- Pack everything into a cooler with flat ice packs at the bottom, placing the heaviest items (the sandwiches) first and the delicate fruit on top.
- When you arrive, use a sharp serrated knife to slice the pressed loaf into individual portions right on the parchment paper for an instant, clean serving surface.
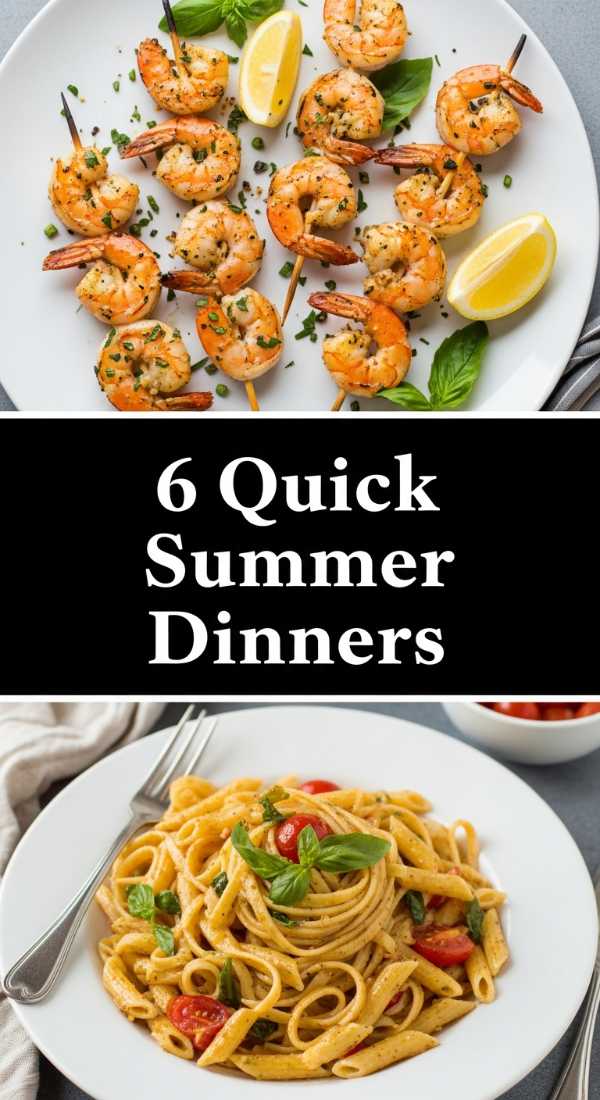
6 Quick Summer Dinner Ideas (Step-by-Step Guide)
Why we love this
On those long, sweltering summer days, the last thing anyone wants is a heavy meal that leaves you feeling sluggish. We love these quick dinner ideas because they prioritize speed and lightness, utilizing high-heat cooking methods that take less than 15 minutes. The sizzle of shrimp hitting a hot pan or the vibrant green of a flash-sauteed zucchini noodle brings a sense of freshness to the table. These meals are designed to be served family-style on a large board, encouraged by a ‘build-your-own’ philosophy that makes dinner feel like a fun, interactive event rather than a chore.
Ingredients
- Large shrimp, peeled and deveined
- Zucchini (for zoodles) or pre-cooked quinoa
- Fresh garlic and ginger
- Soy sauce or tamari
- Sesame oil and honey
- Avocado oil for high-heat cooking
- Green onions and sesame seeds
- Lime wedges
How to make it
- Pat the shrimp extremely dry with paper towels; any surface moisture will cause them to steam rather than sear, and we want that golden-brown crust.
- Heat a large skillet or wok over high heat with a tablespoon of avocado oil until it just begins to shimmer and smoke slightly.
- Add the shrimp in a single layer and let them cook undisturbed for 90 seconds to get a deep sear, then flip and cook for another 60 seconds until opaque.
- Quickly toss in minced garlic and ginger for only 30 seconds—any longer and the garlic will burn and turn bitter.
- Whisk together soy sauce, honey, and sesame oil, then pour it over the shrimp, allowing the sauce to bubble and thicken into a glaze for about 1 minute.
- If using zucchini noodles, toss them in at the very last second just to warm through; they will release too much water if cooked for more than a minute.
- Transfer everything to a large serving board, garnish with sliced green onions and sesame seeds, and serve with lime wedges to cut through the richness of the glaze.
7 Easy Summer Crockpot Recipes (Step-by-Step Guide)

Why we love this
It might seem counterintuitive to use a slow cooker in the summer, but it is actually the ultimate hack for keeping your kitchen cool while still enjoying tender, melt-in-your-mouth meats. We love these recipes because they do all the heavy lifting while you’re out at the pool or beach. The aroma of slow-simmered BBQ chicken or carnitas filling the house is incredibly welcoming. The texture of meat that has been gently cooked for hours, falling apart at the touch of a fork, provides a rich contrast to the crisp, fresh slaws and salsas we pair with them on a serving board.
Ingredients
- Chicken breasts or pork shoulder
- Your favorite BBQ sauce or salsa verde
- Apple cider vinegar
- Brown sugar or maple syrup
- Onion powder and smoked paprika
- Cabbage mix (for slaw)
- Pickled red onions
- Soft brioche buns or tortillas
How to make it
- Place your protein in the bottom of the crockpot and season generously with a dry rub of paprika, onion powder, and a pinch of salt to build a flavor base.
- Pour over a liquid mixture (like BBQ sauce thinned with a splash of apple cider vinegar) but don’t submerge the meat; you want it to braise, not boil.
- Set the crockpot to ‘Low’ for 6-8 hours rather than ‘High’ for 4; the slower temperature ensures the collagen breaks down properly for a succulent texture.
- Once the cooking time is up, remove the meat to a separate bowl and shred it using two forks, then stir in a half cup of the concentrated cooking juices from the pot.
- For the assembly board, toast your buns or tortillas on a dry pan for 30 seconds to give them structure.
- Place the shredded meat in a large central bowl on the board, surrounded by piles of fresh cabbage slaw and pickled onions.
- Allow guests to assemble their own sliders or tacos, ensuring there is a small bowl of extra warm sauce on the side for dipping.
9 Best Beach Food Ideas (Step-by-Step Guide)
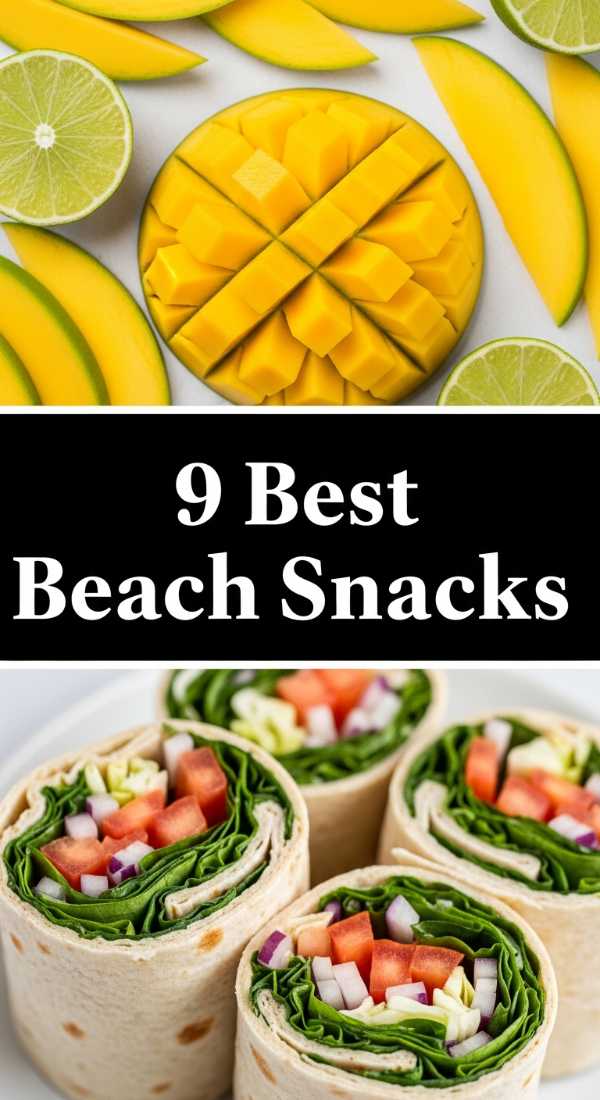
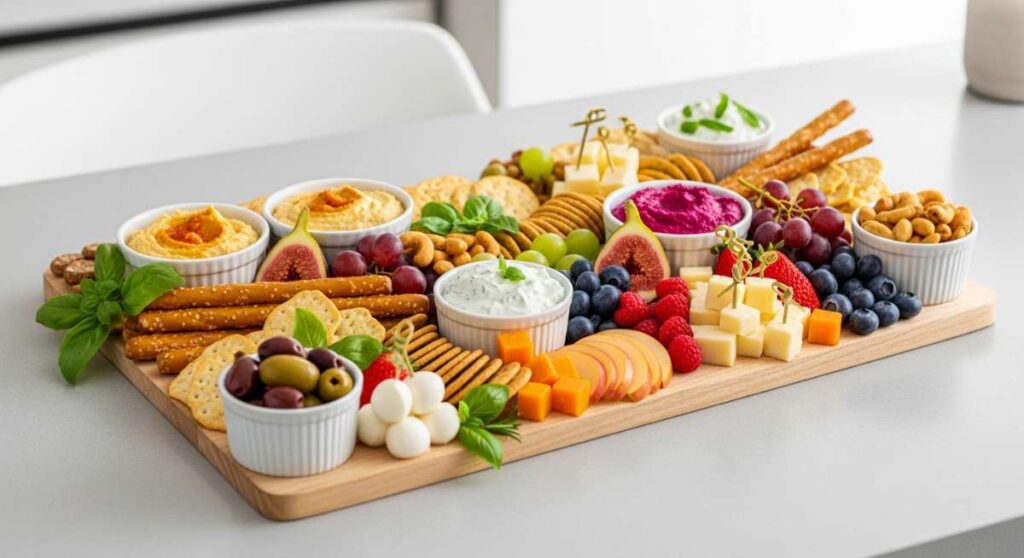
Why we love this
Beach food needs to be ‘sand-proof,’ refreshing, and capable of standing up to the heat of the sun. We love these ideas because they focus on hydrating ingredients and sturdy preparations that won’t wilt the moment they hit the sea air. Think of cool, crisp cucumber rounds used as crackers, or hummus topped with a vibrant herb oil. The combination of salty sea air and the sweet, juicy burst of chilled fruit is one of the most iconic summer experiences. These boards are designed for grazing, allowing you to snack between dips in the ocean without feeling weighed down.
Ingredients
- Hummus (classic or roasted pepper)
- Carrot sticks and celery hearts
- Cucumber rounds
- Pita bread strips
- Watermelon cubes
- Feta cheese crumbles
- Fresh mint
- Salted almonds
How to make it
- Prep is key for the beach: slice all your vegetables and store them in airtight containers with a few ice cubes to keep them extra crisp during transport.
- For the hummus, place it in a leak-proof bowl and create a ‘well’ in the center with a spoon, filling it with olive oil and a sprinkle of za’atar or paprika.
- Cut the watermelon into uniform cubes and toss with crumbled feta and torn mint; the saltiness of the cheese perfectly balances the sweetness of the fruit.
- Store the pita bread in a separate dry bag to prevent it from getting soggy from the moisture of the vegetables.
- Use a high-quality insulated bag with several ice packs positioned on the sides rather than the bottom to ensure even cooling.
- When you set up on the sand, use a flat cutting board as a base to keep your containers level and prevent sand from blowing into the food.
- Keep the board covered with a lightweight mesh food tent or a clean sarong between grazes to protect it from the elements.
10 Best Healthy Summer Recipes (Step-by-Step Guide)

Why we love this
Eating healthy in the summer feels effortless because the produce is so naturally delicious that it doesn’t need much help. We love these recipes because they celebrate the ‘glow’—foods high in antioxidants and healthy fats that make you feel as good as they look. The vibrant greens of kale and spinach, the deep pink of grilled salmon, and the golden hues of roasted chickpeas create a rainbow on your board. The textures are varied and satisfying, offering a mix of crunch, creaminess, and protein that provides sustained energy for all your summer activities.
Ingredients
- Fresh salmon fillets or firm tofu
- Quinoa or farro
- Massaged kale or baby spinach
- Avocado, sliced
- Roasted chickpeas
- Lemon-tahini dressing
- Sunflower seeds or hemp hearts
- Roasted sweet potato cubes
How to make it
- Cook your grains (quinoa or farro) in vegetable broth instead of water to infuse them with extra savory flavor right from the start.
- Season the salmon or tofu with lemon zest and black pepper, then grill or pan-sear over medium heat until the salmon is just opaque and flakes easily with a fork.
- To ‘massage’ the kale, drizzle it with a teaspoon of olive oil and a pinch of salt, then literally squeeze the leaves with your hands for 2 minutes until they turn dark green and tender.
- Roast the sweet potato cubes and chickpeas at 400°F (200°C) for 20 minutes until the potatoes are soft and the chickpeas have a satisfying crunch.
- Prepare a creamy dressing by whisking tahini with lemon juice, a clove of grated garlic, and enough warm water to reach a pourable consistency.
- Arrange the components on a large board in distinct sections: grains at the base, followed by the proteins, roasted veggies, and fresh greens.
- Drizzle the dressing over everything just before serving, and finish with a sprinkle of seeds for an extra boost of healthy fats and texture.
5 Best Summer Pasta Salads (Step-by-Step Guide)
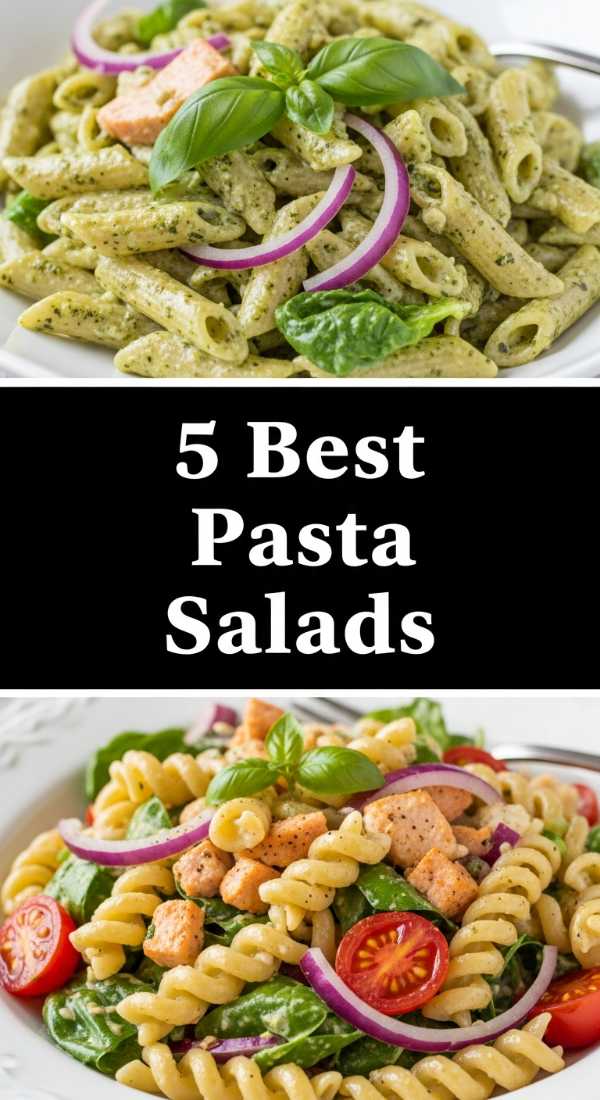
Why we love this
Pasta salad is a classic for a reason, but the modern version is a far cry from the mayo-heavy dishes of the past. We love these herb-forward, vinaigrette-based pasta boards because they are bright, zesty, and actually taste better as they sit. The aroma of fresh pesto or lemon-oregano dressing is incredibly appetite-whetting. The al dente bite of the pasta paired with the crunch of fresh peppers and the silkiness of marinated artichokes creates a complex mouthfeel. It’s the ultimate make-ahead dish that allows the flavors to meld and deepen over time.
Ingredients
- Short pasta (Fusilli, Rotini, or Orzo)
- Basil pesto or sun-dried tomato pesto
- Marinated artichoke hearts
- Kalamata olives
- Bell peppers, finely diced
- Fresh parsley and oregano
- Red wine vinegar
- Parmesan shavings
How to make it
- Cook the pasta in a large pot of water that is ‘salty as the sea’ to ensure the noodles are seasoned from the inside out.
- Drain the pasta 1 minute before the package instructions suggest—the residual heat will finish the cooking, and we want it to stay firm when mixed with dressing.
- While the pasta is still steaming, toss it with a small amount of the vinaigrette or pesto; the warm starch will absorb the flavor better than cold pasta.
- Let the pasta cool to room temperature before adding the fresh herbs and vegetables to prevent them from wilting or losing their vibrant color.
- Dice your vegetables into pieces that are roughly the same size as the pasta shape you chose for a uniform look and a perfect bite every time.
- Layer the pasta salad on a wide, shallow platter rather than a deep bowl so the heavier ingredients (like olives and artichokes) don’t all sink to the bottom.
- Top with a final squeeze of fresh lemon juice and a generous amount of Parmesan shavings right before bringing it to the table.
8 Easy Baseball Snack Ideas (Step-by-Step Guide)

Why we love this
There is a deep sense of nostalgia associated with game-day snacks—the smell of roasted peanuts and the salty-sweet combination of popcorn and chocolate. We love this elevated take on baseball snacks because it turns simple pantry staples into a gourmet experience. It’s all about the ‘crunch factor’ and the ease of snacking while focusing on the game. These boards offer a playful mix of textures, from the chewy pull of a soft pretzel to the brittle snap of toffee-coated nuts, making it impossible to stop at just one handful.
Ingredients
- Gourmet popcorn kernels
- Soft pretzel bites
- Whole peanuts in the shell
- Dark chocolate chunks or M&Ms
- Caramel or honey for drizzling
- Sea salt and cinnamon
- Mini hot dogs (optional for a hearty board)
- Yellow mustard for dipping
How to make it
- Pop the popcorn on the stovetop using coconut oil for a movie-theater flavor, then immediately toss with fine sea salt while it’s still hot.
- Warm the pretzel bites in a 350°F (175°C) oven for 5 minutes, brushing them with a little melted butter and a sprinkle of coarse salt as soon as they come out.
- For a sweet addition, melt the caramel or honey and drizzle it over a portion of the popcorn, then sprinkle with cinnamon and let it cool until it hardens into a glaze.
- Scatter the peanuts in their shells across the board; the act of cracking them open is part of the classic baseball game experience.
- Nestle small bowls of yellow mustard or cheese dip into the board for the pretzel bites to ensure no ‘double-dipping’ drama.
- Mix the chocolate chunks in with the plain salted popcorn for that addictive sweet-and-salty flavor profile.
- Keep the board organized by using different textures to separate the items—use the popcorn as a ‘filler’ to nestle the pretzels and nuts into place.
Wrapping Up Your Summer Entertaining
Hosting shouldn’t feel like a workout, and with these viral board ideas, it finally won’t. By focusing on assembly rather than intense cooking, you free yourself up to actually enjoy the people you invited over. Whether you’re at the beach, in your backyard, or just gathered around the kitchen island, these step-by-step guides ensure that every dish you serve is as beautiful as it is delicious. So, grab your favorite wooden board, pick a theme, and start creating—your guests (and your stress levels) will thank you!