
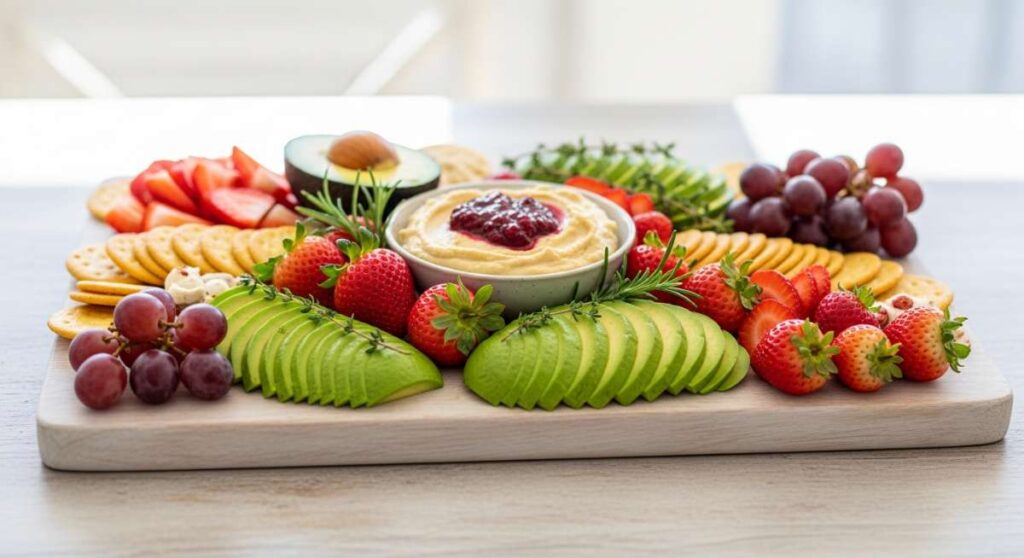
Why Everyone is Obsessed with This Simple, Aesthetic Food Board Hack
There is something almost magical about the way the light changes when spring finally decides to show its face. After months of heavy coats and even heavier comfort foods, our souls crave something lighter, brighter, and infinitely more beautiful. I remember the first time I set out a themed board for my girlfriends; the room practically buzzed with excitement before a single bite was even taken. It’s not just about the food; it’s about the intention we pour into the presentation that makes a Tuesday night feel like a core memory.
This aesthetic food board hack is sweeping the internet because it bridges the gap between ‘effortless host’ and ‘culinary artist.’ By focusing on seasonal colors and unexpected textures, we’re turning the act of eating into a sensory ritual. Whether you’re hosting a garden party or just treating yourself to a solo dinner on the patio, these ideas are designed to make your table look like a Pinterest dream come true without the stress of a professional kitchen.
The secret lies in the layering—the way a sprig of mint leans against a pastel macaron or how a dusting of edible glitter transforms a humble dumpling. Today, I’m walking you through ten ways to bring this spring energy into your home, from slow-simmered soups to cakes that look like they were plucked from a meadow. Let’s dive into the ultimate guide for your spring aesthetic evolution.
How to decorate spring cakes

Why we love this
There is nothing quite as breathtaking as a cake that mirrors the blooming world outside your window. The texture of velvet-smooth Swiss meringue buttercream serves as the perfect canvas for the delicate, paper-thin petals of pansies and violas. As you slice into the layers, the faint aroma of vanilla and fresh citrus zest wafts through the air, creating a moment of pure, sugary bliss that feels both sophisticated and whimsical. It’s the ultimate centerpiece that tastes like a sunny afternoon in a secret garden.
Ingredients
- Pre-baked sponge cake (fully cooled)
- Swiss meringue buttercream
- Edible flowers (pansies, violas, or lavender)
- Fresh berries (strawberries or raspberries)
- Gold leaf or pearl sprinkles
- Offset spatula
How to make it
- Begin by applying a thin ‘crumb coat’ of buttercream to your cooled cake layers using an offset spatula. Chill the cake in the refrigerator for 30 minutes until the frosting is firm to the touch; this ensures no crumbs ruin your final smooth finish.
- Apply a generous second layer of buttercream. For an aesthetic ‘rustic’ look, keep the edges slightly textured, or use a bench scraper held at a 45-degree angle against the rotating cake stand to achieve a perfectly smooth, sharp edge.
- Select your edible flowers, ensuring they are free of moisture. Gently press the largest blooms into the lower third of the cake to create a ‘meadow’ effect that climbs upward.
- Fill in smaller gaps with tiny sprigs of lavender or small berries. Use sterilized tweezers to apply bits of gold leaf for a touch of luxury.
- Place the cake back in the fridge for 20 minutes to set the decorations before serving at room temperature for the best texture.
How to make spring dinner

Why we love this
A true spring dinner is a celebration of crispness and renewal, moving away from the starchy heaviness of winter. Imagine the bright, snapping sound of fresh asparagus spears being trimmed and the vibrant, emerald green of a pea purée spreading across a warm plate. The scent of lemon zest and cracked black pepper fills the kitchen, promising a meal that is as energizing as it is satisfying. It feels light on the palate but rich in the kind of earthy, garden-grown flavors that make you feel truly nourished.
Ingredients
- Fresh Atlantic salmon fillets
- Bunch of thin asparagus
- Frozen sweet peas (for purée)
- Fresh mint leaves
- Lemon wedges and zest
- Extra virgin olive oil
- Maldon sea salt
How to make it
- Preheat your oven to 400°F (200°C). Line a sheet pan with parchment paper to prevent sticking and ensure an easy cleanup.
- Toss the asparagus in olive oil, salt, and lemon zest. Arrange them in a single layer on the pan, leaving space in the center for the salmon.
- Pat the salmon fillets completely dry with paper towels—this is the secret to getting a golden crust. Season heavily with sea salt and place skin-side down on the pan.
- Roast for 12-15 minutes. You’ll know the salmon is done when it flakes easily with a fork and reaches an internal temperature of 145°F, while the asparagus should be tender but still have a slight snap.
- While roasting, blanch the peas in boiling water for 2 minutes, then blitz in a blender with mint and a splash of olive oil until silky smooth to serve as a vibrant base.
How to cook spring meals
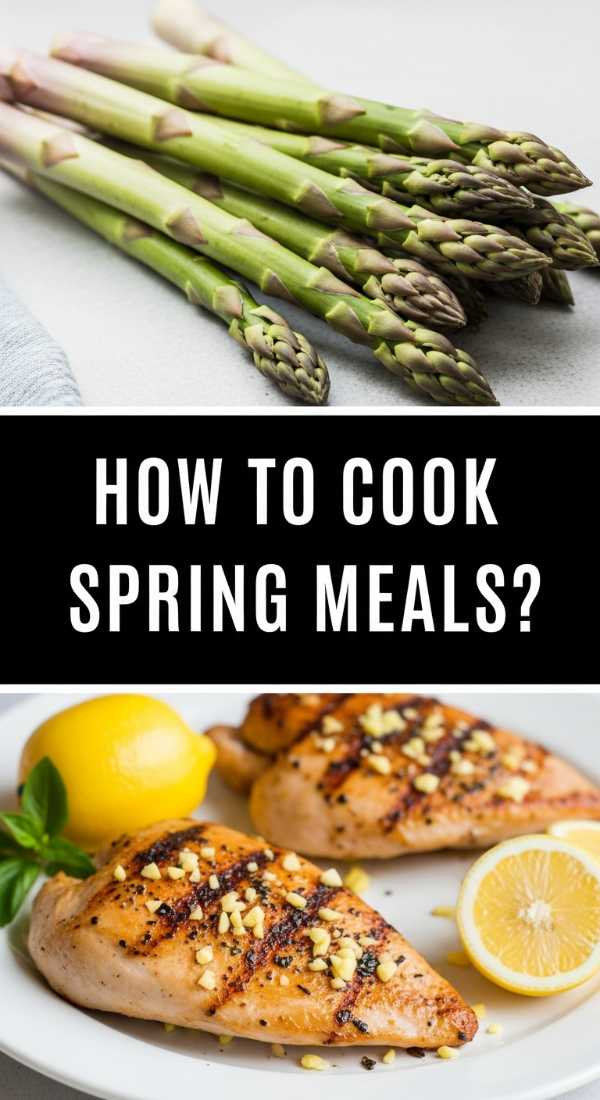
Why we love this
Cooking in the spring is all about the ‘one-pan’ philosophy that lets the natural ingredients speak for themselves. There is a specific joy in watching a medley of radishes, baby carrots, and snap peas transform under a light glaze of honey and balsamic vinegar. The aroma is a sweet and savory mix that signals the end of the day’s hustle. Every bite offers a different texture—from the crunch of a perfectly timed vegetable to the buttery softness of a new potato, making every forkful a discovery.
Ingredients
- Baby heirloom carrots
- Breakfast radishes (halved)
- Sugar snap peas
- Fingerling potatoes
- Honey and balsamic glaze
- Fresh thyme sprigs
- Garlic cloves, smashed
How to make it
- Start by parboiling the fingerling potatoes in salted water for about 8 minutes. You want them just soft enough to pierce with a knife but not falling apart. Drain and let them steam dry for 2 minutes to ensure they crisp up later.
- In a large cast-iron skillet, heat two tablespoons of olive oil over medium-high heat. Add the potatoes and carrots first, as they take the longest to caramelize.
- Once the potatoes show a golden-brown crust, add the radishes and garlic. Sauté for another 5 minutes, tossing frequently so the garlic doesn’t burn.
- Add the snap peas in the final 2 minutes of cooking to maintain their bright green color and snappy texture.
- Drizzle the honey-balsamic glaze over the hot vegetables, tossing to coat evenly until the sauce bubbles and thickens into a glossy sheen. Finish with fresh thyme.
How to make glitter dumplings

Why we love this
This is the viral sensation that has everyone talking—dumplings that literally shimmer under the dining room lights. The contrast between the savory, ginger-scented steam rising from the basket and the ethereal, cosmic glow of the wrappers is breathtaking. As you bite through the tender dough into the juicy pork or vegetable filling, the edible luster dust creates a visual experience that feels like something out of a fairy tale. It’s the ultimate way to surprise guests and turn a standard dim sum night into an aesthetic event.
Ingredients
- Store-bought or homemade dumpling wrappers
- Ground pork or finely chopped mushrooms
- Grated ginger and scallions
- Soy sauce and sesame oil
- Edible luster dust (gold or silver)
- Food-grade soft brush
How to make it
- Mix your filling by combining the protein (pork or mushrooms) with ginger, scallions, soy sauce, and sesame oil. Ensure the mixture is well-incorporated and chilled for 30 minutes to make folding easier.
- Place a small teaspoon of filling in the center of a wrapper. Wet the edges with a finger dipped in water and pleat the edges tightly to seal, ensuring no air bubbles are trapped inside.
- Steam the dumplings in a bamboo steamer lined with parchment paper over boiling water for 8-10 minutes. The wrappers should become slightly translucent and firm.
- Once removed from the steamer, let the dumplings air dry for exactly 60 seconds. This ‘tacky’ phase is crucial for the glitter to adhere.
- Dip a dry, soft food-grade brush into the luster dust and gently buff it onto the surface of the dumplings. Start with a small amount and build the shimmer until they glow.
How to prepare spring crockpot

Why we love this
Who says the slow cooker is only for winter stews? A spring crockpot meal is all about ‘set it and forget it’ so you can spend your extra daylight hours outside. The aroma of lemon, garlic, and artichokes slowly melding together fills the house with a bright, Mediterranean scent that feels incredibly refreshing. The meat becomes so tender it practically melts into the light, citrusy broth, offering a comforting warmth that doesn’t feel heavy or overbearing as the weather warms up.
Ingredients
- Boneless chicken thighs
- Canned artichoke hearts (drained)
- Chicken bone broth
- Fresh lemon slices
- Capers and garlic
- Fresh parsley for garnish
How to make it
- Sear the chicken thighs in a hot pan for 2 minutes per side before placing them in the crockpot. This locks in the juices and prevents the meat from looking ‘gray’ after slow cooking.
- Layer the drained artichoke hearts, smashed garlic cloves, and capers over the chicken. The capers add a necessary salty punch that balances the fat of the chicken.
- Pour in just enough chicken bone broth to cover the bottom half of the ingredients; you don’t want to submerge them completely or the sauce will be too thin.
- Set the crockpot to ‘Low’ for 4-5 hours. Avoid using the ‘High’ setting for spring poultry as it can toughen the meat; the slow, low heat ensures the artichokes stay intact.
- Ten minutes before serving, place fresh lemon slices on top and cover again. This infuses a fresh citrus oil aroma without making the broth bitter. Garnish with heaps of fresh parsley.
How to simmer spring soup

Why we love this
Simmering a spring soup is like capturing a meadow in a bowl. The vibrant, neon-green hue of a blended pea and mint soup is a visual wake-up call after a long winter of brown and beige foods. The texture is silky and luxurious, yet the taste is incredibly clean and sharp. Every spoonful carries the cooling sensation of mint followed by the earthy sweetness of garden peas, making it the perfect transitional dish for those chilly April evenings when the sun has gone down but the spirit is still bright.
Ingredients
- Frozen or fresh shelled peas
- Leeks (white parts only)
- Vegetable stock
- Fresh mint leaves
- Crème fraîche for swirling
- Butter
How to make it
- In a large pot, melt a knob of butter over medium-low heat. Add finely sliced leeks and sauté until they are translucent and soft, but be careful not to let them brown; we want to preserve the green color.
- Add the peas and vegetable stock to the pot. Bring to a gentle simmer—never a rolling boil—for only 5 minutes. Overcooking peas will turn them a dull olive color, losing that ‘spring’ vibrance.
- Remove from heat immediately and add a large handful of fresh mint leaves. The residual heat will steep the mint like tea, releasing its oils without making it bitter.
- Use an immersion blender to purée the soup until it is completely smooth. For a professional, restaurant-style finish, pass the liquid through a fine-mesh sieve to remove any remaining skins.
- Adjust seasoning with sea salt and a squeeze of lemon juice to make the flavors ‘pop’ before serving warm or chilled.
How to make easy dinners

Why we love this
The beauty of easy spring dinners lies in their simplicity and the minimal cleanup required. We love the way a simple sheet pan of Mediterranean ingredients—feta, cherry tomatoes, and olives—softens and blisters in the oven, creating its own sauce. The smell of roasting tomatoes is sweet and nostalgic, and the way the feta becomes creamy and spreadable is pure magic. It’s a meal that feels like a vacation on a plate, put together in less than ten minutes of active prep time.
Ingredients
- Block of feta cheese
- Pint of cherry tomatoes
- Kalamata olives
- Dried oregano and red pepper flakes
- High-quality olive oil
- Crusty baguette
How to make it
- Preheat your oven to 400°F (200°C). In a small baking dish, place the whole block of feta cheese right in the center.
- Surround the cheese with cherry tomatoes and olives. Don’t be afraid to crowd the pan; as the tomatoes burst, their juices will mingle with the olive oil to create a rich sauce.
- Drizzle everything generously with olive oil and sprinkle with oregano and red pepper flakes for a hint of heat.
- Bake for 20-25 minutes until the tomatoes have shriveled and popped, and the feta is soft and slightly golden on the edges.
- Switch the oven to ‘Broil’ for the last 2 minutes to get a bit of char on the tomato skins. Serve immediately in the baking dish with slices of warm baguette to scoop up the melted cheese.
How to serve spring soup

Why we love this
Serving is an art form, especially when it comes to the delicate nature of spring soups. The presentation is what transforms a simple liquid meal into a gourmet experience. We love using shallow, wide bowls that allow for elaborate garnishing. The contrast of a bright green soup topped with snowy white feta crumbles, bright pink radish matches, and a swirl of golden oil is visually stunning. It feels intentional, caring, and deeply aesthetic—turning a quick lunch into a moment of mindfulness.
Ingredients
- Prepared spring soup (pea, asparagus, or leek)
- Radishes (julienned)
- Microgreens or sprouts
- Toasted pine nuts
- Extra virgin olive oil
- Heavy cream or coconut milk
How to make it
- Warm your bowls in a low oven before serving. A warm bowl keeps the soup at the ideal temperature longer, allowing the aromas to bloom as the guest eats.
- Ladle the soup into the center of the bowl. If using a cream swirl, dip a teaspoon into the cream and gently drop three dots onto the surface. Use a toothpick to drag through the dots, creating a ‘heart’ or ‘swirl’ pattern.
- Place a small mound of julienned radishes and microgreens in the very center. The height adds a professional, architectural look to the dish.
- Scatter a few toasted pine nuts around the greens for a necessary crunch that contrasts with the smooth liquid.
- Finish with a final, very thin drizzle of high-quality olive oil. The oil will break into tiny golden droplets on the surface, catching the light beautifully.
How to bake spring cakes

Why we love this
Baking in spring is about light textures and zesty profiles that wake up the taste buds. A lemon and poppyseed cake, for instance, offers a delightful ‘crunch’ against a tender, moist crumb. The aroma of citrus oil being rubbed into sugar is one of the most therapeutic scents in the kitchen. When baked to a perfect pale gold, these cakes feel airy and cloud-like, making them the perfect companion to a cup of floral Earl Grey tea as you watch the birds return to your garden.
Ingredients
- All-purpose flour and baking powder
- Granulated sugar
- Fresh lemons (zest and juice)
- Poppy seeds
- Whole milk and room-temperature eggs
- Unsalted butter
How to make it
- Cream the softened butter and sugar together for at least 5 minutes using a stand mixer. You are looking for a ‘pale and fluffy’ texture; this aeration is what makes the cake light rather than dense.
- Add the lemon zest directly to the sugar-butter mixture. The friction of the sugar crystals helps release the essential oils from the zest, intensifying the flavor.
- Whisk your dry ingredients (flour, poppy seeds, salt) in a separate bowl. This ensures the poppy seeds are evenly distributed and won’t all sink to the bottom of the cake.
- Alternate adding the dry ingredients and the milk/lemon juice to the butter mixture, starting and ending with the dry. Do not overmix at this stage, or the cake will become tough.
- Bake at 350°F (175°C) for 30-35 minutes. Test for doneness by inserting a wooden skewer; it should come out clean or with a few moist crumbs, but no wet batter.
How to grill spring dinner

Why we love this
There is a primal joy in the first grill-out of the year. The scent of charcoal or wood smoke mixing with the fresh, crisp evening air is the ultimate signal that summer is on its way. Grilling spring vegetables like artichokes or lamb chops provides a smoky charred edge that perfectly complements the natural sweetness of young produce. It’s a rustic, hands-on way of eating that encourages everyone to gather around the fire, sharing stories while the grill marks sear into the food.
Ingredients
- Lamb chops or firm tofu steaks
- Whole artichokes (halved and cleaned)
- Garlic-herb butter
- Fresh rosemary sprigs
- Coarse sea salt
How to make it
- Steam the halved artichokes for 15 minutes before they touch the grill. Artichokes are dense, and grilling them from raw will result in a burnt exterior and a hard, inedible interior.
- Brush the lamb (or tofu) and the pre-steamed artichokes with melted garlic-herb butter. Season aggressively with coarse sea salt to create a crust.
- Ensure your grill is screaming hot. You want to hear a loud sizzle the moment the food touches the grates to achieve those iconic, aesthetic grill lines.
- Grill the lamb for 3-4 minutes per side for a perfect medium-rare (internal temp of 135°F). Grill the artichokes cut-side down until they have deep char marks and the leaves are slightly crispy.
- Let the meat rest for 5 minutes under a piece of foil before serving. This allows the juices to redistribute, ensuring every bite is succulent and flavorful.
The Final Flourish for Your Spring Table
Embracing the aesthetic food board trend is more than just a social media flex; it’s a way to celebrate the fleeting beauty of the season. By focusing on fresh ingredients, thoughtful techniques, and those little ‘viral’ touches like edible glitter or floral garnishes, you’re creating an atmosphere of warmth and abundance. Spring is a time for new beginnings, and there’s no better place to start than at your own dining table. So, grab your wooden boards, your freshest produce, and start building something beautiful today!