
The Ultimate Simple Food Board That’s Taking Over TikTok
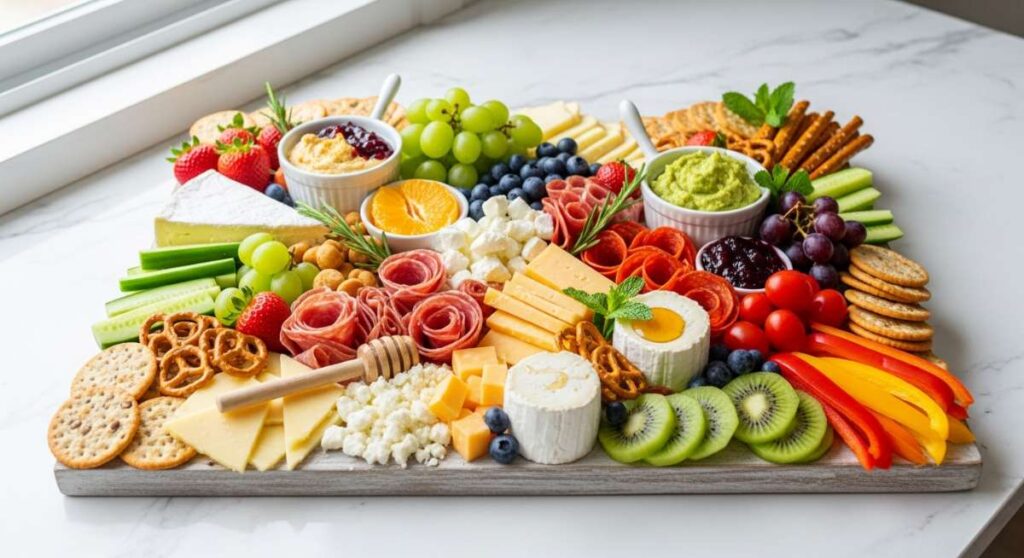
There is something inherently magical about a giant, sprawling board filled with a variety of textures and flavors. It’s more than just a meal; it’s a shared experience that brings people together, sparking conversations as hands reach for a bit of this and a taste of that. I remember the first time I set out a massive spread for my friends; the room instantly filled with laughter and the sound of crackers snapping, making the entire afternoon feel like a celebrated occasion rather than just a simple Tuesday gathering.
Lately, TikTok has been obsessing over the ‘Simple Food Board,’ and honestly, I am here for it. This trend moves away from the expensive, hyper-curated charcuterie of the past and leans into the comfort of everyday favorites, beautifully presented. Whether you are hosting a game day or just trying to survive a busy Wednesday, these ideas will help you master the art of the board with ease and style.
From creamy dips that stay warm to the touch to refreshing seasonal salads that crunch with every bite, this guide covers everything you need to create your own viral-worthy spread. Let’s dive into the components that make these boards so irresistible and learn how to recreate the magic in your own kitchen.
How to make the creamiest rotel dip

Why we love this
This dip is the undisputed king of comfort food, offering a molten, velvety texture that coats every chip perfectly. The warmth of the melted cheese combined with the bright, acidic pop of diced tomatoes and green chiles creates a flavor profile that is both nostalgic and deeply satisfying. As you dip a salty tortilla chip into the bowl, the steam rises, carrying the savory aroma of browned sausage and spices, making it nearly impossible to stop at just one bite.
Ingredients
- 16 oz Velveeta cheese, cubed
- 1 can (10 oz) Ro-Tel Diced Tomatoes and Green Chilies (undrained)
- 1 lb ground breakfast sausage or lean ground beef
- 1/2 cup whole milk or heavy cream (optional for extra creaminess)
- 1/2 tsp garlic powder
- Fresh cilantro for garnish
How to make it
- Place a large skillet over medium-high heat and add your ground sausage or beef. Use a wooden spoon to break the meat into small, uniform crumbles as it browns. Cook until no pink remains and the meat has developed a slightly crispy, golden-brown exterior.
- Carefully drain the excess grease from the skillet to ensure your dip isn’t oily. Return the meat to the pan and lower the heat to medium-low.
- Add the cubed Velveeta cheese to the skillet. It is crucial to use low heat here to prevent the cheese from scorching or becoming grainy. Stir constantly as the cubes begin to soften.
- Pour in the entire can of Ro-Tel tomatoes, including the liquid. The juices from the tomatoes help thin the cheese to the perfect dipping consistency.
- Stir in the garlic powder and, if you prefer an even silkier texture, splash in the milk or heavy cream. Continue to stir until the mixture is completely smooth and uniform in color.
- Transfer the dip to a pre-warmed slow cooker on the ‘warm’ setting to keep it liquid and luscious throughout your gathering. Garnish with fresh cilantro just before serving.
How to prep fresh spring lunch ideas

Why we love this
Spring lunches are all about rejuvenation and crisp, clean flavors that wake up your palate after a long winter. There is something so satisfying about the snap of a fresh snap pea or the peppery bite of a radish paired with a light, zesty dressing. These meals feel like a breath of fresh air, leaving you energized rather than weighed down, making them the perfect addition to a midday food board that celebrates the arrival of warmer weather.
Ingredients
- Mixed baby greens (arugula, spinach, and butter lettuce)
- Sugar snap peas, blanched
- Watermelon radishes, thinly sliced
- English cucumber, ribboned
- Hard-boiled eggs, halved
- Lemon-tahini dressing
How to make it
- Start by washing all your greens in ice-cold water to ensure maximum crispness. Spin them completely dry using a salad spinner, as excess moisture will wilt the delicate leaves and dilute your dressing.
- Prepare your snap peas by trimming the ends and blanching them in boiling water for exactly 60 seconds. Immediately plunge them into an ice bath to stop the cooking process and lock in that vibrant green color and crunch.
- Use a mandoline or a very sharp knife to slice the watermelon radishes and cucumbers into paper-thin rounds or ribbons. This technique increases the surface area for the dressing to cling to and creates a beautiful visual texture.
- Boil your eggs for 9 minutes for a ‘jammy’ yolk or 11 minutes for a fully set yolk. Peel them under cold running water and slice them cleanly in half.
- Arrange the greens as a base on your board, then artfully nestle the vegetables and eggs on top in clusters rather than mixing them. This allows guests to customize their own lunch plates.
- Drizzle the dressing over the top just seconds before serving, or place it in a small ramekin in the center of the board to prevent the veggies from becoming soggy.
How to cook dirty spaghetti recipe

Why we love this
Dirty spaghetti is a soul-warming twist on a classic, characterized by its deep, earthy flavors and rich, savory sauce that clings to every strand of pasta. Unlike a traditional bright marinara, this version is darker and more complex, often incorporating finely minced aromatics and meats that create a ‘dirty’ appearance but a clean, robust taste. The aroma of sautéed bell peppers and onions mingling with browning meat creates a kitchen atmosphere that feels like home.
Ingredients
- 1 lb spaghetti noodles
- 1 lb ground beef or pork
- 1 green bell pepper, finely diced
- 1 yellow onion, finely minced
- 3 cloves garlic, minced
- 2 tbsp tomato paste
- 1 tsp Worcestershire sauce
- 1/2 cup beef broth
- Cajun seasoning to taste
How to make it
- Bring a large pot of heavily salted water to a rolling boil. Add the spaghetti and cook until it is about 1 minute away from being ‘al dente.’ This is important because the pasta will finish cooking in the sauce.
- While the pasta boils, heat a deep skillet over medium heat. Add the ground meat and cook until it is deeply browned. The goal is to get a good sear on the meat to develop flavor.
- Add the diced onions and bell peppers to the meat. Sauté them for about 5-7 minutes until they are soft and translucent, picking up the brown bits from the bottom of the pan.
- Stir in the garlic and tomato paste. Cook for 2 minutes, stirring constantly, until the tomato paste turns a brick-red color and smells toasted.
- Deglaze the pan by pouring in the beef broth and Worcestershire sauce. Scrape the bottom of the pan to release all the flavor. Simmer for 5 minutes until the liquid reduces slightly.
- Using tongs, transfer the spaghetti directly from the water into the skillet. Add a splash of pasta water and toss everything together over medium heat for 1-2 minutes until the sauce is glossy and the noodles are perfectly coated.
How to prepare baseball snack ideas

Why we love this
Baseball snacks bring a sense of nostalgic Americana to any food board, combining salty, crunchy, and sweet elements that are easy to grab during an exciting play. The smell of roasted peanuts and the buttery scent of popcorn instantly transport you to the stadium stands on a sunny afternoon. These snacks are designed for grazing, offering a playful variety that appeals to kids and adults alike, making the game-watching experience feel even more special.
Ingredients
- Salted soft pretzel bites
- Dry-roasted peanuts (in the shell)
- Caramel popcorn
- Beef jerky strips
- Mini corn dogs
- Yellow mustard for dipping
How to make it
- Preheat your oven to 400°F (200°C) to prepare the hot elements. Arrange the mini corn dogs and pretzel bites on a parchment-lined baking sheet, ensuring they aren’t touching so the air can circulate.
- Bake the corn dogs for 12-15 minutes until the outer batter is golden and crispy. For the pretzels, if they are frozen, bake until hot and then brush with melted butter and a sprinkle of coarse sea salt.
- While the hot items bake, prepare your dry goods. Open the peanuts and caramel popcorn, ensuring they are fresh and crunchy.
- Slice the beef jerky into bite-sized strips so they are easier to handle as part of a larger spread.
- Portion the yellow mustard into small individual dipping cups or one large central bowl to prevent a mess on the board.
- Let the hot items cool for just 2 minutes before placing them on the board to ensure they stay crispy rather than steaming and becoming soft.
How to make summer salads

Why we love this
Summer salads are the ultimate celebration of the sun, featuring produce at its absolute peak of sweetness and juiciness. Imagine the contrast of a cold, crisp cucumber against a sun-warmed tomato, finished with a sprinkle of salty feta and a drizzle of herbaceous oil. These salads are light, cooling, and incredibly vibrant, providing a refreshing counterpoint to heavier grilled meats on a summer food board.
Ingredients
- Heirloom tomatoes, sliced into wedges
- Fresh mozzarella pearls
- Fresh basil leaves, torn
- Extra virgin olive oil
- Balsamic glaze
- Flaky sea salt and cracked black pepper
How to make it
- Selection is key for summer salads; choose tomatoes that are heavy for their size and fragrant at the stem. Slice them into irregular wedges to create a rustic, artisanal look on your board.
- Drain the mozzarella pearls from their liquid and pat them dry with a paper towel. This prevents the salad from becoming watery as it sits.
- Layer the tomato wedges and mozzarella pearls on a large platter. Intersperse the torn basil leaves throughout the layers to ensure every bite has that fresh herbal note.
- Whisk together high-quality olive oil with a pinch of salt and pepper. Drizzle this evenly over the tomatoes and cheese, allowing it to pool slightly in the crevices.
- Finish with a generous drizzle of balsamic glaze. The thickness of the glaze ensures it stays put and provides a concentrated sweet-tart punch.
- Wait to add the flaky sea salt until the very last second before serving; salt draws out moisture from tomatoes, and you want them to stay plump and firm for the presentation.
How to cook healthy spring meals

Why we love this
Healthy spring meals focus on light proteins and the first tender greens of the season, creating a balance of nutrition and flavor that feels truly restorative. There’s a specific joy in eating food that looks as vibrant as the garden outside, with bright greens and pale pinks dominating the plate. The textures are usually soft and delicate, featuring poached fish or lightly sautéed greens that melt in your mouth and leave you feeling nourished.
Ingredients
- Salmon fillets
- Asparagus spears, woody ends trimmed
- Lemon slices
- Fresh dill
- Quinoa or couscous
- Garlic-infused olive oil
How to make it
- Preheat your oven to 375°F (190°C). Season the salmon fillets with salt, pepper, and a generous amount of fresh dill. Place them on a baking sheet lined with parchment paper.
- Lay the trimmed asparagus spears around the salmon. Drizzle both the fish and the vegetables with garlic-infused olive oil, which adds depth without the sharpness of raw garlic.
- Place thin slices of lemon directly on top of the salmon. As it bakes, the lemon juice will infuse the fish, keeping it moist and adding a bright acidity.
- Roast for 12-15 minutes. You’ll know the salmon is done when it flakes easily with a fork and the asparagus is tender but still has a slight snap.
- While the salmon roasts, prepare a small pot of quinoa or couscous according to package directions, using vegetable broth instead of water for extra flavor.
- Fluff the grains and serve as a base on the board, topping with the roasted salmon and asparagus for a complete, healthy meal that looks stunning.
How to steam dumplings squishy

Why we love this
There is nothing quite like the texture of a perfectly steamed dumpling—the dough is incredibly soft and slightly tacky, yielding to a savory, juicy interior that bursts with flavor. The process of steaming creates a gentle heat that cooks the filling without drying out the wrapper, resulting in a ‘squishy’ and comforting mouthfeel. It’s an interactive snack that feels like a little gift waiting to be unwrapped with every dip into a spicy soy sauce.
Ingredients
- Frozen or fresh dumplings (pork, shrimp, or veggie)
- Cabbage leaves or parchment paper liners
- Water for steaming
- Soy sauce, sesame oil, and chili crisp for dipping
How to make it
- Prepare your steamer basket—whether bamboo or metal—by lining it with either perforated parchment paper or large outer leaves of cabbage. This is the secret to preventing the delicate dough from sticking and tearing.
- Arrange the dumplings in the basket, ensuring they do not touch each other. If they touch, they will fuse together during the steaming process and break when you try to pull them apart.
- Bring about two inches of water to a boil in a wok or a pot that fits your steamer basket perfectly. Once boiling, place the basket over the steam.
- Cover tightly with a lid and steam for 8-10 minutes if fresh, or 12-15 minutes if frozen. Do not peek! Opening the lid lets the steam escape and drops the temperature.
- Check for doneness: the wrappers should look translucent and feel soft and bouncy to the touch.
- Carefully remove the basket from the heat and let the dumplings sit for 1 minute to ‘set’ before transferring them to your food board with a pair of chopsticks.
How to plan spring dinner ideas

Why we love this
Planning a spring dinner is about embracing the transition of the seasons, moving away from heavy stews and into lighter, faster-cooking ingredients. It’s the time for ‘sheet pan’ dinners that utilize the oven without heating up the whole house, and for meals that feature lots of citrus and fresh herbs. The goal is to spend less time over a hot stove and more time enjoying the lingering evening light with a board full of seasonal delights.
Ingredients
- Chicken thighs (skin-on)
- New potatoes, halved
- Baby carrots with tops
- Honey-mustard glaze
- Fresh parsley
How to make it
- Start by tossing your halved new potatoes and baby carrots in olive oil, salt, and pepper. Spread them out on a large baking sheet, as they take slightly longer to cook than the chicken.
- Roast the vegetables at 400°F (200°C) for about 10 minutes before adding the protein.
- Season the chicken thighs and place them skin-side up nestled among the vegetables. The fat from the chicken will render out and flavor the potatoes as they roast.
- Bake for another 20-25 minutes. During the last 5 minutes of cooking, brush the chicken generously with a honey-mustard glaze to create a sticky, caramelized finish.
- Check the internal temperature of the chicken; it should reach 165°F (74°C) for safety and juiciness.
- Garnish the entire tray with freshly chopped parsley and serve the meal directly on a wooden board for a rustic, family-style spring dinner.
How to toss refreshing summer salads

Why we love this
A truly refreshing summer salad relies on the perfect ‘toss’—a technique that ensures every leaf and fruit slice is lightly coated in dressing without being bruised or drowned. These salads often blur the line between sweet and savory, featuring ingredients like watermelon or peaches paired with salty cheeses. The result is a cold, hydrating dish that sparkles with flavor and provides an instant cooling sensation on a humid afternoon.
Ingredients
- Cold watermelon cubes
- Feta cheese crumbles
- Fresh mint leaves, chiffonade
- Lime juice
- A pinch of chili powder (optional)
How to make it
- Cube your watermelon and place it in a large, chilled stainless steel bowl. Using a cold bowl helps keep the fruit crisp as you work with it.
- Add the fresh mint. To ‘chiffonade’ the mint, stack the leaves, roll them like a cigar, and slice thin ribbons. This releases the aromatic oils without turning the leaves black.
- Drizzle the lime juice over the fruit. The acidity of the lime acts as a flavor enhancer, making the sweetness of the watermelon pop.
- Using two large spoons or your hands (the gentlest way!), toss the watermelon and mint together with a lifting motion rather than a stirring motion. This prevents the fruit from breaking down.
- Once coated, gently fold in the feta cheese. If you toss the feta too vigorously, it will crumble into a paste and turn the salad cloudy.
- Transfer to a chilled serving dish and add a tiny sprinkle of chili powder for a surprising kick that rounds out the sweetness.
How to create baseball snack boards

Why we love this
The beauty of a baseball snack board lies in its organization—it’s a visual feast that categorizes flavors into easy-to-grab zones. There is a sense of abundance and playfulness when you see piles of sunflower seeds next to rows of mini hot dogs and bowls of dipping sauces. It turns a simple game-watch into an event, allowing everyone to customize their snacking experience while staying glued to the action on the screen.
Ingredients
- Mini hot dogs or ‘pigs in a blanket’
- Boxed Cracker Jacks or caramel corn
- Sunflower seeds and pistachios
- Soft pretzels with cheese dip
- Red and white licorice twists
How to make it
- Choose a large wooden board or even a clean sheet pan to act as your base. Start by placing any bowls or ramekins first—these will hold your dips and smaller items like sunflower seeds.
- Position your largest items next, such as the soft pretzels and mini hot dogs. Place them in opposite corners to anchor the board visually.
- Create ‘rivers’ of snacks by pouring the caramel corn or Cracker Jacks in a curved line that connects the different sections of the board.
- Fill in the gaps with the smaller items. Tuck the licorice twists into any empty spaces; their bright red color adds a great pop of ‘team spirit’ to the display.
- Cluster the nuts and seeds near the edges so people can easily grab a handful without disturbing the rest of the arrangement.
- Add a few small tongs or cocktail napkins around the board to make it easy for guests to serve themselves without creating a mess.
The Magic of the Simple Board
As you can see, creating a viral-worthy food board isn’t about expensive ingredients or professional chef skills; it’s about the love and care you put into the presentation. Whether you’re leaning into the nostalgia of baseball snacks or the freshness of a spring lunch, these boards are designed to be flexible, fun, and flavorful. The next time you find yourself hosting, skip the formal plated dinner and embrace the beautiful chaos of a simple food board. Your guests (and your TikTok followers) will thank you!
Frequently Asked Questions
How long can a food board sit out?
For safety, perishables like meat and cheese should not sit at room temperature for more than two hours. If you are serving hot dips like Rotel, use a slow cooker to keep them at a safe temperature throughout the party.
What is the best type of board to use?
While wooden charcuterie boards are classic, you can use large marble slabs, clean baking sheets, or even brown butcher paper spread across your kitchen island for an easy-cleanup option.
How do I prevent my fruit from turning brown?
For fruits like apples or pears, a quick soak in lemon water or a light toss in citrus juice will prevent oxidation and keep your board looking fresh for hours.